1. Introduzione
Thank you for choosing the AVANTEK CW-11 Wireless Doorbell. This manual provides detailed instructions for the installation, operation, and maintenance of your new doorbell system. Please read this manual thoroughly before use and retain it for future reference.
2. Contenuto della confezione
Verificare che tutti i componenti siano presenti nella confezione:
- 1 x ricevitore plug-in
- 1 x trasmettitore (pulsante)
- 2 x Viti
- 2 x Wall Anchors
- 1 x Small Key (for battery compartment)
- 1 nastro biadesivo
- 1 x Manuale utente

Image: Contents of the AVANTEK Doorbell Kit, showing the receiver, transmitter, screws, anchors, key, and adhesive tape.
3. Prodotto finitoview
Ricevitore
- Plug-in design for easy power.
- LED indicator for visual alerts.
- Pulsanti di controllo del volume.
- Melody selection buttons.
- Compact design (approx. 8 cm height, 7.3 cm width) that does not obstruct adjacent power outlets.

Image: The compact receiver plugged into a wall outlet, illustrating its small size (8 cm height, 7.3 cm width) and how it leaves adjacent sockets free.
Trasmettitore
- Push button with LED indicator.
- Powered by a CR2032 lithium battery (included), offering up to 3 years of lifespan.
- IP55 dustproof and waterproof rating, suitable for outdoor use in temperatures from -20°C to +60°C.

Image: The doorbell transmitter highlighting its IP55 dustproof and waterproof features, with illustrations of its resilience in both cold (-20°C) and hot (60°C) weather, and a 3-year maximum battery lifespan.
4. Impostazione
4.1 Installazione del trasmettitore
The transmitter can be installed using either the provided screws and anchors or the double-sided adhesive tape.
- Metodo del nastro adesivo: Clean the desired mounting surface thoroughly. Peel off one side of the protective film from the double-sided adhesive tape and attach it to the back of the transmitter. Peel off the other side and firmly press the transmitter onto the wall for at least 30 seconds.
- Screw-in Method: Mark the desired mounting location. Drill two holes at the marked spots. Insert the wall anchors into the holes. Align the transmitter's mounting holes with the anchors and secure it with the screws.
4.2 Configurazione del ricevitore
Simply plug the receiver into any standard indoor power outlet. The receiver's LED will flash, indicating it is powered on and ready for pairing.
4.3 Abbinamento del trasmettitore e del ricevitore
The doorbell system is pre-paired at the factory. If re-pairing is needed or if you are adding additional transmitters/receivers:
- Collega il ricevitore.
- Press and hold the volume button on the receiver for 3 seconds until its LED starts flashing. This indicates pairing mode.
- Within 5 seconds, press the transmitter button. The receiver's LED will flash, and it will play its current melody once, indicating successful pairing.
- Se l'associazione non riesce, ripetere i passaggi.
Video: This video demonstrates how to pair the AVANTEK wireless doorbell system components, including activating the receiver and transmitter for pairing.
5. Funzionamento
5.1 Melodie cangianti
Il ricevitore offre 52 melodie distinte. Per cambiare melodia:
- Press the 'Next' or 'Previous' button on the side of the receiver to cycle through the available melodies.
- The receiver will play each melody as you select it.
- The memory function ensures your last selected melody is retained even after a power outage.
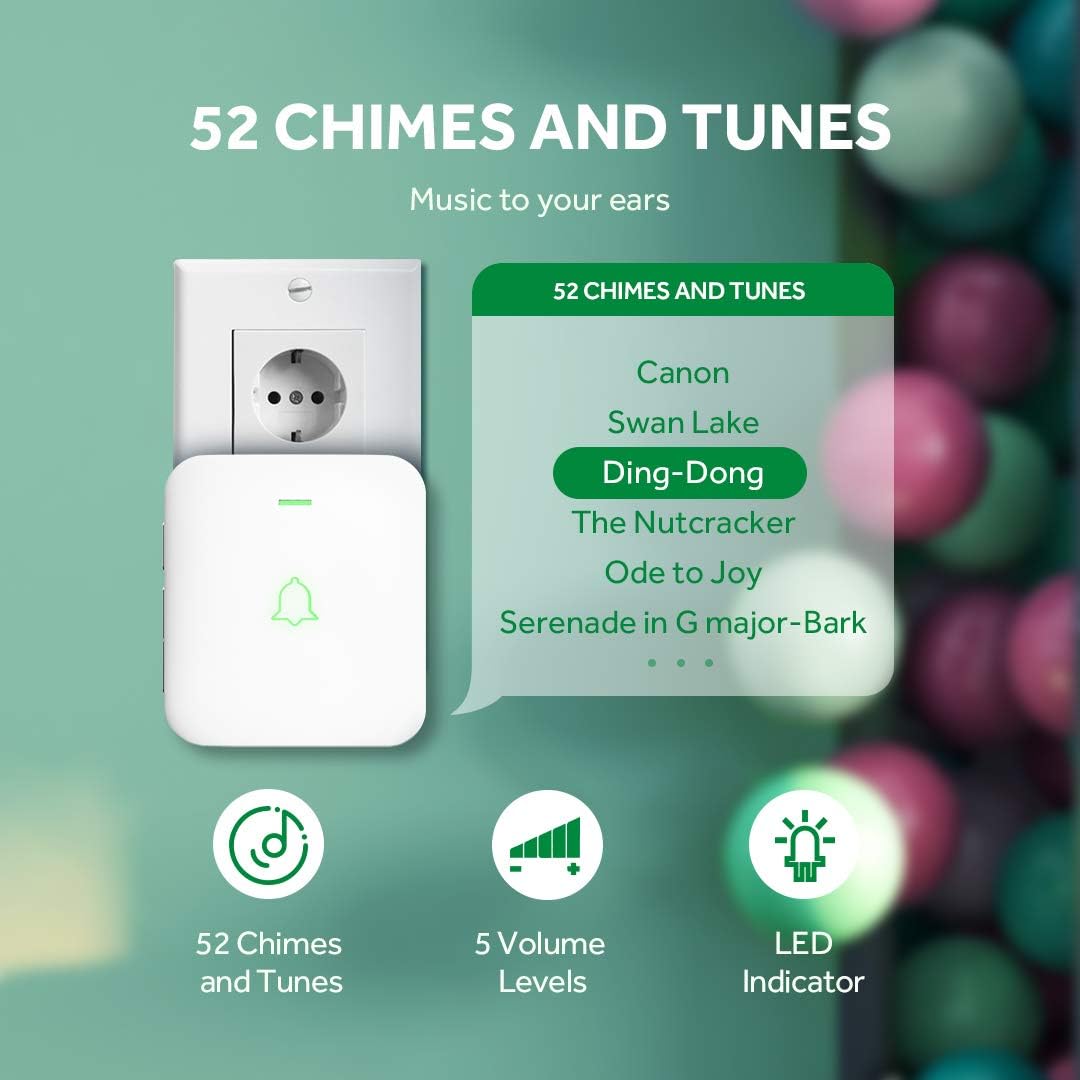
Image: The doorbell receiver displaying its features: 52 chimes and tunes, 5 volume levels, and an LED indicator. Examples of melodies like 'Canon' and 'Ding-Dong' are shown.
5.2 Regolazione del volume
The receiver has 5 adjustable volume levels, with a maximum sound intensity of 115 dB. To adjust the volume:
- Press the 'Volume' button on the side of the receiver repeatedly to cycle through the 5 volume levels.
- The receiver will play a sound at each level to indicate the current volume.
- The memory function retains your last selected volume level.
5.3 Silent Mode (LED Notification)
For situations requiring silence, such as during sleep or meetings, the receiver can be set to silent mode, where it only provides a visual LED notification.
- Cycle through the volume levels until the mute icon is displayed or the sound is off. The LED will still flash when the doorbell is pressed.
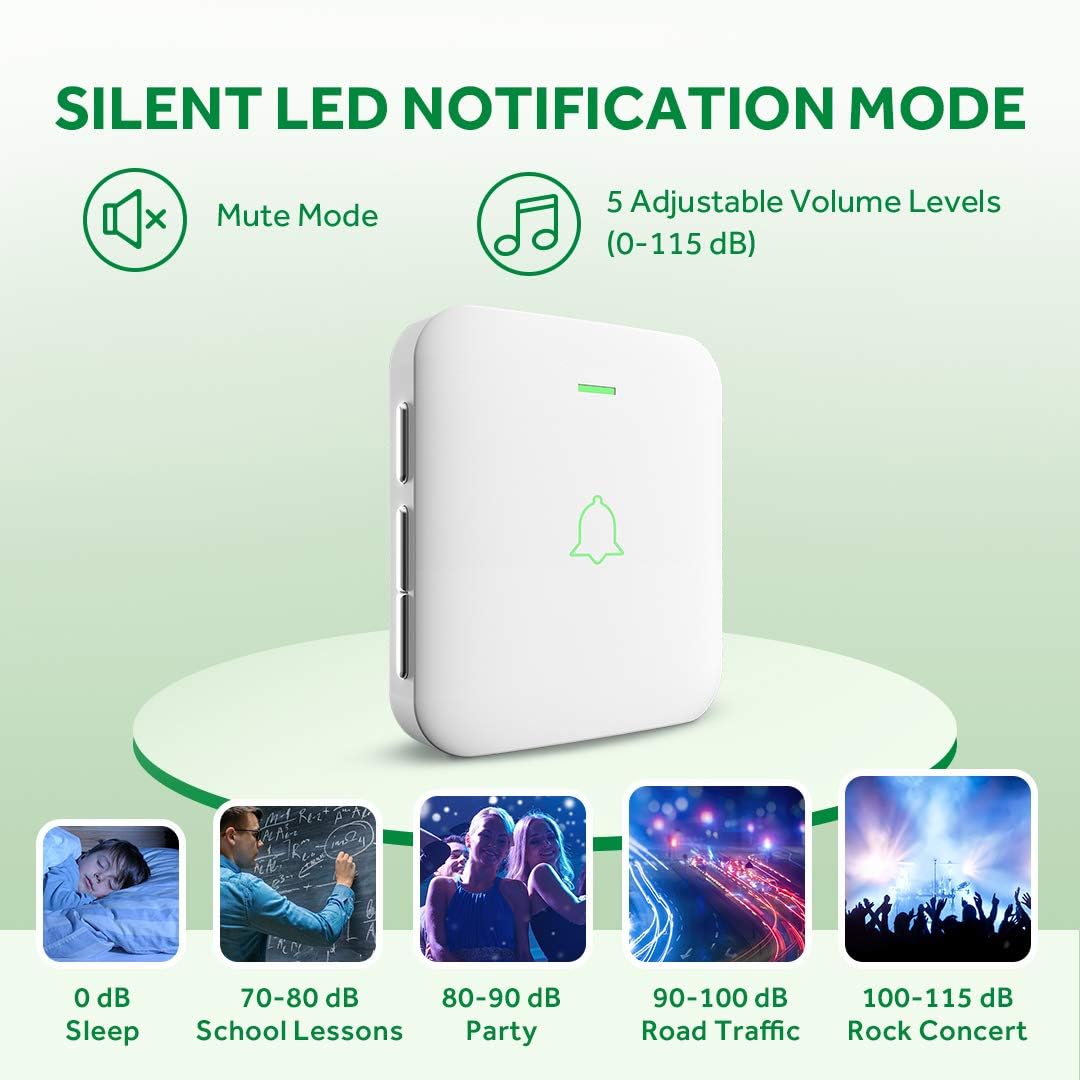
Image: The doorbell receiver illustrating its silent LED notification mode and the range of 5 adjustable volume levels (0-115 dB), with exampdi ambienti sonori tipici.
Video: This video demonstrates how to adjust the volume and activate the silent mode on the AVANTEK wireless doorbell receiver.
6. Manutenzione
6.1 Sostituzione della batteria (trasmettitore)
The transmitter uses a CR2032 lithium battery with an average lifespan of 3 years. When the transmitter's LED no longer lights up or the range decreases significantly, it's time to replace the battery.
- Use the small key (or a small flat-head screwdriver) to open the battery compartment on the side of the transmitter.
- Rimuovere con cautela la vecchia batteria CR2032.
- Inserire una nuova batteria CR2032 con il lato positivo (+) rivolto verso l'alto.
- Chiudere bene il vano batterie.
6.2 Pulizia
Wipe the doorbell units with a soft, dry cloth. Do not use abrasive cleaners or solvents, as they may damage the surface.
7. Risoluzione Dei Problemi
| Problema | Possibile causa | Soluzione |
|---|---|---|
| Il campanello non suona. | Receiver not plugged in or powered off. Transmitter battery is dead. Units are not paired. | Ensure receiver is plugged in and powered. Replace transmitter battery. Re-pair the units (see Section 4.3). |
| Portata wireless ridotta. | Obstructions (thick walls, metal structures). Interference from other devices. Low transmitter battery. | Riposizionare il ricevitore o il trasmettitore per ridurre al minimo gli ostacoli. Sostituire la batteria del trasmettitore. |
| Il LED del ricevitore lampeggia ma non emette alcun suono. | Receiver is in silent (mute) mode. Volume is set to minimum. | Adjust the volume level (see Section 5.2). |
| Non è possibile cambiare la melodia. | Pulsanti non premuti correttamente. | Ensure you are pressing the 'Next' or 'Previous' melody buttons firmly. |
8. Specifiche
- Modello: CW-11 / SB-122
- Marca: AVANTEK
- Portata wireless: Fino a 300 metri (1000 piedi) all'aria aperta
- Melodie: 52 rintocchi selezionabili
- Livelli del volume: 5 livelli regolabili (0-115 dB)
- Batteria del trasmettitore: 1 x CR2032 al litio (incluse)
- Durata della batteria del trasmettitore: Fino a 3 anni
- Potenza del ricevitore: CA 100-240 V (spina)
- Temperatura di esercizio: Da -20°C a +60°C (da -4°F a +140°F)
- Grado di impermeabilità: IP55 (Trasmettitore)
- Certificazioni: Certificazione CE, FCC, RoHS
- Dimensioni (ricevitore): Circa 11.4 x 9.5 x 6.9 cm
- Peso: 159 grammi (confezione totale)
- Metodo di installazione: Self-adhesive or Screw-in
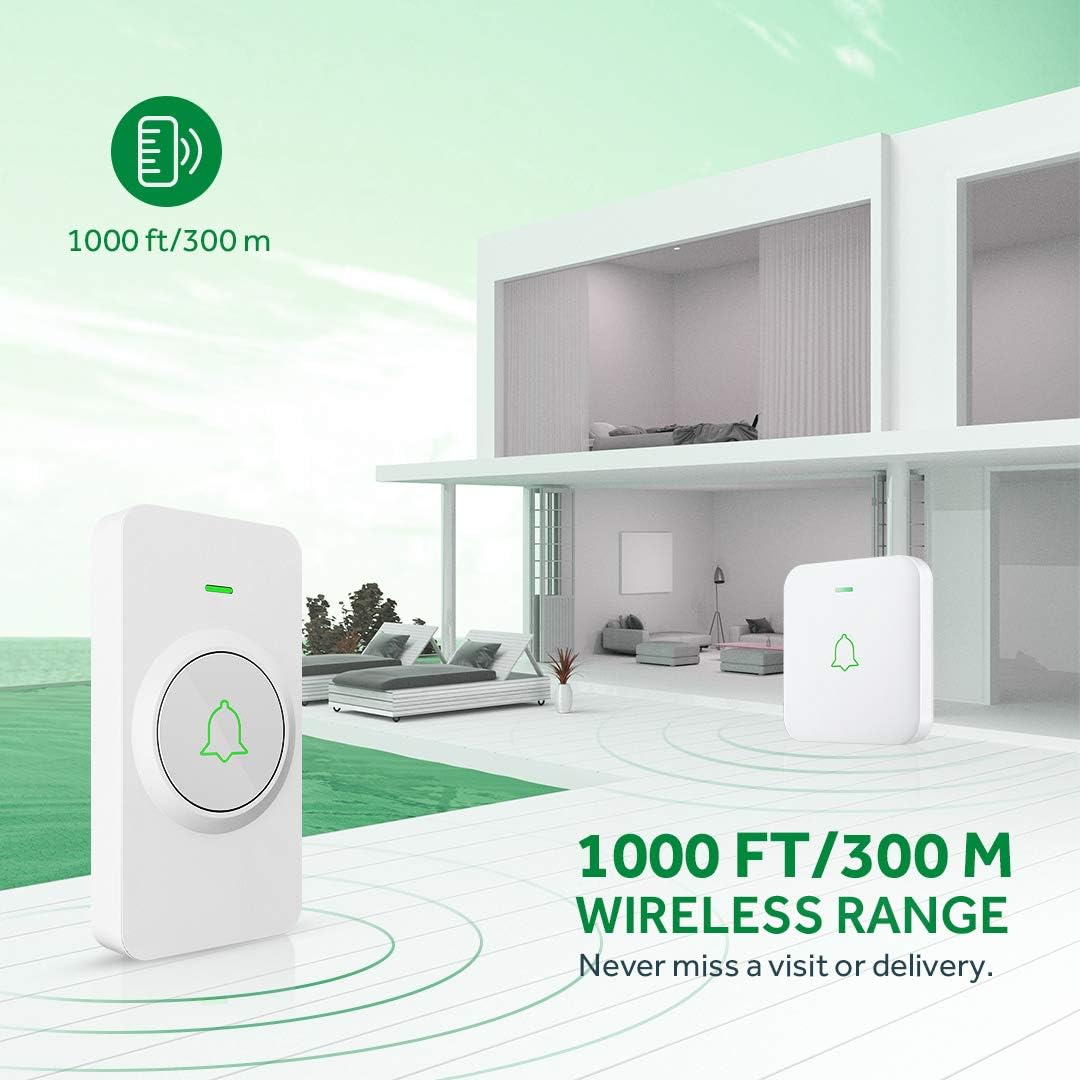
Image: Diagram illustrating the 300-meter (1000 ft) wireless range of the AVANTEK doorbell system within a multi-story home environment.
Video: Questo video fornisce una panoramicaview of the AVANTEK Mini Doorbell Kit, demonstrating its features like instant pairing of multiple receivers, silent mode, and IP55 weather resistance.
9. Garanzia e supporto
AVANTEK products come with a standard manufacturer's warranty. For specific warranty details, technical support, or any inquiries, please refer to the contact information provided on the product packaging or visit the official AVANTEK website. Please note that compatibility for products purchased before 2021 may vary; contact customer support for verification.


