Introduzione
Welcome to your new VANGUARD ALTA PRO 2V 263AT Aluminum Video Tripod. This manual provides essential information for the proper setup, operation, and maintenance of your tripod. Please read these instructions carefully before using the product to ensure optimal performance and longevity.
Prodotto finitoview
The ALTA PRO 2V 263AT is a 3-section aluminum video tripod designed for stability and versatility in video and sport optic applications. It features a built-in 75mm leveling half-ball base for quick adjustments on uneven terrain.
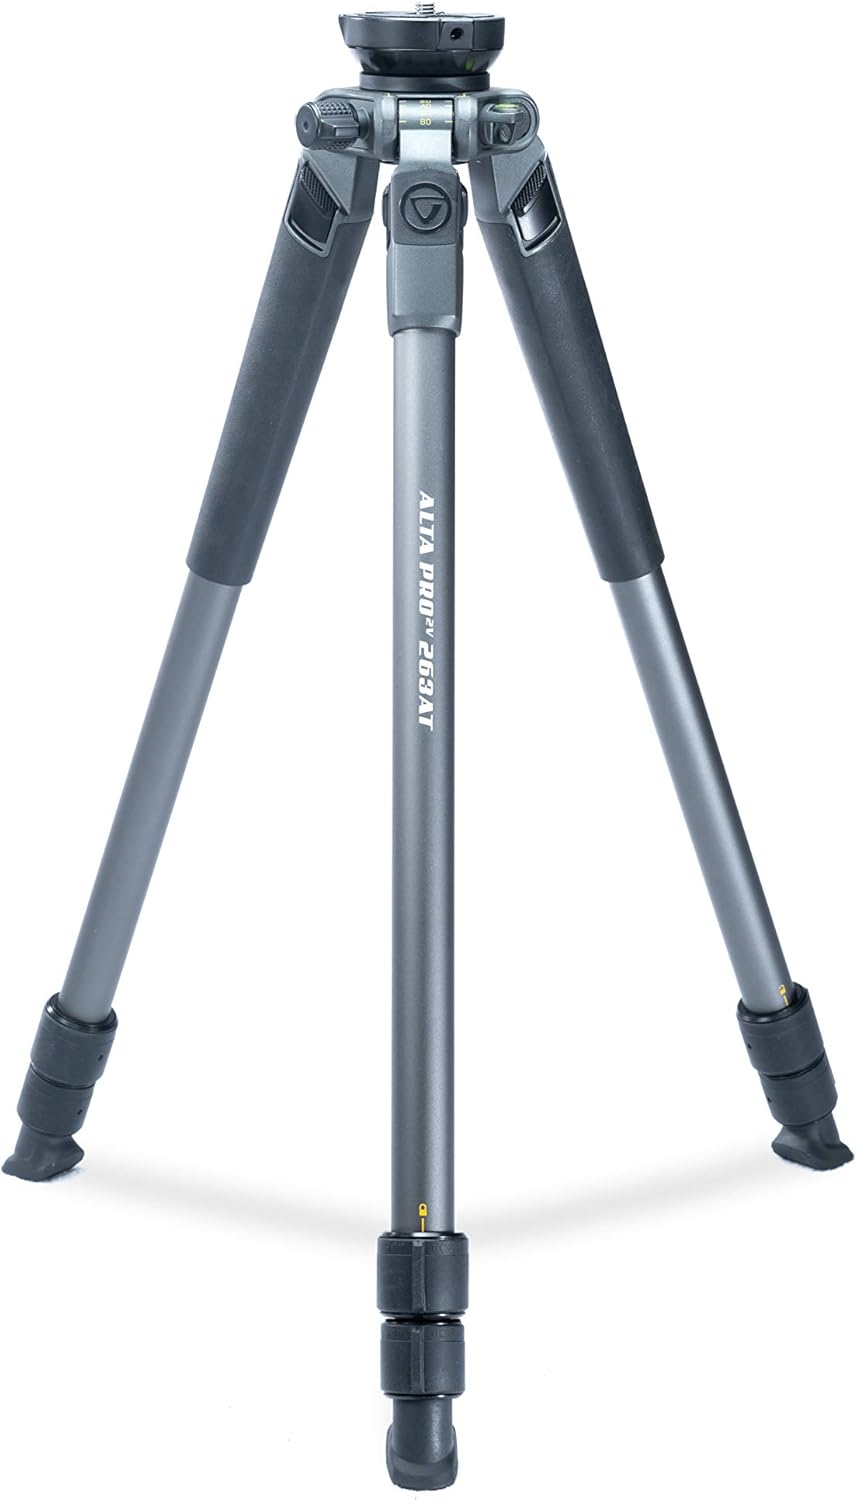
Davanti view of the VANGUARD ALTA PRO 2V 263AT Aluminum Video Tripod, showcasing its three legs, central column, and head mount.
Componenti chiave:
- Built-in 75mm leveling ½ ball with locking set screws and 3/8”-16 top mount thread.
- 3-section aluminum tripod legs.
- ¼ turn lock/unlock twist leg locks.
- Rubberized leg grips on two legs for comfortable handling.
- Anti-slip rubber feet for stability on various surfaces.
- Multi-leg angle selections (20°, 40°, 60°, 80°).
- Two spirit bubble levels for precise leveling.

Avvicinamento view of the tripod's head mount area, showing the 75mm leveling ball, leg angle selectors (20, 40, 60, 80 degrees), and spirit levels.
Impostare
Disimballaggio
Carefully remove the tripod from its packaging. Ensure all components are present and undamaged. The tripod is typically supplied with a carrying bag for transport and storage.

The VANGUARD ALTA PRO 2V 263AT tripod stored in its gray carrying bag with a shoulder strap.
Attaching a Fluid Head
The ALTA PRO 2V 263AT tripod is designed to be used with a separate fluid head (not included). It features a standard 3/8”-16 attachment bolt on the leveling ball for compatibility with most video or pan heads.
- Align the base of your fluid head with the 3/8”-16 attachment bolt on the tripod's leveling ball.
- Thread the fluid head onto the bolt by turning it clockwise until it is hand-tight.
- Locate the three set screws positioned around the leveling ball. Use an appropriate tool (if provided or required by your head) to tighten these set screws firmly. This action secures the fluid head to the tripod, preventing rotation and ensuring stability during use.
Istruzioni per l'uso
Estensione e retrazione delle gambe
The tripod legs are equipped with ¼ turn lock/unlock twist leg locks for quick and secure height adjustments.
- To extend a leg section, twist the corresponding lock counter-clockwise by a quarter turn to unlock it.
- Tirare la sezione della gamba verso l'esterno fino alla lunghezza desiderata.
- Twist the lock clockwise by a quarter turn to securely fasten the leg section in place. Ensure all leg sections are fully locked before mounting equipment.
Regolazione degli angoli delle gambe
Each leg can be independently adjusted to one of four preset angles: 20°, 40°, 60°, or 80°, allowing for versatile positioning on uneven terrain or for low-angle shots.
- To change the leg angle, locate the leg angle selector tab near the top of each leg.
- Press the tab to release the current leg angle.
- Move the leg to the desired angle (20°, 40°, 60°, or 80°) until the selector tab clicks into place, indicating it is securely set.

Un dettagliato view of the tripod's leg angle adjustment mechanism, showing the numbered angle settings (20, 40, 60, 80) and the release lever.
Livellamento del treppiede
The built-in 75mm leveling half-ball allows for quick and precise leveling of your camera or spotting scope on uneven surfaces without adjusting individual leg lengths.
- Loosen the leveling ball lock mechanism located beneath the tripod head.
- Adjust the tripod head until the two integrated spirit bubble levels indicate a perfectly level position.
- Once level, firmly tighten the leveling ball lock to secure the head in place.
Manutenzione
Pulizia
After each use, especially if exposed to dirt, sand, or saltwater, wipe down the tripod with a soft, damp cloth. Avoid using harsh chemicals or abrasive cleaners, as these can damage the finish or components. For stubborn dirt, a mild soap solution can be used, followed by a clean, damp stoffa.
Magazzinaggio
Store the tripod in a dry, clean environment, away from extreme temperatures and humidity. Utilizing the provided carrying bag will protect it from dust and potential damage during storage and transport.
Ispezione
Periodically inspect all screws, leg locks, and joints for tightness and proper function. Ensure that all moving parts operate smoothly. Do not overtighten any fasteners, as this can cause damage.
Risoluzione dei problemi
Tripod Not Leveling Properly
- Ensure the leveling ball lock is sufficiently loosened before attempting to level the head.
- After adjusting the head to a level position (indicated by the bubble levels), firmly tighten the leveling ball lock.
- Verify that all leg sections are fully extended and securely locked.
Leg Sections Not Locking
- Ensure that the ¼ turn twist locks are fully engaged by twisting them clockwise until snug.
- If a leg section slides after locking, the lock may not be fully tightened. Apply a bit more force to secure it.
Attached Head Wobbles
- Confirm that the three set screws around the leveling ball are tightened after attaching your fluid head. These screws are crucial for securing the head to the tripod's leveling base.
- Ensure the fluid head itself is properly mounted and tightened onto the 3/8”-16 attachment bolt.
Specifiche
| Marca | AVANGUARDIA |
| Numero di modello | ALTA PRO 2V 263AT |
| Materiale | Alluminio, gomma |
| Numero di sezioni delle gambe | 3 |
| Diametro della gamba | 26.00 millimetri |
| Altezza piegata | 23.875 pollici |
| Altezza estesa | 51.125 pollici |
| Minimum Height (Macro) | 6.125 pollici |
| Capacità di carico massima | 13.2 libbre |
| Peso dell'articolo | 3.97 libbre |
| Dimensioni del prodotto | 4 x 4 x 23.8 pollici |
| Dispositivi compatibili | Camera, Spotting Scope |
| Recommended Head Type | Fluid Heads, Pan Heads |
Garanzia e supporto
For detailed warranty information, product registration, and customer support, please refer to the official VANGUARD website or contact your local VANGUARD distributor. It is recommended to keep your purchase receipt as proof of purchase for any warranty claims.
You can also visit the VANGUARD Store on Amazon for additional product information and support: VANGUARD Store


