1. Introduzione
Welcome to the user manual for your Modecom Oberon Pro Glass USB 3.0 White PC Case. This manual provides essential information for the proper installation, operation, and maintenance of your computer chassis. Please read this manual thoroughly before beginning assembly to ensure correct setup and to prevent damage to your components or the case itself.
Precauzioni di sicurezza:
- Scollegare sempre l'alimentatore dalla presa a muro prima di installare o rimuovere qualsiasi componente.
- Handle components with care to avoid electrostatic discharge (ESD). Consider using an anti-static wrist strap.
- Tenere le parti di piccole dimensioni e i materiali di imballaggio fuori dalla portata dei bambini.
- Assicurare una corretta ventilazione attorno al case per evitare il surriscaldamento.
2. Prodotto finitoview
The Modecom Oberon Pro Glass is a stylish mid-tower PC case designed to house your computer components. It features a tempered glass side panel for showcasing your build and a clean white finish. The front panel includes convenient USB 3.0 ports for high-speed data transfer.
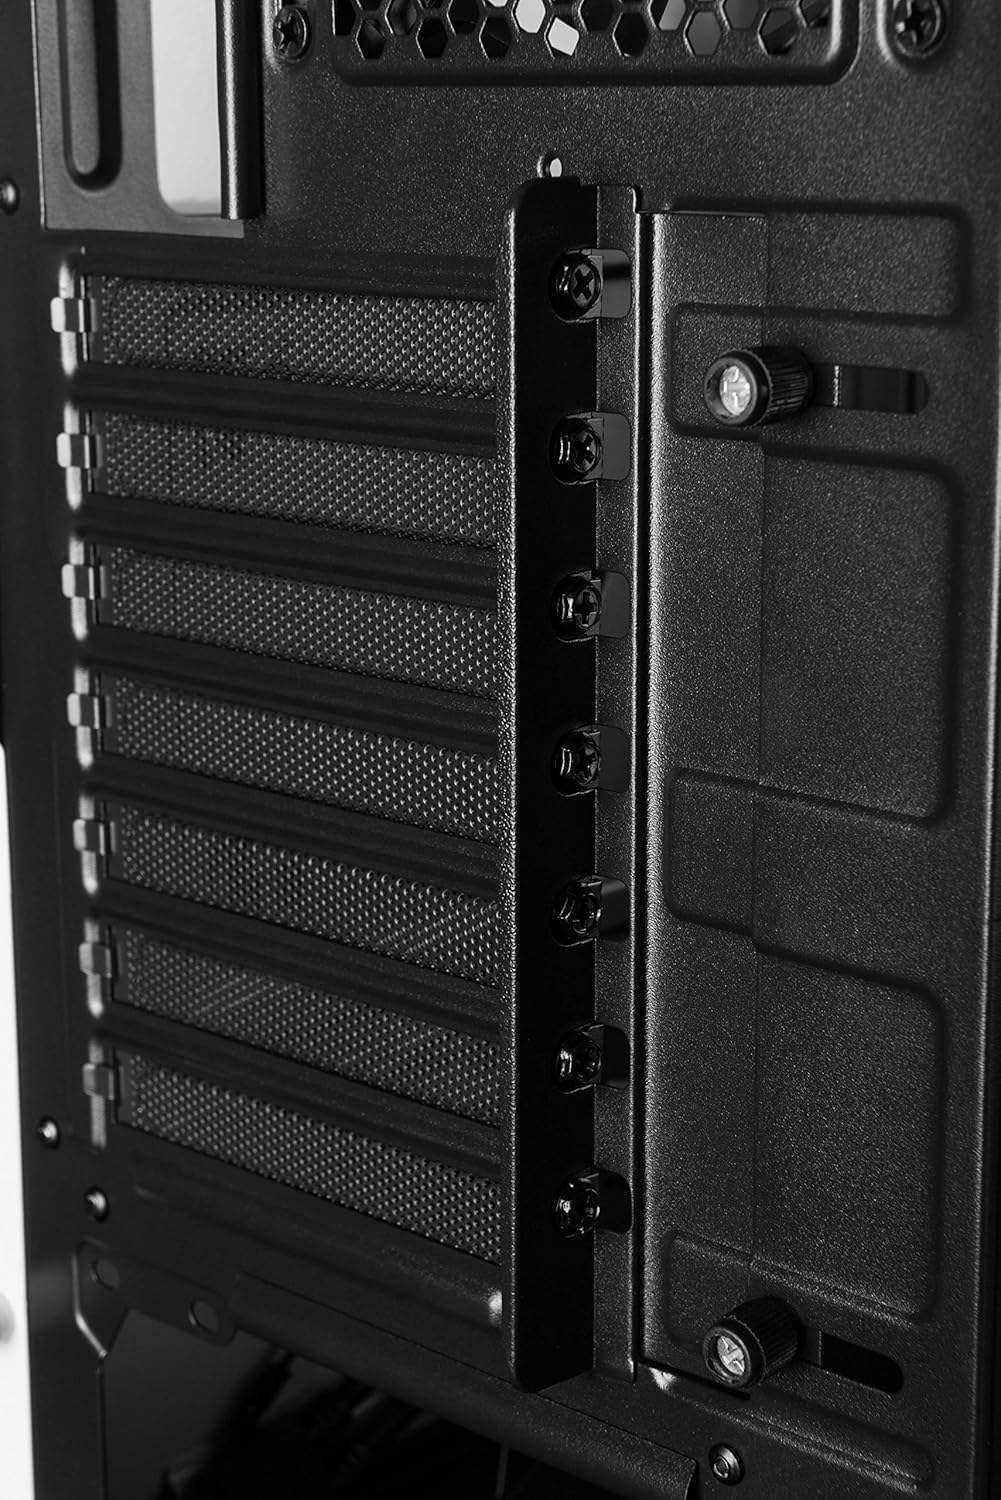
Figura 2.1: Anteriore destro view of the Modecom Oberon Pro Glass PC Case. This image displays the white exterior, the front panel with ventilation, and the top-mounted I/O ports including USB 3.0.
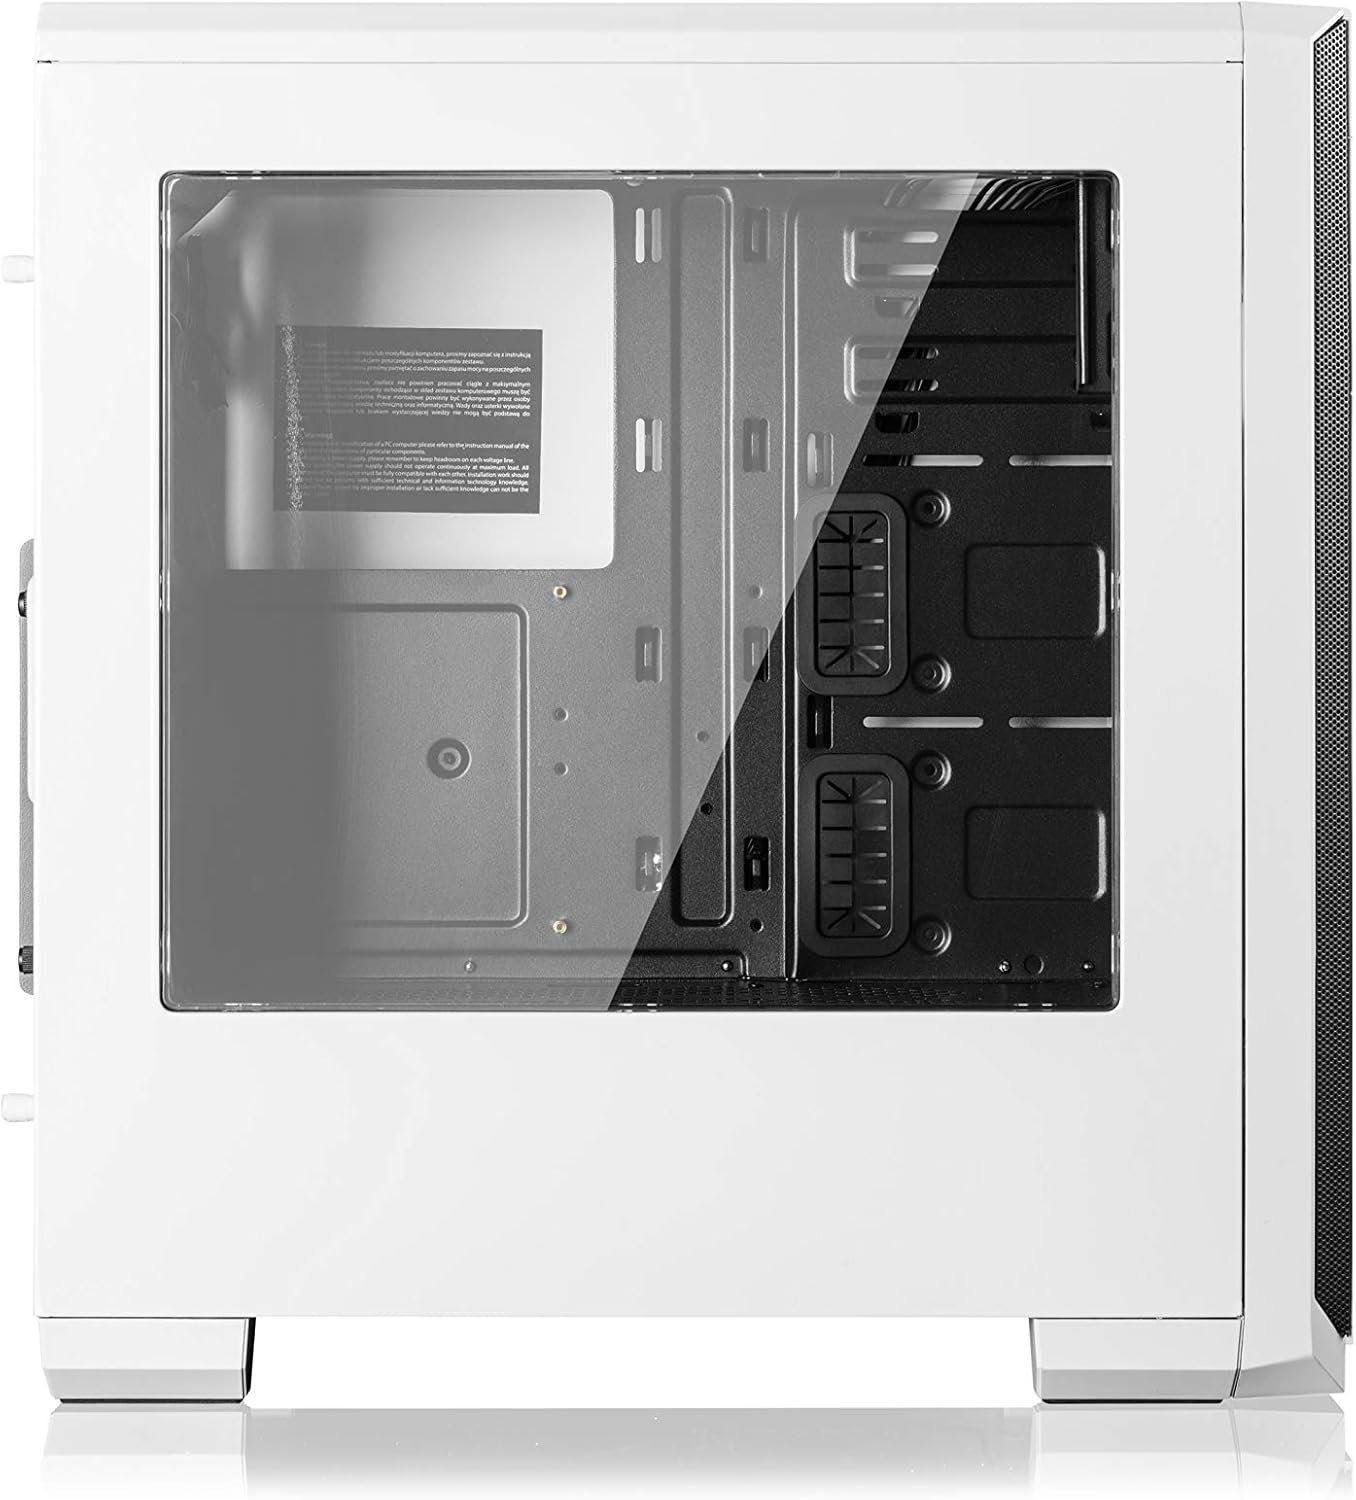
Figura 2.2: Lato view of the Modecom Oberon Pro Glass PC Case, highlighting the tempered glass side panel. This panel allows for a clear view of the internal components when installed.
3. Configurazione e installazione
Follow these steps to install your computer components into the Modecom Oberon Pro Glass PC Case.
3.1. Disimballaggio e ispezione iniziale
- Estrarre con cautela il case del PC dalla confezione.
- Inspect the case for any signs of damage during transit. Contact your retailer immediately if damage is found.
- Remove the tempered glass side panel by unscrewing the thumb screws, typically located at the rear corners of the panel. Set the panel aside on a soft, flat surface to prevent scratches.
3.2. Installazione della scheda madre

Figura 3.1: Interno view of the Modecom Oberon Pro Glass PC Case, showing the motherboard tray, drive bays, and cable management cutouts.
- Install the I/O shield that came with your motherboard into the designated opening at the rear of the case.
- Ensure the motherboard standoffs are correctly aligned for your motherboard's form factor (ATX, Micro ATX, or ITX). Install additional standoffs if necessary.
- Posizionare con attenzione la scheda madre sui distanziatori, allineando i fori delle viti.
- Fissare la scheda madre con le viti fornite. Non serrare eccessivamente.
3.3. Installazione dell'unità di alimentazione (PSU)
- Position your PSU in the dedicated compartment, typically at the bottom rear of the case.
- Align the screw holes on the PSU with those on the case's rear panel.
- Secure the PSU with the provided screws.
3.4. Installazione dell'unità di archiviazione (HDD/SSD)
- Locate the 3.5" HDD bays and 2.5" SSD mounting points within the case.
- For 3.5" HDDs, slide the drive into a bay and secure it with screws or tool-less clips if available.
- For 2.5" SSDs, mount them to the designated trays or screw points, typically behind the motherboard tray or in specific drive cages.
3.5. Expansion Card Installation (GPU, PCIe cards)

Figura 3.2: Interno posteriore view of the Modecom Oberon Pro Glass PC Case, illustrating the expansion slot covers and thumb screws for securing PCIe cards.
- Remove the necessary expansion slot covers from the rear of the case, corresponding to your card's slot on the motherboard.
- Insert your expansion card (e.g., graphics card) firmly into the PCIe slot on the motherboard.
- Secure the card to the case with the provided screws or retention mechanism.
3.6. Installazione del connettore del pannello frontale
- Connect the front panel cables (USB 3.0, HD Audio, Power Switch, Reset Switch, Power LED, HDD LED) to their respective headers on your motherboard. Refer to your motherboard manual for exact pin layouts.
3.7. Gestione dei cavi
- Utilizzare i fori per il passaggio dei cavi e i punti di fissaggio dietro il vassoio della scheda madre per organizzare i cavi. Questo migliora il flusso d'aria e l'estetica.
- Once all components are installed and cables managed, reattach the tempered glass side panel and secure it with the thumb screws.
4. Funzionamento
After successful installation, your PC is ready for operation.
- Accensione: Premere il pulsante di accensione situato sul pannello I/O superiore del case.
- Using Front Panel Ports: The front panel includes USB 3.0 ports and audio jacks. Connect your USB devices (e.g., flash drives, external hard drives) to the USB ports for data transfer. Plug your headphones or microphone into the respective audio jacks.
5. Manutenzione
Una manutenzione regolare aiuta a garantire prestazioni ottimali e longevità dei componenti del PC.
- Filtri antipolvere: Periodically remove and clean the dust filters (if present) to maintain good airflow and prevent dust buildup inside the case. Use compressed air or a soft brush.
- Pulizia esterna: Pulisci le superfici esterne della custodia con un panno morbido eamp panno. Evitare detergenti abrasivi o solventi che potrebbero danneggiare la finitura o il vetro temperato.
- Pannello in vetro temperato: Clean the tempered glass with a glass cleaner and a microfiber cloth to avoid streaks and scratches.
6. Risoluzione Dei Problemi
In caso di problemi, prendere in considerazione i seguenti passaggi di base per la risoluzione dei problemi:
- Il sistema non si accende:
- Assicurarsi che l'alimentatore sia acceso e correttamente collegato alla presa a muro.
- Verificare che il cavo dell'interruttore di alimentazione del pannello frontale sia collegato correttamente al connettore della scheda madre.
- Controllare tutti i collegamenti di alimentazione alla scheda madre e ai componenti.
- Porte USB non funzionanti:
- Confirm that the front panel USB 3.0 cable is securely connected to the corresponding header on the motherboard.
- Eseguire il test con diversi dispositivi USB.
- Rumore eccessivo:
- Identify the source of the noise (e.g., case fans, CPU cooler fan, GPU fan).
- Ensure all fans are free from obstructions and properly secured.
- Clean any dust buildup on fans.
Per problemi più complessi, consultare i manuali dei componenti o rivolgersi a un professionista.
7. Specifiche
| Caratteristica | Descrizione |
|---|---|
| Marca | Modecom |
| Nome del modello | Oberon Pro Glass |
| Numero di modello | AT-OBERON-PG-20-000000-0002 |
| Tipo di caso | Torre media |
| Colore | Bianco |
| Materiale | Policarbonato (PC) |
| Schede madri compatibili | ATX, Micro ATX, ITX |
| Porte I / O anteriori | USB 3.0, Audio In/Out |
| Alimentazione elettrica | W/O PSU (Power Supply Unit not included) |
| Peso dell'articolo | 2 chilogrammi |
| Codice internazionale degli articoli | 05901885248370 |
8. Garanzia e supporto
Informazioni sulla garanzia:
Modecom provides a guarantee of spare parts availability for 2 years from the date of purchase. This ensures that essential components for repair or replacement will be accessible within this period.
Assistenza clienti:
For technical assistance, warranty claims, or further inquiries, please refer to the official Modecom website or contact your local retailer where the product was purchased. Ensure you have your product model number and proof of purchase available when seeking support.


