Introduzione
Grazie per l'acquistoasing the OLIGHT PL-Mini 2 Valkyrie. This compact and powerful tactical flashlight is designed for reliable performance and ease of use. This manual provides detailed instructions for its safe operation, installation, maintenance, and troubleshooting.
Informazioni sulla sicurezza
- Do not shine the light directly into human or animal eyes. The high intensity light can cause temporary blindness or permanent eye damage.
- Tenere fuori dalla portata dei bambini.
- Do not disassemble the light. This will void the warranty and may cause damage.
- Ensure the light is securely mounted before use.
- Utilizzare solo il cavo di ricarica magnetico fornito.
Contenuto della confezione
- OLIGHT PL-Mini 2 Valkyrie x 1
- Cavo di ricarica USB magnetico x 1
- 1913 Rail Mount x 1 (GL mount pre-installed)
- T6/T8 Socket Head Wrench x 1
Impostare
1. Carica del dispositivo
The PL-Mini 2 Valkyrie features a convenient magnetic charging system. Connect the included magnetic USB charging cable to the charging port on the bottom of the light. The indicator on the cable will show red during charging and turn green when fully charged.

Image: The PL-Mini 2 Valkyrie connected to its magnetic charging cable, illustrating the charging process.
2. Installazione della guida
The PL-Mini 2 Valkyrie is compatible with both GL (pre-installed) and Picatinny (1913) rails. To install, slide the light onto your firearm's rail. The adjustable rail allows you to position the light precisely for optimal reach and comfort.
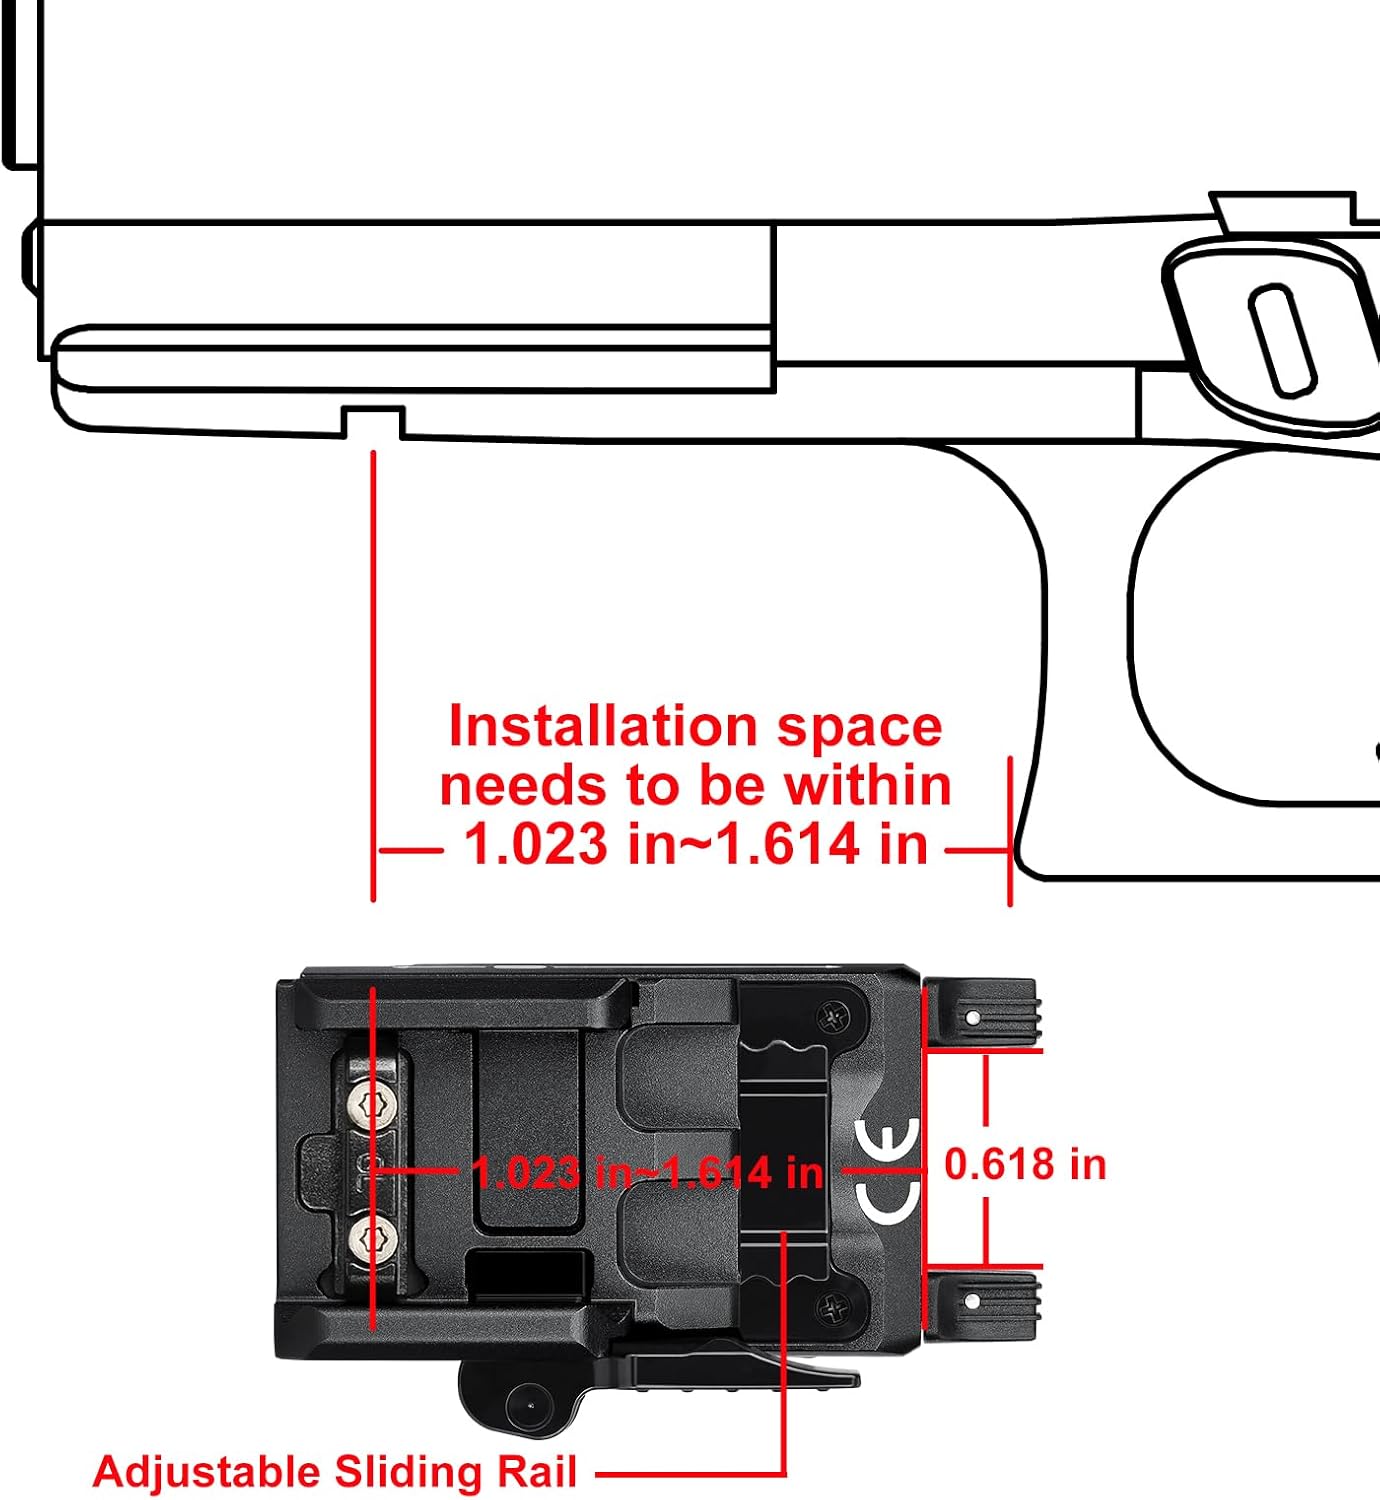
Image: A diagram indicating the required installation space (1.023 in ~ 1.614 in) on a firearm rail for the PL-Mini 2 Valkyrie.

Image: An illustration demonstrating the adjustable sliding rail feature of the PL-Mini 2 Valkyrie, allowing forward and backward movement for precise positioning.
To switch between GL and 1913 rail mounts, use the provided T6/T8 socket head wrench to loosen the screws, replace the mount, and tighten securely.

Image: The PL-Mini 2 Valkyrie with both GL and 1913 rail inserts, highlighting its compatibility with different rail types.
Istruzioni per l'uso
1. Accensione/spegnimento
The PL-Mini 2 Valkyrie features ambidextrous paddle switches. Press either paddle switch downward to activate the light. A quick press will turn the light on or off. To prevent accidental activation, ensure the light is properly secured or removed when not in use.

Image: A diagram illustrating the low power warning indicator (red light) on the PL-Mini 2 Valkyrie, which illuminates when battery power is below 10%.
2. Avviso di bassa potenza
A red indicator light will illuminate on the side of the device when the battery power drops below 10%, signaling that recharging is needed.
Manutenzione
- Pulizia: Use a soft, clean cloth to wipe the lens and body of the flashlight. Do not use abrasive cleaners or solvents.
- Magazzinaggio: Store the light in a cool, dry place away from direct sunlight and extreme temperatures. Charge the battery periodically if storing for extended periods to maintain battery health.
Risoluzione dei problemi
- La luce non si accende: Ensure the battery is charged. Check for any obstructions around the paddle switches.
- La luce non si carica: Verify the magnetic charging cable is properly connected to both the light and a power source. Ensure the power source is active. Clean the magnetic contacts on both the light and the cable.
- Loose on rail: Re-tighten the rail clamp. Ensure the correct rail insert (GL or 1913) is used for your firearm.
Specifiche

Image: An infographic detailing the key specifications of the PL-Mini 2 Valkyrie, including output, runtime, throw, battery, drop test rating, and product weight.
| Caratteristica | Specificazione |
|---|---|
| Uscita massima | 600 lumen |
| Autonomia massima | 60 Minutes (1 hour and 30 minutes total runtime) |
| Lancio massimo | 100 metri |
| Batteria | 3.7V 260mAh/960mWh Lithium Polymer Rechargeable Battery (Built-in) |
| Prova di caduta | 1 metri |
| Peso del prodotto | 2.56 ounces (73g) (including battery) |
| Dimensioni | 2.07"P x 1.26"L x 1.28"A |
| Livello di resistenza all'acqua | Impermeabile (IPX6) |
| Materiale | Alluminio |
Holster Compatibility
The PL-Mini 2 Valkyrie is designed to be compatible with a wide range of firearms. Below are tables listing some compatible firearm models and holster manufacturers.
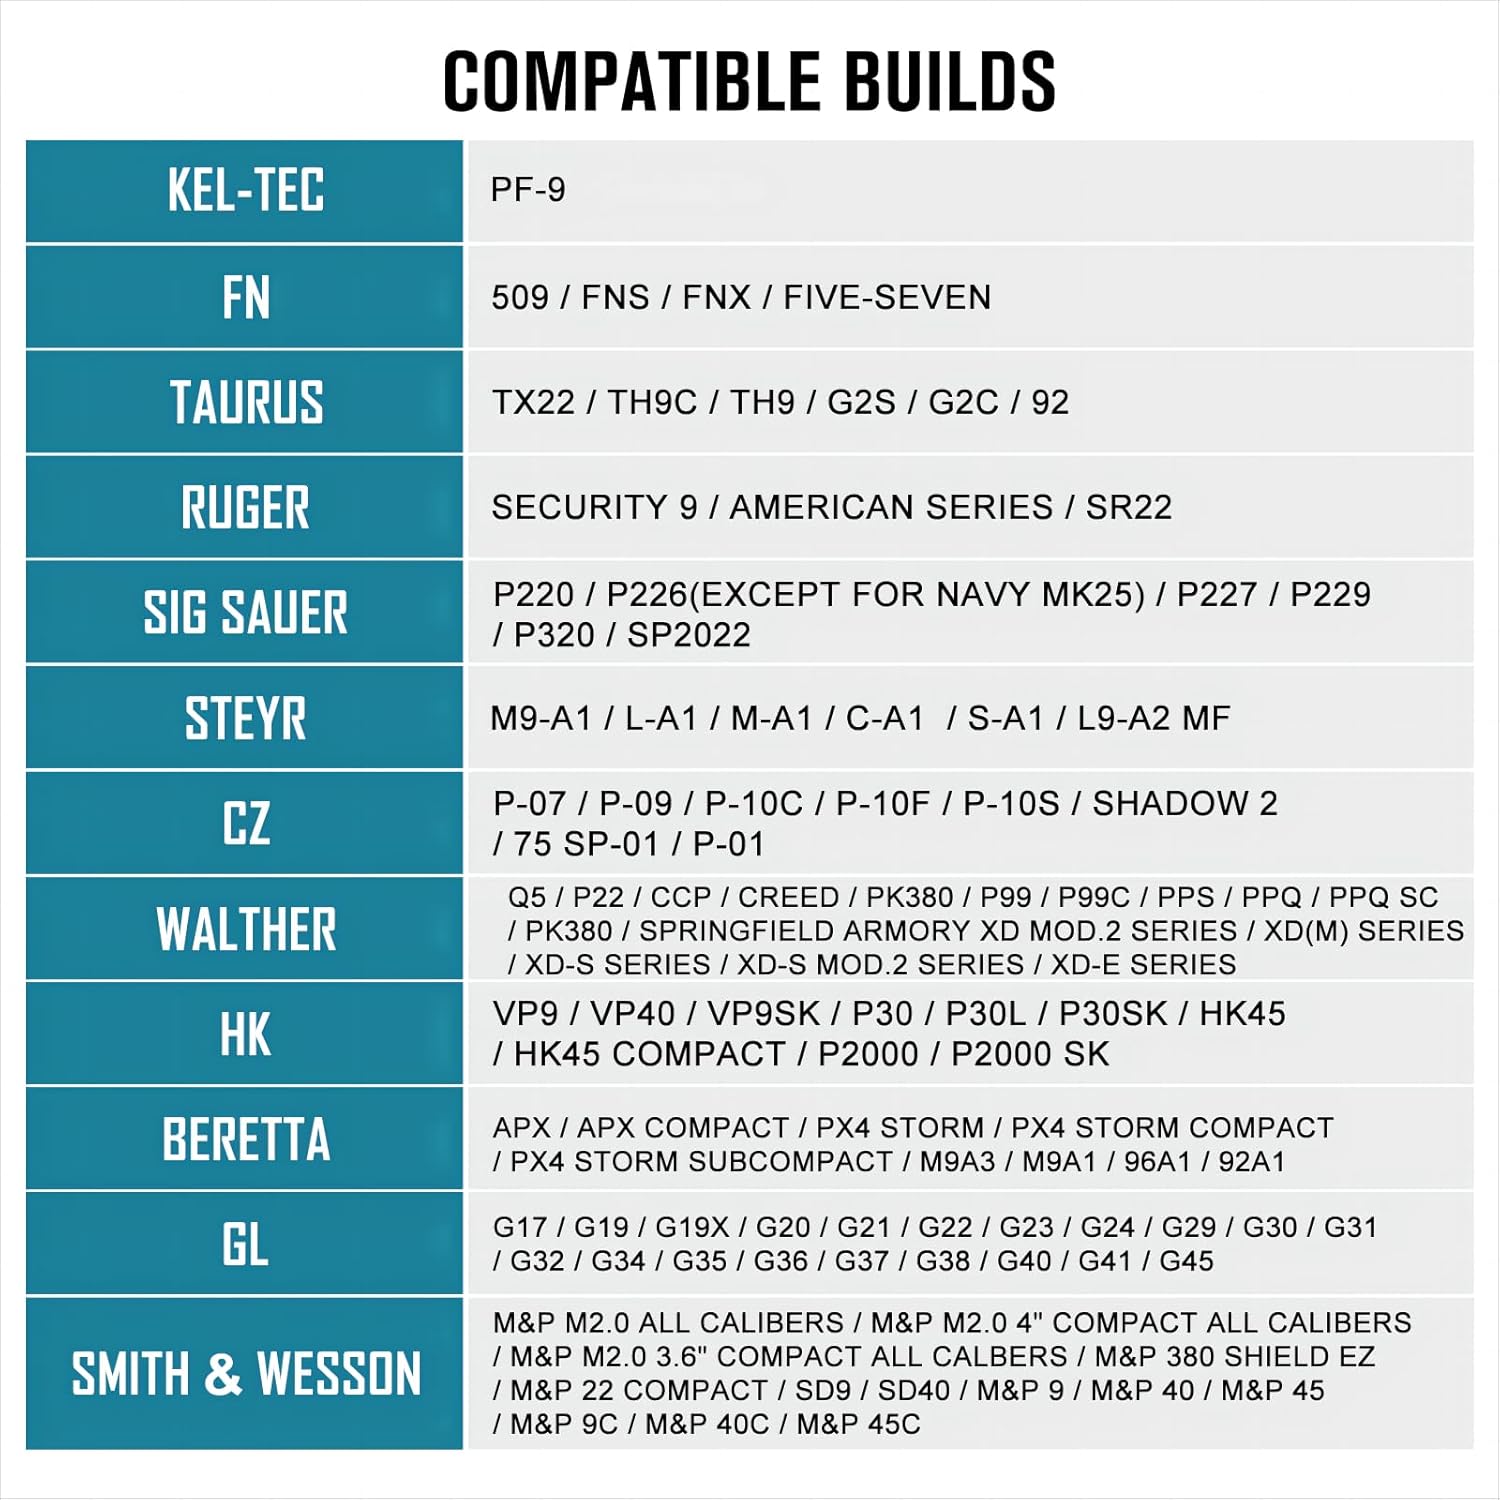
Image: A table detailing holster compatibility, listing various firearm brands and models that work with the PL-Mini 2 Valkyrie.

Image: A comprehensive list of compatible firearm builds from various manufacturers, indicating models that can mount the PL-Mini 2 Valkyrie.
Garanzia e supporto
OLIGHT offers a lifetime warranty for products purchased after January 1st, 2023. This warranty covers defects in materials and workmanship under normal use. For warranty claims or technical support, please visit the official OLIGHT websito o contattare il loro servizio clienti.
Per ulteriori informazioni e supporto, visitare il Negozio OLIGHT su Amazon.