1. Informazioni importanti sulla sicurezza
Please read this manual carefully before operating your air conditioner. Keep this manual for future reference.
- Installazione professionale: Installation, maintenance, and repair must be performed by qualified service personnel. Improper installation can lead to electric shock, fire, or injury.
- Alimentazione elettrica: Assicurarsi che l'alimentazione corrisponda alle specifiche dell'unità. Non utilizzare cavi di alimentazione o spine danneggiati.
- Ventilazione: Do not block the air inlet or outlet of the unit.
- Acqua e umidità: Do not expose the unit to direct water spray or excessive moisture. Do not operate with wet hands.
- Bambini e animali domestici: Tenere bambini e animali domestici lontani dall'unità durante il funzionamento.
- Pulizia: Always disconnect power before cleaning the unit. Use a soft, dry cloth for cleaning.
- Refrigerante: This unit uses R410A refrigerant. Handle with care and ensure proper ventilation during service.
2. Prodotto finitoview
The AUX ASW-H12A4/LIR1 is a 12000BTU (1 Ton) wall-mounted split air conditioning system designed for both heating and cooling. It features fine air purification, a T1 compressor, and Wi-Fi connectivity (optional).
2.1 Componenti
- Unità interna: Responsible for air intake, cooling/heating, and air discharge into the room.
- Unità esterna: Contains the compressor and condenser, responsible for heat exchange with the outside air.
- Telecomando: Used to operate the air conditioner's functions.

Figura 2.1: Oltreview of the AUX Split AC system, showing the indoor unit, outdoor unit, and remote control.
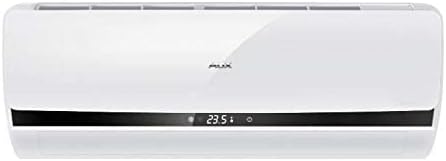
Figura 2.2: Fronte view of the AUX indoor unit, displaying its sleek design and digital display.

Figura 2.3: Angolato view of the AUX indoor unit, highlighting its compact form factor and air vents.
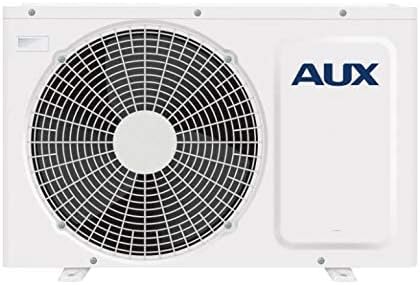
Figura 2.4: Fronte view of the AUX outdoor unit, showing the fan grille and the AUX branding.
3. Configurazione e installazione
Installation of this split air conditioning system requires specialized knowledge and tools. It is strongly recommended that you contact a certified HVAC professional for installation to ensure proper functioning, safety, and warranty validity.
3.1 Controlli pre-installazione
- Verificare che l'alimentazione vol.tage e la frequenza corrispondono ai requisiti dell'unità.
- Assicurarsi che il luogo di installazione delle unità interne ed esterne consenta un corretto flusso d'aria e un adeguato drenaggio.
- Confirm that the maximum communication length of 15 meters is not exceeded.
3.2 Professional Installation Steps (Summary for reference)
- Mounting the indoor unit securely on the wall.
- Installing the outdoor unit on a stable, level surface.
- Connecting refrigerant lines and electrical wiring between indoor and outdoor units.
- Performing vacuuming and refrigerant charging.
- Checking for leaks and testing the system.
4. Istruzioni per l'uso
The air conditioner is primarily controlled via the wireless remote control. Ensure the remote control has working batteries.
4.1 Funzionamento di base
- Accensione/spegnimento: Premere il tasto ACCESO/SPENTO pulsante sul telecomando per avviare o arrestare l'unità.
- Selezione della modalità: Premere il tasto MODALITÀ pulsante per scorrere le modalità disponibili:
- Modalità di raffreddamento: For cooling the room. Cooling power: 2700 W.
- Modalità riscaldamento: For heating the room. Heating power: 2800 W. Minimum operating temperature for heating is -15°C.
- Modalità ventola: Fa circolare l'aria senza raffreddamento o riscaldamento.
- Modalità automatica: L'unità seleziona automaticamente la modalità di funzionamento in base alla temperatura ambiente.
- Modalità a secco: Riduce l'umidità nella stanza.
- Regolazione della temperatura: Utilizzare il TEMP SU/GIÙ pulsanti per impostare la temperatura desiderata.
- Velocità della ventola: Premere il tasto VELOCITÀ DELLA VENTOLA button to adjust the fan speed (4 speeds available).
- Funzione oscillazione: Utilizzare il SWING button to adjust the direction of the airflow.
4.2 Funzioni avanzate
- Funzione timer: The On/Off Timer allows you to set a specific time for the unit to turn on or off. Refer to the remote control's specific instructions for setting the timer.
- Wi-Fi Control (Option): If equipped with the Wi-Fi module, the unit can be controlled via a smartphone application. Consult the separate Wi-Fi control manual for setup and operation.
- Inizio caldo: This function prevents cold air from blowing out when the unit starts in heating mode.
- Funzione di memoria: The unit can memorize your preferred settings.
5. Manutenzione
Una manutenzione regolare garantisce prestazioni ottimali e prolunga la durata del condizionatore. Scollegare sempre l'alimentazione prima di eseguire qualsiasi intervento di manutenzione.
5.1 Pulizia del filtro dell'aria
I filtri dell'aria devono essere puliti regolarmente, in genere ogni due settimane o più frequentemente, a seconda dell'utilizzo e della qualità dell'aria.
- Aprire il pannello frontale dell'unità interna.
- Remove the air filters (Easy Clean Filter type).
- Pulire i filtri con un aspirapolvere oppure lavarli con acqua tiepida (inferiore a 40°C).
- Allow the filters to dry completely in a shaded area before reinstalling them. Do not expose to direct sunlight.
- Reinstallare i filtri e chiudere il pannello frontale.
5.2 Other Filters
This unit features a deodorizing filter, filter with vitamin C, and an anion generator. Refer to your installer or service manual for specific maintenance or replacement instructions for these specialized filters.
5.3 Manutenzione dell'unità esterna
The outdoor unit should be inspected periodically for obstructions (leaves, debris) around the fan and coils. This should ideally be done by a professional during annual servicing.
- Anti-ice formation system: The unit has a system to prevent ice formation on the outdoor coil during heating operation in cold weather.
6. Risoluzione Dei Problemi
Before contacting service, please check the following common issues.
| Problema | Possibile causa | Soluzione |
|---|---|---|
| L'unità non si avvia | Nessuna alimentazione; Batterie del telecomando scariche; Timer impostato su OFF. | Check power supply; Replace batteries; Cancel timer setting. |
| Raffreddamento/riscaldamento insufficiente | Dirty air filters; Blocked air intake/outlet; Room too large; Doors/windows open. | Clean air filters; Remove obstructions; Close doors/windows. |
| Rumore insolito | Loose parts; Unit not level; Refrigerant flow noise (normal). | Ensure unit is level; If noise persists and is unusual, contact service. |
| Perdita d'acqua dall'unità interna | Tubo di scarico intasato; installazione non corretta. | Check and clear drain hose; Contact professional for inspection. |
| Self-diagnosis of malfunctions | Error code displayed on indoor unit. | Note the error code and refer to the service manual or contact customer support. |
Se il problema persiste dopo aver verificato questi punti, contattare personale di assistenza qualificato.
7. Specifiche
| Caratteristica | Specificazione |
|---|---|
| Marca | AUSILIARIO |
| Numero di modello | ASW-H12A4/LIR1 |
| Tipo | Wall Split System |
| Capacità di raffreddamento | Potenza nominale: 12000 BTU |
| Potenza di raffreddamento | 2700 L |
| Potenza di riscaldamento | 2800 L |
| Consumo energetico (raffreddamento) | 820 L |
| Consumo energetico (riscaldamento) | 770 L |
| Dimensioni dell'unità interna (LxAxP) | Dimensioni: 70 × 28.5 × 18.8 centimetri |
| Peso dell'unità interna | 8 kg |
| Dimensioni unità esterna (LxAxP) | Dimensioni: 72 × 54 × 26 centimetri |
| Peso unità esterna | 27 kg |
| Livello di rumore (min/max) | 27dB / 36dB |
| Tipo di refrigerante | La 410A |
| Fase | Monofase |
| Max. Communication Length | 15 metri |
| Air Flow (max) | 7.5 cu m / min |
| Tipo di filtro | Easy Clean Filter, Deodorizing filter, Filter with Vitamin C |
| Caratteristiche speciali | Inverter, Self-diagnosis, Anion generator, Anti-ice formation, Memory function, Warm start, Wi-Fi control (option) |
8. Garanzia e supporto
This AUX air conditioner comes with a limited warranty. Please refer to the warranty card included with your product for specific terms, conditions, and duration. Keep your purchase receipt as proof of purchase.
For technical support, service requests, or inquiries regarding your warranty, please contact your local AUX authorized service center or the retailer from whom you purchased the product. Ensure to provide your model number (ASW-H12A4/LIR1) and serial number (if applicable) when seeking support.
For the most up-to-date information and support resources, please visit the official AUX websito.


