1. Introduzione
This manual provides comprehensive instructions for the setup, operation, and maintenance of your Xprinter XP-360B Thermal Label Barcode Printer. Please read this manual thoroughly before using the printer to ensure proper functionality and to prevent damage.
The XP-360B is a high-speed thermal label printer designed for various applications, including barcode printing, shipping labels, and receipt printing. It supports label widths from 20mm to 80mm and offers a maximum print speed of 200mm per second.

Figure 1.1: Xprinter XP-360B Thermal Label Barcode Printer. This image shows the printer from a front-right angle, with labels being fed out of the front slot.
2. Informazioni sulla sicurezza
To ensure safe operation and prolong the life of your printer, please observe the following safety precautions:
- Non esporre la stampante all'acqua o a umidità eccessiva.
- Evitare di posizionare la stampante alla luce diretta del sole o vicino a fonti di calore.
- Utilizzare solo l'adattatore di alimentazione fornito con la stampante.
- Non tentare di smontare o riparare la stampante autonomamente. Rivolgersi a personale qualificato.
- Tenere la stampante lontana da polvere e detriti.
- Assicurarsi che la stampante sia posizionata su una superficie stabile e piana.
- Scollegare la stampante dalla presa di corrente prima di pulirla o quando non viene utilizzata per lunghi periodi.
3. Contenuto della confezione
Verificare che tutti gli articoli siano presenti nel pacco:
- Xprinter XP-360B Thermal Label Barcode Printer
- Adattatore di alimentazione
- Cavo USB
- Manuale dell'utente (questo documento)
- CD driver (o link per scaricare i driver)
4. Prodotto finitoview
4.1. Fronte View

Figura 4.1: Fronte view of the XP-360B printer, showing the label output slot and control buttons.
- Slot di uscita dell'etichetta: Where printed labels exit the printer.
- Pulsanti di controllo:
- ENERGIA: Indicatore di alimentazione.
- ERRORE: Error indicator.
- PAUSA: Pauses or resumes printing.
- FORAGGIO: Feeds a blank label.
4.2. Lato View

Figura 4.2: lato view of the XP-360B printer, highlighting the power switch.
- Interruttore di alimentazione: Accende o spegne la stampante.
4.3. Interno View (Cover Open)

Figura 4.3: Interno view of the XP-360B printer with the top cover open, showing the label roll compartment and print head assembly.
- Print Head Assembly: Contains the thermal print head.
- Label Roll Compartment: Area for loading the label roll.
- Adjustable Paper Guides: Guides to align the label roll.
5. Impostazione
5.1. Disimballaggio e posizionamento
- Estrarre con cautela la stampante e tutti gli accessori dalla confezione.
- Posizionare la stampante su una superficie stabile e piana, adeguatamente ventilata.
- Ensure there is enough space around the printer for proper operation and maintenance.
5.2. Collegamento della stampante
- Collegare l'adattatore di alimentazione alla porta di ingresso dell'alimentazione della stampante.
- Collegare l'alimentatore a una presa elettrica adeguata.
- Collegare un'estremità del cavo USB alla porta USB della stampante.
- Collegare l'altra estremità del cavo USB a una porta USB disponibile sul computer.
5.3. Caricamento delle etichette
- Assicurarsi che la stampante sia spenta.
- Aprire il coperchio superiore della stampante.
- Place the label roll into the label compartment, ensuring the labels feed from the bottom of the roll towards the front of the printer.
- Adjust the movable paper guides to fit the width of your label roll snugly, without being too tight.
- Pull a few labels out past the print head and through the label output slot.
- Chiudere saldamente il coperchio superiore finché non scatta in posizione.

Figure 5.1: Loading a roll of thermal labels into the XP-360B printer's internal compartment.
5.4. Installazione del driver
Before using the printer, you must install the appropriate drivers on your computer. Drivers are typically provided on a CD or can be downloaded from the manufacturer's official websito.
- Insert the driver CD into your computer's CD-ROM drive, or navigate to the official Xprinter support website to download the XP-360B drivers.
- Seguire le istruzioni visualizzate sullo schermo per completare l'installazione del driver.
- After installation, it is recommended to restart your computer.
6. Istruzioni per l'uso
6.1. Accensione/Spegnimento
- To turn on the printer, flip the power switch located on the side of the printer to the 'ON' position. The POWER indicator light will illuminate.
- To turn off the printer, flip the power switch to the 'OFF' position.
6.2. Stampa di base
- Assicurarsi che la stampante sia collegata al computer e accesa.
- Open the document or application from which you wish to print labels (e.g., label design software, shipping platform).
- Go to the print settings (File > Stampa).
- Select "Xprinter XP-360B" as your printer.
- Adjust the paper size and orientation settings to match your labels (e.g., 4x6 inch, portrait/landscape).
- Click "Print". The printer will automatically detect the label gaps and print accordingly.
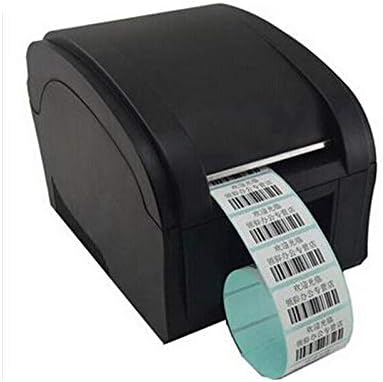
Figure 6.1: The XP-360B printer in operation, feeding out a continuous roll of printed labels.
6.3. Using Control Buttons
- Pulsante ALIMENTAZIONE: Press this button once to feed a single blank label. This is useful for testing label alignment or advancing to the next label.
- Pulsante PAUSA: Press this button to temporarily pause a print job. Press it again to resume printing.
7. Manutenzione
Una manutenzione regolare garantisce prestazioni ottimali e prolunga la durata della stampante.
7.1. Pulizia della testina di stampa
The print head should be cleaned regularly, especially if print quality degrades or after printing a large volume of labels.
- Turn off the printer and unplug it from the power outlet.
- Aprire il coperchio superiore della stampante.
- Se la stampante è stata utilizzata di recente, attendere qualche minuto affinché la testina di stampa si raffreddi.
- Gently wipe the thermal print head surface with an alcohol swab or a lint-free cloth lightly damparricchito con alcol isopropilico.
- Lasciare asciugare completamente la testina di stampa prima di chiudere il coperchio e accendere la stampante.
7.2. Cleaning the Platen Roller
The platen roller helps feed the labels smoothly. Clean it if you notice feeding issues.
- Follow steps 1-3 from "Cleaning the Print Head".
- Rotate the platen roller manually and wipe its surface with an alcohol swab or a lint-free cloth lightly damparricchito con alcol isopropilico.
- Allow it to dry completely before closing the cover.
8. Risoluzione Dei Problemi
This section addresses common issues you might encounter with your XP-360B printer.
| Problema | Possibile causa | Soluzione |
|---|---|---|
| La stampante non si accende | Power cable loose; Power outlet faulty; Printer fault | Check power cable connection; Try a different outlet; Contact support if problem persists. |
| No printing / Printer offline | USB cable loose; Driver not installed; Printer offline in OS | Check USB connection; Install drivers; Check printer status in computer settings. |
| Scarsa qualità di stampa / Stampe sbiadite | Dirty print head; Low quality labels; Incorrect print density settings | Clean the print head (see Section 7.1); Use high-quality thermal labels; Adjust print density in driver settings. |
| Le etichette non vengono alimentate correttamente | Labels loaded incorrectly; Paper guides not adjusted; Dirty platen roller | Re-load labels correctly; Adjust paper guides; Clean platen roller (see Section 7.2). |
| La spia ERROR è accesa | Paper jam; Cover open; Print head overheating | Clear any paper jams; Ensure cover is closed properly; Turn off printer and let it cool down. |
9. Specifiche
| Caratteristica | Descrizione |
|---|---|
| Modello | XP-360B |
| Metodo di stampa | Termico diretto |
| Interfaccia | USB |
| Velocità di stampa | Fino a 200 mm/secondo |
| Larghezza massima della carta | 80mm (adjustable from 20mm) |
| Modalità di alimentazione della carta | Automatico |
| Stampa in rete | Cablato |
| Stampa fronte-retro | NO |
| Dimensioni | Dimensioni: 25 x 22 x 21 cm |
| Peso | 2 kg |
10. Garanzia e supporto
Xprinter products are designed for reliability and performance. For specific warranty terms and conditions, please refer to the warranty card included with your product or visit the official Xprinter websito.
If you encounter any issues that cannot be resolved using the troubleshooting guide, or if you require technical assistance, please contact Xprinter customer support through their official websito o le informazioni di contatto fornite nella documentazione del prodotto.
Please have your model number (XP-360B) and purchase information ready when contacting support.


