1. Introduzione
Thank you for choosing the Tacklife PES01A Circular Saw. This powerful and versatile tool is designed for efficient and precise cutting of various materials, including wood and plastic. Featuring a robust 1500W motor, laser guide, and adjustable cutting capabilities, it is an ideal tool for both professional and DIY projects. Please read this manual thoroughly before operation to ensure safe and effective use of your new circular saw.

Figure 1.1: Tacklife PES01A Circular Saw overview.
2. Istruzioni generali di sicurezza
Seguire sempre le precauzioni di sicurezza di base quando si utilizzano utensili elettrici per ridurre il rischio di incendi, scosse elettriche e lesioni personali. Conservare questo manuale per riferimento futuro.
2.1. Sicurezza dell'area di lavoro
- Mantenere l'area di lavoro pulita e ben illuminata. Le aree disordinate o buie favoriscono gli incidenti.
- Non utilizzare utensili elettrici in atmosfere esplosive, come in presenza di liquidi, gas o polvere infiammabili. Gli utensili elettrici creano scintille che possono incendiare la polvere o i fumi.
- Tenere lontani bambini e astanti mentre si utilizza un elettroutensile. Le distrazioni possono causare la perdita del controllo.
2.2. Sicurezza elettrica
- Le spine degli utensili elettrici devono essere adatte alla presa. Non modificare mai la spina in alcun modo.
- Evitare il contatto del corpo con superfici messe a terra o collegate a massa, come tubi, radiatori, fornelli e frigoriferi. C'è un rischio maggiore di scosse elettriche se il corpo è collegato a massa o collegato a massa.
- Non esporre gli utensili elettrici alla pioggia o a condizioni di bagnato. L'ingresso di acqua in un utensile elettrico aumenta il rischio di scosse elettriche.
- Non abusare del cavo. Non usare mai il cavo per trasportare, tirare o scollegare l'elettroutensile. Tenere il cavo lontano da calore, olio, bordi taglienti o parti in movimento.
2.3. Sicurezza personale
- Indossare sempre protezioni per gli occhi. Utilizzare occhiali di sicurezza o maschere.
- Indossare protezioni acustiche quando si utilizza l'utensile per periodi prolungati.
- Vestiti in modo appropriato. Non indossare abiti larghi o gioielli. Tieni i capelli e gli abiti lontani dalle parti in movimento.
- Siate vigili, fate attenzione a ciò che fate e usate il buon senso quando utilizzate un elettroutensile.
- Utilizzare le misure di sicurezzaamps or a vise to secure the workpiece. This is safer than using your hand and it frees both hands to operate the tool.
2.4. Circular Saw Specific Safety
- Tenere le mani lontane dall'area di taglio e dalla lama. Tenere l'altra mano sull'impugnatura ausiliaria o sull'alloggiamento del motore. Se entrambe le mani tengono la sega, non possono essere tagliate dalla lama.
- Non mettere le mani sotto il pezzo in lavorazione. La protezione non può proteggerti dalla lama sotto il pezzo in lavorazione.
- Regolare la profondità di taglio in base allo spessore del pezzo. Sotto il pezzo deve essere visibile meno di un dente intero della lama.
- Non tenere mai il pezzo in lavorazione tra le mani o sulla gamba durante il taglio. Fissare il pezzo in lavorazione su una piattaforma stabile.
- Tenere l'utensile elettrico dalle superfici di presa isolate quando si esegue un'operazione in cui l'accessorio da taglio potrebbe entrare in contatto con cavi nascosti o con il proprio cavo.
- Always ensure the lower guard is closed before placing the saw down.
3. Componenti e caratteristiche
Familiarize yourself with the parts of your Tacklife PES01A Circular Saw before operation.

Figura 3.1: Componenti principali della sega circolare.
- 1. Motore potente: Ensures good heat dissipation.
- 2. Interruttore laser: Activates the laser guide.
- 3. 3M Power Cord & Cable Tie: Convenient for storage and use.
- 4. Doppio interruttore di sicurezza: Requires pressing both buttons to start, preventing accidental injury.
- 5. Manico gommato: For comfortable and secure grip.
- 6. Support Handle: Provides additional control.
- 7. Aluminum Alloy Cover: Durable housing.
- 8. Iron Base Plate: Sturdy base for cutting.
- 9. Iron Blade Guard: Protects the blade.
Accessori inclusi:

Figure 3.2: Standard accessories included with the saw.
- 1 x Tacklife PES01A Circular Saw
- 1 x 185mm 24-Tooth TCT Blade (for wood/plastic)
- 1 x 185mm 40-Tooth TCT Blade (for wood/plastic)
- 1 x Hex Wrench (for blade changes)
- 1 x Parallel Guide Ruler
- 1 x Dust Port Adapter (35mm diameter)
- 1 x Manuale utente
- 1 x Scheda di garanzia
4. Installazione e assemblaggio
4.1. Blade Installation/Removal
- Prima di tentare di sostituire la lama, assicurarsi che la sega sia scollegata dalla presa di corrente.
- Tenere premuto il pulsante di blocco del mandrino.
- Using the hex wrench, loosen the blade bolt by turning it counter-clockwise.
- Sollevare la protezione inferiore della lama e rimuovere con cautela la vecchia lama.
- Posizionare la nuova lama sul mandrino, assicurandosi che i denti siano rivolti nella direzione della freccia sulla protezione della sega.
- Replace the blade bolt and tighten it securely with the hex wrench while holding the spindle lock button.
- Release the spindle lock and check that the blade rotates freely and the guard moves smoothly.
4.2. Attaching the Parallel Guide Ruler
The parallel guide ruler helps achieve straight cuts parallel to the edge of the workpiece.
- Far scorrere il righello guida nella fessura sulla parte anteriore della piastra di base della sega.
- Regolare il righello sulla larghezza di taglio desiderata.
- Stringere la vite di bloccaggio per fissare il righello in posizione.
4.3. Collegamento dell'aspirazione della polvere
For a cleaner work environment, connect a vacuum cleaner to the dust port.
- Attach the 35mm dust port adapter to the dust outlet on the saw.
- Connect your vacuum cleaner hose to the adapter.
5. Istruzioni per l'uso
5.1. Regolazione della profondità di taglio
The cutting depth can be adjusted to match the thickness of your material. The maximum cutting depth at 90° is 65mm (2.5 inches).

Figure 5.1: Adjusting cutting depth for straight and bevel cuts.
- Loosen the depth adjustment lever located at the rear of the saw.
- Raise or lower the base plate to the desired cutting depth. Ensure only a small portion of the blade teeth extends below the workpiece.
- Stringere saldamente la leva di regolazione della profondità.
5.2. Adjusting Bevel Angle (Miter Cut)
The saw can make bevel cuts up to 45°. The maximum cutting depth at 45° is 45mm (1.8 inches).
- Loosen the bevel adjustment knob/lever at the front of the saw.
- Inclinare la piastra di base all'angolazione desiderata (da 0° a 45°).
- Tighten the bevel adjustment knob/lever securely.
5.3. Utilizzo della guida laser
The integrated laser guide provides a visual line for precise cutting.

Figure 5.2: The laser guide assists in making straight cuts.
- Locate the laser switch on the saw.
- Flip the switch to turn the laser on. A red laser line will project onto your workpiece, indicating the cutting path.
- Align the laser line with your marked cut line on the material.
- Turn off the laser when not in use to conserve battery (if applicable) or prevent accidental activation.
5.4. Effettuare un taglio
Assicurarsi sempre che il pezzo in lavorazione sia ben chiusoamped prima del taglio.

Figure 5.3: Cutting a wooden board with the circular saw.

Figure 5.4: Cutting a plastic sheet with the circular saw.
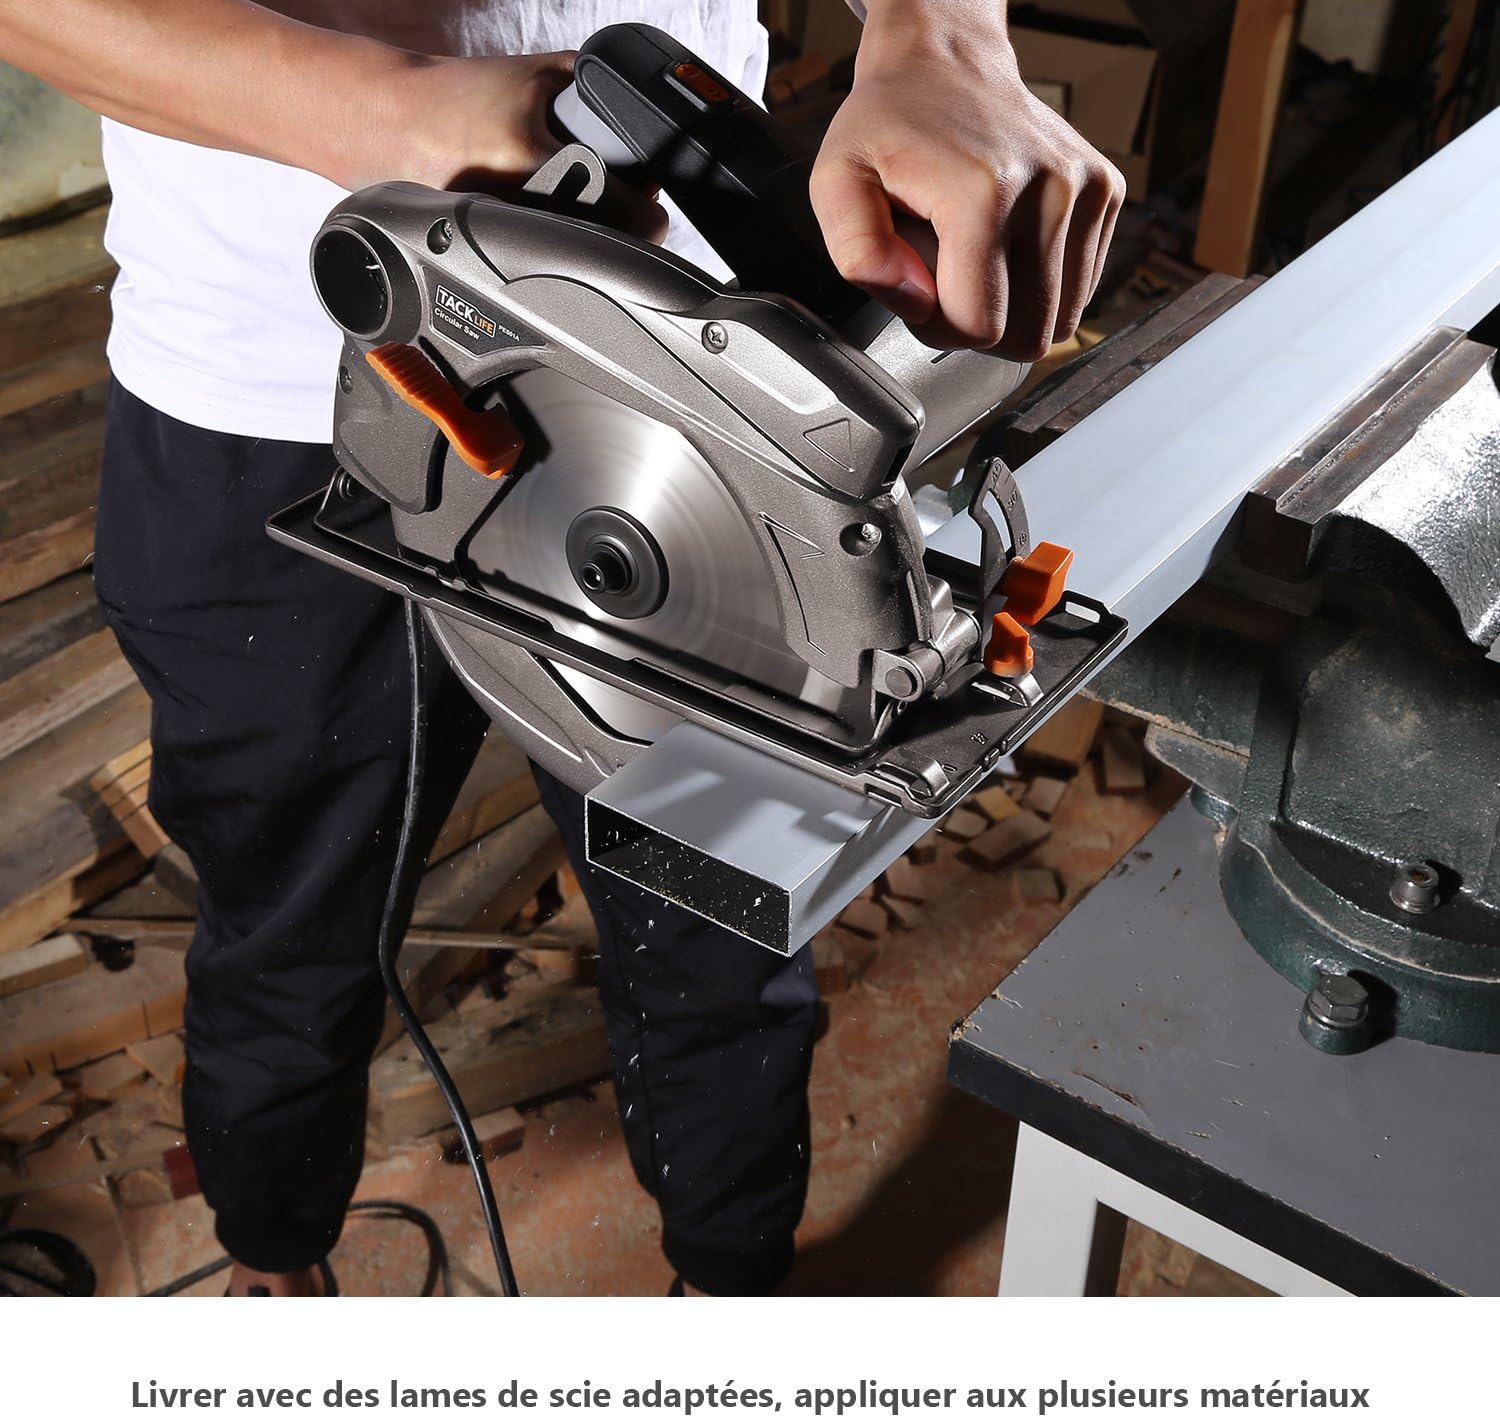
Figure 5.5: Cutting a metal profile with the circular saw (ensure appropriate blade is used).
- Collegare la sega a una presa di corrente adatta.
- Hold the saw firmly with both hands, ensuring a stable grip on the main and auxiliary handles.
- To start the saw, press the double safety switch (requires pressing both buttons simultaneously for safety).
- Consentire alla lama di raggiungere la massima velocità prima di iniziare il taglio.
- Guide the saw smoothly and steadily along your marked line. Do not force the saw; let the blade do the work.
- Maintain a consistent feed rate.
- Una volta completato il taglio, rilasciare il grilletto e lasciare che la lama si fermi completamente prima di sollevare la sega dal pezzo in lavorazione.
- Unplug the saw after use.
6. Manutenzione
Una manutenzione regolare garantisce la longevità e il funzionamento sicuro della sega circolare.
6.1. Pulizia
- Scollegare sempre la sega prima di pulirla.
- Use a soft brush or compressed air to remove dust and debris from the motor vents and blade guard.
- Wipe down the exterior of the saw with a damp stoffa. Non utilizzare prodotti chimici aggressivi o detergenti abrasivi.
- Mantenere pulita la piastra di base per garantire uno scorrimento fluido sul pezzo in lavorazione.
6.2. Cura della lama
- Inspect blades regularly for dullness, cracks, or missing teeth. Replace damaged blades immediately.
- Pulire le pale da accumuli di resina e pece utilizzando un apposito detergente.
- Store blades properly to prevent damage and corrosion.
6.3. Conservazione
- Conservare la sega in un luogo asciutto e sicuro, fuori dalla portata dei bambini.
- Proteggere il cavo di alimentazione da eventuali danni durante lo stoccaggio.
7. Risoluzione Dei Problemi
Questa sezione affronta i problemi più comuni che potresti riscontrare con la tua sega circolare.
| Problema | Possibile causa | Soluzione |
|---|---|---|
| La sega non si avvia. | Nessuna alimentazione; interruttore di sicurezza non inserito; cavo di alimentazione difettoso. | Check power outlet and circuit breaker; Ensure both safety switch buttons are pressed; Inspect power cord for damage. |
| Blade not cutting smoothly or burning wood. | Dull or dirty blade; Incorrect blade for material; Overfeeding the saw. | Replace or clean blade; Use appropriate blade for the material; Reduce feed rate. |
| Vibrazioni eccessive. | Lama allentata; Lama danneggiata; Cuscinetti usurati. | Tighten blade bolt; Replace blade; Contact customer support if bearings are suspected. |
| La guida laser non funziona. | Laser switch off; Laser lens dirty; Laser module faulty. | Turn on laser switch; Clean laser lens; Contact customer support. |
| La raccolta della polvere è scarsa. | Dust port clogged; Vacuum not powerful enough; Hose not properly connected. | Clear dust port; Use a more powerful vacuum; Ensure hose is securely attached. |
8. Specifiche tecniche
| Caratteristica | Specificazione |
|---|---|
| Modello | PES01A |
| Potenza in ingresso | 1500 L |
| Voltage | 230 Volt |
| Velocità a vuoto | 4700 giri al minuto |
| Diametro lama | 185 mm (7-1/4 pollici) |
| Profondità di taglio massima (90°) | 65 mm (2.5 pollici) |
| Profondità di taglio massima (45°) | 45 mm (1.8 pollici) |
| Capacità di smussatura | 0° - 45° |
| Peso | 4.9 kg (10.8 libbre) |
| Guida laser | SÌ |
| Diametro della porta della polvere | 35 millimetri |
9. Garanzia e supporto
Tacklife products are manufactured to high-quality standards and are warranted against defects in materials and workmanship. Please refer to the included warranty card for specific terms and conditions, including the warranty period and registration process.
Figura 9.1: Esample of included warranty card.
Assistenza clienti:
For technical assistance, troubleshooting, or warranty claims, please contact Tacklife customer support. Contact information can typically be found on the warranty card or the official Tacklife websito.
- Websito: www.tacklife.com (Si prega di controllare il sito ufficiale websito per le informazioni di contatto più aggiornate.)
- E-mail: Fare riferimento alla scheda di garanzia o alla confezione del prodotto.
When contacting support, please have your product model (PES01A) and purchase date ready.


