1. Prodotto finitoview
The GameMax Optical is a mid-tower ATX PC gaming case designed for system builders. It features transparent acrylic panels on the front and both sides, providing a clear view of internal components. The case supports ATX motherboards and includes four pre-installed Rainbow Dual-Ring ARGB fans for cooling and customizable lighting effects. The design prioritizes effective airflow with multiple air intakes and support for up to eight cooling fans.
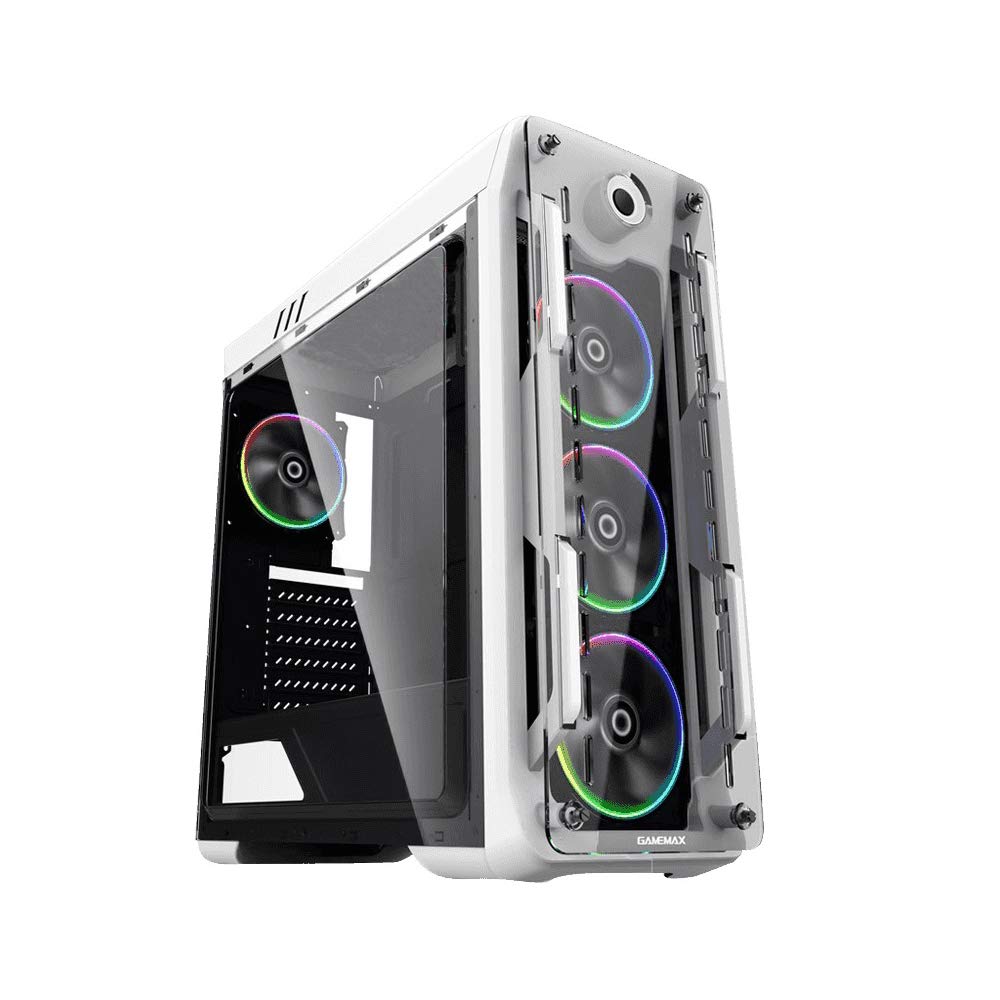
Figura 1: Frontale e laterale view of the GameMax Optical PC Gaming Case.
2 Caratteristiche
- Costruzione in acrilico: Transparent acrylic panels on the front and both sides for component visibility.
- Flusso d'aria ottimale: Designed with multiple air intakes and heat dissipation points, supporting up to eight fans for efficient cooling.
- Sistema di raffreddamento: Includes four pre-installed Rainbow Dual-Ring ARGB fans. Fan speed and ARGB lighting can be controlled via an RF remote or a manual controller on the top I/O panel.
- Struttura interna: Mid-tower chassis compatible with ATX, Micro-ATX, and Mini-ITX motherboards. Supports four internal hard drives, CPU coolers up to 160mm in height, and graphics cards up to 360mm in length.
3. Contenuto della confezione
Verificare che tutti gli articoli siano presenti nel pacco:
- GameMax Optical PC Case
- 4 x Rainbow Dual-Ring ARGB Fans (pre-installed)
- RF Remote Controller for ARGB Fans
- Kit di accessori (viti, distanziatori, fascette)
- Manuale dell'utente (questo documento)
4. Configurazione e installazione
Before beginning installation, ensure your workspace is clean and static-free. Refer to your motherboard and component manuals for specific installation instructions.
4.1. Preparazione
- Unpack the PC case and remove all packaging materials.
- Posizionare la custodia su una superficie piana e stabile.
- Remove the side acrylic panels by unscrewing the thumb screws.
4.2. Installazione della scheda madre
- Install the necessary motherboard standoffs into the motherboard tray according to your motherboard's form factor (ATX, Micro-ATX, Mini-ITX).
- Posizionare la schermatura I/O nell'apertura posteriore del case.
- Carefully align your motherboard with the standoffs and I/O shield, then gently lower it into place.
- Fissare la scheda madre con le viti. Non stringere eccessivamente.
4.3. Installazione dell'alimentatore
- Individuare l'area di montaggio dell'alimentatore nella parte inferiore posteriore del case.
- Slide the power supply into the designated bay.
- Fissare l'alimentatore con le viti dalla parte posteriore del case.
4.4. Installazione dell'unità di archiviazione
Install 3.5-inch HDDs and 2.5-inch SSDs into the designated drive bays. Refer to the case's internal structure for specific mounting points and methods (e.g., trays, screw-in mounts).

Figura 2: Interno view showing fan placement and component space.
4.5. Installazione della scheda grafica e della scheda di espansione
- Rimuovere le coperture degli slot PCI-E necessari dalla parte posteriore del case.
- Insert your graphics card or other expansion cards into the appropriate PCI-E slots on the motherboard.
- Fissare le schede con le viti.
4.6. Connessioni per ventole e ARGB
The pre-installed ARGB fans are connected to a fan controller. Connect the fan controller to your power supply (usually via SATA power) and to your motherboard's ARGB header (if desired for software control) or use the included RF remote for control.
4.7. Gestione dei cavi
Route all cables (power, data, front panel I/O) through the designated cutouts and tie-down points behind the motherboard tray to ensure clean aesthetics and unobstructed airflow.

Figura 3: Posteriore view of the case, showing I/O and expansion slots.
5. Istruzioni per l'uso
5.1. Accensione
- Ensure all components are securely installed and cables are connected.
- Connect the power cable to your power supply and a wall outlet.
- Press the power button on the top I/O panel of the case.
5.2. Fan and ARGB Lighting Control
- Telecomando RF: Use the included RF remote to change ARGB lighting modes, colors, and fan speeds.
- Manual Fan Controller: A dedicated button on the top I/O panel allows for manual adjustment of fan speed.
- Software della scheda madre: If the fan controller is connected to a compatible motherboard ARGB header, you may be able to control lighting effects via your motherboard's RGB software.
6. Manutenzione
Una manutenzione regolare aiuta a garantire prestazioni ottimali e longevità del case e dei componenti del PC.
- Filtri antipolvere: Periodically remove and clean any dust filters (e.g., on the top, front, or bottom) to maintain good airflow.
- Pannelli acrilici: Clean acrylic panels with a soft, damp cloth and mild cleaner. Avoid abrasive materials or harsh chemicals that can scratch or damage the acrylic.
- Pulizia della ventola: Use compressed air to remove dust buildup from fan blades and heatsinks.
- Gestione dei cavi: Controllare di tanto in tanto il percorso dei cavi per assicurarsi che nessuno di essi ostruisca il flusso d'aria o il funzionamento della ventola.
7. Risoluzione Dei Problemi
In caso di problemi, fare riferimento ai seguenti passaggi comuni per la risoluzione dei problemi:
- Nessun potere: Ensure the power supply is switched on, the power cable is securely connected, and all internal power connections (24-pin ATX, 8-pin CPU, GPU power) are firm.
- Fans Not Spinning / ARGB Not Lighting: Check that the fan controller is properly connected to the power supply and that all fans are securely plugged into the controller. Verify ARGB headers are correctly connected to the motherboard or controller.
- Surriscaldamento: Ensure all fans are spinning in the correct direction for optimal airflow. Clean any dust filters and fan blades. Verify that CPU and GPU coolers are properly seated.
- Componenti sciolti: If you hear rattling or experience instability, power down the system and check that all installed components (motherboard, GPU, drives) are securely fastened with screws.
8. Specifiche
| Caratteristica | Specificazione |
|---|---|
| Nome del modello | GMX-OPTICAL-WHT |
| Tipo di caso | Mid Tower |
| Compatibilità della scheda madre | ATX, Micro ATX, Mini ITX |
| Dimensioni (L x P x A) | 18.39 x 8.11 x 19.8 pollici (467 x 206 x 503 mm) |
| Peso dell'articolo | 10.12 libbre (4.6 chilogrammi) |
| Materiale | Acrilico |
| Ventole preinstallate | 4 x Rainbow Dual-Ring ARGB Fans |
| massimo Altezza del dispositivo di raffreddamento della CPU | 160mm |
| Max. GPU Length | 360mm |
| Alloggiamenti unità | 4 internal (combination of 3.5" HDD and 2.5" SSD) |
| Porte I / O anteriori | 2 x USB 2.0, Audio In/Out, Power Button, Reset Button, Fan Controller |
9. Informazioni sulla garanzia
For detailed warranty terms and conditions, please refer to the official GAMEMAX website or contact your retailer directly. Keep your proof of purchase for warranty claims.
10. Supporto
For technical assistance, product inquiries, or further support, please visit the official GAMEMAX websito:
You may also contact GAMEMAX customer support through the channels provided on their websito.


