Informazioni sulla sicurezza
Read and understand all instructions before beginning installation. Failure to follow these instructions could result in electric shock, fire, or serious personal injury.
- Ensure the installation site is structurally sound and can support the fan's weight (approximately 21 lbs).
- Tutti i cablaggi devono essere conformi alle normative elettriche nazionali e locali. Se non si ha familiarità con i cablaggi, consultare un elettricista qualificato.
- Scollegare l'alimentazione dall'interruttore automatico o dalla scatola dei fusibili prima di iniziare l'installazione o di eseguire qualsiasi intervento di manutenzione.
- Non utilizzare il ventilatore se le pale o l'alloggiamento sono danneggiati.
- Maintain a minimum clearance of 7 feet from the floor to the bottom edge of the fan blades.
- Questo ventilatore è progettato solo per uso interno.
Configurazione e installazione
This section guides you through the assembly and installation process of your Hunter ceiling fan.
1. Disimballaggio e ispezione
Carefully remove all components from the packaging. Inspect all parts for any damage. Do not discard packaging materials until assembly is complete and the fan is operating correctly.
2. Montaggio della ventola
The fan uses a standard profile mounting with included 3-inch and 2-inch downrods. Choose the appropriate downrod length for your ceiling height. Ensure the electrical box is securely mounted and capable of supporting the fan.

Image: Hunter 46-inch ceiling fan installed in a living space, demonstrating typical mounting.
- Fissare la staffa di montaggio alla scatola elettrica del soffitto.
- Feed electrical wires through the downrod and canopy.
- Fissare la barra di supporto all'alloggiamento del motore.
- Sollevare il gruppo ventola e appenderlo alla staffa di montaggio.
3. Collegamenti elettrici
Ensure power is OFF at the circuit breaker before making any electrical connections. Connect the fan's wires to the household wiring according to the wiring diagram provided in the full installation guide (not included here). This fan operates on 120 Volts AC.
4. Fissaggio delle pale del ventilatore
The fan includes 5 reversible Medium Density Fiberboard (MDF) blades with Warm Grey Oak and Greyed Walnut finishes. Choose your preferred finish before attaching the blades.

Immagine: Primo piano view of the fan's motor housing with the Hunter logo and a blade arm attached, showing the connection point.
- Attach each blade to a blade arm using the provided screws.
- Secure the blade arms to the motor housing.

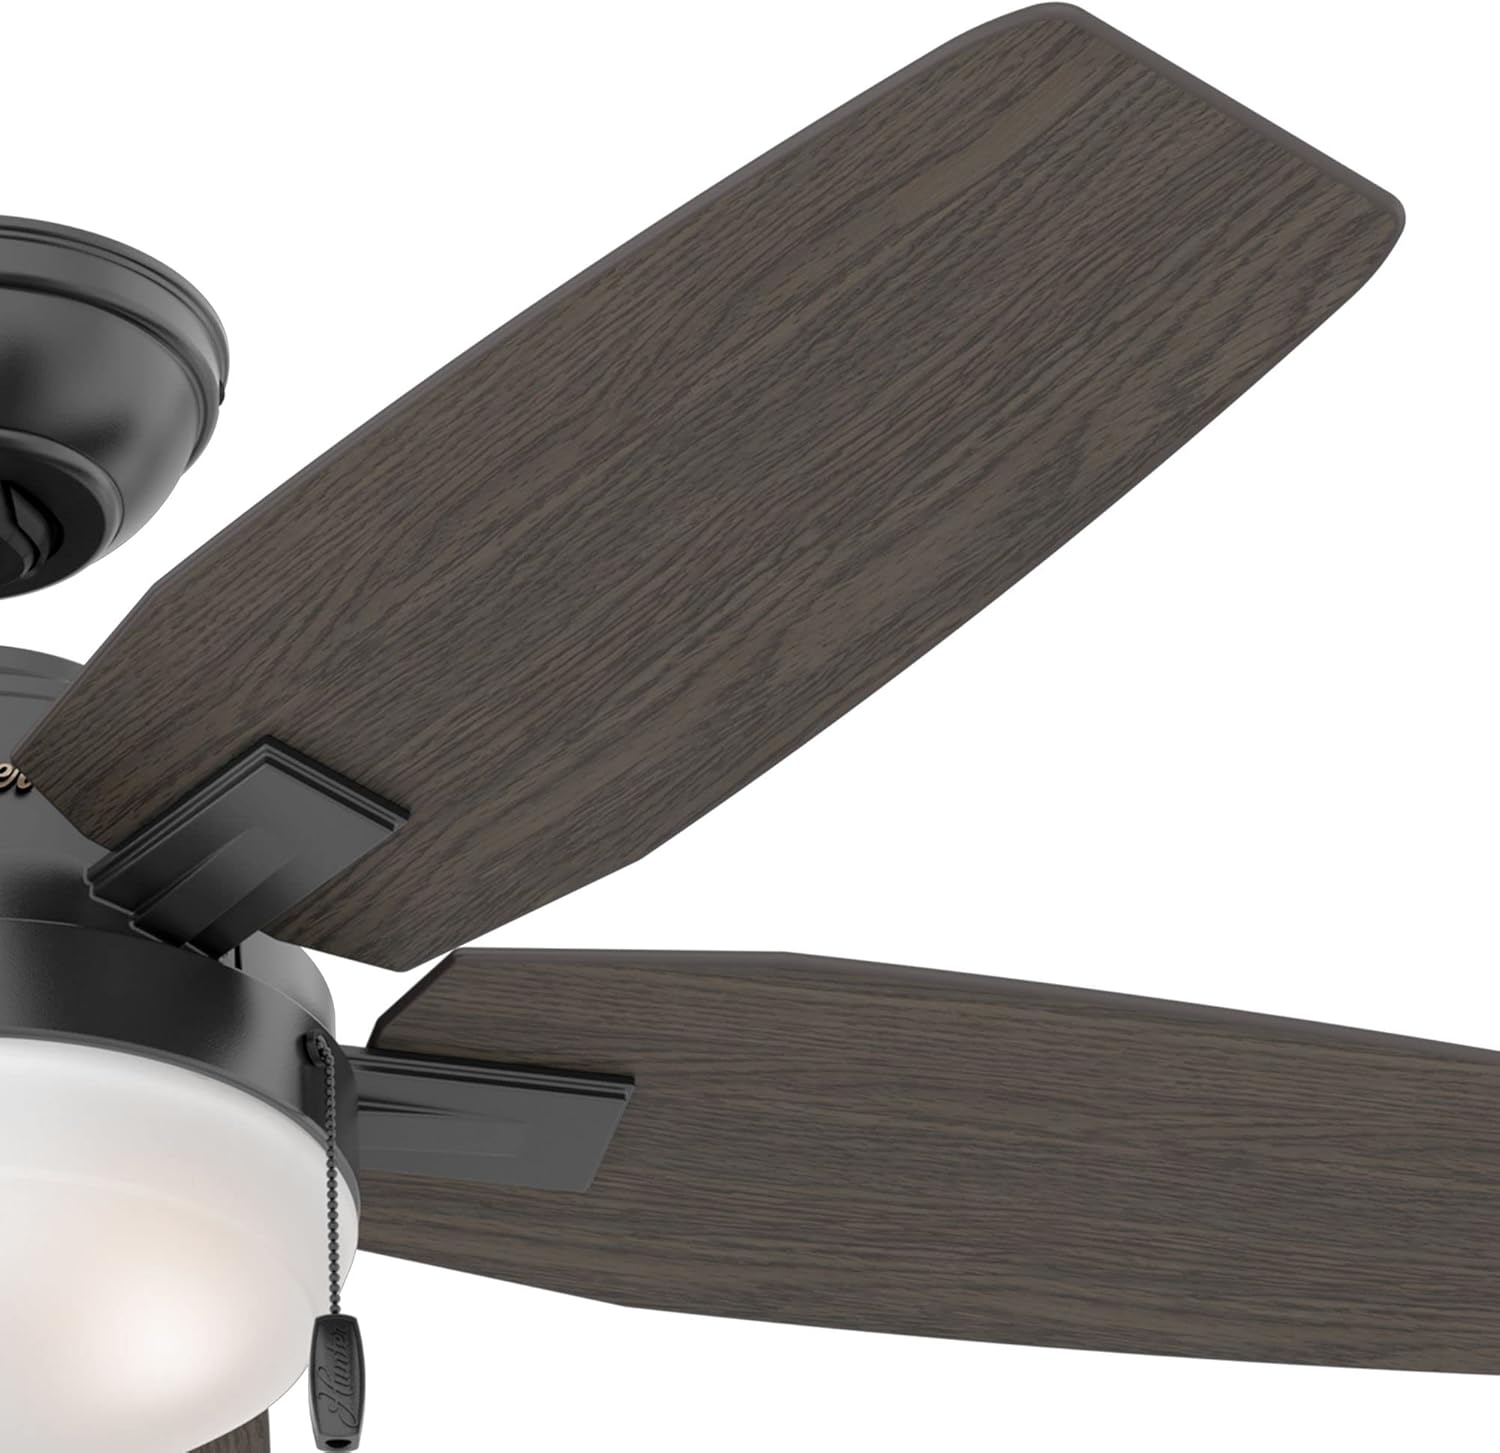
Image: Left shows the Warm Grey Oak side of a fan blade. Right shows the Greyed Walnut side of a fan blade, demonstrating the reversible design.
5. Installazione del kit luci
The fan includes an integrated light kit with premium painted cased white glass shading and two 9-watt energy-efficient, dimmable LED bulbs (E26/A19 base).

Image: Close-up of the fan's light kit, showing the frosted white glass shade and the two pull chains for fan speed and light control.
- Collegare i fili del kit luci ai fili del motore della ventola.
- Secure the light kit assembly to the fan motor housing.
- Installare le lampadine a LED nelle prese.
- Attach the glass shade to the light kit.
Istruzioni per l'uso
Your Hunter ceiling fan is controlled by pull chains for both fan speed and light operation.
Controllo della velocità della ventola
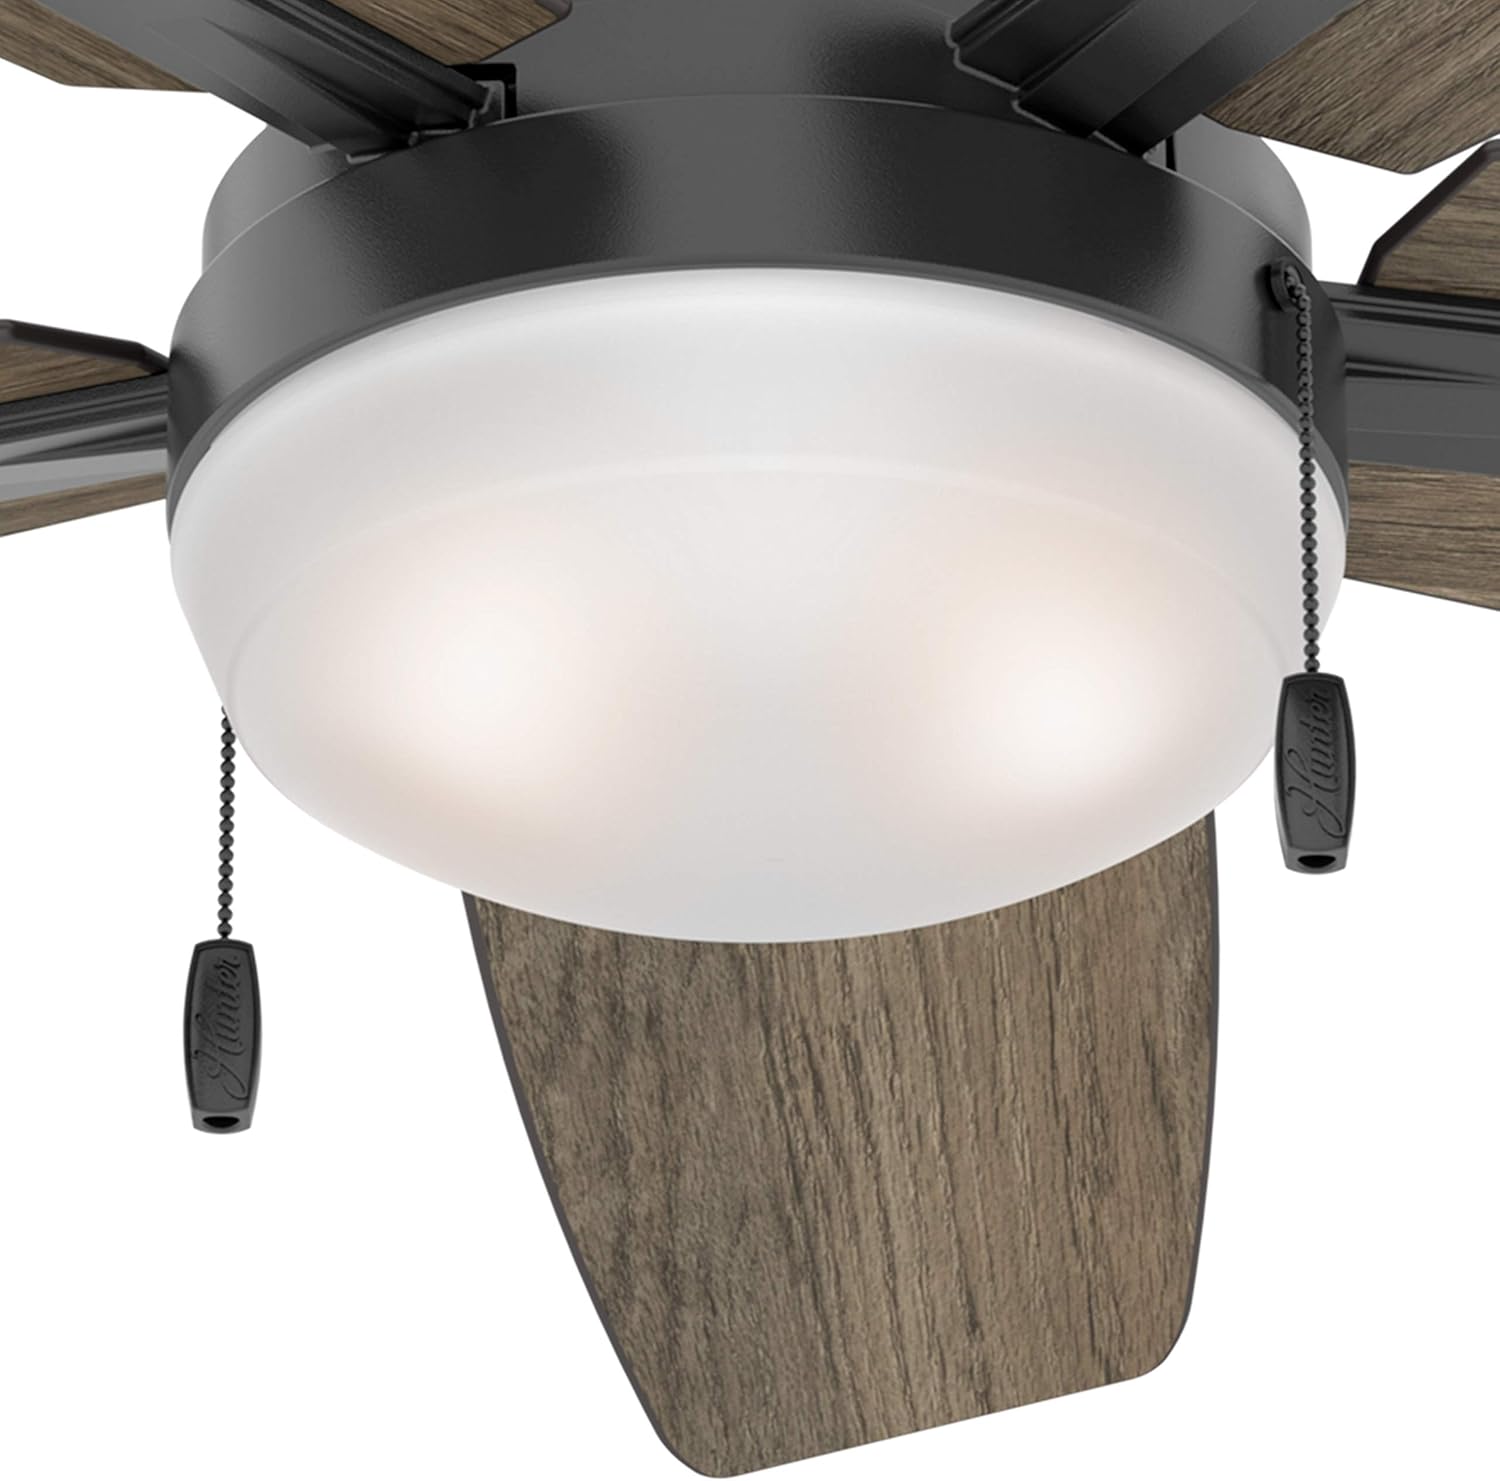
Immagine: dettagliata view of the fan's light kit, highlighting the two pull chains. One chain controls the fan speed, and the other controls the light.
- Locate the pull chain designated for fan speed (often marked with a fan icon or a shorter chain).
- Tirare la catena una volta per raggiungere l'alta velocità.
- Tirare la catena una seconda volta per ottenere la velocità media.
- Tirare la catena una terza volta per la bassa velocità.
- Tirare la catena una quarta volta per SPEGNERE il ventilatore.
Controllo della luce
- Locate the pull chain designated for light control (often marked with a light bulb icon or a longer chain).
- Tirare la catena una volta per accendere la luce.
- Pull the chain a second time to turn the light OFF.
- To dim the light, pull and hold the light chain. Release when the desired brightness is reached.
Reversible Blade Operation (Seasonal Use)
Your fan features reversible blades and a reversible motor for year-round comfort. A switch on the fan motor housing allows you to change the direction of blade rotation.
- Operazione estiva: Set the switch to make the blades rotate counter-clockwise. This creates a downward airflow, producing a cooling effect.
- Operazione invernale: Set the switch to make the blades rotate clockwise. This creates an upward airflow, recirculating warm air from the ceiling without creating a direct draft.
- Prima di cambiare direzione, spegnere sempre il ventilatore e attendere che le pale si fermino completamente.
Manutenzione
Una manutenzione regolare garantisce la longevità e le prestazioni ottimali del ventilatore da soffitto.
- Pulizia: Pulire periodicamente le pale del ventilatore e l'alloggiamento del motore con un panno morbido e asciutto.amp panno. Non utilizzare detergenti abrasivi o solventi, poiché potrebbero danneggiare la finitura.
- Viti di serraggio: Check all screws on the fan blades, blade arms, and mounting hardware at least twice a year. Tighten any loose screws to prevent wobbling and noise.
- Sostituzione della lampadina: If a light bulb needs replacement, ensure the power is off. Use only 9-watt LED bulbs with an E26/A19 base, or equivalent.
- Nessuna lubrificazione richiesta: Il motore della ventola è permanentemente lubrificato e non necessita di lubrificazione.
Risoluzione dei problemi
If you experience issues with your fan, refer to the following common problems and solutions before contacting support.
La ventola non si avvia
- Controlla la potenza: Ensure the circuit breaker is ON and the wall switch (if applicable) is ON.
- Collegamenti elettrici: Verify all electrical connections are secure and correctly wired according to the installation instructions.
- Catena di trazione: Ensure the fan pull chain has been pulled to an ON position.
La ventola oscilla
- Viti della lama: Check that all blade screws are tightened securely.
- Blade Arms: Ensure blade arms are securely attached to the motor.
- Montaggio: Verify the mounting bracket and downrod are securely fastened to the ceiling and electrical box.
- Bilanciamento della lama: Uneven blade weight can cause wobbling. Use a balancing kit (often sold separately) if necessary.
La luce non funziona
- Installazione della lampadina: Assicurarsi che le lampadine siano ben avvitate.
- Bulb Functionality: Test bulbs in a known working fixture or replace with new ones.
- Cablaggio: Controllare i collegamenti elettrici del kit luci.
- Catena di trazione: Ensure the light pull chain is in the ON position.
Funzionamento rumoroso
- Viti allentate: Tighten all screws on the fan.
- Montaggio: Ensure the fan is securely mounted and not touching any part of the ceiling.
- Paralume in vetro: Check if the glass shade is securely fastened and not rattling.
- Distanza tra le lame: Ensure blades are not hitting anything.
Specifiche

Image: Energy Guide label showing estimated yearly energy cost ($10) and airflow (3,133 Cubic Feet Per Minute) for the fan.
| Marca | Cacciatore |
| Numero di modello | CC5C95C84 |
| Dimensioni del prodotto | 46 cm L x 46 cm P x 14.51 cm A |
| Peso dell'articolo | 21.05 libbre |
| Colore | Nero opaco |
| Materiale | Metal (Housing), MDF (Blades), Glass (Shade) |
| Numero di lame | 5 (Reversible: Warm Grey Oak / Greyed Walnut) |
| Tipo di sorgente luminosa | LED integrato |
| Lampadine incluse | 2 x 9 Watt, Dimmable LED (E26/A19 base) |
| Luminosità | 800 lumen (potenza luminosa massima) |
| Metodo di controllo | Tirare il controllo della catena |
| Velocità della ventola | 3 |
| Tipo di montaggio | Downrod Mount (3" and 2" downrods included) |
| Uso interno/esterno | Solo al chiuso |
| Voltage | 120 Volt |
| Capacità del flusso d'aria | 2635 piedi cubi al minuto |
| Efficienza | Energy Efficient, ETL Certified |
Garanzia e supporto
For specific warranty information regarding your Hunter ceiling fan, please refer to the documentation included with your purchase or visit the official Hunter Fan Company websito.
If you require technical assistance or have questions not covered in this manual, please contact Hunter Customer Support:
- Hunter Fan Company Official Websito: www.hunterfan.com
- Assistenza clienti: Fare riferimento al website for current contact methods (phone, email, chat).
Please have your model number (CC5C95C84) and date of purchase available when contacting support.


