1. Prodotto finitoview
This manual provides comprehensive instructions for the setup, operation, and maintenance of your Calvas Fetcus replacement remote control for Panasonic air conditioners. This remote is designed to provide seamless control over your compatible air conditioning unit, offering functions such as power, mode selection, temperature adjustment, fan speed control, and timer settings.
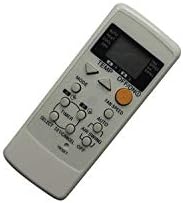
Figura 1: Fronte view of the Calvas Fetcus remote control.
2. Impostazione
2.1. Installazione della batteria
The remote control requires batteries for operation. Please follow these steps to install or replace the batteries:
- Individuare il coperchio del vano batterie sul retro del telecomando.
- Far scorrere il coperchio verso il basso o premere il fermo (se presente) per aprire il vano.
- Insert two new batteries of the appropriate type (e.g., AAA or AA, please check markings inside the compartment) into the compartment, ensuring the positive (+) and negative (-) terminals align correctly with the markings inside.
- Chiudere il coperchio del vano batteria facendolo scorrere nuovamente in posizione finché non scatta in posizione.

Figura 2: Vano batterie sul retro del telecomando.
2.2. Utilizzo iniziale
Once batteries are installed, the remote control is ready for use. No programming is typically required for this replacement remote, as it is pre-programmed for compatible Panasonic air conditioner models. Simply point the remote control towards the air conditioner's receiver and press the desired function button.
3. Istruzioni per l'uso
Per un controllo ottimale del tuo condizionatore, prendi familiarità con i pulsanti e le loro funzioni.

Figura 3: dettagliata view dei pulsanti del telecomando.
3.1. Funzioni dei pulsanti
- Pulsante ON/OFF: Accende o spegne il condizionatore d'aria.
- Pulsante MODE: Passa attraverso le modalità operative quali Raffreddamento, Riscaldamento, Ventilatore, Deumidificazione, Auto.
- Pulsanti TEMP ▲/▼: Regola l'impostazione della temperatura desiderata verso l'alto o verso il basso.
- Pulsante VELOCITÀ VENTOLA: Modifica la velocità della ventola (ad esempio, Bassa, Media, Alta, Auto).
- Pulsante AIR SWING: Controlla il movimento verticale delle alette per la direzione dell'aria.
- Pulsante TIMER: Initiates or adjusts the timer settings for scheduled operation.
- Pulsante AUTO: Activates the automatic operating mode, where the unit selects the best mode and fan speed based on room temperature.
- Pulsante di reset: Resets the remote control settings (usually a small recessed button requiring a pointed object).
3.2. Funzionamento di base
- Accensione/spegnimento: Premere il tasto ACCESO/SPENTO button once to turn the unit on, and again to turn it off.
- Selezione della modalità: Premere il tasto MODALITÀ button repeatedly until the desired operating mode (e.g., Cool, Heat) is displayed on the remote's screen.
- Regolazione della temperatura: Utilizzare il TEMPERATURA ▲ or TEMPERATURA ▼ buttons to set your preferred temperature.
- Impostazione della velocità della ventola: Premere il tasto VELOCITÀ DELLA VENTOLA pulsante per scorrere le velocità della ventola disponibili.
4. Manutenzione
4.1. Sostituzione della batteria
Replace batteries when the remote control's display becomes dim or when the remote no longer responds to button presses. Refer to Section 2.1 for detailed battery installation instructions. Always replace both batteries at the same time with new ones of the appropriate type.
4.2. Pulizia
Per pulire il telecomando, strofinare delicatamente la superficie con un panno morbido e asciutto. Per lo sporco ostinato, utilizzare un panno leggermenteamp cloth can be used, followed immediately by a dry cloth. Do not use abrasive cleaners, solvents, or immerse the remote in water, as this can damage the electronic components.
4.3. Conservazione
If the remote control will not be used for an extended period, it is recommended to remove the batteries to prevent leakage and potential damage to the remote. Store the remote in a cool, dry place away from direct sunlight and extreme temperatures.
5. Risoluzione Dei Problemi
| Problema | Possibile causa | Soluzione |
|---|---|---|
| Telecomando non funzionante. | Batterie scariche o installate in modo errato. | Sostituire le batterie assicurandosi della corretta polarità (+/-). |
| La portata del telecomando è scarsa. | Weak batteries; Obstruction between remote and AC unit; Remote not pointed directly at AC unit. | Replace batteries; Remove obstructions; Ensure direct line of sight to AC unit's receiver. |
| Il condizionatore non risponde ai comandi. | Remote control not compatible with AC unit; AC unit is off or unplugged; AC unit's receiver is faulty. | Verify compatibility with your specific Panasonic AC model; Check AC unit's power supply; Consult AC unit's manual or service technician. |
| Il display remoto è scuro o vuoto. | Batteria scarica. | Sostituire le batterie. |
6. Specifiche
| Caratteristica | Dettaglio |
|---|---|
| Marca | punti calvi |
| Numero di modello | CLS-D41D8CD98F00B204E9800998ECF8427E |
| Dispositivi compatibili | Panasonic Air Conditioners (CS-E9CKP, CS-E15CKP, CWA75C258, CWA75C377, CWA75C376) |
| Tecnologia di connettività | Infrarossi (IR) |
| Comunicazione senza fili | IR |
| Frequenza | 433 MHz |
| Canale | 1 |
| Numero massimo di dispositivi supportati | 1 |
| Peso dell'articolo | 99.8 g (circa) |
| Materiale | Altro |
| Quantità del pacchetto dell'articolo | 1 |
| Caratteristiche speciali | Infrared, Universal, Wireless |
| Descrizione della batteria | Lithium (Note: Typically uses AAA/AA. Please check remote's battery compartment for specific type.) |
7. Informazioni sulla garanzia
Questo prodotto viene fornito con un Garanzia di 90 giorni from the date of purchase. This warranty covers manufacturing defects and malfunctions under normal use. Please retain your proof of purchase for warranty claims. For specific terms and conditions, or to initiate a warranty claim, please contact your retailer or the manufacturer.
8. Supporto
For further assistance, troubleshooting not covered in this manual, or inquiries regarding your Calvas Fetcus remote control, please contact the seller or the manufacturer directly. Refer to your purchase documentation for contact details. You may also visit the product page on Amazon.ca for additional information or customer service options.
Link al prodotto: https://www.amazon.ca/Calvas-RemoteControl-Panasonic-CS-E15CKP-Conditioner/dp/B07R6X7KZL


