1. Introduzione
Welcome to the TMEZON Wireless Security Camera System user manual. This guide provides detailed instructions for the setup, operation, and maintenance of your MZ-WF8430W system. Please read this manual thoroughly before installation and use to ensure proper functionality and safety. This system features 3-megapixel cameras, an 8-channel Network Video Recorder (NVR), and IP66 waterproof cameras suitable for both indoor and outdoor surveillance.
2. Contenuto della confezione
Si prega di controllare la confezione per verificare la presenza dei seguenti elementi:
- 1 x 8-Channel Wireless NVR
- 4 telecamere IP wireless da 3 MP
- 1 adattatore di alimentazione NVR
- 4 adattatori di alimentazione per fotocamera
- Mouse 1 x USB
- 1 x Cavo di rete
- 1 x Manuale utente
- Kit viti di montaggio

Immagine: Oltreview of the TMEZON Wireless Security Camera System components, including the NVR and four cameras.
3. Guida all'installazione
3.1 Connessione NVR iniziale
Follow these steps to set up your NVR:
- Collegare l'NVR a un monitor tramite un cavo HDMI o VGA.
- Collegare il mouse USB alla porta USB dell'NVR.
- Collegare l'NVR al router utilizzando il cavo di rete fornito per l'accesso a Internet e la visione remota viewing.
- Collegare l'adattatore di alimentazione dell'NVR a una presa elettrica. L'NVR si accenderà automaticamente.

Image: Diagram illustrating the connections for the NVR, including power, monitor, and network cable to a router.
3.2 Installazione della telecamera
The cameras are IP66 waterproof, making them suitable for both indoor and outdoor use. Ensure cameras are within the NVR's wireless range.
- Choose suitable locations for your cameras, considering coverage area and power outlet proximity.
- Mount the cameras securely using the provided screw kits.
- Collegare ciascuna telecamera al rispettivo adattatore di alimentazione e inserirla in una presa elettrica.
- The cameras will automatically pair with the NVR. If not, refer to the troubleshooting section for manual pairing.
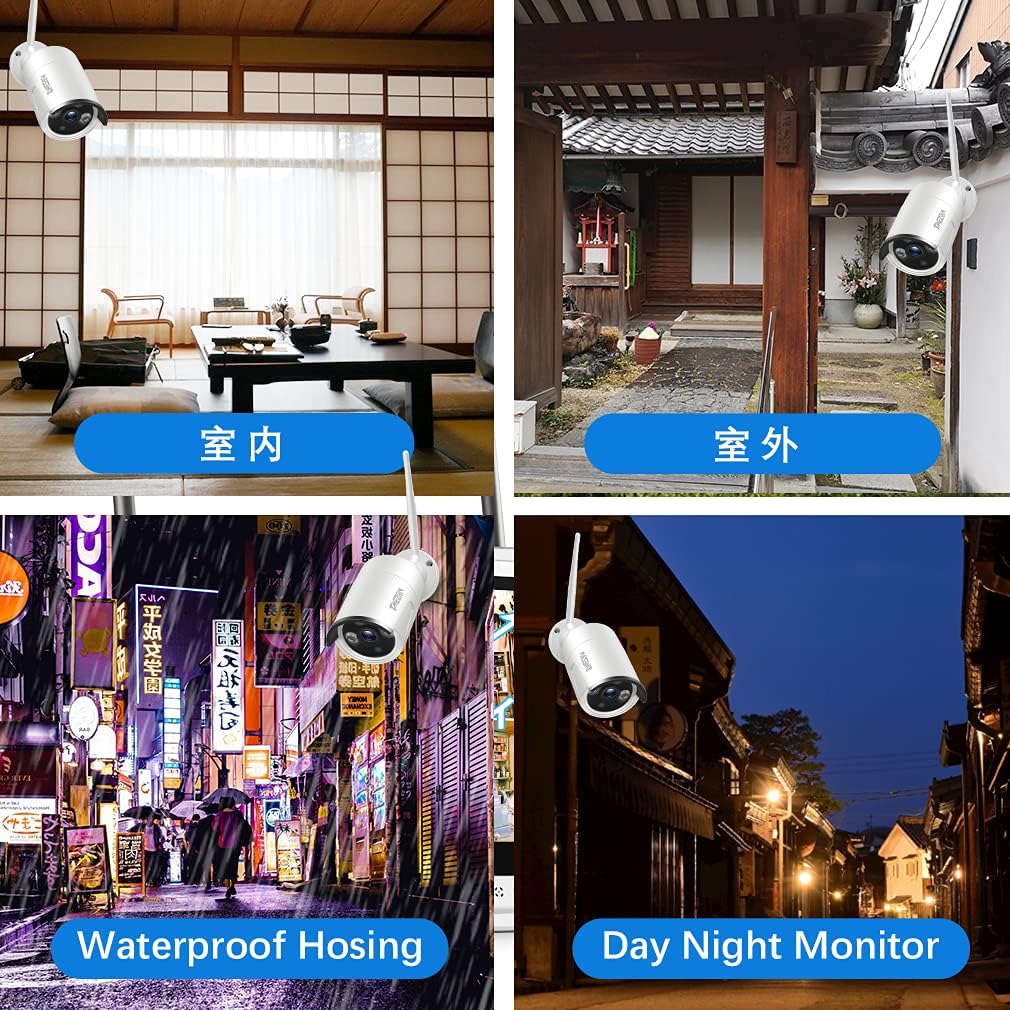
Immagine: Examples of camera placement for both indoor and outdoor environments.
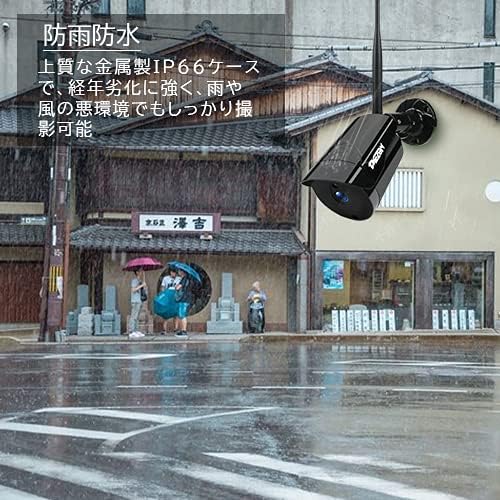
Image: A camera mounted outdoors, demonstrating its IP66 waterproof capability in a rainy setting.
3.3 Remote Access Setup (Mobile App)
A view your cameras remotely on a smartphone or PC, follow these steps:
- Download the 'IP PRO' app from the App Store (iOS) or Google Play Store (Android).
- Registra un nuovo account all'interno dell'app.
- Scansiona il codice QR sul tuo NVR o inserisci manualmente l'ID del dispositivo per aggiungere il tuo sistema all'app.
- Una volta aggiunto, puoi view live feeds, playback recordings, and manage settings from your mobile device.

Image: Demonstrates remote access to the camera system from various devices including tablets, laptops, and smartphones.

Image: A visual guide showing the steps for easy remote access setup via the mobile application.
Video: Generale sopraview of the system's features and setup process.
4. Istruzioni per l'uso
4.1 Vivere View e Registrazione
After initial setup, the NVR will display live feeds from all connected cameras. You can navigate the interface using the USB mouse. The system is configured for continuous recording by default. You can adjust recording schedules and modes (e.g., motion-triggered) in the NVR settings.
4.2 Riproduzione
per riview registrato footage:
- Right-click on the NVR interface to access the main menu.
- Selezionare 'Riproduzione'.
- Choose the desired camera, date, and time to view registrazioni.
4.3 Rilevamento del movimento
The system supports motion detection, which can trigger recording and alerts. To configure:
- Access the NVR's main menu and go to 'Alarm' or 'Motion Detect' settings.
- Enable motion detection for specific cameras.
- Adjust sensitivity and define detection areas as needed.

Image: Highlights key features such as WiFi wireless connectivity, motion detection, night vision mode, IP66 waterproof rating, remote monitoring, and email alerts.
4.4 Visione notturna
The cameras are equipped with infrared (IR) LEDs for automatic night vision, providing clear black and white video footage in condizioni di scarsa illuminazione o di assenza di illuminazione.
4.5 Avvisi e-mail
You can configure the system to send email notifications when motion is detected:
- In the NVR settings, navigate to 'Network' then 'Email'.
- Enter your email server details and recipient email addresses.
- Enable email alerts for motion detection events.

Image: A smartphone screen displaying an instant email notification triggered by an alarm event, showing a person attempting to break in.
Video: Demonstrates various operational aspects of the security camera system.
5. Manutenzione
Una manutenzione regolare garantisce prestazioni ottimali e longevità del tuo sistema di sicurezza:
- Telecamere pulite: Pulire periodicamente le lenti della fotocamera con un panno morbido eamp panno per rimuovere polvere e sporco, garantendo una qualità dell'immagine nitida.
- Controllare le connessioni: Ensure all power and network cables are securely connected to prevent signal loss.
- Aggiornamenti del firmware: Controlla il sito ufficiale TMEZON website for any available firmware updates for your NVR and cameras to enhance features and security.
- Stato del disco rigido: If your NVR has a hard drive, regularly check its status in the system settings to prevent recording failures.
6. Risoluzione Dei Problemi
Ecco le soluzioni ai problemi più comuni che potresti riscontrare:
6.1 Nessuna visualizzazione video sul monitor
- Controlla la potenza: Ensure the NVR and monitor are powered on and connected correctly.
- Connessione via cavo: Verify the HDMI/VGA cable is securely connected between the NVR and monitor.
- Sorgente di input: Confirm the monitor's input source is set to the correct HDMI/VGA port.
6.2 Cameras Not Showing on NVR
- Potenza della fotocamera: Ensure all cameras are powered on.
- Portata wireless: Check if cameras are within the NVR's wireless range. Obstacles like thick walls can reduce signal strength.
- Accoppiamento manuale: If cameras do not automatically connect, you may need to manually pair them. Access the NVR's 'IPC Channel Config' or 'Wireless Add' menu and follow the on-screen instructions to add cameras.
6.3 Accesso remoto non funzionante
- NVR Internet Connection: Ensure the NVR is connected to your router and has internet access. Check the network status in NVR settings.
- Accesso all'app: Verify you are logged into the correct account on the mobile app.
- Dispositivo aggiunto: Confirm the NVR device has been successfully added to your app account.
- Impostazioni del router: Ensure your router is not blocking the NVR's internet access.
6.4 Scarsa qualità dell'immagine
- Lente pulita: Clean the camera lens as described in the maintenance section.
- Impostazioni di risoluzione: Check the camera's resolution settings in the NVR. Ensure it's set to 3MP (2048*1536P) for optimal clarity.
- Illuminazione: Ensure adequate lighting for color images during the day. Night vision will be black and white.
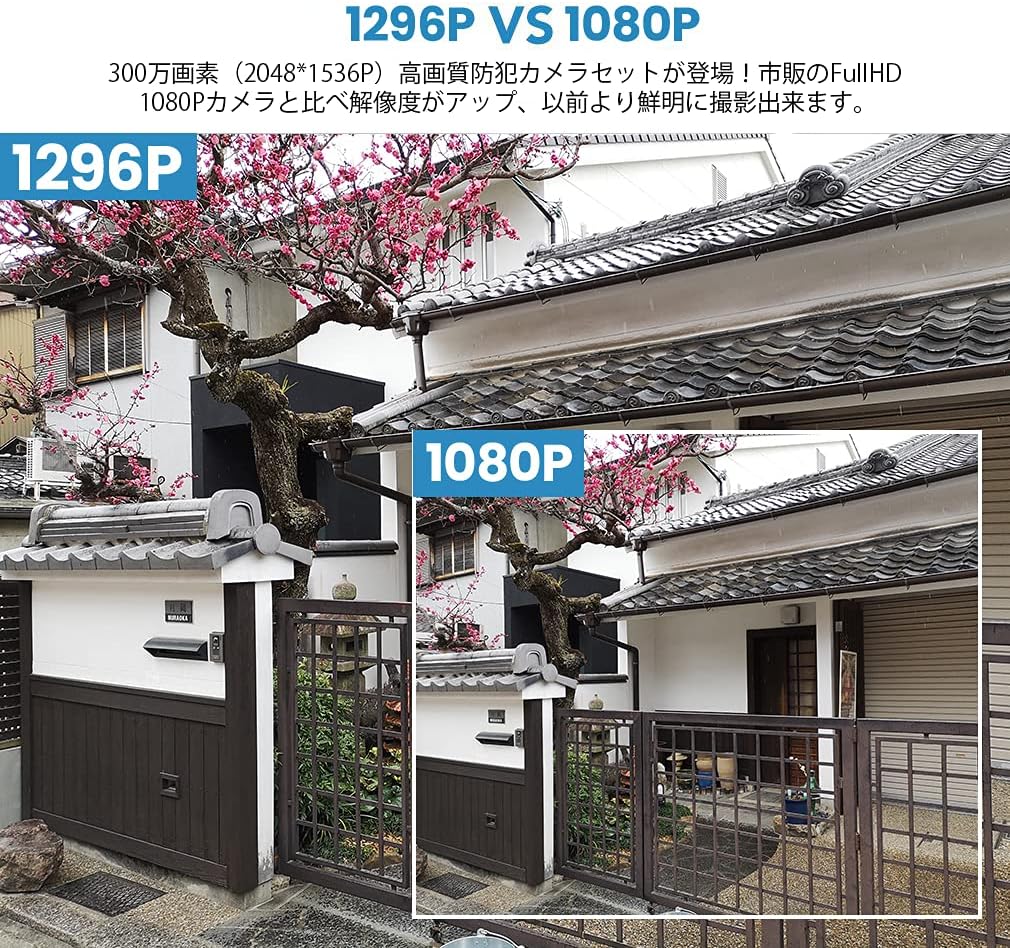
Image: A visual comparison demonstrating the improved clarity and detail of 1296P resolution compared to 1080P.

Image: A comparison showing the difference in image quality between 1080P and 720P resolutions, highlighting the superior detail of 1080P.
7. Specifiche
| Caratteristica | Specificazione |
|---|---|
| Marca | TMEZONE |
| Numero di modello | MZ-WF8430W |
| Tecnologia di connettività | Senza fili |
| Risoluzione di acquisizione video | 1944p (3 Megapixel) |
| Caratteristiche speciali | Impermeabile (IP66) |
| Numero di canali | 8 |
| Dimensioni del pacco | Dimensioni: 32 x 31.1 x 18.3 cm |
| Peso del pacco | 3.64 chilogrammi |
| Batterie richieste | NO |
8. Garanzia e supporto
TMEZON provides customer support for its products. For warranty information, technical assistance, or any questions not covered in this manual, please contact TMEZON customer service through their official website or the contact information provided with your purchase. Please have your model number (MZ-WF8430W) and purchase details ready when contacting support.


