1. Prodotto finitoview
The FEELWORLD F6 Plus V2 is a 6-inch field monitor designed for DSLR cameras, featuring a 3D LUT touch screen with a 1920x1080 IPS display. It supports 4K HDMI input and output, and includes a tilt arm for flexible mounting. This manual provides instructions for setup, operation, and maintenance of your F6 Plus V2 monitor.

Image 1.1: FEELWORLD F6 Plus V2 6-inch field monitor.
2. Contenuto della confezione
Verifica che tutti gli articoli elencati di seguito siano inclusi nel tuo pacchetto:
- FEELWORLD F6 Plus V2 Monitor
- Cavo micro HDMI
- Parasole
- Braccio inclinabile
- Manuale operativo

Image 2.1: Included accessories with the FEELWORLD F6 Plus V2 monitor.
3. Guida all'installazione
3.1 Fisico Oltreview
Familiarize yourself with the ports and controls of the F6 Plus V2 monitor.
- Lato superiore: Power/Touch button, 3/4-inch screw mount, Menu rocker wheel.
- Lato sinistro: HDMI In, HDMI Out (4K pass-through up to 24Hz), DC Out 8V.
- Lato inferiore: SD Card slot (for 3D LUT upload and firmware upgrade), DC In 12V, 1/4-inch screw mount, Headphone monitor jack.
- Lato posteriore: Standard F970 battery slot.

Immagine 3.1: In alto view of the monitor with power/touch button and menu wheel.

Immagine 3.2: Lato view of the monitor displaying various input/output ports.
3.2 Alimentazione del monitor
The F6 Plus V2 can be powered via the F970 battery slot on the back or through the DC In 12V port. Ensure the battery is charged or the power adapter is connected before use.
3.3 Montaggio del monitor
The monitor can be mounted using the included tilt arm via the hot shoe mount or 1/4"-20 thread. This allows for flexible positioning, such as on top of your camera or on a gimbal.
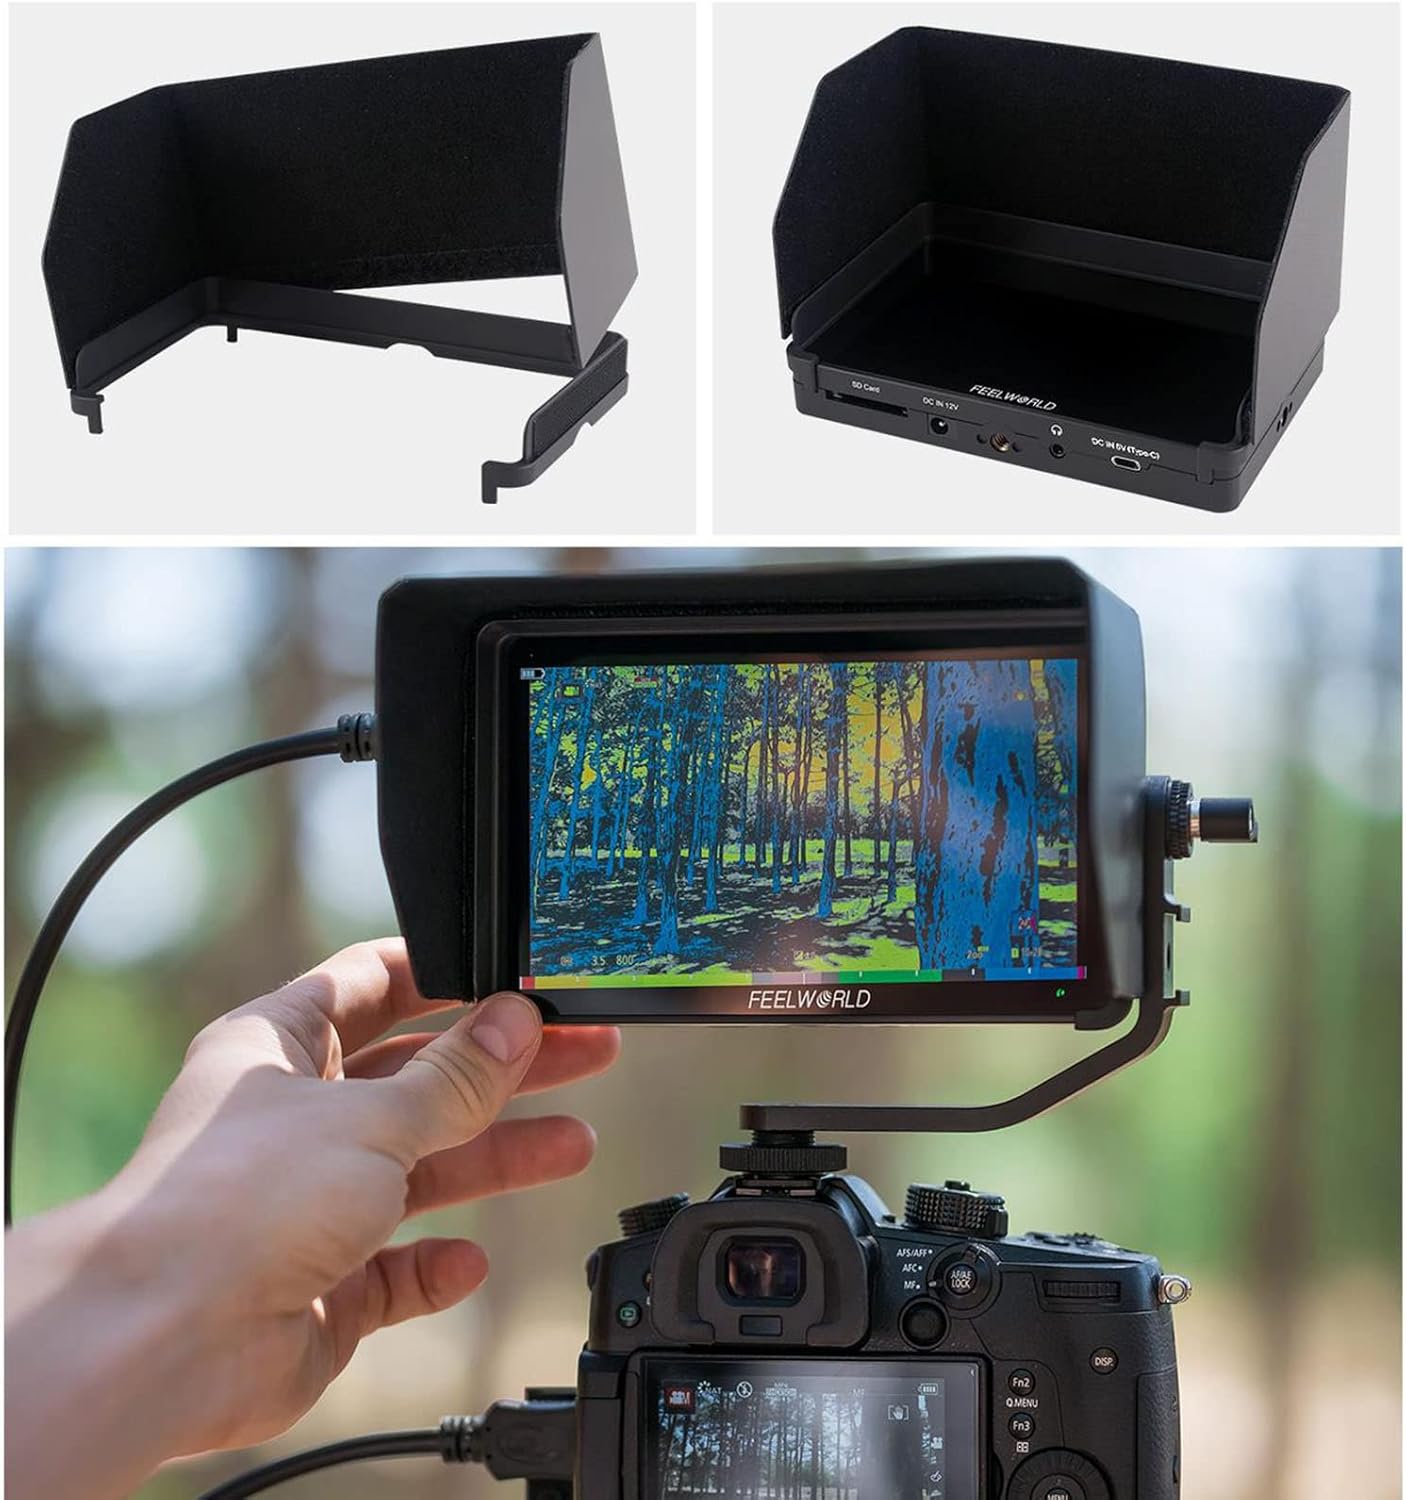
Image 3.3: Monitor mounted on a camera with the tilt arm and sunshade.
4. Istruzioni per l'uso
4.1 Funzionamento di base
Press the Power/Touch button to turn the monitor on or off. The touch screen allows for intuitive control of all parameters.
4.2 Navigazione nel menu
Tap twice on the screen to enter the menu system. The menu rocker wheel can also be used to navigate and select options. The menu is organized into several categories:
- Impostazioni immagine: Adjust display parameters.
- Impostazioni delle funzionalità: Access monitoring tools.
- Impostazioni di sistema: Configure general monitor options.
4.3 Strumenti e funzionalità di monitoraggio
The F6 Plus V2 includes a variety of professional monitoring tools to assist with your video production:
- Monitoraggio della forma d'onda: Choose from RGB Parade, Y Parade, vectorscope, histogram, and audio phase/level displays for broadcast-accurate signal monitoring.
- Assistenza alla messa a fuoco (picco): Highlights in-focus areas to aid in sharp focusing.
- Colore falso: Visualizza i livelli di esposizione utilizzando sovrapposizioni di colori.
- Istogramma: Graphical representation of tonal distribution.
- Misuratore audio: Monitors audio input levels.
- Monocromo: Visualizza l'immagine in bianco e nero.
- Indicatore di sicurezza: Provides frame guides for various aspect ratios (e.g., 4:3, 16:9, 2.35:1).
- Indicatore centrale: Visualizza un mirino al centro dello schermo.
- Modalità anamorfica: De-comprime il cibo anamorficotage (1.33x, 2.0x).
- Capovolgimento immagine: Capovolge l'immagine orizzontalmente o verticalmente.
- Ingrandisci: Magnifies a portion of the screen for detailed inspection.
- Congelare: Holds the current frame on the screen.
- Pixel-to-Pixel: Visualizza l'immagine alla sua risoluzione nativa senza ridimensionamento.
- Screenshot & Video Overlay: Capture screenshots and compare them with real-time video using semi-transparent overlay. (Requires SD card)

Image 4.1: Waveform monitoring and other analysis tools on the F6 Plus V2.
Image 4.2: Screenshot and video overlay function for composition comparison.
4.4 3D LUT Color Calibration
The monitor supports 3D LUT (Look Up Table) import via SD card, allowing you to preview your desired color grades in real-time. It comes with pre-loaded LUTs for various log profiles like S-Log2/3, V-Log, and Log-C.
- To import custom LUTs, save your .cube LUT files onto an SD card.
- Inserire la scheda SD nello slot per schede SD del monitor.
- Navigate to the LUT Import section in the menu and select "Initialize" to load the LUTs.
- Once imported, you can select your desired LUT from the list for live preview.

Image 4.3: Real-time 3D LUT preview for color calibration.
4.5 Regolazioni del display
You can adjust various display parameters to suit your viewing preferences and shooting environment:
- Color Temperature (e.g., 6500K)
- Retroilluminazione
- Luminosità
- Contrasto
- Saturazione
- Tinta
- Nitidezza
5. Manutenzione
To ensure the longevity and optimal performance of your FEELWORLD F6 Plus V2 monitor, follow these maintenance guidelines:
- Pulizia: Utilizzare un panno morbido e asciutto per pulire lo schermo e il corpo del monitor. Per le macchie ostinate, utilizzare un panno leggermenteamp cloth with a mild, non-abrasive cleaner can be used, ensuring no liquid enters the ports.
- Magazzinaggio: Store the monitor in a cool, dry place away from direct sunlight and extreme temperatures. Use the provided sunshade or a protective case when not in use to prevent scratches and dust accumulation.
- Cura della batteria: If using rechargeable batteries, follow the manufacturer's instructions for charging and storage. Remove batteries if the monitor will not be used for an extended period.
- Aggiornamenti del firmware: Periodically check the FEELWORLD official website for firmware updates to ensure your monitor has the latest features and bug fixes. Follow the provided instructions for safe updating via the SD card slot.
6. Risoluzione Dei Problemi
If you encounter issues with your FEELWORLD F6 Plus V2 monitor, refer to the following common troubleshooting steps:
- Nessun potere: Ensure the battery is fully charged or the power adapter is securely connected. Check the power button operation.
- Nessun segnale: Verify that the HDMI cable is correctly connected to both the camera and the monitor. Check the camera's HDMI output settings. Ensure the correct input source is selected on the monitor.
- Distorsione dell'immagine/Colori errati: Check the HDMI cable for damage. Reset display settings to default in the monitor menu. Ensure no incorrect LUTs are applied.
- Touchscreen che non risponde: Try restarting the monitor. Ensure the touch function is enabled via the Power/Touch button.
- Errore di aggiornamento del firmware: Assicurarsi che la scheda SD sia formattata correttamente e che il firmware file is correctly placed. Follow the update instructions precisely.
For persistent issues, contact FEELWORLD customer support or refer to the official websito per ulteriore assistenza.
7. Specifiche
| Caratteristica | Specificazione |
|---|---|
| Numero di modello | F6 PLUS V2 |
| Dimensioni dello schermo | 6 pollici |
| Risoluzione | Risoluzione Full HD 1080p (1920x1080) |
| Tipo di visualizzazione | IPS Touch Screen |
| Proporzioni | 16:9 |
| Rapporto di contrasto | 1000:1 |
| Luminosità | 500 nidi |
| Ingresso/uscita HDMI | Ingresso HDMI 4K e uscita loop |
| Supporto LUT | 3D LUT Cube Import (up to 50) via SD Card |
| Potenza in ingresso | DC In 12V, 5V Type-C, F970/LP-E6 Battery Plate |
| Potenza in uscita | DC Out 8V |
| Peso dell'articolo | 2.2 libbre |
| Dimensioni del pacco | 7.5 x 5.1 x 3.4 pollici |
8. Video ufficiale del prodotto
Video 8.1: FEELWORLD F6 Plus 4K DSLR Camera Field Monitor Overview by INSTACINE. This video demonstrates the monitor's features, physical layout, and menu options, including touch screen functionality and LUT loading. Note: This video is for the FEELWORLD F6 Plus model, and some features or specifications may vary slightly for the F6 Plus V2.
9. Garanzia e supporto
Per informazioni sulla garanzia, supporto tecnico o richieste di assistenza, fare riferimento al sito ufficiale FEELWORLD webo contattare direttamente il servizio clienti. Conservare la ricevuta d'acquisto come prova d'acquisto per eventuali reclami in garanzia.


