Introduzione
This manual provides detailed instructions for the installation and maintenance of your Donner Acoustic Guitar Bridge Pins. These pins are designed to enhance your guitar's sustain and appearance. Please read this manual thoroughly before installation.
Contenuto della confezione
- 6 x Donner Acoustic Guitar Bridge Pins (Brown Cocobolo with 3mm Abalone Dot)
- 1 x Guitar Pins Puller
- 1 x carta vetrata

Image: The complete package including six cocobolo bridge pins with abalone dots and a metal pin puller.
Caratteristiche
- Materiale: Crafted from genuine Cocobolo wood for durability and aesthetic appeal.
- Abalone Dot: Each pin features a 3mm colorful abalone dot inlay.
- Enhanced Sustain: Designed to improve string sustain and the instrument's natural resonance.
- Dimensioni standard: Compatible with most acoustic guitar brands. Refer to specifications for dimensions.
- Strumenti inclusi: Comes with a guitar pin puller for easy removal and sandpaper for custom fitting.

Immagine: Primo piano view of the cocobolo wood grain, highlighting its unique appearance and texture.
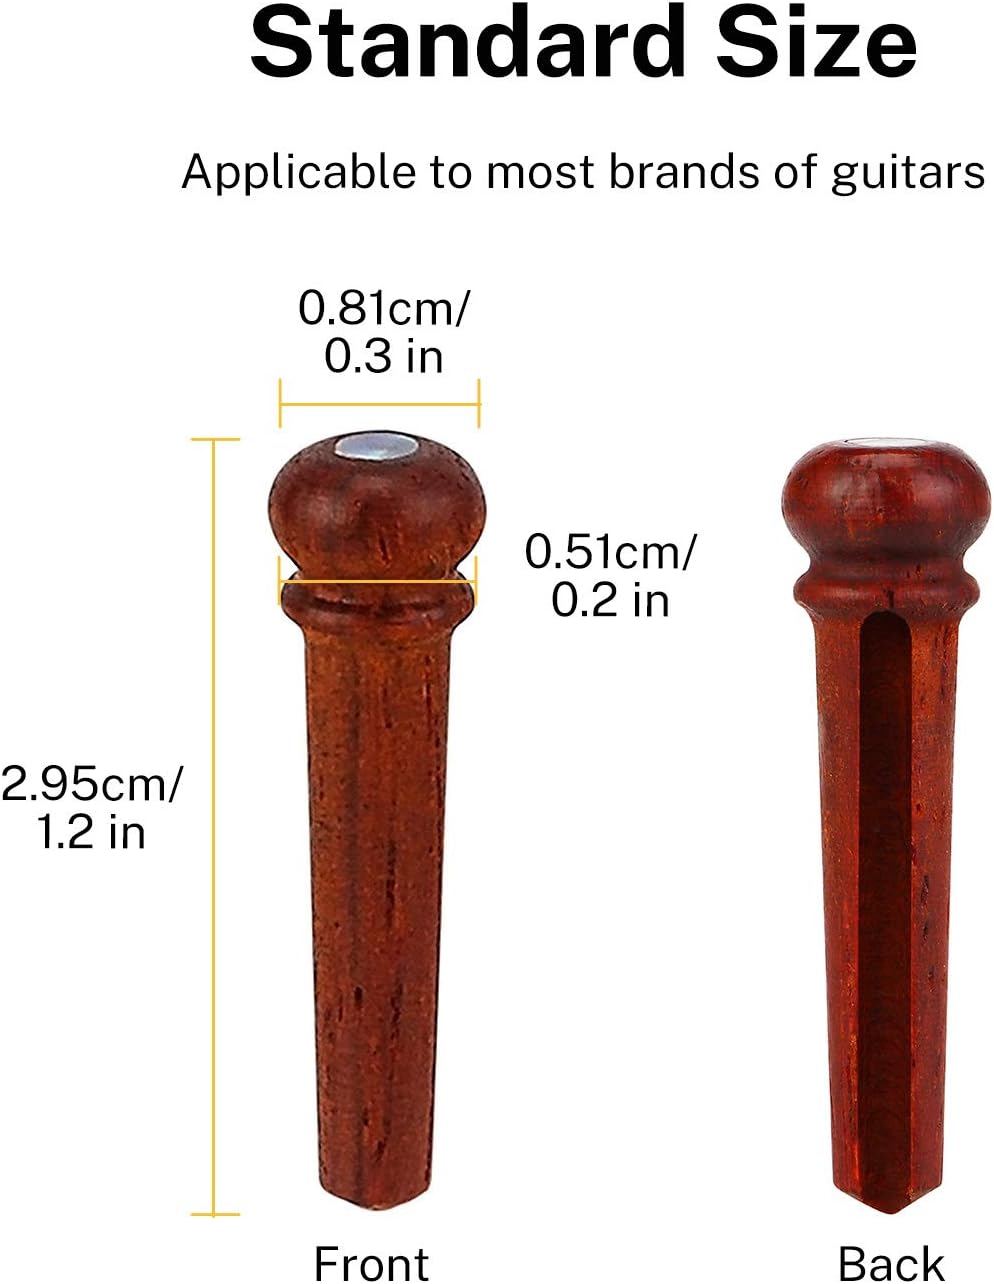
Immagine: dettagliata view of a bridge pin's head, showcasing the inlaid 3mm abalone dot.
Configurazione e installazione
Follow these steps to install your new Donner Acoustic Guitar Bridge Pins:
- Remove Old Pins: Carefully remove the existing bridge pins from your guitar. Use the included guitar pins puller by sliding its notched end under the pin head and gently prying upwards.
- Prepare New Pins (if necessary): The Donner bridge pins are designed to fit most standard acoustic guitars. However, some guitars may require minor adjustments. If a pin does not fit snugly, you may need to sand it slightly.
- Attach the pin to a drill for easier sanding.
- Gently sand the tapered part of the pin using the provided sandpaper until it fits securely in the bridge hole.
- Ensure not to over-sand, as an overly loose pin can affect tone and stability.
- Install New Pins: Insert the new bridge pins into the bridge holes. Ensure the string is properly seated in the pin's groove before pushing the pin down. The pin should fit firmly but not require excessive force.
- Tune Guitar: Once all pins are installed, string and tune your guitar.

Image: A hand demonstrating the use of the metal pin puller to remove a bridge pin from a guitar bridge.
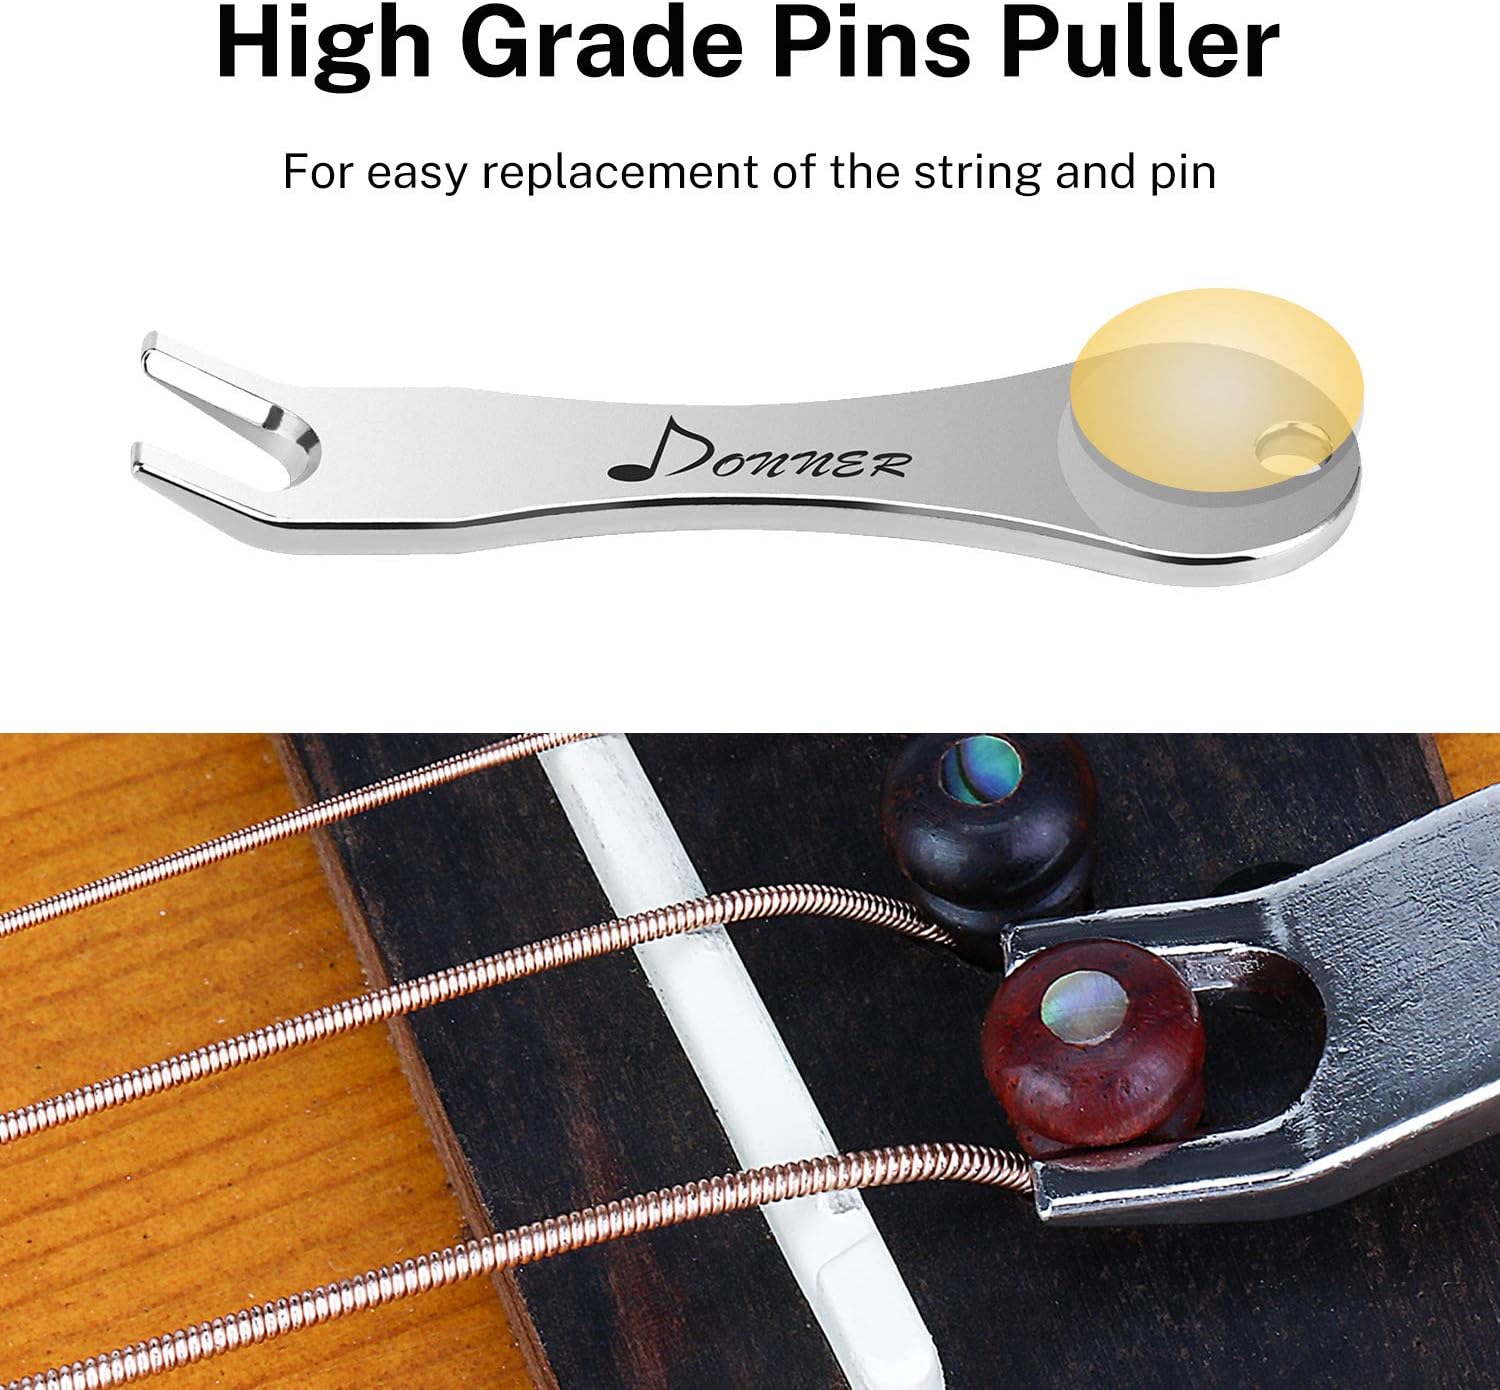
Image: A three-panel illustration showing how to prepare a drill and sandpaper, fix the pin on the drill, and sand the pin using the provided sandpaper.

Image: A hand carefully inserting a new bridge pin into the guitar's bridge, ensuring proper alignment.

Image: Six cocobolo bridge pins with abalone dots installed in the bridge of an acoustic guitar, with strings threaded through.
Manutenzione
To ensure the longevity and performance of your bridge pins:
- Periodically check pins for secure fit. If a pin becomes loose, it may need slight adjustment or replacement.
- Clean pins with a soft, dry cloth. Avoid harsh chemicals.
- Store unused pins in a dry environment to prevent warping or damage.
Risoluzione dei problemi
- Pin does not fit into the bridge hole:
- The pins may be slightly too large for your guitar's bridge holes. Use the included sandpaper to carefully sand down the tapered part of the pin until it fits snugly. Sand gradually and test the fit frequently to avoid over-sanding.
- Pin is too loose:
- If a pin is too loose, it may not hold the string securely, potentially affecting tone or causing the string to slip. Ensure the string ball end is properly seated against the bridge plate inside the guitar body before inserting the pin. If the pin remains loose, it might be incompatible with your guitar's bridge hole size. Consider consulting a guitar technician.
- Difficulty removing old pins:
- The included pin puller is designed for easy removal. If pins are stubborn, ensure the puller is correctly positioned under the pin head. For extremely tight pins, gentle wiggling while pulling can help. Avoid excessive force to prevent damage to the bridge.
Specifiche
| Numero di modello | EC2014 |
| Materiale | Cocobolo Wood with Abalone Dot |
| Quantità | 6 perni |
| Abalone Dot Size | 3mm |
| Pin Dimensions (Approx.) | Length: 2.95cm (1.2 in), Head Diameter: 0.81cm (0.3 in) |
| Peso dell'articolo | 1.06 once (confezione totale) |
| Dimensioni del prodotto | 4.33 x 3.94 x 0.79 pollici (confezione) |

Image: A diagram illustrating the precise dimensions of a single bridge pin, including length and head diameter.
Supporto
For further assistance or inquiries, please visit the official Donner website or contact customer support. Information regarding product warranty, if applicable, can be found on the Donner official websito.
You can find more information about Donner products and support at: Negozio Donner su Amazon


