Introduzione
Welcome to the brim 15 Bar Espresso Machine user manual. This guide provides detailed instructions for the safe and efficient operation, maintenance, and troubleshooting of your new espresso machine. Please read this manual thoroughly before first use and retain it for future reference.
Informazioni importanti sulla sicurezza
Quando si utilizzano apparecchi elettrici, è necessario adottare sempre le seguenti precauzioni di sicurezza di base per ridurre il rischio di incendi, scosse elettriche e/o lesioni alle persone, tra cui:
- Leggi tutte le istruzioni.
- Non toccare le superfici calde. Utilizzare maniglie o manopole.
- Per proteggersi da incendi, scosse elettriche e lesioni alle persone, non immergere il cavo, le spine o l'apparecchio in acqua o altri liquidi.
- È necessaria un'attenta supervisione quando un elettrodomestico viene utilizzato da bambini o nelle loro vicinanze.
- Scollegare dalla presa quando non in uso e prima di pulire. Lasciare raffreddare prima di mettere o togliere parti e prima di pulire l'apparecchio.
- Non utilizzare alcun apparecchio con un cavo o una spina danneggiati, dopo che l'apparecchio stesso non funziona correttamente o è stato danneggiato in qualsiasi modo.
- L'uso di accessori non consigliati dal produttore dell'apparecchio può causare incendi, scosse elettriche o lesioni alle persone.
- Non utilizzare all'aperto.
- Non lasciare che il cavo penda dal bordo del tavolo o del bancone o che tocchi superfici calde.
- Non posizionare sopra o vicino a un fornello a gas o elettrico caldo, oppure in un forno caldo.
- Collegare sempre prima la spina all'apparecchio, quindi collegare il cavo alla presa a muro. Per scollegarlo, posizionare un qualsiasi interruttore su "off", quindi rimuovere la spina dalla presa a muro.
- Non utilizzare l'apparecchio per scopi diversi da quelli previsti.
- Quando si sposta un apparecchio contenente liquidi caldi, occorre prestare la massima attenzione.
Prodotto finitoview
The brim 15 Bar Espresso Machine is designed to provide a high-quality coffee experience at home. It features a high-pressure Italian pump and a powerful thermocoil heating system for consistent results.
Componenti
- Pannello di controllo: Features Power, Single Shot, Double Shot, and Steam buttons, along with a pressure gauge.
- Portafiltro: Contiene il caffè macinato per la preparazione.
- Lancia vapore: Per montare e montare il latte.
- Serbatoio dell'acqua: Rimovibile per un facile riempimento.
- vassoio antigoccia: Raccoglie il liquido in eccesso ed è rimovibile per la pulizia.
- Cestelli filtranti: Pressurized single and double cup filter baskets.
- Tamper/Scoop: 2-in-1 tool for measuring and tampmacinare fondi di caffè.
- Frothing Pitcher: Stainless steel pitcher for milk frothing.
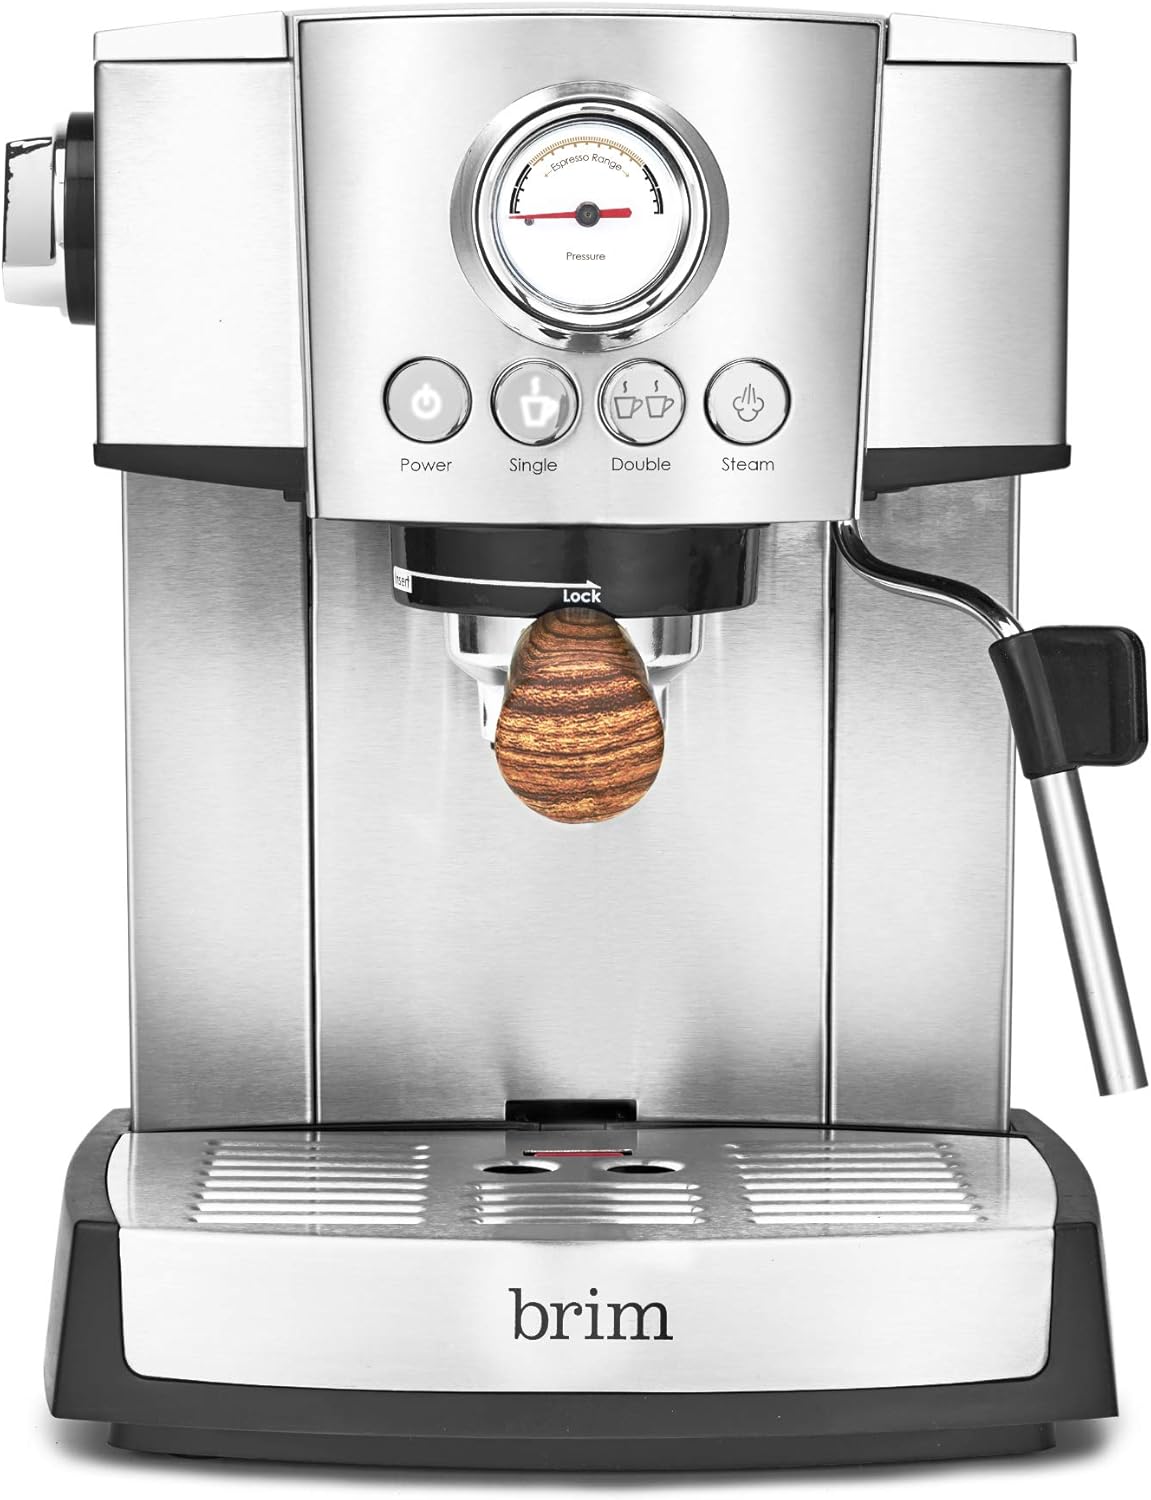
Figura 1: Davanti view of the brim 15 Bar Espresso Machine, showing the control panel with pressure gauge, power, single, double, and steam buttons, the portafilter, and the drip tray.

Figura 2: Angolato view of the brim 15 Bar Espresso Machine, highlighting the removable water tank on the side, the portafilter with its wooden handle, and the steam wand.
Impostare
1. Disimballaggio
- Carefully remove all packaging materials and the espresso machine from the box.
- Assicurarsi che tutti i componenti elencati nel "Prodotto sopraview" sono presenti.
- Rimuovere eventuali pellicole o adesivi protettivi dall'apparecchio.
2. Pulizia iniziale
- Wash the water tank, portafilter, filter baskets, frothing pitcher, and drip tray in warm, soapy water. Rinse thoroughly and dry.
- Pulire l'esterno della macchina con un pannoamp stoffa. Non immergere l'unità principale in acqua.
3. Riempimento del serbatoio dell'acqua
- Rimuovere il serbatoio dell'acqua dal retro della macchina.
- Riempire il serbatoio con acqua fresca e fredda filtrata fino alla linea MAX.
- Riposizionare saldamente il serbatoio dell'acqua nella sua posizione.
4. Preparazione della macchina (primo utilizzo)
- Collegare la macchina a una presa elettrica con messa a terra.
- Premere il tasto Energia button. The indicator light will flash as the machine heats up.
- Once the light stops flashing and remains solid, the machine is ready.
- Place a large cup under the portafilter (without coffee grounds).
- Premere il tasto Doppio colpo button to run water through the system. This primes the pump and flushes any manufacturing residue.
- Repeat this process for the steam wand by turning the steam knob to release steam until water flows consistently.
- Turn off the steam and discard the water. Your machine is now ready for use.
Istruzioni per l'uso
1. Preparare l'Espresso
- Preparare il portafiltro: Inserire il filtro desiderato (singolo o doppio) nel portafiltro.
- Macinare il caffè: Macinare i chicchi di caffè fresco fino a ottenere una consistenza fine adatta all'espresso.
- Dose e Tamp: Use the scoop to add ground coffee to the filter basket. For a single shot, use one scoop (approx. 7g). For a double shot, use two scoops (approx. 14g). Tamp il caffè in modo deciso e uniforme con la tamper. Assicurarsi che il letto del caffè sia livellato.
- Collegare il portafiltro: Inserire il portafiltro nella testa di infusione e ruotarlo con decisione verso destra finché non è saldamente bloccato.
- Coppa del posto: Posizionare una o due tazzine da caffè espresso sulla vaschetta raccogli-gocce, direttamente sotto i beccucci del portafiltro.
- Preparare l'espresso: Once the machine is heated (solid indicator light), press the Colpo singolo or Doppio colpo button. The machine will automatically dispense the correct amount of espresso.
- Monitorare la pressione: Observe the pressure gauge during extraction. The needle should ideally be in the "Espresso Range" for optimal flavor.
- Rimuovere il portafiltro: After brewing, carefully remove the portafilter by twisting it to the left. Be cautious as it will be hot. Discard the used coffee grounds.

Figura 3: Avvicinamento view of espresso being extracted from the portafilter into a white cup, demonstrating the brewing process.
2. Steaming and Frothing Milk
- Preparare il latte: Fill the stainless steel frothing pitcher with cold milk (dairy or non-dairy) up to just below the spout.
- Attiva Steam: Premere il tasto Vapore button. The indicator light will flash as the machine heats up to steaming temperature. Once solid, it's ready.
- Spurgo lancia vapore: Posizionare la lancia vapore sopra la vaschetta raccogligocce e aprire brevemente la manopola vapore per far fuoriuscire l'acqua di condensa. Chiudere la manopola.
- Latte al vapore: Immerse the tip of the steam wand just below the surface of the milk in the pitcher. Open the steam knob fully.
- Latte schiumato: For frothing, keep the wand tip near the surface to incorporate air, creating foam. For steaming (heating), immerse the wand deeper. Move the pitcher in a circular motion to create a vortex.
- Monitorare la temperatura: Continue steaming until the milk reaches the desired temperature (around 140-150°F / 60-65°C) and texture. The pitcher will become hot to the touch.
- Interrompere la cottura a vapore: Chiudere la manopola del vapore, quindi rimuovere la caraffa.
- Pulisci la lancia del vapore: Pulire immediatamente la lancia vapore con un pannoamp cloth to prevent milk residue from drying. Briefly open the steam knob again to purge any milk from inside the wand.

Figura 4: A person's hands holding a stainless steel frothing pitcher under the steam wand, actively steaming milk to create foam for coffee beverages.
3. Making Cappuccinos and Lattes
Once you have brewed your espresso and frothed your milk, combine them to create your desired beverage.
- Cappuccino: Pour the frothed milk over the espresso, aiming for equal parts espresso, steamed milk, and a generous layer of foam.
- Latte macchiato: Pour the steamed milk over the espresso, holding back the foam initially, then topping with a thin layer of microfoam. Lattes typically have more steamed milk and less foam than cappuccinos.

Figura 5: Two ceramic cups containing coffee beverages with intricate latte art, showcasing the potential results of proper milk frothing.
Manutenzione e pulizia
Regular cleaning and maintenance will ensure the longevity and optimal performance of your espresso machine. Always unplug the machine and allow it to cool before cleaning.
1. Pulizia quotidiana
- Portafiltro e filtri: Dopo ogni utilizzo, rimuovere il portafiltro, eliminare i fondi di caffè e sciacquare il portafiltro e il filtro sotto l'acqua calda. Utilizzare una spazzola per rimuovere eventuali residui di caffè ostinati.
- Lancia vapore: Subito dopo aver montato il latte, pulire la lancia vapore con un pannoamp panno. Emettere brevemente vapore per eliminare eventuali residui di latte all'interno.
- vassoio antigoccia: Empty and rinse the drip tray daily or when the "Full" indicator appears. Wash with warm, soapy water.
- Testa di fermentazione: Wipe the brew head screen with a damp panno per rimuovere eventuali fondi di caffè.
- Esterno: Pulire l'esterno della macchina con un panno morbido, damp stoffa. Non utilizzare detergenti abrasivi o spugnette abrasive.
2. Decalcificazione
Mineral deposits (limescale) can build up in the machine over time, affecting performance and taste. Descale your machine every 2-3 months, or more frequently if you have hard water.
- Preparare la soluzione decalcificante: Mix a descaling solution according to the manufacturer's instructions (e.g., white vinegar and water, or a commercial descaler). Fill the water tank with this solution.
- Run Solution Through Brew Head: Place a large container under the brew head. Turn on the machine and press the Doppio colpo button to run half of the solution through the brew head.
- Run Solution Through Steam Wand: Place another container under the steam wand. Open the steam knob and run the remaining solution through the steam wand until the tank is empty.
- Risciacquo: Fill the water tank with fresh, clean water. Repeat steps 2 and 3 to thoroughly rinse the machine and remove any descaling solution residue.
Risoluzione dei problemi
Consulta la tabella seguente per i problemi più comuni e le relative possibili soluzioni. Se il problema persiste, contatta l'assistenza clienti.
| Problema | Possibile causa | Soluzione |
|---|---|---|
| No water flows from the brew head. | Water tank empty or not properly seated; machine not primed; pump airlocked. | Fill water tank and ensure it's seated correctly. Prime the machine as per "Setup" instructions. |
| L'espresso scorre troppo lentamente o non scorre affatto. | Coffee grounds too fine; too much coffee in filter; coffee tamptroppo forte; testina di erogazione ostruita. | Utilizzare una macinatura più grossolana; ridurre la quantità di caffè; tamp lighter; clean brew head. |
| Espresso flows too quickly or is watery. | Coffee grounds too coarse; too little coffee in filter; coffee tamped è troppo leggero. | Utilizzare una macinatura più fine; aumentare la quantità di caffè; tamp più solido. |
| La lancia vapore non produce vapore o produce vapore debole. | Machine not at steaming temperature; steam wand clogged; water tank empty. | Wait for steam indicator light to be solid. Clean steam wand. Fill water tank. |
| La macchina perde acqua. | Serbatoio dell'acqua non posizionato correttamente; vaschetta raccogligocce piena; guarnizioni usurate. | Ensure water tank is secure. Empty drip tray. Contact support if seals are suspected. |
Specifiche
| Caratteristica | Dettaglio |
|---|---|
| Marca | orlo |
| Nome del modello | Espresso Maker |
| Numero modello articolo | 50030 |
| ASIN | B07YN8JRP6 |
| Tipo di caffettiera | Macchina per caffè espresso |
| Caratteristica speciale | Programmabile |
| Modalità di funzionamento | Manuale |
| Input dell'interfaccia umana | Pulsanti |
| Colore | Argento |
| Dimensioni del prodotto | 11.81 x 10.47 x 14.09 pollici |
| Peso dell'articolo | 12.56 libbre |
| Produttore | orlo |
| Codice UPC | 829486500305 |
Garanzia e supporto
For warranty information, please refer to the documentation included with your product at the time of purchase. For technical support, replacement parts, or general inquiries, please visit the official brim websito o contattare il loro servizio clienti.
Supporto online: Visit the brim Store on Amazon


