1. Importanti istruzioni di sicurezza
Please read all instructions carefully before using the CREATE Thera Classic Espresso Machine. Retain this manual for future reference. Incorrect operation may result in damage to the appliance or personal injury.
- Assicurarsi che l'apparecchio sia collegato a una presa di corrente con messa a terra e con la tensione correttatage (240 V).
- Non immergere l'apparecchio, il cavo di alimentazione o la spina in acqua o altri liquidi.
- Keep hands and cords away from hot surfaces and steam. The steam wand and portafilter can become very hot during operation.
- Always turn off the machine and unplug it before cleaning or when not in use.
- Non utilizzare la macchina se il cavo o la spina sono danneggiati, oppure se l'apparecchio non funziona correttamente o è stato danneggiato in qualsiasi modo.
- Questo apparecchio è destinato esclusivamente all'uso domestico. Non utilizzare all'esterno.
- I bambini devono essere sorvegliati per assicurarsi che non giochino con l'apparecchio.
2. Prodotto finitoview e componenti
Familiarize yourself with the parts of your CREATE Thera Classic Espresso Machine.

Immagine 2.1: Davanti view of the CREATE Thera Classic Espresso Machine, showing the control panel, portafilter, and drip tray with two espresso cups.

Immagine 2.2: All removable components of the espresso machine laid out, including the portafilter, single and double shot filter baskets, measuring spoon with tamper, and the water tank.
Componenti principali:
- Pannello di controllo: Power button, single shot button, double shot button, pressure gauge, steam knob.
- Serbatoio dell'acqua: Serbatoio rimovibile per acqua dolce. Capacità: 1.25 litri.
- Portafiltro: Handle with filter basket holder.
- Cestelli filtranti: For single and double espresso shots, or ESE pods.
- Lancia vapore: Per montare il latte ed erogare acqua calda.
- vassoio antigoccia: Vassoio rimovibile per raccogliere i liquidi in eccesso.
- Misurino/Tamplui: For measuring ground coffee and tamping it into the filter basket.
3. Configurazione e primo utilizzo
3.1 Disimballaggio
- Rimuovere con cautela tutto il materiale di imballaggio e assicurarsi che tutti i componenti siano presenti.
- Clean the water tank, portafilter, filter baskets, and drip tray with warm water and mild detergent. Rinse thoroughly.
- Pulire l'esterno della macchina con un pannoamp stoffa.
3.2 Riempimento del serbatoio dell'acqua
- Rimuovere il serbatoio dell'acqua dal retro della macchina.
- Riempire il serbatoio con acqua fresca e fredda fino all'indicatore di livello MAX. Non superare la linea MAX.
- Riposizionare il serbatoio dell'acqua nella sua posizione originale, assicurandosi che sia posizionato correttamente.
3.3 Priming the Machine (First Use or After Extended Storage)
Priming ensures the water system is filled and ready for operation.
- Assicurarsi che il serbatoio dell'acqua sia pieno.
- Place a large container under the portafilter head and another under the steam wand.
- Plug in the machine and press the power button (usually indicated by a power symbol or a light). The indicator light will illuminate.
- Once the machine has heated up (indicator light stops flashing or turns solid), press the double shot button to run water through the portafilter head until water flows steadily.
- Turn the steam knob to release steam/hot water through the steam wand until water flows steadily. Close the steam knob.
- Ora la macchina è pronta all'uso.
4. Istruzioni per l'uso
4.1 Preparazione dell'espresso con caffè macinato
- Preparare la macchina: Ensure the water tank is filled and the machine is powered on and preheated.
- Preparare il portafiltro: Inserire il filtro desiderato (singolo o doppio) nel portafiltro.
- Aggiungi caffè: Use the measuring spoon to add freshly ground espresso coffee to the filter basket. For a single shot, use one level spoon; for a double, use two.
- Tamp il Caffè: Usa la tamper end of the measuring spoon to press the coffee grounds firmly and evenly. Ensure the surface is level.
- Collegare il portafiltro: Align the portafilter with the group head (INSERT position) and twist it firmly to the right until it is securely locked (LOCK position).
- Posizionare le tazze: Posizionare una o due tazzine da caffè espresso sulla vaschetta raccogli-gocce, direttamente sotto i beccucci del portafiltro.
- Preparare l'espresso: Press the single shot or double shot button. The machine will begin brewing. The pressure gauge will indicate the brewing pressure.
- Smetti di preparare: The machine may stop automatically, or you can press the button again to stop brewing manually when the desired volume is reached.
- Rimuovere il portafiltro: Ruotare con cautela il portafiltro verso sinistra per rimuoverlo. Smaltire i fondi di caffè usati.
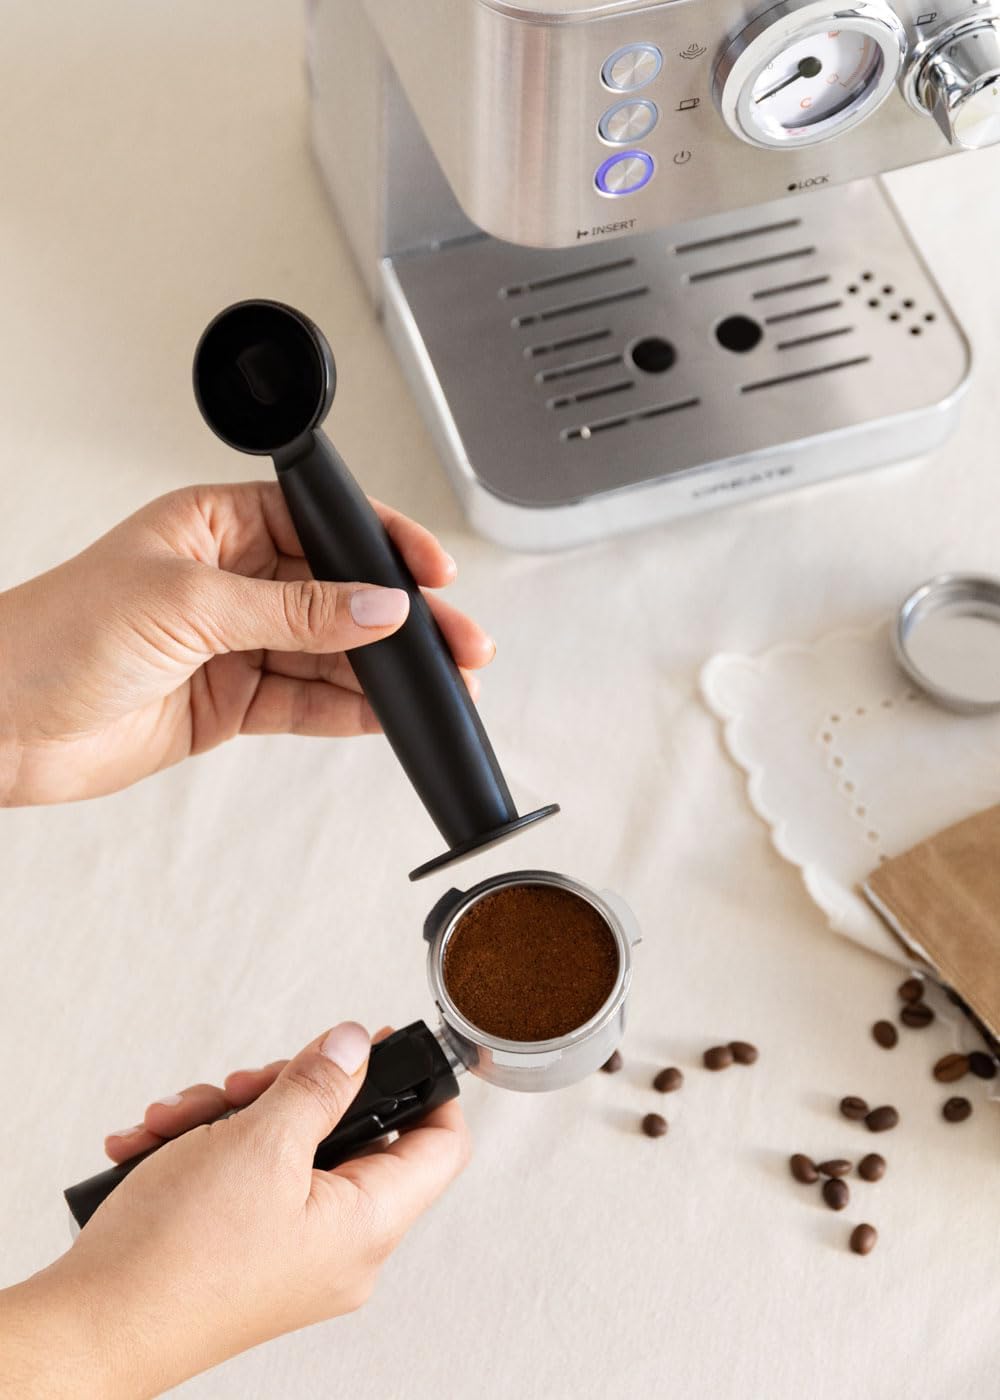
Immagine 4.1: Una mano tamping ground coffee into the portafilter for espresso preparation.
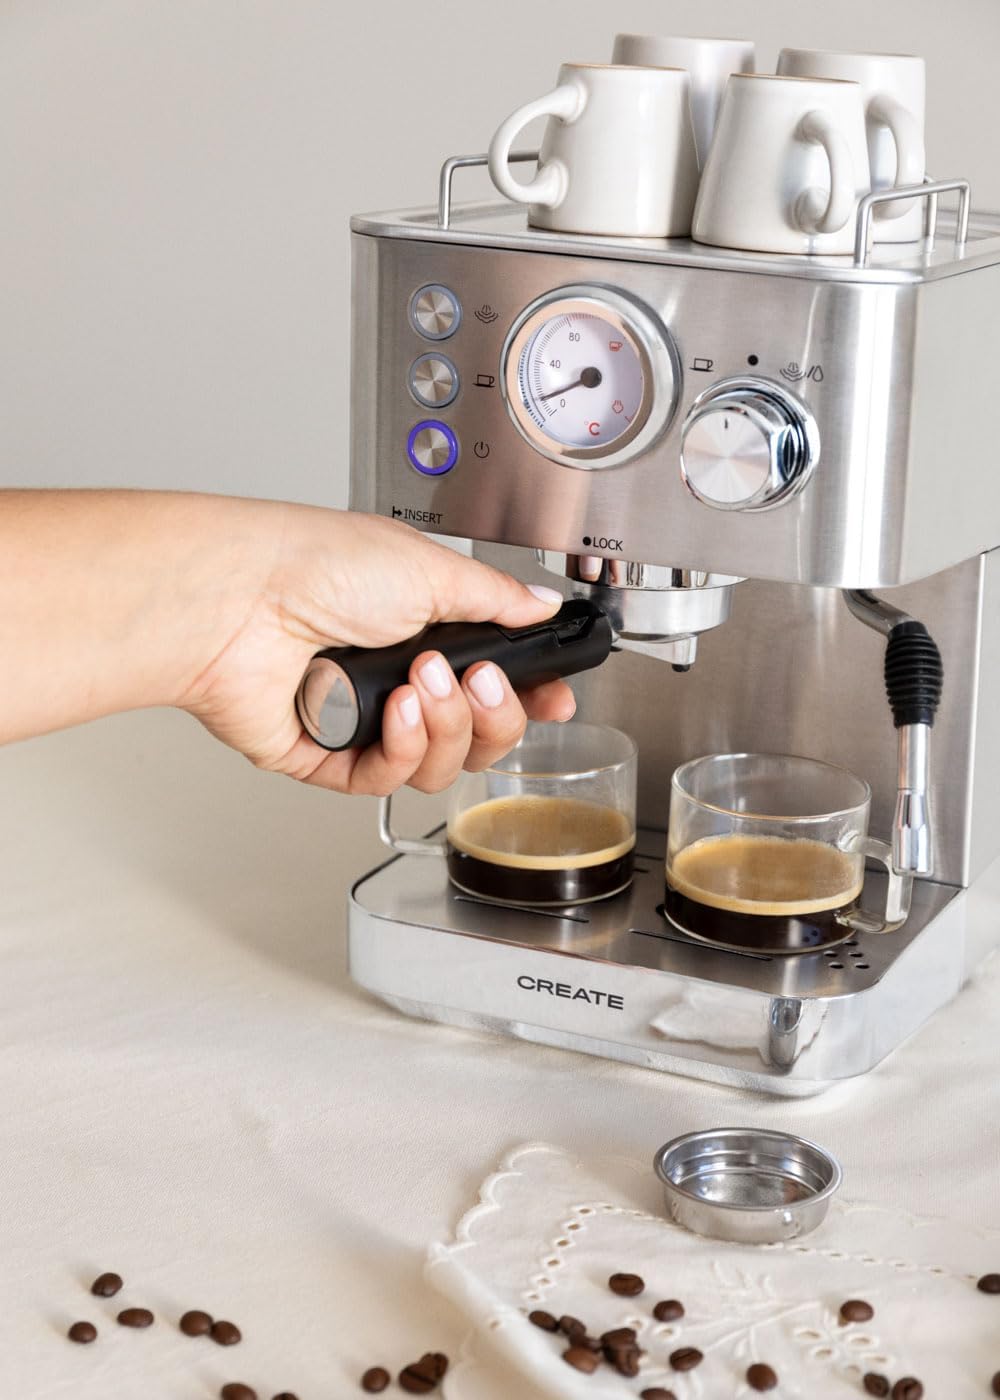
Immagine 4.2: A hand inserting the portafilter into the group head of the espresso machine.

Immagine 4.3: Espresso being brewed into two clear glass cups, showing the rich crema.
4.2 Preparazione dell'espresso con cialde monodose ESE
- Follow steps 1-2 from 'Making Espresso with Ground Coffee'. Use the specific filter basket designed for ESE pods if provided.
- Place one ESE pod into the filter basket. Do not tamp.
- Follow steps 5-9 from 'Making Espresso with Ground Coffee'.
4.3 Latte fumante
- Preparare il latte: Riempire una brocca in acciaio inossidabile con latte freddo (con o senza lattosio) fino a poco sotto il beccuccio.
- Attiva Steam: Ensure the machine is preheated. Turn the steam knob to the steam position. Wait for the steam indicator light to illuminate steadily, indicating the machine has reached steaming temperature.
- Spurgo lancia vapore: Briefly open the steam knob to release any condensed water from the wand into the drip tray, then close it.
- Latte schiumato: Insert the steam wand tip just below the surface of the milk. Open the steam knob fully. Move the pitcher up and down slightly to create foam.
- Riscaldare il latte: Once desired foam is achieved, lower the wand deeper into the milk to heat it without adding more air. Continue until the pitcher is hot to the touch.
- Interrompere la cottura a vapore: Chiudere la manopola del vapore, quindi rimuovere la caraffa.
- Pulisci la lancia del vapore: Pulire immediatamente la lancia vapore con un pannoamp panno per rimuovere eventuali residui di latte. Aprire brevemente la manopola vapore per eliminare eventuali residui di latte dall'interno della lancia, quindi richiuderla.

Immagine 4.4: A hand holding a frothing pitcher while the steam wand froths milk.
5. Manutenzione e pulizia
Una pulizia regolare garantisce prestazioni ottimali e prolunga la durata della macchina per l'espresso.
5.1 Pulizia giornaliera
- Portafiltro e filtri: Dopo ogni utilizzo, rimuovere il portafiltro, gettare via i fondi di caffè e sciacquare il portafiltro e il filtro sotto l'acqua calda.
- Lancia vapore: As described in section 4.3, clean immediately after each use.
- vassoio antigoccia: Svuotare e sciacquare la vaschetta raccogligocce ogni giorno o quando l'indicatore sale.
- Esterno: Pulire l'esterno della macchina con un panno morbido, damp stoffa. Non utilizzare detergenti abrasivi o spugnette abrasive.
5.2 Decalcificazione
Con il tempo, i depositi minerali (calcare) possono accumularsi nella macchina, compromettendone le prestazioni. Decalcificare la macchina ogni 2-3 mesi, o più frequentemente se l'acqua è dura.
- Use a commercially available descaling solution specifically designed for espresso machines. Follow the manufacturer's instructions for mixing the solution with water.
- Riempire il serbatoio dell'acqua con la soluzione decalcificante.
- Posizionare un contenitore capiente sotto il portafiltro e la lancia vapore.
- Run half of the solution through the portafilter by pressing the double shot button.
- Open the steam knob to run the remaining solution through the steam wand.
- Spegnere la macchina e lasciarla riposare per 15-20 minuti.
- Svuotare e sciacquare accuratamente il serbatoio dell'acqua. Riempirlo con acqua fresca.
- Ripetere i passaggi da 3 a 5 con acqua fresca per risciacquare completamente la macchina.
6. Risoluzione Dei Problemi
Se riscontri problemi con il tuo computer, fai riferimento ai seguenti problemi comuni e alle relative soluzioni.
| Problema | Possibile causa | Soluzione |
|---|---|---|
| Nessuna erogazione di caffè | No water in tank; Clogged filter; Machine not primed. | Fill water tank; Clean filter basket; Prime the machine. |
| Il caffè viene preparato troppo lentamente o non viene preparato affatto | Fondi di caffè troppo fini oamptroppo forte; Filtro intasato. | Utilizzare una macinatura più grossolana; Tamp less firmly; Clean filter. |
| Coffee brews too quickly, weak coffee | Coffee grounds too coarse or not enough coffee; Not tamped abbastanza. | Use finer grind; Use more coffee; Tamp più saldamente. |
| Nessun vapore dalla lancia | Steam wand clogged; Machine not at steaming temperature. | Pulire la lancia vapore; attendere che la spia del vapore diventi fissa. |
| Perdita d'acqua dalla macchina | Water tank not seated correctly; Drip tray full; Portafilter not secured. | Reseat water tank; Empty drip tray; Secure portafilter firmly. |
Se il problema persiste dopo aver provato queste soluzioni, contattare l'assistenza clienti.
7. Specifiche
Technical details for the CREATE Thera Classic Espresso Machine.

Immagine 7.1: Dimensional drawing of the espresso machine, indicating height, width, and depth measurements.
- Marca: CREARE
- Numero modello: AXleftj (also 59225_115714)
- Stile: CLASSICO
- Energia: 1100 L
- Voltage: 240 Volt
- Pressione: 20 barre
- Capacità del serbatoio dell'acqua: 1.25 litri
- Dimensioni del prodotto: 30.1 x 20.2 x 31.3 cm (L x P x A)
- Peso: 4.5 kg
- Materiale: Acciaio inossidabile
- Compatibilità: Ground coffee and ESE single-dose pods
8. Garanzia e supporto
For warranty information, please refer to the documentation provided at the time of purchase. This typically includes details on coverage period and terms.
For technical support, spare parts, or service inquiries, please visit the official CREATE websito o contattare il servizio clienti. I dettagli di contatto si trovano solitamente sulla confezione del prodotto o sul cartellino del produttore. websito.


