1. Introduzione
Grazie per l'acquistoasing the Unic UC68 Multimedia Home Theatre LED Projector. This manual provides essential information for setting up, operating, and maintaining your projector to ensure optimal performance and longevity. Please read this manual thoroughly before using the product and keep it for future reference.
2. Informazioni sulla sicurezza
Per garantire un funzionamento sicuro ed evitare danni, osservare le seguenti precauzioni di sicurezza:
- Non guardare direttamente nell'obiettivo del proiettore quando lamp is on, as the strong light can cause eye damage.
- Assicurare un'adeguata ventilazione attorno al proiettore. Non ostruire le aperture di ventilazione.
- Posizionare il proiettore su una superficie stabile e piana per evitare che cada.
- Use only the power adapter supplied with the projector. Using an incorrect adapter may cause damage or fire.
- Keep the projector away from water, moisture, and other liquids. Do not operate in wet environments.
- Do not attempt to open or repair the projector yourself. Refer all servicing to qualified service personnel.
- Scollegare il proiettore dalla presa di corrente durante i temporali o quando non viene utilizzato per lunghi periodi.
3. Contenuto della confezione
Si prega di verificare che tutti gli articoli elencati di seguito siano inclusi nel pacchetto:
- Unic UC68 Projector Host
- Controllo remoto
- Cavo di alimentazione
- cavo AV
- Manuale di istruzioni
- Copriobiettivo
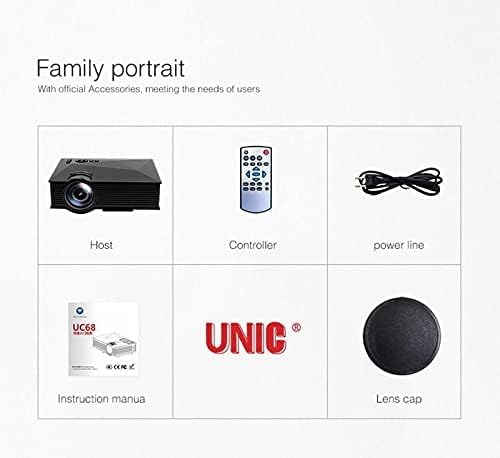
Image: The Unic UC68 projector package contents, showing the main unit, remote control, power cord, instruction manual, and lens cap.
4. Prodotto finitoview
Familiarize yourself with the various parts and ports of your Unic UC68 projector.

Immagine: Un dettaglio view of the Unic UC68 projector, highlighting its lens, control buttons on top, and various input/output ports on the side.
Porte di ingresso/uscita

Image: A visual representation of the Unic UC68 projector's rear and side panels, indicating ports for HDMI, USB, SD card, AV, VGA, and audio out, along with exampnumero di dispositivi che possono essere collegati.
| Porta | Descrizione |
|---|---|
| Cavo HDMI | Connect to devices like laptops, Blu-ray players, game consoles. |
| USB 2.0 (x2) | Connect USB flash drives for media playback or power external devices (5Vout-500mA). |
| Slot per scheda SD | Insert SD cards for direct media playback. |
| VGA | Collegati a computer o laptop più vecchi. |
| AV | Connect to devices with composite video and stereo audio output (e.g., DVD players). |
| Headphone Port (3.5mm) | Collegare altoparlanti esterni o cuffie. |
5. Impostazione
Per la configurazione iniziale del proiettore, seguire questi passaggi:
- Posizionamento: Place the projector on a stable, flat surface. Ensure there is enough space around the projector for proper ventilation. The ideal projection distance is between 1.07m and 3.8m.
- Collegamento elettrico: Collegare il cavo di alimentazione all'ingresso di alimentazione del proiettore e quindi collegarlo a una presa a muro.
- Collegare la sorgente di ingresso: Connect your desired input device (e.g., laptop, game console, USB drive) to the appropriate port on the projector (HDMI, VGA, USB, AV, SD card).
- Accensione: Press the power button on the projector or the remote control to turn on the projector. The LED indicator will light up.
- Regolazione della messa a fuoco: Once an image is displayed, rotate the focus ring on the projector lens until the image appears clear and sharp.
- Correzione trapezoidale: If the projected image appears trapezoidal, adjust the keystone correction (if available on your model, typically a manual slider near the lens) to square the image.
6. Istruzioni per l'uso
Accensione/spegnimento
- Per accendere: Premere il pulsante di alimentazione sul proiettore o sul telecomando.
- Per spegnere: Press the power button again. Wait for the fan to stop completely before unplugging the power cable.
Selezione della sorgente di input
Use the 'Source' button on the remote control or the projector's control panel to cycle through available input sources (HDMI, VGA, AV, USB, SD).
Navigazione nei menu
Use the arrow keys on the remote or projector to navigate through the on-screen menu. Press 'OK' or 'Enter' to confirm selections. Adjust settings such as picture mode, aspect ratio, and sound.
Riproduzione multimediale (USB/SD)
Insert a USB flash drive or SD card into the respective port. The projector will typically prompt you to select the media type (Movie, Music, Photo, Text). Navigate to your desired file and press 'OK' to play.
7. Manutenzione
Proper maintenance ensures the longevity and performance of your projector:
- Pulizia delle lenti: Utilizzare un panno morbido e privo di lanugine, specificamente progettato per lenti ottiche. Non utilizzare detergenti abrasivi o esercitare una pressione eccessiva.
- Pulizia del filtro antipolvere: Regularly check and clean the dust filter (if accessible) to maintain proper airflow and prevent overheating. Refer to the specific location in your manual if applicable.
- Pulizia esterna: Pulire l'esterno del proiettore con un panno morbido e asciutto. Per macchie ostinate, utilizzare un panno leggermenteamp È possibile utilizzare un panno, ma assicurarsi che non penetri umidità nel dispositivo.
- Magazzinaggio: When not in use for extended periods, store the projector in a cool, dry, dust-free environment. Use the lens cap to protect the lens.
8. Risoluzione Dei Problemi
Se riscontri problemi con il proiettore, fai riferimento ai seguenti problemi comuni e alle relative soluzioni:
| Problema | Possibile causa | Soluzione |
|---|---|---|
| Nessun potere | Power cable not connected; Power outlet faulty; Projector in standby mode. | Controllare il collegamento del cavo di alimentazione; provare una presa diversa; premere il pulsante di accensione. |
| Nessuna immagine | Incorrect input source selected; Input device not connected properly; Lens cap on. | Select correct input source; Reconnect input cable; Remove lens cap. |
| L'immagine è sfocata | Messa a fuoco non regolata; distanza di proiezione troppo lontana/vicina. | Adjust focus ring; Adjust projection distance. |
| Nessun suono | Volume too low; Muted; External speakers not connected/configured. | Increase volume; Unmute; Check external speaker connection. |
| Il telecomando non funziona | Batterie scariche/inserite in modo errato; Ostruzione tra telecomando e proiettore. | Sostituire le batterie; assicurarsi che il ricevitore IR sia ben visibile. |
| Projector Overheating | Ventilation blocked; Dusty filters. | Ensure clear ventilation; Clean dust filters. |
9. Specifiche
| Caratteristica | Specificazione |
|---|---|
| Numero di modello | UC68 |
| Luminosità | 1800 lumen (80 ANSI) |
| Risoluzione nativa | 800 x 480 RGB |
| Supporto alla risoluzione | Up to 1920 x 1080 pixels (1080p) |
| Proporzioni | 4:3 / 16:9 |
| LCD Contrast Ratio | 800:1 |
| LED lamp Vita | Più di 20,000 ore |
| Lente | F=125 |
| Viewdistanza | 1.07 - 3.8 metri |
| Dimensioni della proiezione | 34 - 130 pollici |
| Gestione | Manuale |
| Consumo energetico | 55 W max |
| Uscita USB | 5 Vout-500 mA |
| Alimentazione elettrica | 100 V - 240 V / 0.9A (50/60Hz) |
| Porte di ingresso/uscita | 1 AV, 1 Headphone (3.5mm), 2 USB 2.0, 1 SD Card Slot, 1 HDMI, 1 VGA |
| Colore | Nero |
| Peso dell'articolo | 1.34 chilogrammi |
| Dimensioni del pacco | Dimensioni: 30 x 19.3 x 10.6 cm |
10. Garanzia e supporto
This product comes with a standard manufacturer's warranty. For warranty claims, technical support, or service inquiries, please refer to the contact information provided with your purchase documentation or visit the official UNIC websito. Non tentare di riparare il dispositivo da soli, poiché ciò potrebbe invalidare la garanzia.


