1. Informazioni sulla sicurezza
Read all instructions carefully before beginning installation. Failure to follow these instructions may result in electrical shock, fire, or personal injury.
- Prima di procedere all'installazione o alla manutenzione, scollegare sempre l'alimentazione dall'interruttore automatico o dalla scatola dei fusibili.
- Tutti i cablaggi devono essere conformi alle normative elettriche nazionali e locali. Se non si ha familiarità con i cablaggi, consultare un elettricista qualificato.
- Ensure the installation site can support the weight of the fan (approximately 3.53 kg).
- Non utilizzare il ventilatore se le pale o l'alloggiamento sono danneggiati.
- Maintain a minimum clearance of 7 feet (2.1 meters) from the floor to the bottom edge of the fan blades.
- Non inserire oggetti nel percorso delle pale del ventilatore.
2. Contenuto della confezione
Verify that all components listed below are present before beginning installation. If any parts are missing or damaged, do not proceed with installation and contact customer support.
- Assemblaggio dell'alloggiamento del motore
- Fan Blades (4) - Reversible white/bleached oak
- Blade Brackets (4)
- Verga
- Baldacchino
- Staffa di fissaggio
- Assemblaggio kit luci
- Mushroom Globe Glass
- Pull Chains (2)
- Pacchetto hardware (viti, rondelle, dadi per cavi)
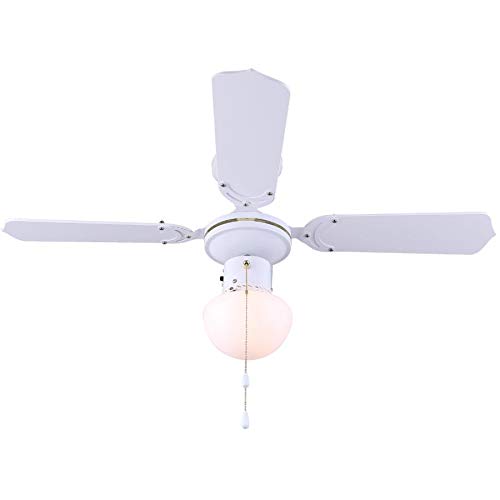
Figura 2.1: Oltreview of the Canarm Unity Ceiling Fan with Light, displaying the motor housing, four blades, and the central mushroom globe light.
3. Configurazione e installazione
Si raccomanda l'installazione da parte di un professionista. Assicurarsi che l'interruttore automatico sia scollegato prima di procedere.
3.1 Montaggio della ventola
- Fissare la staffa di montaggio alla scatola di giunzione del soffitto. Assicurarsi che la scatola di giunzione sia fissata saldamente alla struttura dell'edificio e possa sostenere il peso del ventilatore.
- Feed the electrical wires from the junction box through the center hole of the mounting bracket.
- Attach the downrod to the motor housing, ensuring all screws are tightened.
- Sollevare con cautela il gruppo ventola e appenderlo alla staffa di montaggio utilizzando il gancio presente sulla barra di supporto.
3.2 collegamenti elettrici
Connect the fan's electrical wires to the household wiring according to the following:
- Connect the green/bare copper wire (ground) from the fan to the ground wire from the junction box.
- Connect the white wire (neutral) from the fan to the white wire from the junction box.
- Connect the black wire (hot for fan) from the fan to the black wire from the junction box.
- Connect the blue wire (hot for light) from the fan to the black or blue wire from the junction box (if separate light switch).
- Secure all connections with wire nuts and ensure no loose strands of wire are exposed.
3.3 Fissaggio delle pale del ventilatore
- Attach each blade to a blade bracket using the provided screws. Ensure the desired blade finish (white or bleached oak) is facing downwards.
- Secure each blade assembly to the motor housing using the screws provided. Ensure all screws are tight.
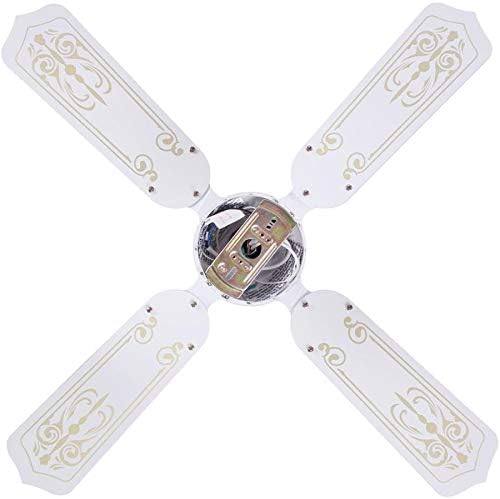

Figure 3.3: Images showing the blade attachment points on the motor housing (left) and the assembled blades from a top-down perspective (right).
3.4 Installazione del kit luci
- Connect the light kit wires to the corresponding wires from the fan motor housing (usually white to white, blue to black).
- Secure the light kit assembly to the bottom of the motor housing with the provided screws.
- Install the appropriate light bulb(s) (not included) into the sockets.
- Carefully attach the mushroom globe glass to the light kit by twisting or securing with screws, depending on the design.

Figura 3.4: primo piano view of the fan's light kit with the mushroom globe glass.
3.5 passaggi finali
- Carefully slide the canopy up against the ceiling and secure it with the provided screws.
- Ripristinare l'alimentazione all'interruttore automatico.
4. Istruzioni per l'uso
The Canarm Unity ceiling fan is operated by two pull chains.
- Controllo della velocità della ventola: One pull chain controls the fan speed. Pull the chain repeatedly to cycle through the three available speeds (High, Medium, Low) and Off.
- Controllo della luce: The second pull chain controls the light. Pull the chain to turn the light On or Off.
- Inversione della lama: To change the direction of the fan blades (e.g., for summer cooling or winter heat circulation), locate the slide switch on the motor housing. With the fan off, slide the switch to the opposite position. This fan features reversible white/bleached oak blades.

Figure 4.1: The Canarm Unity fan installed, demonstrating its function within a living space.
5. Manutenzione
Una manutenzione regolare garantisce prestazioni ottimali e prolunga la durata del ventilatore da soffitto.
- Pulizia: Pulire periodicamente le pale del ventilatore e l'alloggiamento del motore con un panno morbido e asciutto.amp panno. Non usare detergenti abrasivi o solventi.
- Viti di serraggio: Check all screws on the blade attachments and mounting hardware annually. Tighten any loose screws to prevent wobbling or noise.
- Sostituzione della lampadina: Disconnect power before replacing light bulbs. Allow bulbs to cool before handling. Use bulbs of the correct wattage and type as specified in the fan's electrical ratings.
6. Risoluzione Dei Problemi
Prima di tentare qualsiasi riparazione, assicurarsi che l'alimentazione sia scollegata dall'interruttore automatico.
| Problema | Possibile causa | Soluzione |
|---|---|---|
| La ventola non si avvia | No power to the fan; Loose wire connections; Motor malfunction | Check circuit breaker/fuse; Verify all wire connections are secure; Contact a qualified electrician or customer support. |
| La luce non funziona | Bulb faulty or loose; Loose wire connections; Light kit malfunction | Replace bulb; Tighten bulb; Check light kit wiring; Contact customer support. |
| La ventola traballa | Viti della lama allentate; Lame sbilanciate; Staffa di montaggio allentata | Tighten all blade screws; Ensure blades are balanced (balancing kit may be needed); Verify mounting bracket is secure. |
| Funzionamento rumoroso | Loose screws; Motor bearings; Canopy rubbing ceiling | Check and tighten all screws; Ensure canopy is not touching the ceiling; If motor noise persists, contact customer support. |
7. Specifiche
| Marca | canarm |
| Numero di modello | CF2336411L |
| Dimensioni del prodotto | 91.44 x 91.44 x 20.32 cm (36 x 36 x 8 pollici) |
| Peso dell'articolo | 3.53 kg |
| Colore | Bianco |
| Numero di lame | 4 |
| Finitura della lama | Reversible White/Bleached Oak |
| Numero di velocità | 3 |
| Potenza/Watttage | 60 watt |
| Tipo di montaggio | Supporto per asta |
| Tipo di controllore | Tirare il controllo della catena |
8. Garanzia e supporto
This product is covered by the manufacturer's standard warranty. Please refer to the warranty card included in your original packaging for specific terms and conditions.
For technical assistance, missing parts, or warranty claims, please contact Canarm customer support. Contact information can typically be found on the manufacturer's websito o sulla confezione del prodotto.
Si prega di conservare questo manuale per riferimento futuro.


