1. Importanti istruzioni di sicurezza
Please read all instructions carefully before using the CREATE Mill PRO Coffee and Food Grinder. Retain this manual for future reference.
- Scollegare sempre l'apparecchio dalla presa di corrente prima di pulirlo, montarne o smontarne i componenti.
- Non immergere la base del motore in acqua o altri liquidi. Pulire con un panno umido.amp solo tessuto.
- Keep hands and utensils out of the grinding cup during operation to prevent injury and damage to the appliance.
- Prima di utilizzare il macinino, assicurarsi che il coperchio sia ben chiuso.
- Questo apparecchio non è destinato all'uso da parte di persone con ridotte capacità fisiche, sensoriali o mentali, o prive di esperienza e conoscenza, a meno che non siano supervisionate o abbiano ricevuto istruzioni sull'uso dell'apparecchio da una persona responsabile della loro sicurezza.
- Do not operate the grinder continuously for more than 30 seconds. Allow a short break between grinding cycles to prevent overheating.
- Do not grind hard, oily, or wet ingredients that may damage the blades or motor.
- Store the appliance out of reach of children.
2. Prodotto finitoview
The CREATE Mill PRO is a versatile electric grinder designed for coffee beans, spices, nuts, and other dry food items. It features a powerful motor and durable stainless steel blades.

Image 2.1: The CREATE Mill PRO Coffee and Food Grinder, showcasing its sleek stainless steel design and transparent lid.
Componenti:
- Base del motore: Contiene il motore e il collegamento di alimentazione.
- Grinding Cups (x2): Stainless steel cups with integrated blades for different grinding tasks. One cup typically has a 4-blade design for general grinding, and the other a 2-blade design for coarser grinding or specific ingredients.
- Transparent Lids (x2): Allow observation of the grinding process.
- Cavo di alimentazione: Per collegare l'apparecchio a una presa elettrica.
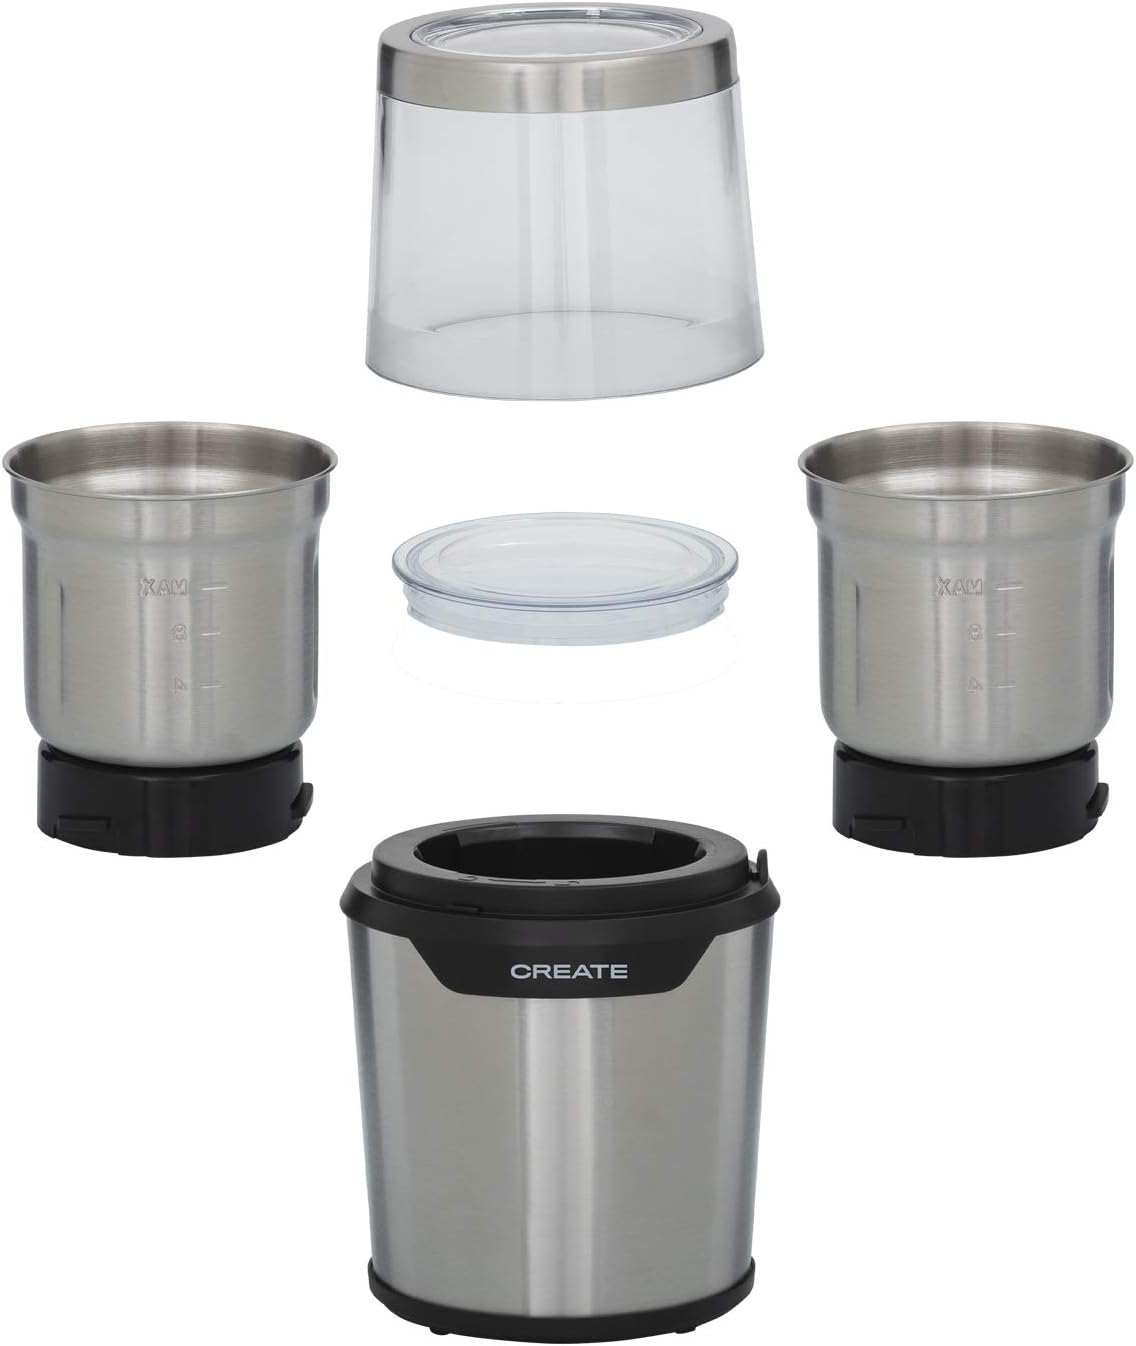
Image 2.2: All components of the CREATE Mill PRO grinder, including the motor base, two grinding cups with different blade types, and two transparent lids.
3. Impostazione
- Disimballare: Rimuovere con attenzione tutti i componenti dalla confezione.
- Pulito: Before first use, wash the grinding cups and lids with warm soapy water, then rinse and dry thoroughly. Wipe the motor base with a damp stoffa.
- Posizionamento: Posizionare la base del motore su una superficie stabile, piana e asciutta.
- Assemble Grinding Cup: Select the appropriate grinding cup for your task. Ensure it is securely seated onto the motor base. The grinding cup should click into place or fit snugly.

Image 3.1: Illustration of how the grinding cup fits onto the motor base, showing the separate components before assembly.
4. Istruzioni per l'uso
- Aggiungere gli ingredienti: Place the desired amount of dry ingredients into the grinding cup. Do not exceed the 'MAX' fill line (approximately 80g capacity). Overfilling can lead to inefficient grinding and potential damage.

Immagine 4.1: Primo piano view of the grinding cup interior, clearly showing the 'MAX' fill line to prevent overfilling.
- Coperchio sicuro: Place the transparent lid onto the grinding cup and twist or press down firmly to ensure it is securely locked. The grinder will not operate if the lid is not properly secured.
- Connetti alimentazione: Collegare il cavo di alimentazione a una presa elettrica standard.

Image 4.2: The power cord securely plugged into the base of the CREATE Mill PRO grinder.
- Macinazione: Press and hold the lid or the designated power button (if present) to start grinding. The grinder operates on a pulse action. For best results, use short bursts (5-10 seconds) and check the consistency through the transparent lid.
- Monitorare i progressi: Observe the grinding process through the transparent lid. Release the lid/button to stop grinding.
- Raggiungere la coerenza desiderata: Repeat short grinding bursts until the desired consistency is achieved. For very fine grinds, you may need several short cycles.
- Scollegare e rimuovere: Once grinding is complete, unplug the appliance. Carefully remove the lid, then lift the grinding cup from the motor base.
- Contenuto vuoto: Pour out the ground ingredients. Use a small brush if necessary to remove any remaining particles.
Tipi di lama:
The CREATE Mill PRO typically includes two types of grinding cups with different blade configurations:
- 4-Blade Grinding Cup: Ideal for coffee beans, spices, and achieving finer grinds.
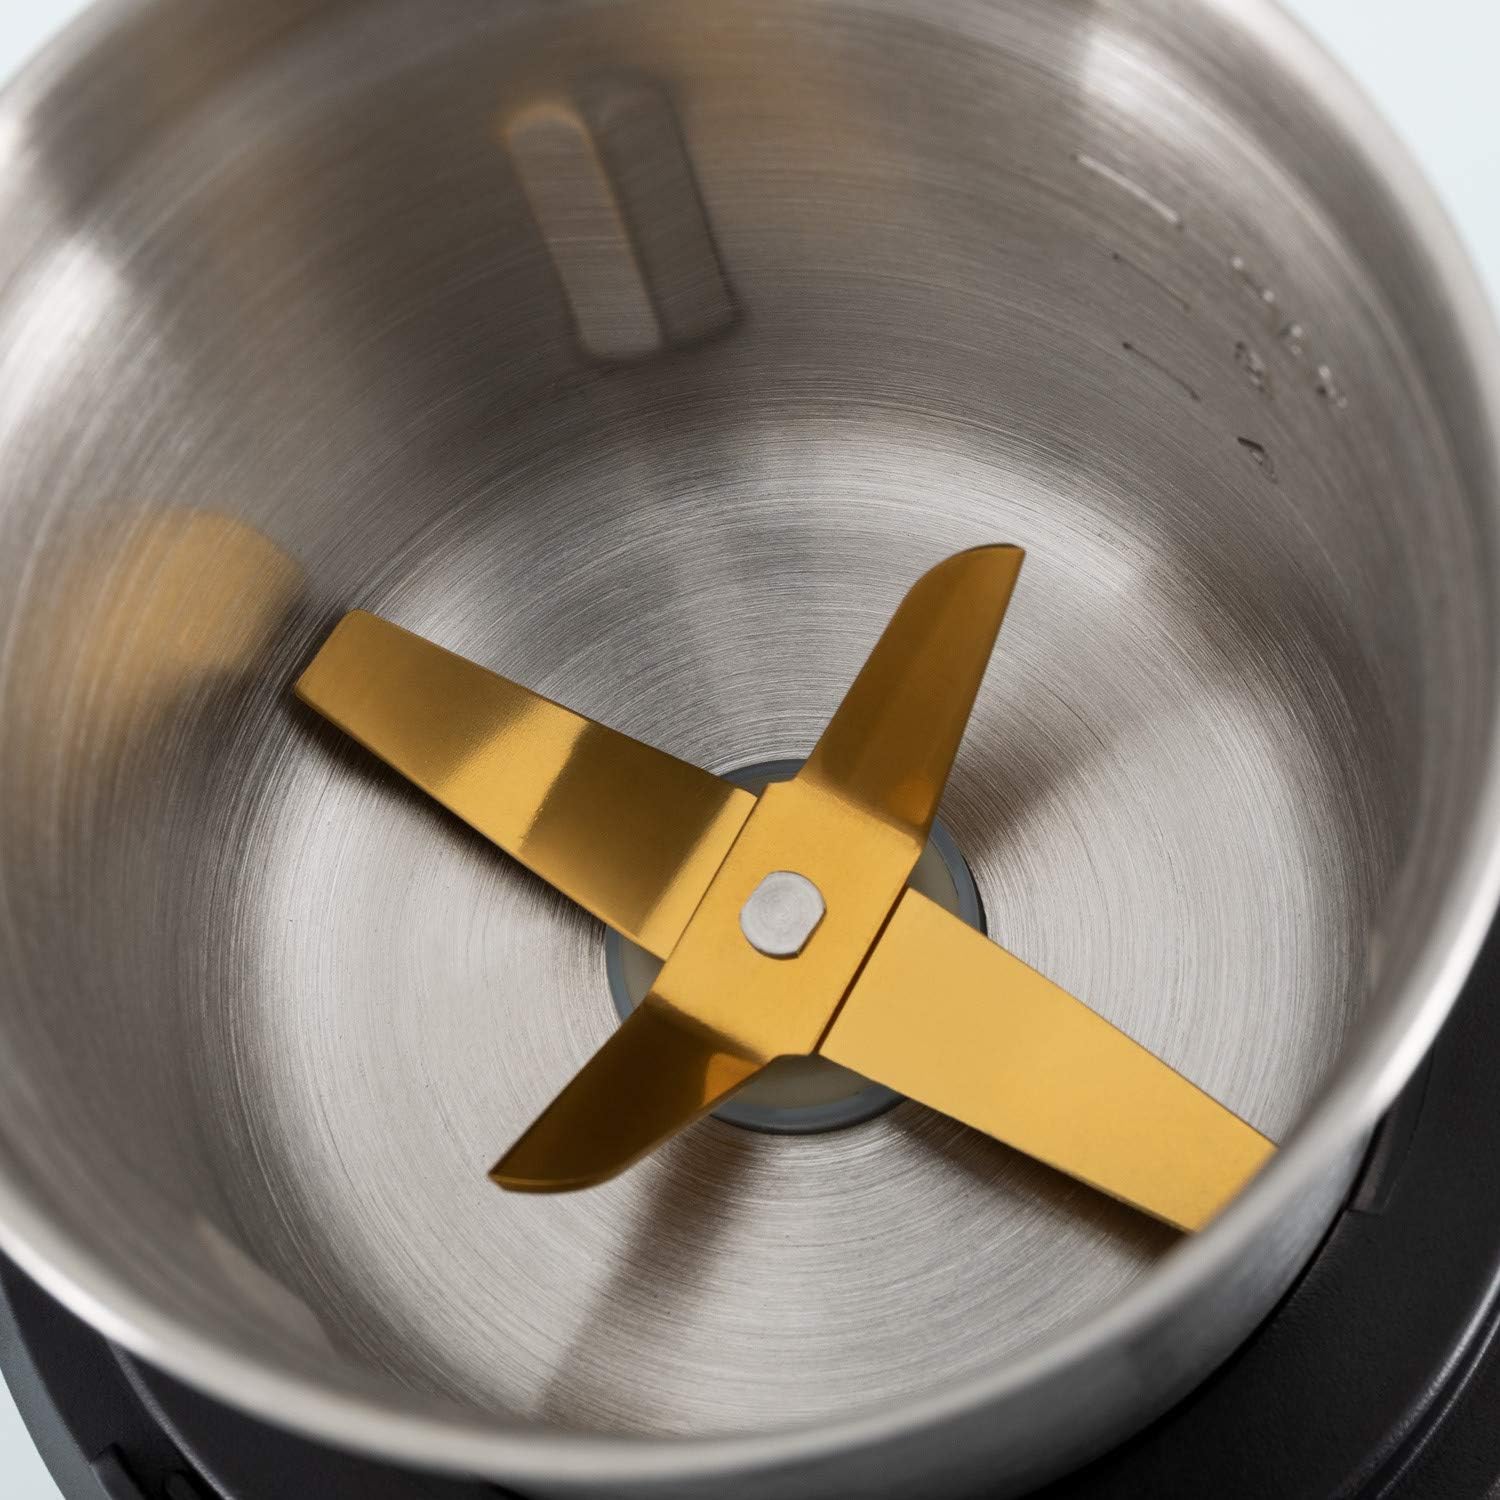
Image 4.3: Close-up of the 4-blade grinding attachment, suitable for fine grinding of coffee and spices.
- 2-Blade Grinding Cup: Suitable for coarser grinding, nuts, or larger food items.

Image 4.4: Close-up of the 2-blade grinding attachment, designed for coarser grinding tasks.
5. Manutenzione e pulizia
Una pulizia regolare garantisce prestazioni ottimali e prolunga la durata del tuo macinacaffè.
- Scollegare: Prima di pulire il macinacaffè, assicurarsi sempre che sia scollegato dalla presa di corrente.
- Clean Grinding Cups and Lids: Remove the grinding cup from the motor base. Wash the grinding cups and lids with warm, soapy water. Use a small brush to remove any stubborn residue from the blades. Rinse thoroughly and dry completely before reassembling or storing.
- Base del motore pulita: Pulire l'esterno della base del motore con un panno morbido eamp panno. Non utilizzare detergenti abrasivi né immergere la base del motore in acqua.
- Magazzinaggio: Conservare il macinino in un luogo asciutto, lontano dalla luce solare diretta e dall'umidità.
6. Risoluzione Dei Problemi
| Problema | Possibile causa | Soluzione |
|---|---|---|
| Il macinino non si accende. |
|
|
| Ingredients are not grinding effectively. |
|
|
| Rumore o odore insolito durante il funzionamento. |
|
|
7. Specifiche
- Marca: CREARE
- Modello: Mulino PRO
- Energia: 300W
- Capacità: 80 grammi
- Voltage: 230V AC (2.3E+2 Volts AC)
- Dimensioni: 30.8 x 13 x 12.2 cm (Confezione)
- Peso: 1.38 kg (prodotto)
- Materiali: Stainless Steel, BPA-free plastics
8. Garanzia e supporto
The CREATE Mill PRO Coffee and Food Grinder comes with a standard manufacturer's warranty. Please refer to the warranty card included in your product packaging for specific terms and conditions.
For technical support, troubleshooting assistance, or warranty claims, please contact CREATE customer service through their official webo al rivenditore presso cui è stato acquistato il prodotto. Conservare la prova d'acquisto per la convalida della garanzia.


