1. Introduzione
This manual provides comprehensive instructions for the installation, operation, and maintenance of your ErGear Single Monitor Mount, Model EGSS7. This monitor arm is designed to enhance your workspace ergonomics by providing adjustable positioning for a single monitor. Please read this manual thoroughly before installation and retain it for future reference.

Image 1.1: The ErGear Single Monitor Arm (Model EGSS7) in a typical office setup.
2. Informazioni sulla sicurezza
Please observe the following safety precautions to prevent injury or damage to your equipment:
- Non superare la capacità di peso massima di 14.3 libbre (6.5 kg).
- Ensure your monitor is between 17 and 27 inches in size.
- Verify that your monitor is VESA compatible (75x75mm or 100x100mm).
- Install the mount on a sturdy desk surface that can support the combined weight of the mount and your monitor.
- Seguire attentamente tutti i passaggi di installazione. Un'installazione non corretta può causare danni all'apparecchiatura o lesioni personali.
- Tenere le parti di piccole dimensioni lontano dalla portata dei bambini.
3. Contenuto della confezione
Before proceeding with installation, please ensure all components are present and undamaged. Refer to the included parts list for detailed identification.
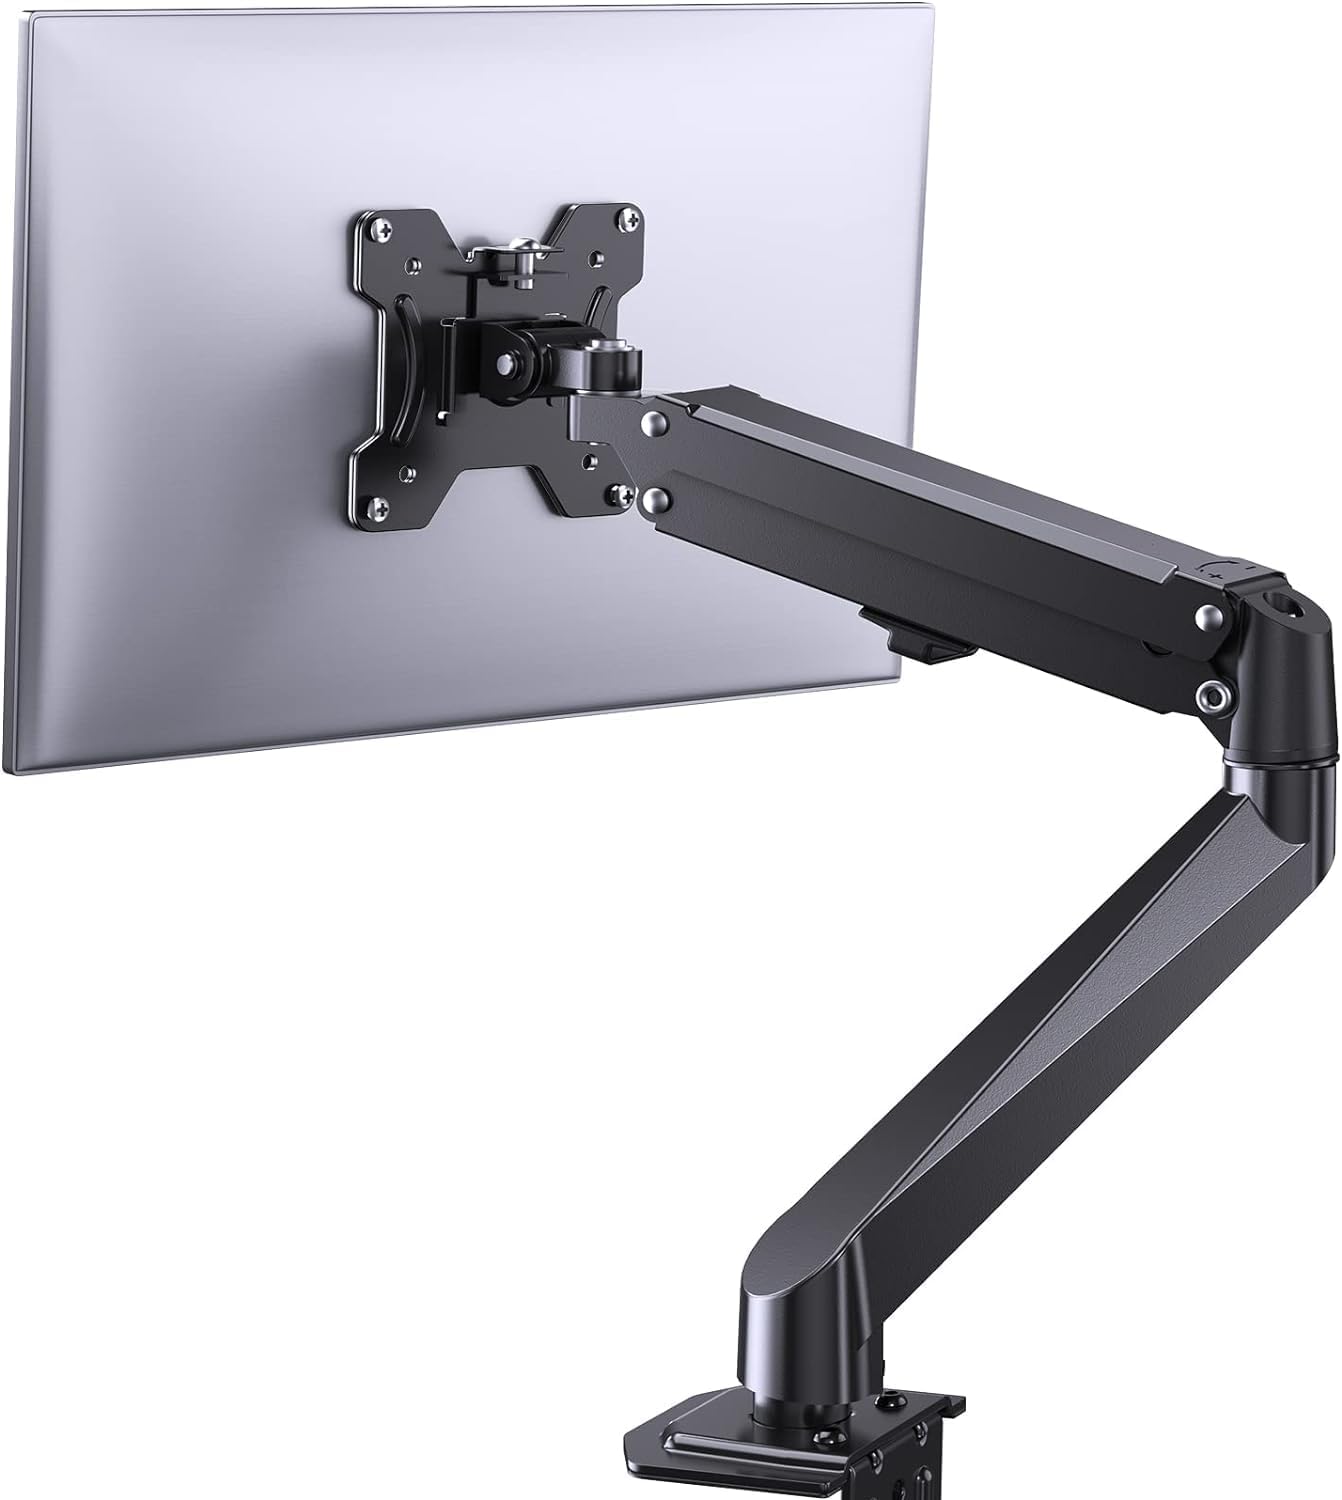
Immagine 3.1: Passoview of the ErGear Single Monitor Mount components.
4. Specifiche
| Caratteristica | Specificazione |
|---|---|
| Marca | Ergear |
| Modello | EGSS7 |
| Dimensioni del monitor compatibili | 17 - 27 pollici |
| Capacità di peso | Fino a 14.3 libbre (6.5 kg) |
| Compatibilità VESA | 75x75mm, 100x100mm |
| Tipo di montaggio | Cclamp o Grommet |
| Materiale | Acciaio legato |
| Colore | Nero |
| Gamma di inclinazione | da -35° a +50° |
| Gamma girevole | da -90° a +90° |
| Rotazione | 360° |
| Dimensioni del prodotto | Dimensioni: 41.2 x 30.4 x 10 cm |

Image 4.1: Monitor size and weight capacity details.
5. Istruzioni per l'installazione
The ErGear Single Monitor Mount offers two installation options: C-clamp or Grommet mounting. Choose the option best suited for your desk.

Immagine 5.1: C-clamp and Grommet mounting options with desk thickness ranges.
5.1 C-clamp Installazione
- Allega il C-clamp to the base of the monitor arm.
- Posizionare il C-clamp on the edge of your desk. Ensure the desk thickness is between 0.4 and 3.3 inches.
- Stringere la clamp securely using the provided knob until the mount is stable.
5.2 Grommet Installation
- If your desk has a grommet hole, insert the grommet bolt through the base of the monitor arm and the desk hole. Ensure the desk thickness is between 0.4 and 3.1 inches.
- Secure the mount from underneath the desk using the provided plate and nut.
5.3 Fissaggio del monitor
- Carefully attach your VESA-compatible monitor to the VESA plate on the arm using the appropriate screws.
- Ensure the screws are tightened firmly but do not overtighten.
5.4 Regolazione della tensione
The gas spring arm requires tension adjustment to properly support your monitor's weight. Use the included Allen key to adjust the tension screw located on the arm. Turn clockwise to increase tension for heavier monitors, and counter-clockwise to decrease tension for lighter monitors. Adjust until the monitor stays in position when moved.

Immagine 5.2: Interno view of the flexible gas spring arm.
6. Istruzioni per l'uso
Once installed, your ErGear monitor mount allows for flexible positioning of your monitor.
6.1 Regolazione della posizione del monitor
- Regolazione dell'altezza: Gently push or pull the monitor to the desired height. The gas spring mechanism will hold it in place.
- Inclinazione: Il monitor può essere inclinato da -35° a +50° per ridurre i riflessi e ottimizzare viewangoli di inclinazione.
- Girevole: Swivel the monitor from -90° to +90° for collaborative work or to view content from different angles.
- Rotazione: Ruotare il monitor di 360° per passare dall'orientamento orizzontale a quello verticale e viceversa.

Image 6.1: Monitor height adjustment.

Image 6.2: Full motion range capabilities of the monitor arm.
6.2 Gestione dei cavi
The monitor arm features an integrated cable management system to keep your workspace tidy. Route your monitor cables through the designated channels on the arm to conceal them.

Image 6.3: Integrated cable management system.
7. Manutenzione
Una manutenzione regolare garantisce la longevità e le prestazioni ottimali del supporto per monitor.
- Controllare periodicamente tutte le viti e i collegamenti per assicurarsi che siano ben serrati.
- Clean the surface of the mount with a soft, damp stoffa. Evitare detergenti abrasivi.
- Re-adjust the gas spring tension if your monitor feels too loose or too stiff when moving.
8. Risoluzione Dei Problemi
| Problema | Possibile causa | Soluzione |
|---|---|---|
| Il monitor si piega o non rimane in posizione. | Gas spring tension is too low. | Increase gas spring tension using the Allen key (clockwise). |
| Monitor is difficult to move. | Gas spring tension is too high. | Decrease gas spring tension using the Allen key (counter-clockwise). |
| Il supporto sembra instabile. | Cclamp or grommet connection is loose. | Stringere il C-clamp knob or grommet nut. |
| Il monitor non è compatibile con la piastra VESA. | Modello VESA errato. | Ensure your monitor has a 75x75mm or 100x100mm VESA pattern. |
9. Garanzia e supporto
For warranty information or technical support, please refer to the contact details provided with your purchase or visit the official ErGear website. Please have your model number (EGSS7) and purchase date available when contacting support.


