1. Introduzione
Thank you for choosing the SALTER Ronda PT-1970 Exercise Bike. This manual provides essential information for the safe assembly, operation, and maintenance of your new fitness equipment. Please read this manual thoroughly before use and keep it for future reference.
The SALTER Ronda PT-1970 is designed for home use, offering easy access, making it suitable for seniors or users with reduced mobility. It features a magnetic resistance system for smooth and quiet operation, an adjustable seat and handlebar, and an LCD monitor to track your workout progress.
2. Informazioni sulla sicurezza
- Consultare il proprio medico prima di iniziare qualsiasi programma di esercizi.
- Posizionare sempre la cyclette su una superficie piana e stabile.
- Tenere i bambini e gli animali domestici lontani dall'apparecchiatura durante l'uso.
- Prima di ogni utilizzo, assicurarsi che tutti i bulloni e i dadi siano ben serrati.
- Indossare abbigliamento e calzature sportive adeguati.
- Interrompere immediatamente l'esercizio se ci si sente deboli, storditi o si avverte dolore.
- The maximum user weight for this bike is 130 kg.
- Non tentare di modificare l'apparecchiatura.
3. Contenuto della confezione
Carefully unpack the box and ensure all components are present. If any parts are missing or damaged, contact customer support.
- Complete SALTER Ronda PT-1970 Exercise Bike (main frame, handlebars, seat, pedals, bases)
- Monitor LCD
- Monitor Batteries (4 x AAA)
- Attrezzi di montaggio (chiavi inglesi, chiavi a brugola)
- Manuale dell'utente (questo documento)
4. Istruzioni di montaggio
Follow these steps to assemble your SALTER Ronda PT-1970 Exercise Bike. It is recommended to have two people for assembly.
- Fissare le basi stabilizzatrici: Secure the front and rear stabilizer bases to the main frame using the provided bolts and washers. Ensure the leveling feet are facing downwards.
- Installa i pedali: Identify the left (L) and right (R) pedals. The left pedal screws counter-clockwise, and the right pedal screws clockwise. Tighten them firmly.
- Montare il reggisella e la sella: Inserire il reggisella nel telaio principale e fissarlo all'altezza desiderata utilizzando la manopola di regolazione. Fissare il sedile al reggisella.
- Fissare il reggisella e il manubrio: Connect the handlebar post to the main frame. Route any necessary cables through the post. Attach the handlebars to the handlebar post.
- Installare il monitor LCD: Connect the sensor cables from the handlebar post to the back of the LCD monitor. Insert the 4 AAA batteries into the monitor. Mount the monitor onto the handlebar post.

Immagine: Completa view of the SALTER Ronda PT-1970 exercise bike with dimensions indicated (148cm H x 110cm L x 52cm W).

Immagine: lato sinistro view of the assembled SALTER Ronda PT-1970 exercise bike, showing the main components.
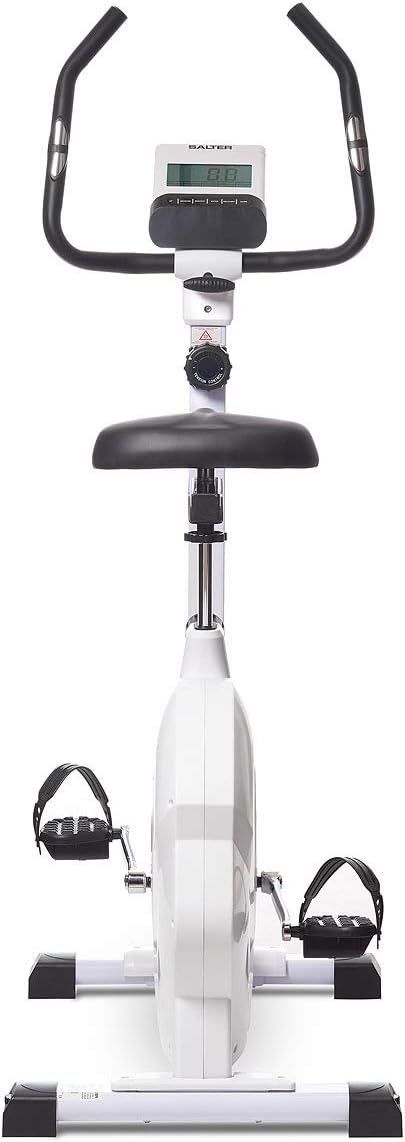
Immagine: Frontale view of the SALTER Ronda PT-1970 exercise bike, highlighting the handlebars and LCD monitor.
5. Regolazioni
5.1 Regolazione del sedile
The seat can be adjusted both vertically and horizontally to achieve an optimal and comfortable riding position.
- Regolazione verticale: Loosen the vertical adjustment knob located on the seat post. Raise or lower the seat to the desired height. Ensure the seat post is inserted past the minimum insertion mark. Tighten the knob firmly.
- Regolazione orizzontale: Loosen the horizontal adjustment knob located under the seat. Slide the seat forward or backward to your preferred position. Tighten the knob firmly.

Image: Close-up of the seat post and horizontal adjustment mechanism, showing the knob for sliding the seat.

Image: Close-up of the seat height adjustment knob, used to secure the seat at the desired vertical position.
5.2 Regolazione del manubrio
The handlebar angle can be adjusted to provide a comfortable grip and varied workout positions.
- Loosen the handlebar adjustment knob located at the base of the handlebars. Adjust the angle of the handlebars to your preference. Tighten the knob firmly to secure the position.

Image: Close-up of the handlebar base, showing the adjustment knob and the tension control dial.
6. Istruzioni per l'uso
6.1 Controllo della resistenza
The SALTER Ronda PT-1970 features 8 levels of magnetic resistance, allowing you to customize your workout intensity.
- Turn the tension control knob, located below the handlebars, clockwise to increase resistance (higher numbers).
- Ruotare la manopola in senso antiorario per diminuire la resistenza (numeri più bassi).
Image: The tension control knob with resistance levels 1-8 clearly visible.
6.2 Funzioni del monitor LCD
The easy-to-use LCD monitor provides real-time feedback on your workout:
- TEMPO: Visualizza la durata del tuo allenamento.
- VELOCITÀ: Mostra la velocità attuale della tua pedalata.
- DISTANZA: Tiene traccia della distanza totale percorsa durante la sessione.
- CALORIE: Stima le calorie bruciate durante l'allenamento.
- IMPULSO: Shows your heart rate when holding the pulse sensors.
6.3 Misurazione degli impulsi
To measure your heart rate, firmly grip the contact sensors located on the handlebars. Your pulse will be displayed on the LCD monitor after a few seconds.
7. Manutenzione
Una manutenzione regolare garantisce la longevità e le prestazioni ottimali della tua cyclette.
- Pulizia: Pulisci la bici con la pubblicitàamp Dopo ogni utilizzo, rimuovere il sudore e la polvere con un panno. Non utilizzare detergenti abrasivi.
- Ispezione: Controllare periodicamente che tutti i bulloni, i dadi e le parti mobili siano ben serrati e non presentino segni di usura. Serrare eventuali elementi di fissaggio allentati.
- Lubrificazione: The magnetic resistance system requires no lubrication.
- Magazzinaggio: Store the bike in a dry, cool place away from direct sunlight and extreme temperatures. The integrated wheels allow for easy relocation.

Image: Close-up of a leveling foot, which can be adjusted to stabilize the bike on uneven surfaces.
8. Risoluzione Dei Problemi
In caso di problemi, fare riferimento ai seguenti problemi comuni e alle relative soluzioni:
- Il monitor non visualizza:
- Check if the batteries are correctly installed and not depleted. Replace if necessary (4 x AAA).
- Ensure all cables connecting the monitor to the bike are securely plugged in.
- Lettura del polso imprecisa:
- Assicurati che le tue mani afferrino saldamente entrambi i sensori del polso.
- Assicuratevi che le vostre mani siano pulite e prive di lozioni o umidità eccessiva.
- Rumori insoliti durante il funzionamento:
- Check all visible bolts and nuts for tightness. Tighten any loose fasteners.
- Ensure the bike is on a level surface and the leveling feet are properly adjusted.
- Resistenza non variabile:
- Verify that the tension control knob is turning freely and engaging the resistance mechanism.
9. Specifiche
| Nome del modello | SALTER Ronda PT-1970 |
| Marca | SALTER |
| Meccanismo di resistenza | Magnetico |
| Numero di livelli di resistenza | 8 |
| Peso equivalente del volano | 7 kg |
| Dimensioni del prodotto (L x P x A) | Dimensioni: 110 x 52 x 148 cm |
| Peso del prodotto | 32 kg |
| Peso massimo dell'utente | 130 kg |
| Fonte di alimentazione (monitor) | 4 batterie AAA (incluse) |
| Materiale | Acciaio legato |
| Colore | Bianco |
10. Garanzia e supporto
For warranty information or technical support, please refer to the warranty card included with your product or contact SALTER customer service directly. Keep your proof of purchase for any warranty claims.
You can visit the SALTER brand store for more information: Negozio del marchio SALTER


