1. Introduzione
The Yottamaster DF5U3 is a 5-bay external hard drive enclosure designed for both 2.5-inch and 3.5-inch SATA HDD/SSDs. It supports a total capacity of up to 90TB (5 x 18TB drives) and features a USB 3.0 interface for data transfer speeds up to 6Gbps. This enclosure is built with an aluminum alloy frame and includes an 80mm RGB silent fan for efficient cooling. This manual provides detailed instructions for the proper setup, operation, and maintenance of your Yottamaster DF5U3 enclosure.
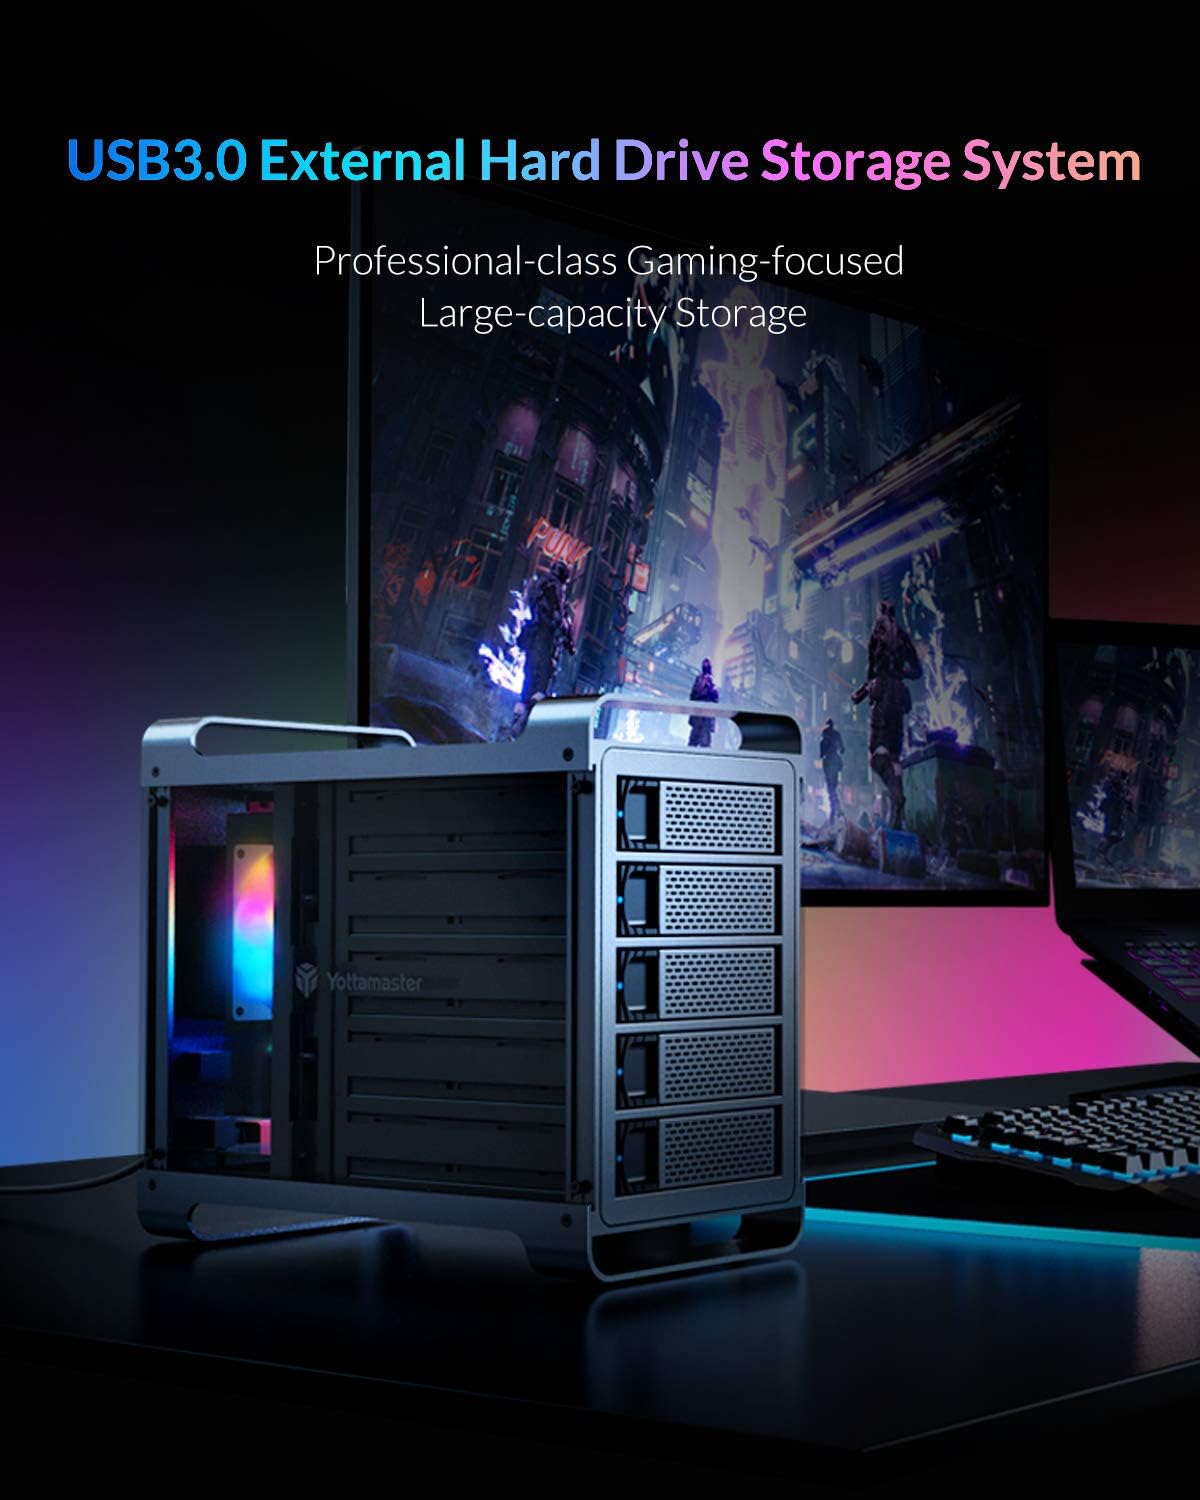
Figure 1: Yottamaster 5-Bay USB 3.0 Hard Drive Enclosure (DF5U3)
2. Contenuto della confezione
Si prega di verificare che tutti gli articoli siano presenti nel pacco:
- Yottamaster 5-Bay USB 3.0 Hard Drive Enclosure (DF5U3)
- USB 3.0 Type-B Data Cable
- Adattatore di alimentazione (150 W)
- Screws for Drive Installation
- Cacciavite
- Manuale d'uso
3. Caratteristiche principali
- Alta capacità: Supporta fino a 90 TB di spazio di archiviazione totale (5 unità da 18 TB).
- Compatibilità unità: Designed for both 2.5-inch and 3.5-inch SATA I/II/III HDD/SSDs.
- Fast Transfer Speed: L'interfaccia USB 3.0 garantisce velocità di trasferimento dati fino a 6 Gbps.
- Raffreddamento efficiente: Features an 80mm RGB silent fan to maintain optimal drive temperatures.
- Costruzione durevole: Built with a robust aluminum alloy frame.
- Collega e usa: Driverless installation for ease of use.
- Non-RAID Version: This model does not support hardware RAID. Software RAID can be configured using your operating system's tools.
4. Guida all'installazione
4.1 Installazione dell'unità
- Gently pull the lever on the front of an empty drive bay to release and slide out the drive tray.
- Place your 2.5-inch or 3.5-inch SATA HDD/SSD onto the drive tray. Align the screw holes on the drive with those on the tray.
- Fissare l'unità al vassoio utilizzando le viti e il cacciavite forniti.
- Slide the loaded drive tray back into the enclosure until it clicks securely into place.
- Ripetere l'operazione per tutte le unità desiderate.

Figure 2: Inserting a drive into the tray

Figure 3: Drive trays ready for installation
4.2 Connecting the Enclosure
- Connect the power adapter to the AC-in port on the rear of the enclosure and then to a power outlet.
- Connect one end of the USB 3.0 Type-B data cable to the USB 3.0 port on the rear of the enclosure.
- Collegare l'altra estremità del cavo dati USB 3.0 a una porta USB 3.0 disponibile sul computer.
- Press the power switch on the rear of the enclosure to the "ON" position. The enclosure will power on, and the RGB fan will illuminate.

Figura 4: Collegamenti del pannello posteriore
5. Istruzioni per l'uso
5.1 Initializing and Formatting Drives
For new hard drives, or if you wish to erase existing data, you will need to initialize and format them. This process creates partitions and prepares the drives for use with your operating system.
Video 1: Guide on how to format a hard drive partition in Windows or Mac OS. This video demonstrates the steps to initialize and format your drives for first-time use.
5.2 Adjusting/Disabling Sleep Mode
The enclosure may enter a sleep mode after a period of inactivity to conserve power and reduce wear on the drives. You can adjust or disable this feature if needed.
Video 2: Instructions on how to cancel the sleep mode for Yottamaster multi-bay HDD enclosures.
Video 3: A step-by-step guide to adjust or disable the sleep mode on the enclosure, providing detailed visual instructions.
6. Manutenzione
To ensure the longevity and optimal performance of your Yottamaster DF5U3 enclosure, follow these maintenance guidelines:
- Pulizia: Regularly clean the exterior of the enclosure with a soft, dry cloth. Ensure the fan vents are free from dust accumulation to maintain proper airflow.
- Ambiente: Operate the enclosure in a well-ventilated area, away from direct sunlight, heat sources, and excessive moisture.
- Rimozione sicura: Always safely eject the enclosure from your operating system before disconnecting the USB cable or power to prevent data corruption.
- Aggiornamenti del firmware: Check the Yottamaster official webperiodicamente il sito per verificare la disponibilità di eventuali aggiornamenti del firmware che potrebbero migliorare le prestazioni o risolvere problemi.
7. Risoluzione Dei Problemi
If you encounter issues with your Yottamaster DF5U3 enclosure, please refer to the following common solutions:
- Unità non riconosciute:
- Assicurarsi che tutti i cavi (USB e alimentazione) siano collegati saldamente.
- Verify that the enclosure is powered on.
- Check Disk Management (Windows) or Disk Utility (Mac) to see if the drives are detected but uninitialized/unformatted. Refer to the formatting video in Section 5.1.
- Prova a collegare l'alloggiamento a una porta USB o a un computer diverso.
- Ensure the drives are properly seated in their trays and secured with screws.
- Enclosure Goes to Sleep Unexpectedly:
- Refer to the videos in Section 5.2 for instructions on how to adjust or disable the sleep timer function.
- Check your operating system's power management settings, as they can also influence drive sleep behavior.
- Velocità di trasferimento lente:
- Assicurati di utilizzare una porta USB 3.0 sul tuo computer. Collegandoti a una porta USB 2.0 la velocità sarà inferiore.
- Verify the quality of your USB 3.0 cable.
- Performance can be affected by the speed of the installed hard drives themselves.
- Rumore eccessivo della ventola:
- Ensure the enclosure is placed on a stable, flat surface to prevent vibrations.
- Check for any obstructions in the fan or vents.
If these steps do not resolve your issue, please contact Yottamaster customer support.
8. Specifiche
| Caratteristica | Dettaglio |
|---|---|
| Numero di modello | DF5U3 |
| Marca | Maestro Yotta |
| Alloggiamenti unità | 5 |
| Capacità massima | 90 TB (5 x 18 TB) |
| Unità compatibili | HDD/SSD SATA I/II/III da 2.5" e 3.5". |
| Interfaccia | USB 3.0 tipo B |
| Velocità di trasferimento dati | Fino a 6 Gbps |
| Raffreddamento | 80mm RGB Silent Fan |
| Materiale | Lega di alluminio |
| Sistema operativo compatibile | Windows, Mac, Linux |
| Alimentazione elettrica | Adattatore di alimentazione esterno da 150 W |
9. Garanzia e supporto
9.1 Informazioni sulla garanzia
Yottamaster products come with a standard manufacturer's warranty. Please refer to the warranty card included in your package or visit the official Yottamaster websito per termini e condizioni di garanzia dettagliati specifici per la tua regione.
9.2 Assistenza clienti
For technical assistance, troubleshooting, or any product-related inquiries, please contact Yottamaster customer support through their official channels:
- Ufficiale Websito: www.yottamaster.com
- Pagina di supporto: Visit the 'Support' or 'Downloads' section on the official website for FAQs, drivers, and firmware updates.