1. Introduzione
This manual provides essential instructions for the safe and effective operation of your AGFA Photo Realishot DC5200 compact digital camera. Please read this manual thoroughly before using the camera and retain it for future reference.

Figura 1: Fronte view of the AGFA Photo Realishot DC5200 compact camera.

Figure 2: AGFA Photo Realishot DC5200 highlighting 21MP photo resolution and HD video capability.
2. Contenuto della confezione
Verifica che tutti gli articoli elencati di seguito siano inclusi nella confezione della tua fotocamera:
- AGFA Photo Realishot DC5200 Camera
- Cavo USB
- Manuale dell'utente (questo documento)
- Batteria al litio ricaricabile
3. Componenti della fotocamera
3.1 Front View
The front of the camera features the lens, flash, and self-timer lamp.
3.2 Posteriore View (Schermo a cristalli liquidi)
The rear of the camera is dominated by the 2.4-inch TFT LCD screen, used for framing shots, reviewimmagini e navigazione nei menu.

Figura 3: Posteriore view of the camera displaying the 2.4-inch LCD screen.
3.3 Parte superiore e laterale Views
The top and sides house the power button, shutter button, zoom controls, and ports for connectivity.
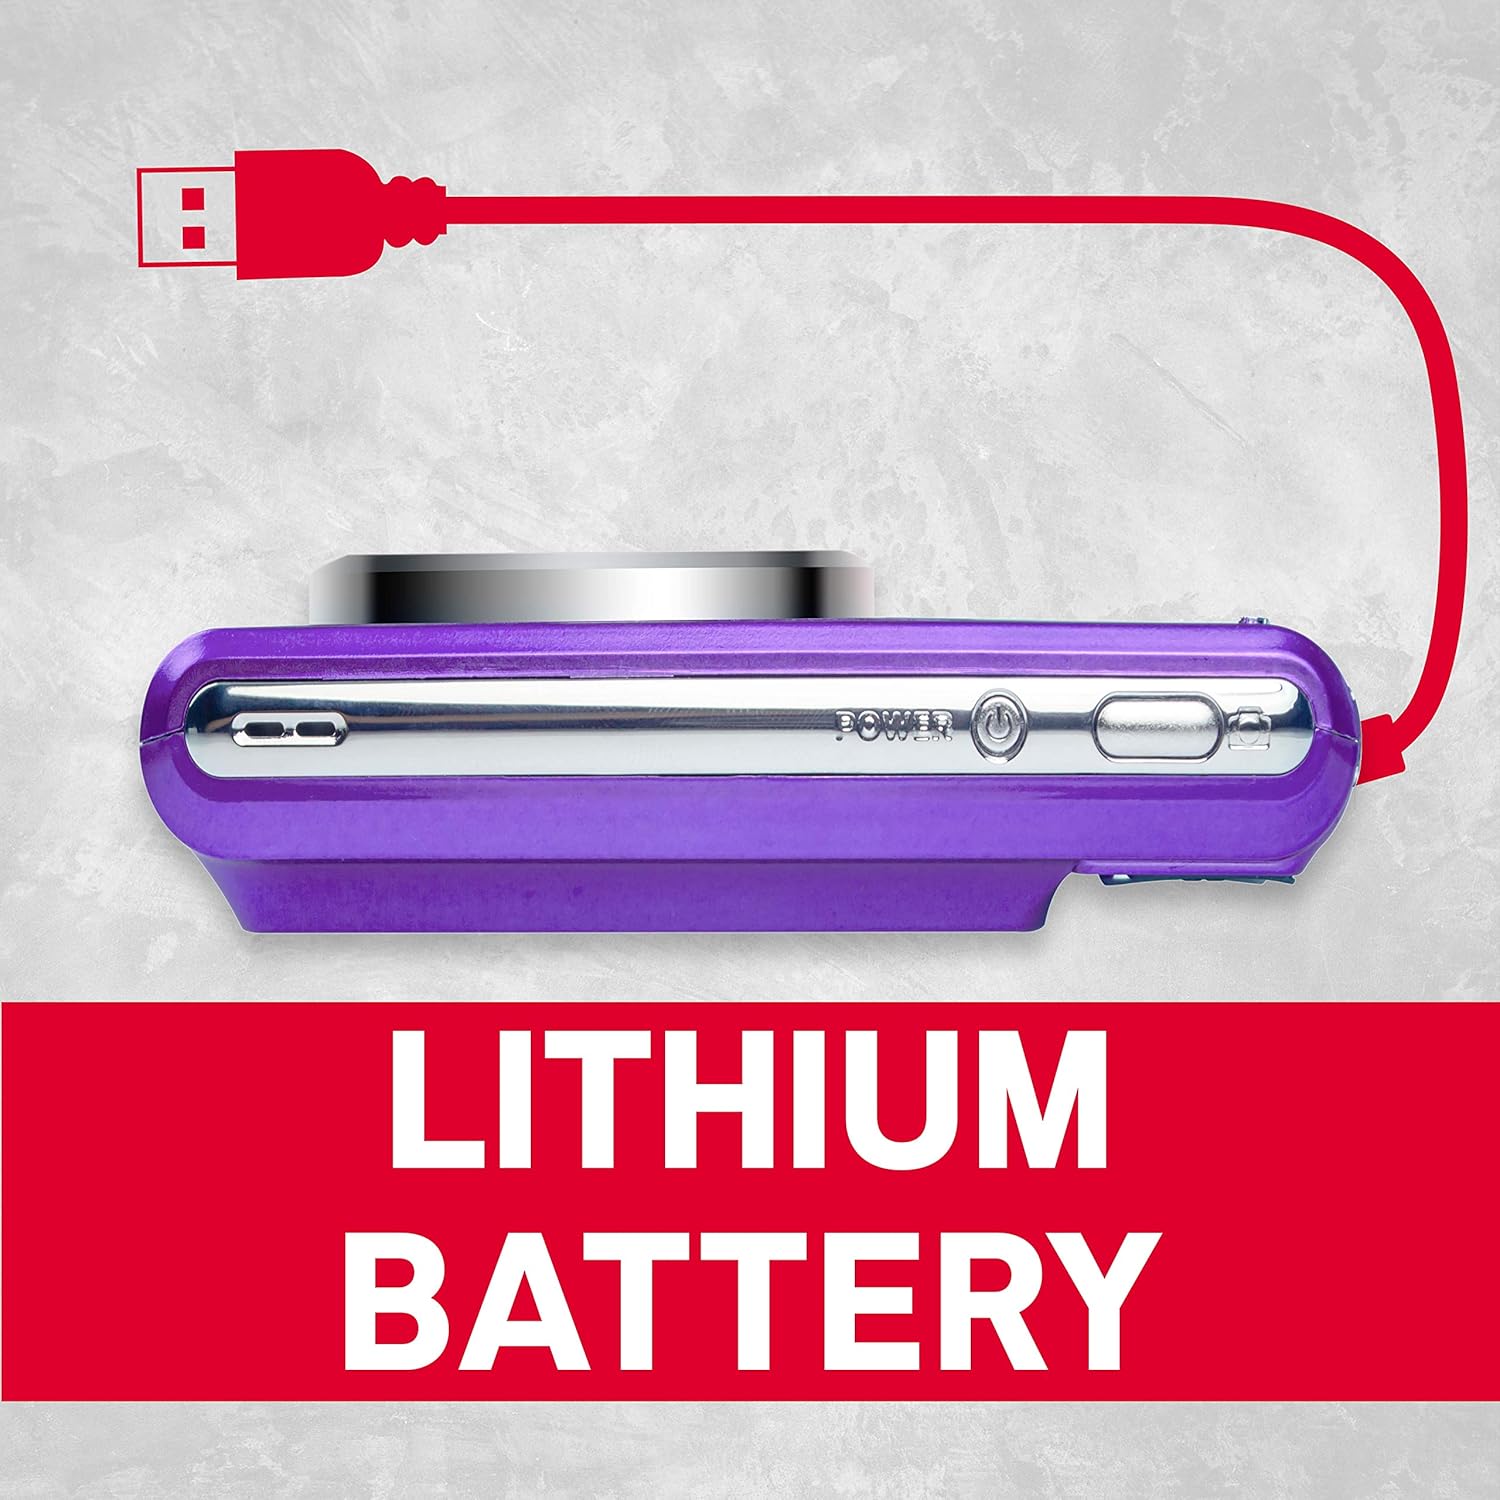
Figura 4: lato view of the camera showing the USB port for charging and data transfer.
4. Configurazione iniziale
4.1 Caricamento della batteria
- Insert the provided lithium battery into the battery compartment, ensuring correct polarity.
- Connect the camera to a power source using the supplied USB cable. The charging indicator will illuminate.
- La carica è completa quando la spia luminosa si spegne.
4.2 Inserimento di una scheda SD
The camera supports SD cards up to 32 GB (not included). A memory card is required to save photos and videos.
- Aprire il coperchio dello slot della scheda SD.
- Inserire la scheda SD con i contatti metallici rivolti nella direzione corretta finché non scatta in posizione.
- Chiudere bene il coperchio dello slot della scheda SD.
5. Funzionamento di base
5.1 Accensione/spegnimento
Premere e tenere premuto il tasto Energia pulsante per accendere o spegnere la fotocamera.
5.2 Scattare foto
- Accendi la telecamera.
- Inquadra il tuo scatto utilizzando lo schermo LCD.
- Premere il tasto Otturatore premere il pulsante a metà per mettere a fuoco, quindi premerlo completamente per catturare l'immagine.
5.3 Registrazione di video
- Switch to video mode (if applicable, refer to on-screen menu).
- Premere il tasto Otturatore pulsante per avviare la registrazione.
- Premere il tasto Otturatore nuovamente il pulsante per interrompere la registrazione.
5.4 Utilizzo dello zoom digitale
The camera features 8x digital zoom. Use the zoom controls (typically labeled W for Wide and T for Telephoto) to adjust the focal length.

Figura 5: Esample of 8x digital zoom capability.
5.5 modalità di scena
The camera offers various scene modes to optimize settings for different shooting conditions. Common modes include:
- Modalità automatica: General purpose shooting.
- Modalità notturna: For low-light environments.
- Modalità Spiaggia: For bright, reflective scenes.
Access scene modes through the camera's menu system.

Figure 6: Visual representation of different scene modes available on the camera.
6. Funzionalità avanzate
6.1 Rilevamento volti
The camera can automatically detect faces in the frame and optimize focus and exposure for portraits.

Figure 7: Camera demonstrating face detection technology.
6.2 Digital Image Stabilization
This feature helps reduce blur caused by camera shake, resulting in clearer images, especially in challenging conditions.
6.3 Autoscatto
Set a delay of 2, 5, or 10 seconds before the shutter fires, useful for self-portraits or group photos.
6.4 Red-Eye Reduction Flash
When using the flash, this feature emits a pre-flash to minimize the red-eye effect in portraits.
7. Viewing Foto e video
per riview immagini e video catturati:
- Premere il tasto Riproduzione pulsante (spesso indicato da un'icona di riproduzione).
- Use the directional buttons to navigate through your files.
- Premere il tasto OK or Entrare pulsante per view una foto o riprodurre un video.
8. Trasferimento Fileda un computer
È possibile trasferire foto e video su un computer utilizzando il cavo USB in dotazione.
- Assicurarsi che la fotocamera sia spenta.
- Collega la fotocamera al computer tramite il cavo USB.
- Power on the camera. It should appear as a removable disk or device on your computer.
- Copia il desiderato filedalla scheda di memoria della fotocamera al computer.
- Prima di scollegare il cavo USB, estrarre in modo sicuro la fotocamera dal computer.
9. Cura e manutenzione
- Keep the camera clean. Use a soft, dry cloth to wipe the camera body.
- For the lens and LCD screen, use a specialized lens cleaning cloth. Avoid harsh chemicals.
- Conservare la fotocamera in un luogo fresco e asciutto, lontano dalla luce solare diretta e da temperature estreme.
- Rimuovere la batteria se si prevede di non utilizzare la fotocamera per un periodo prolungato.
10. Risoluzione Dei Problemi
| Problema | Possibile causa | Soluzione |
|---|---|---|
| La fotocamera non si accende. | La batteria è scarica o inserita in modo errato. | Caricare completamente la batteria. Assicurarsi che la batteria sia inserita con la polarità corretta. |
| Non è possibile scattare foto. | La scheda SD è piena, bloccata o non inserita. | Insert an SD card, unlock it, or delete unnecessary files. |
| Le immagini sono sfocate. | Vibrazione della fotocamera, movimento del soggetto o messa a fuoco errata. | Hold the camera steady. Ensure adequate lighting. Use digital image stabilization. |
| Il flash non si attiva. | Il flash è disattivato o la batteria è scarica. | Enable flash in settings. Recharge battery. |
11. Specifiche tecniche
- Risoluzione foto: 21 Megapixel
- Risoluzione video: 720p HD (1280x720)
- Schermo LCD: LCD TFT da 2.4 pollici
- Zoom digitale: 8x
- Stabilizzazione dell'immagine: Digitale
- Caratteristiche speciali: Face Detection, Self-Timer (2s/5s/10s), Red-Eye Reduction Flash
- Batteria: Batteria al litio ricaricabile
- Magazzinaggio: Supports SD Card up to 32 GB (not included)
- Supportato File Formati: JPEG (photos), AVI (videos)
- Dimensioni del prodotto: 3.74 x 2.28 x 1.06 pollici
- Peso dell'articolo: 3.14 once

Figura 8: Oltreview of key camera features and specifications.
12. Garanzia e supporto
For warranty information and customer support, please refer to the documentation provided with your purchase or visit the official AgfaPhoto websito. Conservare la prova d'acquisto per eventuali reclami in garanzia.


