1. Introduzione e oltreview
Thank you for choosing the Black + Decker BHSM168DSM-QS 1600W Steam Mop. This appliance is designed to provide effective and hygienic cleaning for various surfaces in your home using the power of steam. Please read this manual thoroughly before first use to ensure safe and optimal operation.
Key features of your steam mop include:
- 99.9% Germ Elimination: Kills 99.9% of germs using only tap water, eliminating the need for harsh chemicals.
- 180° Swivel Steering: Allows for easy maneuverability around furniture and in tight spaces.
- AutoSelect Technology: Automatically adjusts steam flow for each floor type.
- Pulizia versatile: Cleans more than just floors, includes various attachments for different cleaning applications around the home.

Figure 1: The Black + Decker BHSM168DSM-QS 1600W Steam Mop.
2. Informazioni sulla sicurezza
Osservare sempre le precauzioni di sicurezza di base quando si utilizzano apparecchi elettrici per ridurre il rischio di incendi, scosse elettriche e lesioni personali. Conservare questo manuale per riferimento futuro.
- Non immergere l'apparecchio in acqua o altri liquidi.
- Non lasciare l'apparecchio incustodito quando è collegato alla corrente.
- Tenere l'apparecchio fuori dalla portata dei bambini.
- Utilizzare solo come descritto nel presente manuale.
- Do not use on unsealed wooden floors, unglazed ceramic floors, or floors that are sensitive to moisture.
- Scollegare sempre l'apparecchio dalla presa di corrente prima di riempire o svuotare il serbatoio dell'acqua o quando non è in uso.
- Non dirigere il vapore verso persone, animali o apparecchi elettrici.
- Ensure the steam mop is cool before attaching or detaching accessories.
3. Contenuto della confezione
Verificare che tutti gli articoli siano presenti nel pacco:
- 1 x Steam cleaner unit
- 1 x Mop head
- 2 x Hose wipers
- 3 x Brushes (various sizes/types)
- 1 x Carpet glider
- 3 x Mop pads
- 1 x Delta mop head
4. Impostazione
4.1 Assemblaggio del pulitore a vapore
- Inserire la maniglia nel corpo principale del pulitore a vapore finché non scatta saldamente in posizione.
- Attach the mop head to the bottom of the main body. Ensure it is firmly connected.
- Secure a clean mop pad to the mop head.
4.2 Riempimento del serbatoio dell'acqua
The steam mop uses tap water. For areas with hard water, distilled or demineralized water is recommended to prevent mineral buildup.
- Assicurarsi che l'apparecchio sia scollegato.
- Aprire il tappo del serbatoio dell'acqua.
- Fill the tank with clean water, ensuring not to overfill past the maximum line.
- Chiudere saldamente il tappo del serbatoio dell'acqua.

Figure 2: Adjusting the steam dial for different floor types.
5. Istruzioni per l'uso
5.1 General Operation (Floor Cleaning)
- Plug the steam mop into a suitable power outlet. The indicator light will illuminate.
- Wait for approximately 15-30 seconds for the water to heat up and steam to be ready.
- Use the AutoSelect dial to choose the appropriate floor type (e.g., wood/laminate, tile/vinyl). The steam output will adjust automatically.
- Begin cleaning by moving the mop slowly and steadily across the floor.
- Per le macchie ostinate, tenere il mocio sulla zona interessata per qualche secondo per consentire al vapore di penetrare.

Figure 3: Using the steam mop for floor cleaning.
5.2 Using the Handheld Steamer
The main unit detaches to become a versatile handheld steam cleaner.
- Unplug the steam mop.
- Premere il pulsante di rilascio per staccare l'unità portatile dal corpo principale.
- Attach the desired accessory (e.g., brush, squeegee, SteaMitt) to the handheld unit.
- Plug the handheld unit back into the power outlet and wait for it to heat up.
- Direct steam at the surface to be cleaned. Use the steam trigger for controlled steam release.

Figure 4: The SteaMitt accessory in action, cleaning a table.
5.3 Using the SteaMitt™
The SteaMitt™ allows for direct, hands-on steam cleaning.
- Attach the SteaMitt™ accessory to the handheld unit.
- Place the SteaMitt™ glove onto your hand.
- Plug in the unit and wait for steam to be ready.
- Use the SteaMitt™ to clean various surfaces, such as sinks, countertops, and fixtures.

Figure 5: Detaching the mop head for accessory use or storage.
5.4 Using the Delta Mop Head
The Delta mop head is ideal for cleaning corners and hard-to-reach areas.
- Attach the Delta mop head to the main unit or handheld unit as required.
- Secure a Delta mop pad to the head.
- Proceed with cleaning, guiding the triangular head into corners and edges.
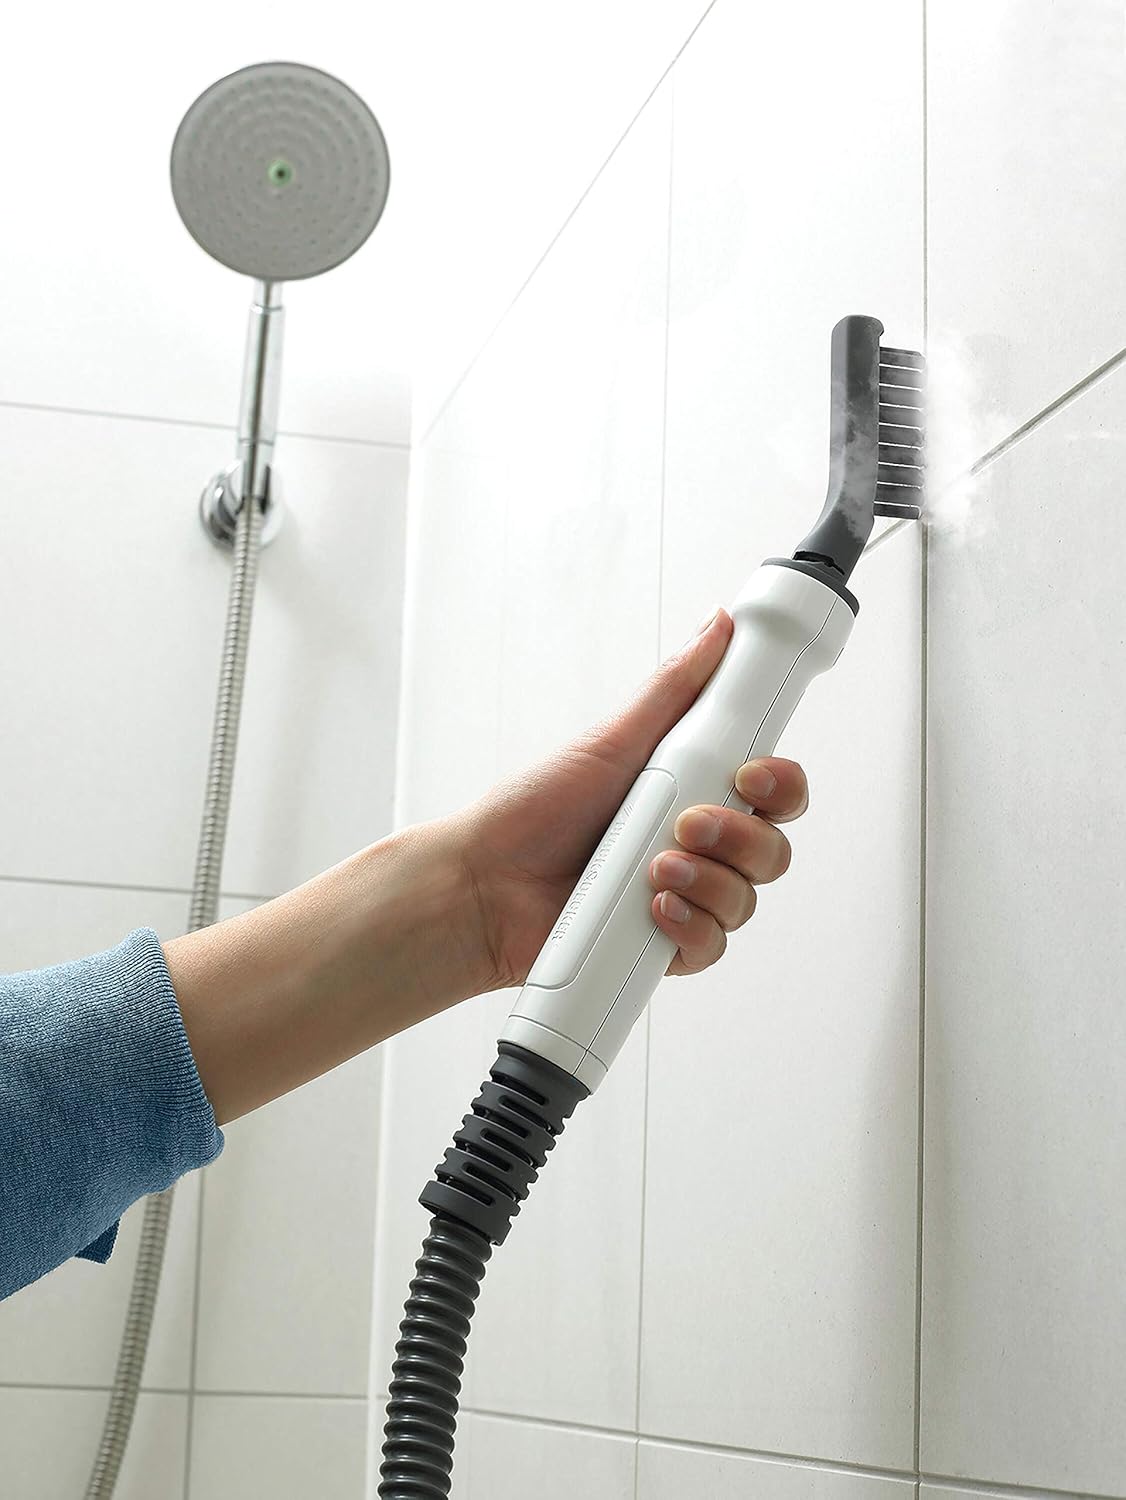
Figure 6: The Delta mop head effectively cleaning a bathroom corner.
6. Manutenzione
6.1 Cleaning Mop Pads and Accessories
Mop pads are machine washable. Wash them separately from other laundry to avoid lint transfer. Do not use bleach or fabric softeners.
- Remove mop pads after each use.
- Machine wash at a low temperature (e.g., 30-40°C) or hand wash.
- Allow to air dry completely before reuse or storage.
- Wipe down other accessories with a damp stoffa.
6.2 Decalcificazione dell'apparecchio
Regular descaling is important to maintain performance, especially in hard water areas.
- Mescolare una soluzione composta da parti uguali di aceto bianco e acqua.
- Riempire il serbatoio dell'acqua con la soluzione decalcificante.
- Run the steam mop until the tank is empty.
- Rinse the tank and run two full tanks of clean water through the appliance to flush out any remaining solution.
6.3 Conservazione
When not in use, store the steam mop in a dry, safe place.
- Ensure the water tank is empty and the appliance is cool.
- Avvolgere ordinatamente il cavo di alimentazione attorno agli appositi avvolgicavo.
- Conservare tutti gli accessori insieme per evitare di perderli.
7. Risoluzione Dei Problemi
| Problema | Possibile causa | Soluzione |
|---|---|---|
| Non viene prodotto vapore. | Il serbatoio dell'acqua è vuoto. | Riempire il serbatoio dell'acqua. |
| Apparecchio non collegato o interruttore di alimentazione spento. | Ensure the appliance is properly plugged in and switched on. | |
| Heating element not hot enough. | Wait for the indicator light to show it's ready (approx. 15-30 seconds). | |
| Bassa produzione di vapore. | Accumulo di minerali (incrostazioni). | Descale the appliance as described in Section 6.2. |
| Incorrect AutoSelect setting. | Adjust the AutoSelect dial to a higher steam setting if suitable for the surface. | |
| Perdita d'acqua dalla testa del mocio. | Mop pad is oversaturated or not properly attached. | Ensure mop pad is correctly attached and not excessively wet before use. Replace if worn. |
Se il problema persiste dopo aver provato queste soluzioni, contattare l'assistenza clienti.
8. Specifiche
| Specificazione | Valore |
|---|---|
| Dimensioni del prodotto | Dimensioni: 12 x 30 x 121 cm |
| Peso del prodotto | 2 chilogrammi |
| Fattore di forma | Mop style |
| Numero di parti | 13 |
| Batteria richiesta | NO |
| Numero di modello del prodotto | BHSM168DSM-QS |
| Prima data disponibile | 2 ottobre 2020 |
| Paese di origine | Cina |
| Marca | Nero+Decker |
| Caratteristica principale | Portatile |
| Raccomandazione di superficie | Carpet (with glider), Hard Floors |
| Nome del modello | BHSM168DSM-QS |
9. Garanzia e supporto
This product comes with a standard manufacturer's warranty. Please refer to the warranty card included in your package for specific terms and conditions. For technical support, spare parts, or warranty claims, please contact Black+Decker customer service through their official websito o le informazioni di contatto fornite con l'acquisto.
10. Video del prodotto finitoview
Watch this video for a visual guide on assembling and using your Black + Decker BHSM168DSM-QS Steam Mop and its various accessories.
Video: Oltreview of the Black + Decker BHSM168DSM-QS Steam Mop features and usage.
Note: The provided JSON data did not contain a direct m3u8 video URL. A placeholder image URL was used for demonstration purposes, as a direct video embed was not possible with the given data.


