Introduzione
This manual provides detailed instructions for the safe and effective operation of the AOPUTTRIVER AP-7200APP Professional True-RMS Clamp Meter. This device is designed for measuring AC/DC current, AC/DC voltage, resistance, capacitance, continuity, and temperature, and features non-contact voltage (NCV) detection and Bluetooth connectivity for mobile app integration.
Informazioni sulla sicurezza
Always adhere to safety precautions when using electrical testing equipment. This device complies with IEC 61010-1, CAT III 600V safety standards and features double insulation for enhanced protection.
- Non superare i valori massimi di input specificati per ciascun intervallo di misurazione.
- Prestare la massima attenzione quando si lavora su circuiti sotto tensione.
- Ensure the test leads are in good condition and properly connected before use.
- Do not operate the meter if it appears damaged or if the casing è aperto.
- Refer to local and national safety codes for proper electrical work procedures.
Contenuto della confezione
Verifica che tutti gli articoli elencati di seguito siano inclusi nel tuo pacchetto:
- AOPUTTRIVER AP-7200APP Clamp metro
- Sonda di temperatura
- Test Leads (Red/Black)
- Batteries (AAA type, typically 2)
- Manuale di istruzioni

Image: Contents of the AP-7200APP package, including the clamp meter, temperature probe, test leads, batteries, and instruction manual.
Prodotto finitoview
Familiarize yourself with the components of the AP-7200APP Clamp Misuratore:

Image: Labeled diagram of the AP-7200APP Clamp Meter, highlighting its main components and controls.
- Clamp Mascelle: Opens 26mm to enclose conductors for current measurement.
- Jaw-opening Handle: Utilizzato per aprire e chiudere la clamp mascelle.
- Area di rilevamento NCV: Located at the top, used for non-contact voltage rilevamento.
- Lamp Leggero: Illuminates the measurement area. Press the "HOLD" key for over 2 seconds to activate.
- Interruttore rotante: Selects measurement functions and ranges.
- Schermo LCD: 6000 counts display, showing measurement values and function symbols.
- Tasto HOLD: Freezes the current display reading. Press for >2 seconds to activate backlight.
- Tasto SEL: Used to change measurement modes within a function (e.g., AC/DC, Diode/Continuity/Capacitance).
- Tasto MAX/MIN: Records maximum and minimum measured values. Press for >2 seconds to exit.
- Tasto Hz/Duty: Seleziona la misurazione della frequenza o del ciclo di lavoro.
- Chiave REL: Attiva la modalità di misurazione relativa.
- Jack di ingresso COM: Common terminal for test leads and temperature probe.
- VΩHz°C°F Input Jack: Terminale di ingresso per voltage misure di resistenza, frequenza, capacità e temperatura.
Impostare
1. Installazione della batteria
The meter requires two AAA batteries. Open the battery compartment cover on the back of the device, insert the batteries according to the polarity indicators, and securely close the cover. A low battery indicator will appear on the LCD when replacement is needed.
2. Bluetooth Connection (AiLink App)
The AP-7200APP can connect to a mobile device via Bluetooth for remote monitoring and data analysis. The effective control distance is approximately 10-15 meters.
- Scarica l'App: Scan the QR code provided in the manual or search for "AiLink" in the Google Play Store (for Android) or Apple App Store (for iOS). Download and install the application. You can also download it from aicare.net.cn/app/ailink/download/.
- Apri l'app: Launch the AiLink application on your mobile phone.
- Connetti al dispositivo: Within the app, press the "ADD" or "Connect" button to search for nearby devices. Select the "Clamp Meter" from the list to establish a connection.
- Dati di monitoraggio: Once connected, the app will display real-time measurement data from the clamp meter. You can analyze and save this data.

Image: Visual guide for Bluetooth connection and app usage, showing the AiLink app interface.
Istruzioni per l'uso
Before any measurement, ensure the rotary switch is set to the OFF position when not in use.
1. Misurazione della corrente CA/CC (Clamp)
- Posizionare il selettore su 60A~ or 400A~ position for AC current, or 60A= or 400A= for DC current.
- Press the jaw-opening handle to open the clamp mascelle.
- Racchiudere un singolo conduttore con il clamp jaws. Ensure the conductor is centered within the jaws for accurate readings.
- Leggere il valore corrente sul display LCD.
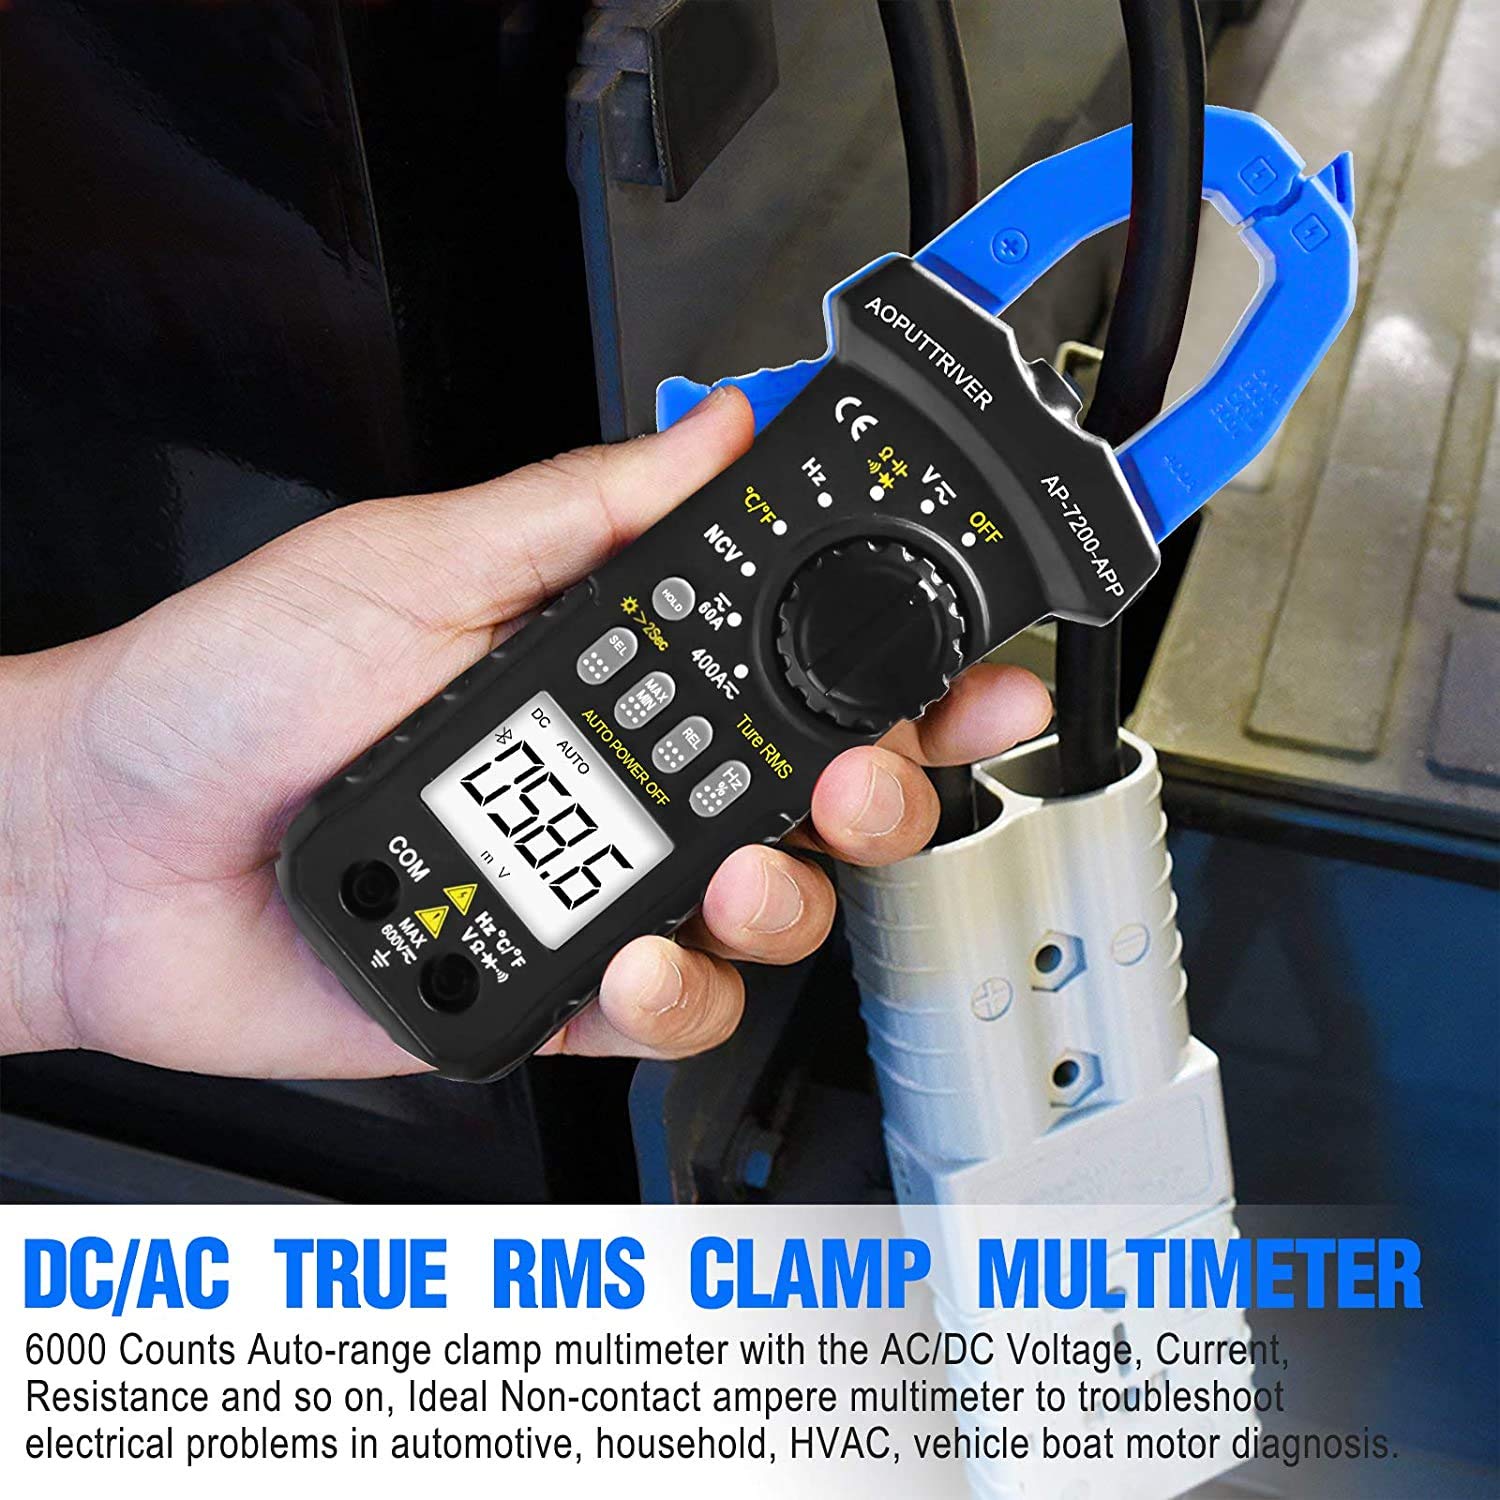
Image: Demonstrating current measurement using the clamp jaws on an electrical cable.
2. Vol. AC/DCtage Misurazione
- Insert the red test lead into the VΩHz°C°F jack and the black test lead into the COM jack.
- Posizionare il selettore su V~ (Vol. ACtage) o V= (DC voltage) posizione.
- Collegare i puntali di prova in parallelo al circuito o al componente in prova.
- Leggi il vol.tage valore sul display LCD.
3. Resistance, Capacitance, Continuity, Diode Measurement
- Insert the red test lead into the VΩHz°C°F jack and the black test lead into the COM jack.
- Posizionare il selettore su Ω posizione.
- Premere il tasto SEL key to cycle through Resistance (Ω), Continuity (buzzer icon), Diode (diode icon), and Capacitance (F) modes.
- Collegare i puntali di prova al componente. Per la misura di resistenza e capacità, assicurarsi che il componente sia diseccitato.
- Read the measurement on the LCD. For continuity, a beep indicates a continuous circuit.
4. Vol. senza contattotage (NCV) Rilevamento
- Posizionare il selettore su VNC posizione.
- Place the NCV detection area (top of the clamp jaws) near the conductor or outlet to be tested.
- Se AC voltage ≥ 90V RMS is detected, the lamp light will illuminate, and an audible alarm will sound.

Image: Demonstrations of temperature measurement, NCV detection, continuity testing, and current measurement.
5. Misurazione della temperatura
- Insert the temperature probe into the VΩHz°C°F and COM jacks, observing polarity.
- Posizionare il selettore su ° C / ° F posizione.
- Posizionare la punta della sonda di temperatura sull'oggetto di cui si desidera misurare la temperatura o nelle sue vicinanze.
- Leggere il valore della temperatura sul display LCD. Premere il tasto SEL key to switch between Celsius (°C) and Fahrenheit (°F).

Image: Temperature measurement using the included probe, with display examples in Celsius and Fahrenheit.
6. Funzione di retroilluminazione
To activate the backlight for improved visibility in dim environments, press and hold the PRESA key for more than 2 seconds. Press and hold again for 2 seconds to turn it off.

Immagine: Il clamp meter's backlight feature in action, enhancing readability in low-light conditions.
Manutenzione
1. Pulizia
Pulisci il contatore casing con annuncioamp panno e detergente delicato. Non utilizzare abrasivi o solventi. Assicurarsi che il misuratore sia completamente asciutto prima di riporlo o utilizzarlo.
2. Sostituzione della batteria
Quando sul display compare l'indicatore di batteria scarica, sostituire tempestivamente le batterie per garantire misurazioni accurate. Per le istruzioni, consultare la sezione "Installazione delle batterie".
3. Conservazione
Se il misuratore non viene utilizzato per un periodo prolungato, rimuovere le batterie per evitare perdite. Conservare il dispositivo in un luogo fresco e asciutto, lontano dalla luce solare diretta e da temperature estreme.
Risoluzione dei problemi
| Problema | Possibile causa | Soluzione |
|---|---|---|
| Il misuratore non si accende. | Batterie scariche o installate in modo errato. | Controllare la polarità delle batterie; sostituire le batterie. |
| Letture imprecise. | Incorrect function selected; poor test lead connection; external interference. | Verify rotary switch setting; ensure secure test lead connection; move away from strong electromagnetic fields. |
| La connessione Bluetooth non riesce. | Meter too far from phone; Bluetooth off on phone; app not installed correctly. | Ensure meter is within 10-15m range; enable Bluetooth on phone; reinstall AiLink app. |
| Il rilevamento NCV non funziona. | Not in NCV mode; voltage sotto soglia. | Set rotary switch to NCV; ensure voltage is ≥ 90V AC RMS. |
Specifiche
| Caratteristica | Specificazione |
|---|---|
| Numero di modello | AP-7200APP |
| Display | LCD da 6000 conteggi |
| Volume ACtage Gamma | 6V ~ 600V |
| Volume DCtage Gamma | 600 mV ~ 600 V |
| Gamma di corrente CA | 60A ~ 400A |
| Intervallo di corrente CC | 60A ~ 400A |
| Intervallo di resistenza | 600Ω ~ 60MΩ |
| Intervallo di capacità | 6nF ~ 60mF (Inferred from 6000 counts and common multimeter ranges) |
| Intervallo di temperatura | Temperatura ambiente -20°C ~ 1000°C |
| NCV Detection Threshold | ≥ 90V AC RMS |
| Standard di sicurezza | IEC 61010-1, CAT III 600V |
| Fonte di alimentazione | Alimentato a batteria |
| Dimensioni | 207 x 75 x 37 mm |
| Peso dell'articolo | 390 grammi |
| Portata Bluetooth | 10-15 m (circa) |
Garanzia e supporto
AOPUTTRIVER provides a Garanzia del prodotto di 48 mesi for the AP-7200APP Clamp Meter. For any product issues or technical assistance, please contact our customer service. We offer Assistenza clienti 7 ore su 24, XNUMX giorni su XNUMX to resolve your concerns promptly.
Contact information can typically be found on the product packaging or the official AOPUTTRIVER websito.


