1. Introduzione
This manual provides detailed instructions for the installation, operation, and maintenance of your Zooz 800 Series Z-Wave Long Range S2 Dimmer Switch, model ZEN77 800LR. This device is designed to provide wireless brightness control for your lighting fixtures within a Z-Wave network.

Image 1.1: The Zooz ZEN77 800LR Dimmer Switch and its retail packaging. The packaging highlights the 'S2 dimmer 800 ZEN77 800LR' model and includes a QR code for product registration.
2. Informazioni importanti sulla sicurezza
Please read all safety precautions before installing or operating the device. Failure to follow these instructions may result in electric shock, fire, or property damage.
- Rischio elettrico: Installation must be performed by a qualified electrician or trained personnel. Ensure power is turned OFF at the circuit breaker before installation.
- Limiti di carico: Non superare 100 W for LED's or 300 W for incandescent lampadine.
- Incompatible Loads: Do NOT connect this dimmer to chandeliers, ceiling fans, receptacles, motors, or home appliances. This device is for lighting control only.
- Cavo neutro richiesto: A neutral wire is mandatory for the proper operation of this dimmer switch. Verify its presence in your electrical box before proceeding with installation.
- Solo per uso interno: Questo dispositivo è progettato per l'uso in ambienti interni ed asciutti.
3. Specifiche del prodotto
| Parametro | Valore |
|---|---|
| Numero di modello | ZEN77LR |
| Regione Z-Wave | Stati Uniti/Canada/Messico |
| Energia | 120 VAC, 60 Hz |
| Carichi massimi | 300 W Incandescent, 100 W LED's |
| Gamma di onde Z | Up to 100 feet line of sight (hub to repeater) |
| Temperatura di esercizio | 32-104° F (0-40° C) |
| Installazione e utilizzo | Solo al chiuso |
| Protocollo di connettività | Z-Wave |
| Tipo di circuito | 3-way, 4-way, 5-way compatible |
| Certificazioni | ETL quotato |
| Peso dell'articolo | 5.3 once |
| Codice UPC | 853478006773 |
4. Installazione
4.1 Lista di controllo pre-installazione
- Verify that a neutral wire is present in your electrical box. This is essential for the dimmer's operation.
- Garantire l'acqua totaletage of your lighting fixtures does not exceed 100W for LED or 300W for incandescent.
- Turn OFF power to the light switch circuit at the circuit breaker before beginning any wiring.

Image 4.1: The dimmer switch highlighting the requirement for a neutral wire and specifying maximum load capacities (100W LED, 300W Incandescent). It also warns against connecting to tube lights, chandeliers, or fans.
4.2 Istruzioni per il cablaggio
The ZEN77 800LR dimmer switch supports simple 3-way and 4-way setups using existing on/off switches (not dimmers). No add-on switches are required. Wire the Zooz dimmer in the electrical box that has a direct connection to both power (line) and neutral.
- Connect the Line (hot) wire to the Line terminal on the dimmer.
- Connect the Load (to light fixture) wire to the Load terminal on the dimmer.
- Connect the Neutral wire to the Neutral terminal on the dimmer.
- For 3-way/4-way setups, connect the traveler wire(s) to the designated traveler terminal(s) on the dimmer. Refer to the detailed wiring diagrams provided on the Zooz website for specific configurations.
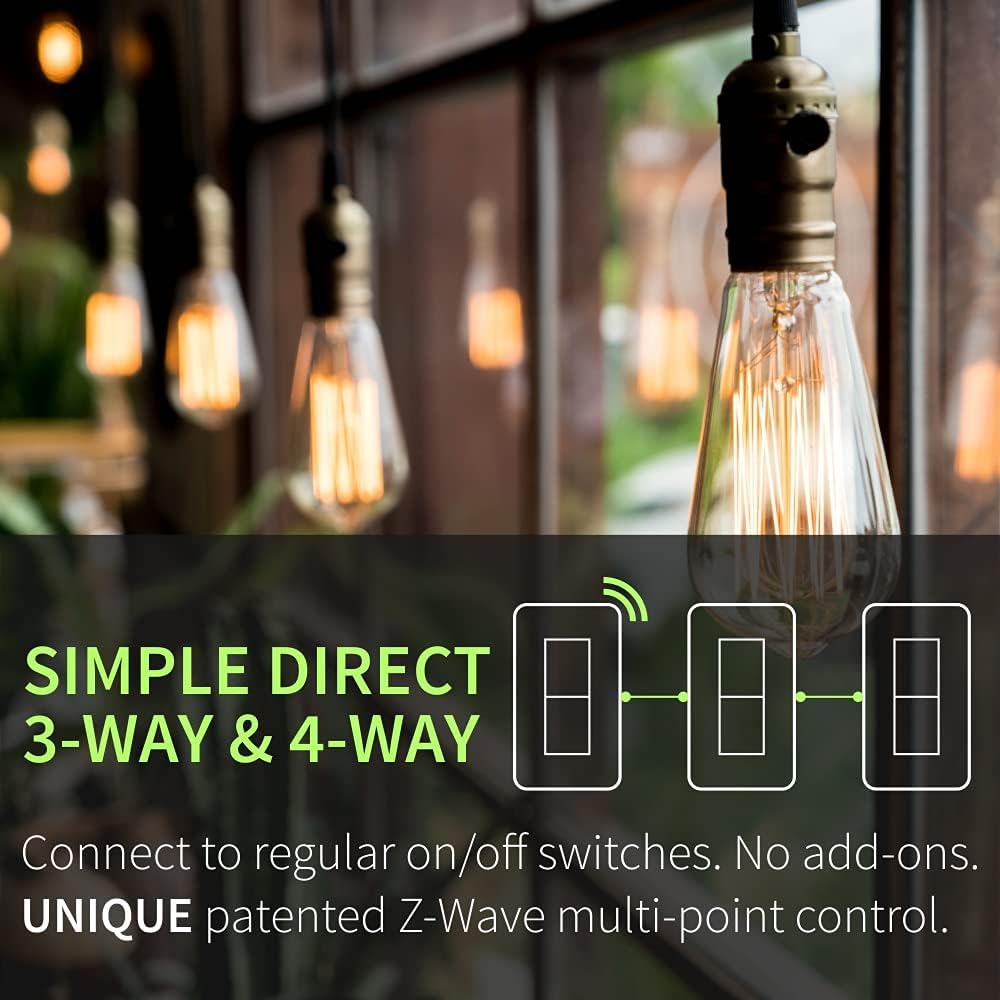
Image 4.2: A diagram showing the simple direct 3-way and 4-way wiring solution, indicating connection to regular on/off switches without the need for add-ons.
4.3 Installazione fisica
The compact design of the ZEN77 800LR (1.16" deep) allows for easier installation in shallow or crowded electrical boxes.
- After wiring, carefully push the switch into the electrical box.
- Secure the switch to the box using the provided screws.
- Attach the wall plate (not included) over the switch.

Immagine 4.3: Un lato profile of the dimmer switch illustrating its shallow depth of 1.16 inches, designed for easier fitting in electrical boxes.
4.4 Inclusione Z-Wave (associazione)
Once the switch is physically installed and power is restored, you can add it to your Z-Wave network using Smart Start or classic inclusion methods.
- Avvio intelligente: Scan the QR code on the switch or packaging with your Z-Wave hub's app if it supports Smart Start. The device will automatically include when powered on.
- Inclusione classica: Put your Z-Wave hub into inclusion mode. Then, tap the upper paddle of the dimmer switch 3 times quickly. The LED indicator will confirm successful inclusion.
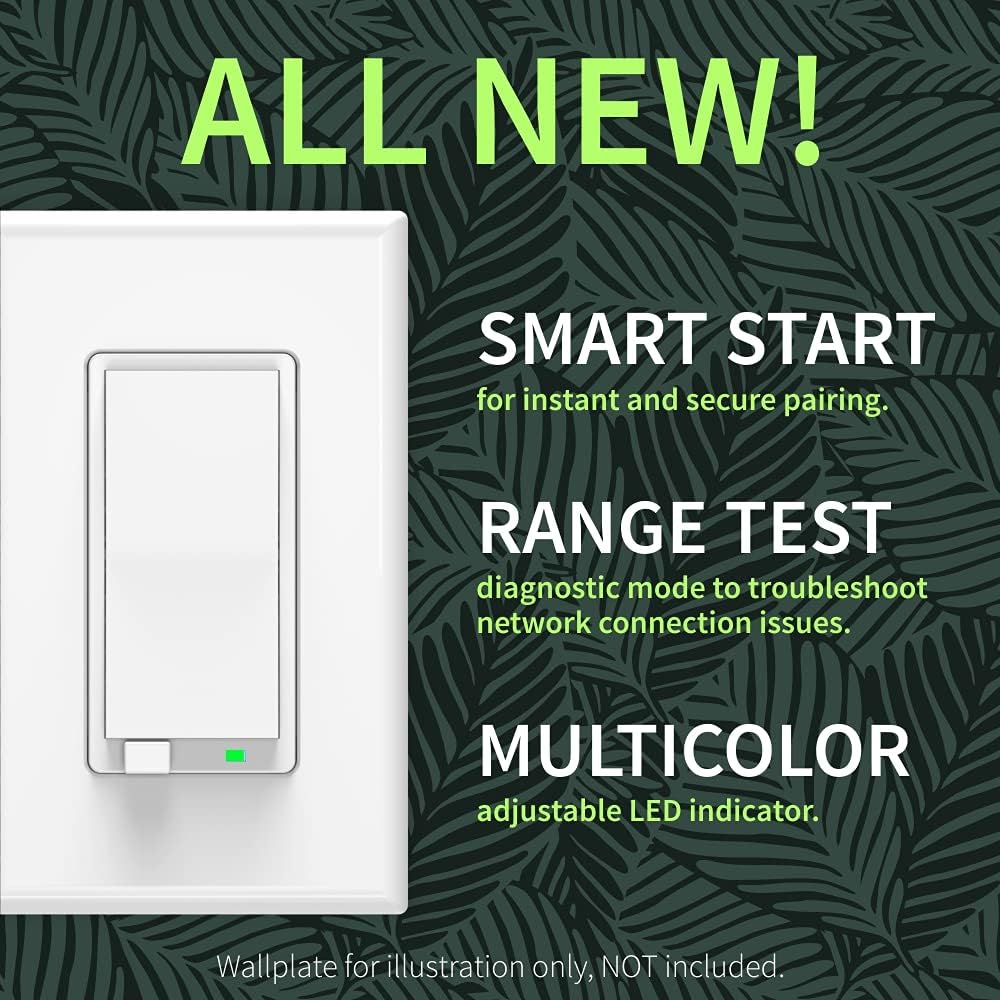
Image 4.4: The dimmer switch showcasing its Smart Start feature for easy pairing, a built-in Range Test for diagnostics, and a customizable multicolor LED indicator.
5. Istruzioni per l'uso
5.1 Controllo di base
- Attiva/disattiva: Tap the upper paddle to turn lights ON, tap the lower paddle to turn lights OFF.
- Oscura/Illumina: Press and hold the upper paddle to brighten, press and hold the lower paddle to dim.
- Luminosità massima istantanea: Double-tap the upper paddle to instantly turn lights ON to full brightness.
- Last Brightness Level: A single tap on the upper paddle will turn lights ON to the last set brightness level. This behavior can be programmed via your Z-Wave hub.

Image 5.1: An illustration demonstrating the double-tap function for instant full brightness and the hold function on the lower paddle for night light mode (dimmed light on).
5.2 Funzionalità avanzate
The ZEN77 800LR offers several advanced features configurable through your Z-Wave hub's advanced settings:
- Modalità luce notturna: Hold the lower paddle to turn on lights at a very low, dimmed level.
- Multi-color LED Indicator: Customize the color and brightness level of the LED indicator. It can also be set to indicate network status or load status.
- Controllo della scena: If supported by your Z-Wave hub, the switch can trigger scenes with multi-tap commands.
- Controllo vocale: This dimmer can be controlled via voice commands when connected to a compatible Z-Wave hub (e.g., Z-Box Hub, SmartThings, Hubitat, Home Assistant) that integrates with smart speakers. It will NOT work directly with smart speakers without a Z-Wave hub.
6. Manutenzione
To maintain the performance and appearance of your dimmer switch:
- Pulisci l'interruttore e la piastra a muro con un panno morbido eamp panno. Evitare detergenti abrasivi o solventi.
- Ensure the switch is not exposed to excessive moisture or direct water spray.
- Periodically check electrical connections for tightness, especially if any issues arise. Always turn off power at the breaker before inspecting wiring.
7. Risoluzione Dei Problemi
If you experience issues with your Zooz ZEN77 800LR dimmer switch, refer to the following common solutions:
- L'interruttore non risponde: Ensure power is ON at the circuit breaker. Verify all wiring connections are secure.
- Lights Flicker or Don't Dim Properly: Check that your bulbs are dimmable LEDs or incandescent bulbs. Ensure the total wattage does not exceed the specified limits (100W LED, 300W Incandescent).
- Cannot Include to Z-Wave Network: Ensure your Z-Wave hub is in inclusion mode. Try moving the hub closer to the switch temporarily. Perform a Z-Wave exclusion first, then try inclusion again.
- Z-Wave Range Issues: The ZEN77 800LR includes a built-in range test tool to diagnose network connection issues. Consult your Z-Wave hub's documentation or the Zooz website for instructions on how to activate and interpret the range test.
- Nessun filo neutro: This dimmer requires a neutral wire. If your electrical box lacks a neutral wire, this dimmer is not compatible.
8. Garanzia e supporto
Zooz products typically come with a manufacturer's warranty. For specific warranty details and to register your product for an extended warranty, please visit the official Zooz websito.
For additional support, detailed wiring diagrams, or advanced configuration guides, please visit the Zooz websito oppure contatta il loro servizio clienti.


