1. Introduzione
This manual provides essential information for the installation, operation, and maintenance of the American Standard Trane Defrost Control, model CNT08177_ver1. This Original Equipment Manufacturer (OEM) component is designed to manage the defrost cycle in compatible HVAC systems, ensuring efficient and reliable performance. Please read this manual thoroughly before installation and operation.
2. Informazioni sulla sicurezza
ATTENZIONE: Rischio di scossa elettrica. Scollegare l'alimentazione prima di effettuare interventi di manutenzione.
Installation and servicing should only be performed by qualified HVAC technicians. Failure to follow these instructions could result in property damage, personal injury, or death.
- Always disconnect power to the HVAC unit before installing, servicing, or removing the defrost control.
- Assicurarsi che tutti i collegamenti elettrici siano conformi alle normative elettriche locali e nazionali.
- Non utilizzare l'unità se i componenti sono danneggiati.
- Indossare adeguati dispositivi di protezione individuale (DPI) durante l'installazione e la manutenzione.
3. Prodotto finitoview
The Trane CNT08177_ver1 Defrost Control is an Original Equipment Manufacturer (OEM) component designed for specific American Standard and Trane HVAC units. It is a critical part of the heat pump system, responsible for initiating and terminating the defrost cycle to prevent ice buildup on the outdoor coil.
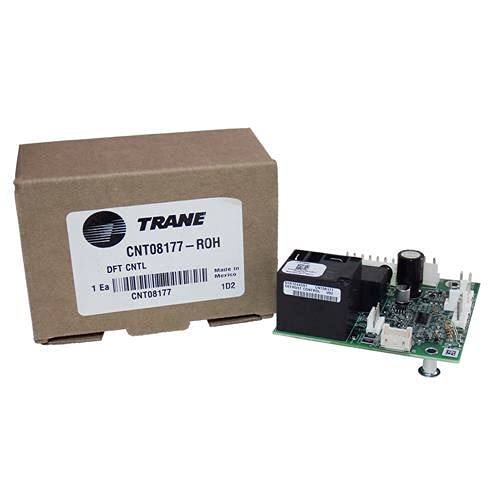
Figure 3.1: The Trane CNT08177 Defrost Control module alongside its product packaging. The packaging clearly displays the model number and brand.
This control board replaces several older models, including D161244G, D161244-G01, D161244G01, CNT8177, CNT-8177, CNT08177, CNT7932, CNT-7932, and CNT07932.

Figura 3.2: Un dettaglio view of the Trane CNT08177 Defrost Control circuit board, showing various electronic components, connectors, and relays. This image highlights the intricate design of the control module.
It is commonly found in the following American Standard units:
- A4HP4017A1000BA
- A4HP4036A1000BA
- A4HP4018A1000BA
- A4HP4023A1000BA
- A4HP6030A1000AA
- A4HP6036A1000AA
- A4HP6024A1000AA
- A4HP4024A1000BA
- A4HP4048A1000BA
- A4HP4042A1000BA
- A4HP4060A1000BA
- A4HP6018A1000AA
- A4HP4030A1000BA

Figure 3.3: An official stamp indicating that the product is an Original Equipment Manufacturer (OEM) component from Trane. This signifies authenticity and compatibility with Trane systems.
4. Installazione
This section outlines the general procedure for installing the defrost control. Refer to your specific HVAC unit's service manual for detailed wiring diagrams and location of the control board.
- Disconnessione dell'alimentazione: Locate the main power disconnect for the outdoor HVAC unit and turn it OFF. Verify power is off using a multimeter.
- Pannello di controllo degli accessi: Open the control panel access cover on the outdoor unit.
- Identify Old Control: Locate the existing defrost control board. Note the position and connection of all wires. It is recommended to take a photograph before disconnecting any wires.
- Scollegare i fili: Carefully disconnect all wires from the old defrost control board.
- Rimuovi vecchio controllo: Unmount the old defrost control board from its mounting points.
- Mount New Control: Mount the new Trane CNT08177_ver1 defrost control board in the same location. Ensure it is securely fastened.
- Collegare i fili: Reconnect all wires to the new defrost control board, ensuring each wire is connected to its correct terminal as per the unit's wiring diagram. Double-check all connections for tightness.
- Pannello di accesso sicuro: Close and secure the control panel access cover.
- Ripristina alimentazione: Restore power to the outdoor HVAC unit.
- Operazione di prova: Monitor the unit's operation to ensure the defrost control functions correctly.
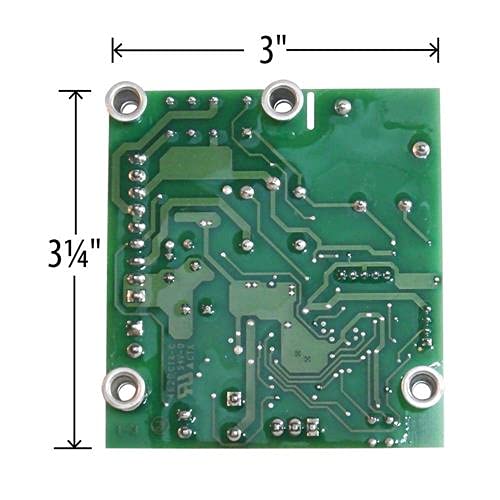
Figure 4.1: The underside of the Trane CNT08177 Defrost Control board, illustrating its compact dimensions of approximately 3 inches by 3.75 inches. This view shows the mounting points and circuit traces.
5. Funzionamento
The Trane CNT08177_ver1 Defrost Control operates automatically within the HVAC system. Its primary function is to monitor the outdoor coil temperature and ambient conditions to determine when a defrost cycle is necessary. When conditions indicate ice buildup, the control initiates a defrost cycle, typically by reversing the refrigerant flow (in heat pumps) and activating auxiliary heat to melt the ice.
During a defrost cycle, the outdoor fan typically stops, and the compressor continues to run. Water may be observed draining from the outdoor unit as ice melts. Once the coil temperature reaches a predetermined set point, or after a set duration, the defrost cycle terminates, and the unit returns to normal heating operation.
No user intervention is required for the operation of this control board once correctly installed.
6. Manutenzione
The defrost control itself requires no routine maintenance. However, regular maintenance of the overall HVAC system is crucial for its proper functioning and longevity.
- Controllo annuale del sistema: Have a qualified HVAC technician perform an annual inspection and tune-up of your heat pump system.
- Pulizia della bobina: Ensure outdoor coils are kept clean and free of debris to allow for proper heat exchange and prevent excessive ice buildup.
- Liquidazione: Maintain adequate clearance around the outdoor unit to ensure proper airflow.
- Ispezione del cablaggio: Periodically inspect wiring connections for signs of wear, corrosion, or looseness. (Only perform with power disconnected.)
7. Risoluzione Dei Problemi
Issues related to defrosting are often indicative of a problem with the defrost control board or associated components. Consult a qualified HVAC technician for diagnosis and repair.
| Sintomo | Possibile causa | Azione |
|---|---|---|
| Unit not defrosting (ice buildup on outdoor coil) |
|
|
| Unit frequently entering defrost cycle |
|
|
| Unit stuck in defrost mode |
|
|
Nota: Attempting repairs without proper training and tools can be dangerous and may void warranties. Always prioritize safety.
8. Specifiche
| Attributo | Dettaglio |
|---|---|
| Tipo di prodotto | Scheda di controllo dello sbrinamento |
| Marca | Trane / American Standard OEM |
| Numero di modello | CNT08177_ver1 |
| Sostituisce / Sostituisce | D161244G, D161244-G01, D161244G01, CNT8177, CNT-8177, CNT08177, CNT7932, CNT-7932, CNT07932 |
| Peso dell'articolo | 1 libbra |
| Primo disponibile | 8 giugno 2021 |
9. Garanzia e supporto
As an OEM component, warranty coverage for the Trane CNT08177_ver1 Defrost Control is typically provided by the manufacturer (Trane) or the seller. Specific warranty terms may vary. Please retain your proof of purchase for any warranty claims.
For technical support, service, or warranty inquiries, please contact your authorized Trane or American Standard dealer or the point of purchase. Do not attempt to repair the control board yourself, as this may void the warranty.
Produttore: Trane


