1. Introduzione
This manual provides detailed instructions for the installation, operation, and maintenance of your LAMAX T4 Car Camera. Please read this manual thoroughly before using the device to ensure proper function and safety. The LAMAX T4 is a Full HD dashcam designed to record your journeys, featuring a magnetic mount, super capacitor power, and a 140-degree wide-angle lens.
2. Contenuto della confezione
Verifica che tutti gli articoli elencati di seguito siano presenti nel tuo pacco:
- LAMAX T4 Dashcam
- supporto magnetico
- Car Adapter with additional USB port
- 3M Replacement Adhesive
- Mini USB PC Cable
- Optional Magnetic 3M Holder with GPS (accessory)

Figure 2.1: Contents of the LAMAX T4 Car Camera package. Includes the dashcam, magnetic mount, car charger, USB cable, and adhesive pads.
3. Prodotto finitoview
The LAMAX T4 Car Camera is equipped with several features to enhance your driving experience and provide reliable recording. Key features include Full HD video resolution, a 140-degree wide-angle lens, Wide Dynamic Range (WDR) for improved image quality in varying light conditions, a G-sensor for incident detection, and a super capacitor for enhanced durability.
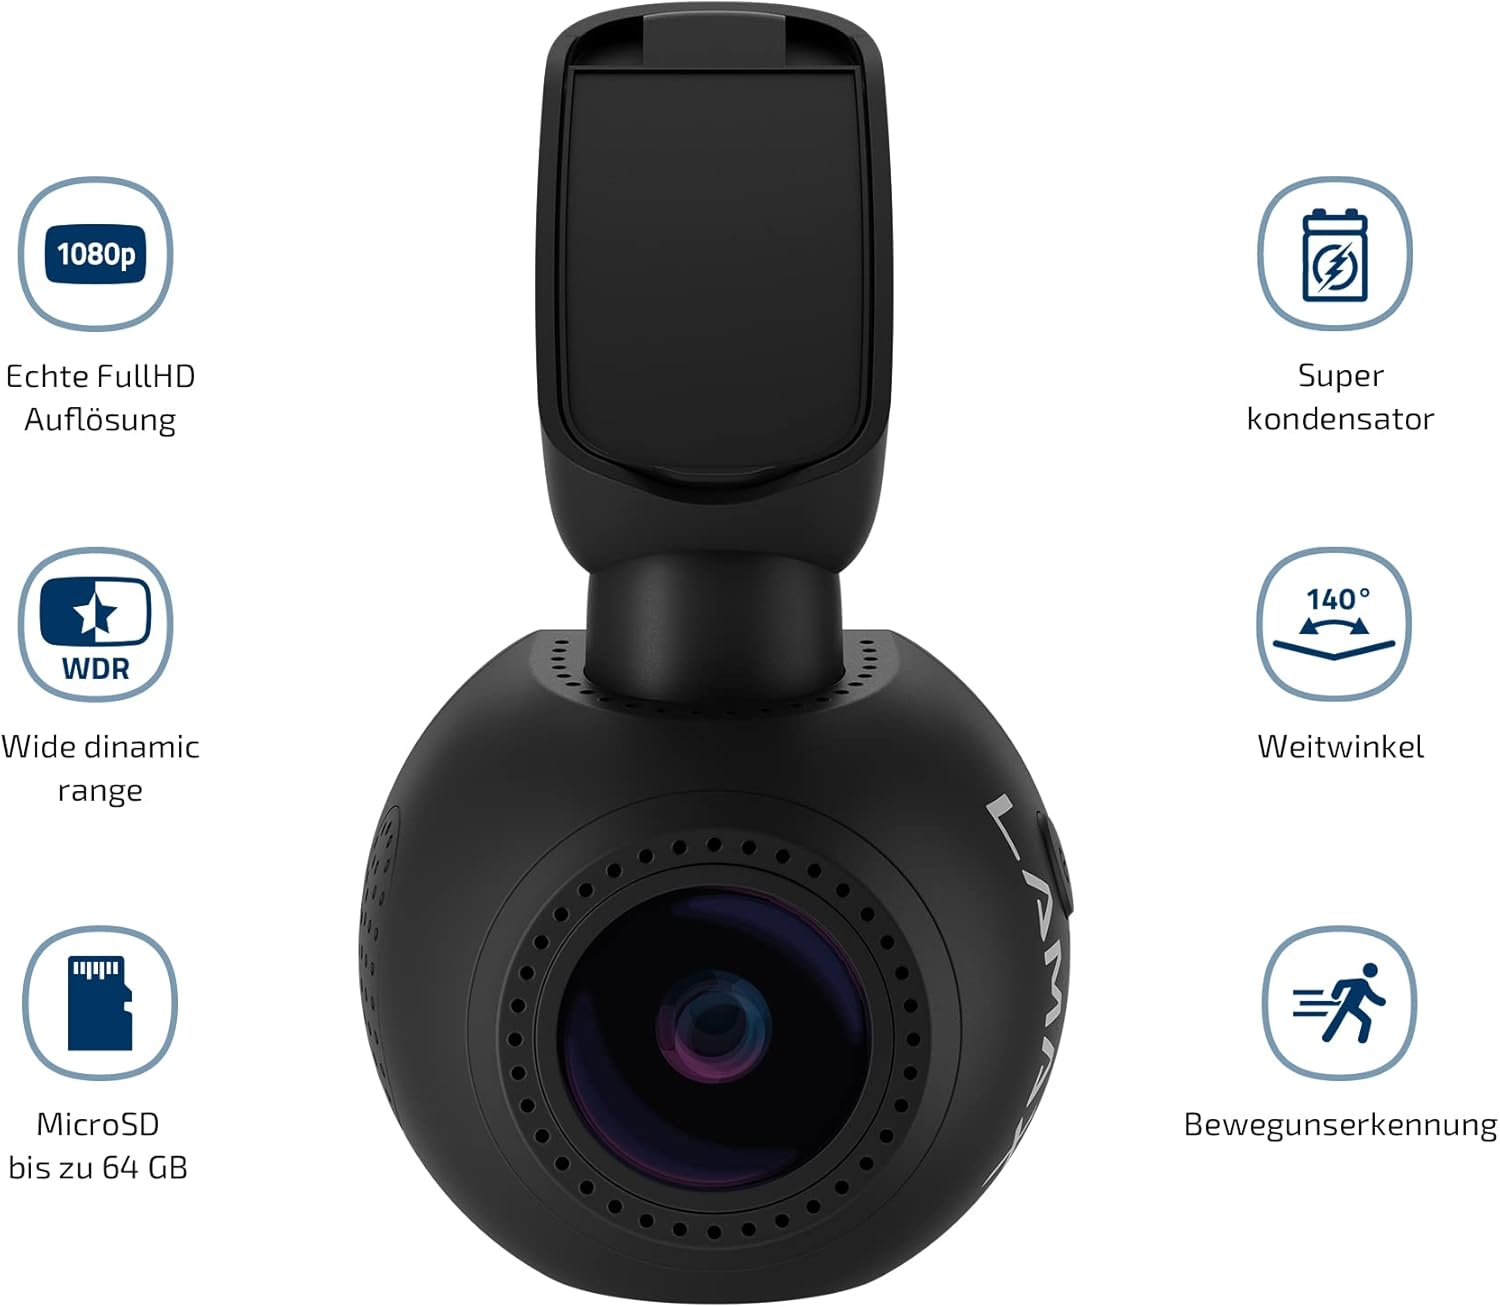
Figura 3.1: Oltreview of LAMAX T4 Car Camera features, highlighting 1080p Full HD, Super Capacitor, 140-degree wide angle, WDR, MicroSD support up to 64GB, and Motion Detection.
3.1 Identificazione dei componenti
Familiarize yourself with the various parts of your LAMAX T4 dashcam:
- Obiettivo della fotocamera: Registra video.
- Schermo da 1.5 pollici: Per viewing vivo footage, riproduzione e navigazione nel menu.
- Magnetic Mount Connector: For attaching the camera to the magnetic holder.
- Slot per scheda MicroSD: Inserisci qui la tua scheda di memoria.
- Microfono: Registra l'audio.
- Indicatore LED: Mostra lo stato del dispositivo (ad esempio, registrazione, carica).
- Pulsanti di controllo: For menu navigation and function selection.
- Mini porta USB: Per l'alimentazione e il trasferimento dati.

Figure 3.2: Detailed diagram identifying the components of the LAMAX T4 Car Camera, including the magnetic mount, power input, MicroSD slot, microphone, LED indicator, and control buttons.
4. Impostazione
4.1 Montaggio della telecamera
- Pulisci l'area del parabrezza in cui intendi montare la telecamera. Assicurati che non ostruisca il tuo view.
- Attach the magnetic holder to the windshield using the provided 3M adhesive pad. Press firmly for at least 30 seconds to ensure a secure bond.
- Slide the LAMAX T4 dashcam onto the magnetic holder. The magnetic connection will secure the camera. An additional lock mechanism on the mount provides extra stability.
- Regolare l'angolazione della telecamera per garantire una visione chiara view della strada da percorrere.

Figure 4.1: LAMAX T4 Car Camera mounted on the windshield, showing the driver's perspective of the road.

Figura 4.2: primo piano view of the LAMAX T4 Car Camera securely mounted on the car windshield.
4.2 Collegamento di alimentazione
- Connect the Mini USB cable to the camera's Mini USB port.
- Plug the other end of the cable into the provided car adapter.
- Insert the car adapter into your vehicle's 12V cigarette lighter socket.
- The camera will automatically power on and begin recording when the vehicle's ignition is turned on. The car adapter also includes an additional USB port for charging other devices.
4.3 Inserimento di una scheda MicroSD
The LAMAX T4 supports MicroSD cards up to 64GB. A high-speed card (Class 10 or higher) is recommended for optimal performance.
- With the camera powered off, locate the MicroSD card slot on the side of the device.
- Inserire la scheda MicroSD con i contatti dorati rivolti verso il retro della fotocamera finché non scatta in posizione.
- Per rimuoverla, spingere delicatamente la scheda finché non scatta, quindi rilasciarla e verrà espulsa.
4.4 Modulo GPS opzionale
If you have the optional GPS module, attach it to the magnetic mount before attaching the camera. The GPS module records vehicle position and speed, which can be displayed in the video footage.
5. Istruzioni per l'uso
5.1 Accensione/spegnimento
- Automatico: The camera powers on and off automatically with the vehicle's ignition.
- Manuale: Press and hold the power button to manually turn the camera on or off.
5.2 Registrazione video
The LAMAX T4 records in Full HD (1080p) at 30 frames per second. It utilizes loop recording, meaning when the memory card is full, the oldest unprotected filevengono sovrascritti da nuove registrazioni.
- Avvia la registrazione: Recording typically starts automatically when the camera powers on. A flashing LED indicator confirms recording is active.
- Interrompi registrazione: Press the 'OK' button to stop recording. Press again to resume.
- Proteggere Files: During recording, press the 'M' button to manually protect the current recording from being overwritten. Files protected by the G-sensor are also locked.
5.3 Funzione G-Sensor
The integrated G-sensor detects sudden impacts or rapid acceleration/deceleration. When triggered, it automatically locks the current video segment, preventing it from being overwritten during loop recording. The sensitivity of the G-sensor can be adjusted in the camera settings.
5.4 Ampia gamma dinamica (WDR)
WDR technology improves video quality in challenging lighting conditions, such as strong backlighting or rapid changes from dark to bright environments. This ensures clearer details in both bright and dark areas of the image.
5.5 Visualizzazione e navigazione del menu
The 1.5-inch display allows you to view cibo vivotage, play back recorded videos, and access camera settings. Use the control buttons (Up, Down, OK, M) to navigate through the menu options.

Figure 5.1: The LAMAX T4 Car Camera display showing a live view of the road during operation.
5.6 Impostazioni data e ora
È importante impostare la data e l'ora corrette per ottenere tempi video accuratiamps. Access these settings through the camera's menu. Due to the super capacitor, the camera relies on continuous power to maintain date and time settings over extended periods without power. If the camera is left unpowered for several days, the date and time may need to be reset.
6. Manutenzione
6.1 Pulizia della fotocamera
- Per pulire il corpo della fotocamera, utilizzare un panno morbido e asciutto.
- Per la lente, utilizzare un panno e una soluzione specifici per la pulizia delle lenti, per evitare graffi.
- Non utilizzare detergenti abrasivi o solventi.
6.2 Gestione della scheda MicroSD
- Regularly format your MicroSD card (e.g., once a month) using the camera's menu option to maintain optimal performance and prevent data corruption.
- Replace the MicroSD card if you experience frequent recording errors or data loss.
7. Risoluzione Dei Problemi
If you encounter issues with your LAMAX T4, refer to the following common problems and solutions:
- La fotocamera non si accende:
Ensure the car adapter is securely plugged into the 12V socket and the Mini USB cable is firmly connected to the camera. Check if the vehicle's 12V socket is receiving power. - La fotocamera non registra:
Verify that a MicroSD card is inserted correctly and is not full. Format the MicroSD card if necessary. Ensure the camera is receiving continuous power. - Date and time settings are not saved:
The LAMAX T4 uses a super capacitor, which requires continuous power to maintain date and time settings over long periods. If the camera is disconnected from power for more than a few days, the date and time may reset. Reconnect to power and reset the date/time in the settings. - Video quality is poor or license plates are unreadable:
Ensure the camera lens is clean and free from obstructions. Check that the camera is recording in Full HD (1080p) resolution in the settings. While the camera records in Full HD, license plate readability can be affected by distance, speed, and lighting conditions. - Magnetic mount is not stable:
Ensure the windshield surface is clean and dry before applying the 3M adhesive. Press the adhesive firmly for the recommended time. If the adhesive wears out, use a replacement 3M adhesive pad. - Camera freezes or malfunctions:
Try resetting the camera by pressing the reset button (if available) or disconnecting and reconnecting the power. If the issue persists, try using a different MicroSD card.
8. Specifiche
Technical specifications for the LAMAX T4 Car Camera:
| Numero di modello | LMXT4 |
| Risoluzione di acquisizione video | 1080p (Full HD) |
| Fotogrammi al secondo | 30 fps |
| Viewangolo di ing | 140° (horizontal max.) |
| Dimensioni dello schermo | 1.5 pollici |
| Fonte di alimentazione | Super Capacitor, 12V Car Adapter |
| Magazzinaggio | MicroSD card up to 64GB (Class 10 recommended) |
| Caratteristiche speciali | WDR, G-Sensor, Loop Recording, Magnetic Mount, Optional GPS |
| Connettività | Ausiliario, USB |
| Tipo di montaggio | Supporto magnetico |
| Dimensioni del prodotto | Dimensioni: 6 x 16 x 11 cm |
| Peso dell'articolo | 340 grammi |
9. Informazioni sulla garanzia
LAMAX products are covered by a manufacturer's warranty. The specific terms and duration of the warranty may vary by region and retailer. Please retain your proof of purchase for any warranty claims. For detailed warranty information, refer to the documentation provided with your purchase or visit the official LAMAX websito.
10. Assistenza clienti
If you require further assistance or have questions not covered in this manual, please contact LAMAX customer support. You can typically find contact information on the official LAMAX website or through your product retailer. When contacting support, please have your product model (LMXT4) and proof of purchase available.