1. Introduzione
Thank you for choosing the Acekool FT1 18L Digital Air Fryer Oven. This versatile 1800W appliance is designed to provide a healthier way to cook your favorite meals, utilizing rapid air circulation for crispy results with little to no oil. It functions as an all-in-one machine, capable of air frying, baking, grilling, roasting, toasting, dehydrating, and rotisserie cooking. This manual provides essential information for safe operation, maintenance, and troubleshooting to ensure optimal performance and longevity of your appliance.
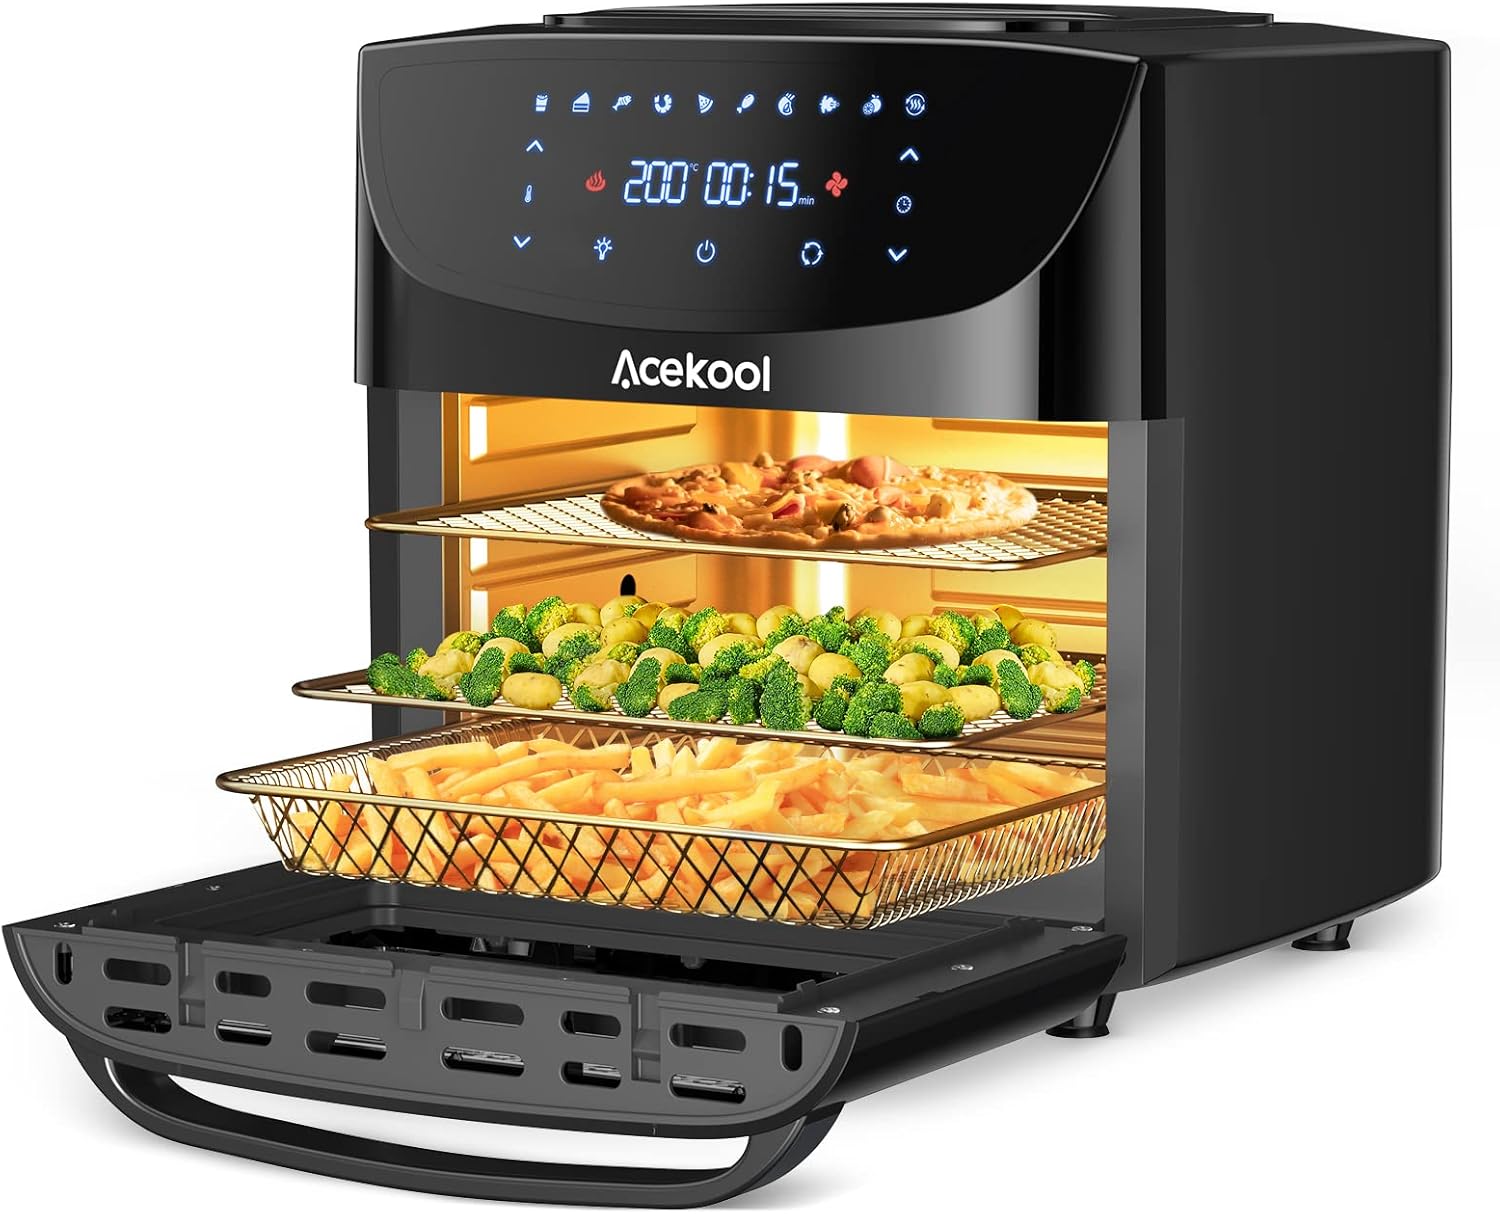
Image: The Acekool FT1 Air Fryer Oven in use, showcasing its multi-level cooking capacity with pizza, broccoli, and fries.
2. Importanti istruzioni di sicurezza
Quando si utilizzano apparecchi elettrici, è necessario seguire sempre le precauzioni di sicurezza di base per ridurre il rischio di incendi, scosse elettriche e lesioni.
- Leggere tutte le istruzioni prima di mettere in funzione l'apparecchio.
- Non toccare le superfici calde. Utilizzare maniglie o manopole. Utilizzare sempre presine o guanti resistenti al calore quando si maneggiano materiali caldi.
- Per proteggersi da scosse elettriche, non immergere il cavo, le spine o l'unità principale in acqua o altri liquidi.
- È necessaria un'attenta supervisione quando un elettrodomestico viene utilizzato da bambini o nelle loro vicinanze.
- Scollegare dalla presa quando non in uso e prima di pulire. Lasciare raffreddare prima di mettere o togliere parti.
- Non utilizzare alcun apparecchio con un cavo o una spina danneggiati oppure dopo che l'apparecchio stesso non funziona correttamente o è stato danneggiato in qualsiasi modo.
- Non utilizzare accessori non raccomandati dal produttore dell'apparecchio, poiché potrebbero causare lesioni.
- Non utilizzare all'aperto.
- Non lasciare che il cavo penda dal bordo del tavolo o del bancone o che tocchi superfici calde.
- Non posizionare sopra o vicino a un fornello a gas o elettrico caldo, oppure in un forno caldo.
- Prestare la massima attenzione quando si sposta un apparecchio contenente olio bollente o altri liquidi bollenti.
- Collegare sempre prima la spina all'apparecchio, quindi collegare il cavo alla presa a muro. Per scollegarlo, posizionare un qualsiasi interruttore su "off", quindi rimuovere la spina dalla presa a muro.
- Non utilizzare l'apparecchio per scopi diversi da quelli previsti.
- Assicurare un'adeguata ventilazione attorno all'apparecchio durante il funzionamento.
- The appliance features an overheating protection system and automatic shut-off for safety.
- The air fryer is constructed with food-grade 304 stainless steel and is PFOA-free and BPA-free.
3. Prodotto finitoview
3.1 Componenti
- Unità principale con pannello di controllo touch screen digitale
- Transparent Glass Window
- Interior Cooking Chamber
- Cavo di alimentazione
3.2 Accessori inclusi
Your Acekool FT1 Air Fryer Oven comes with a comprehensive set of accessories to enhance your cooking experience:
- Air Flow Racks (x2): Per la cottura su più livelli e la circolazione dell'aria.
- Fryer Net Basket (x1): Ideal for fries, chicken nuggets, and other smaller items.
- Drip Tray (x1): Collects excess oil and food debris for easy cleaning.
- Skewers (x8): For preparing kebabs and other skewered dishes.
- Rotisserie Shaft, Forks & Set Screws (x1 set): Per la cottura allo spiedo di polli interi o arrosti.
- Rotisserie Fetch Tool (x1): For safely removing the hot rotisserie shaft from the oven.
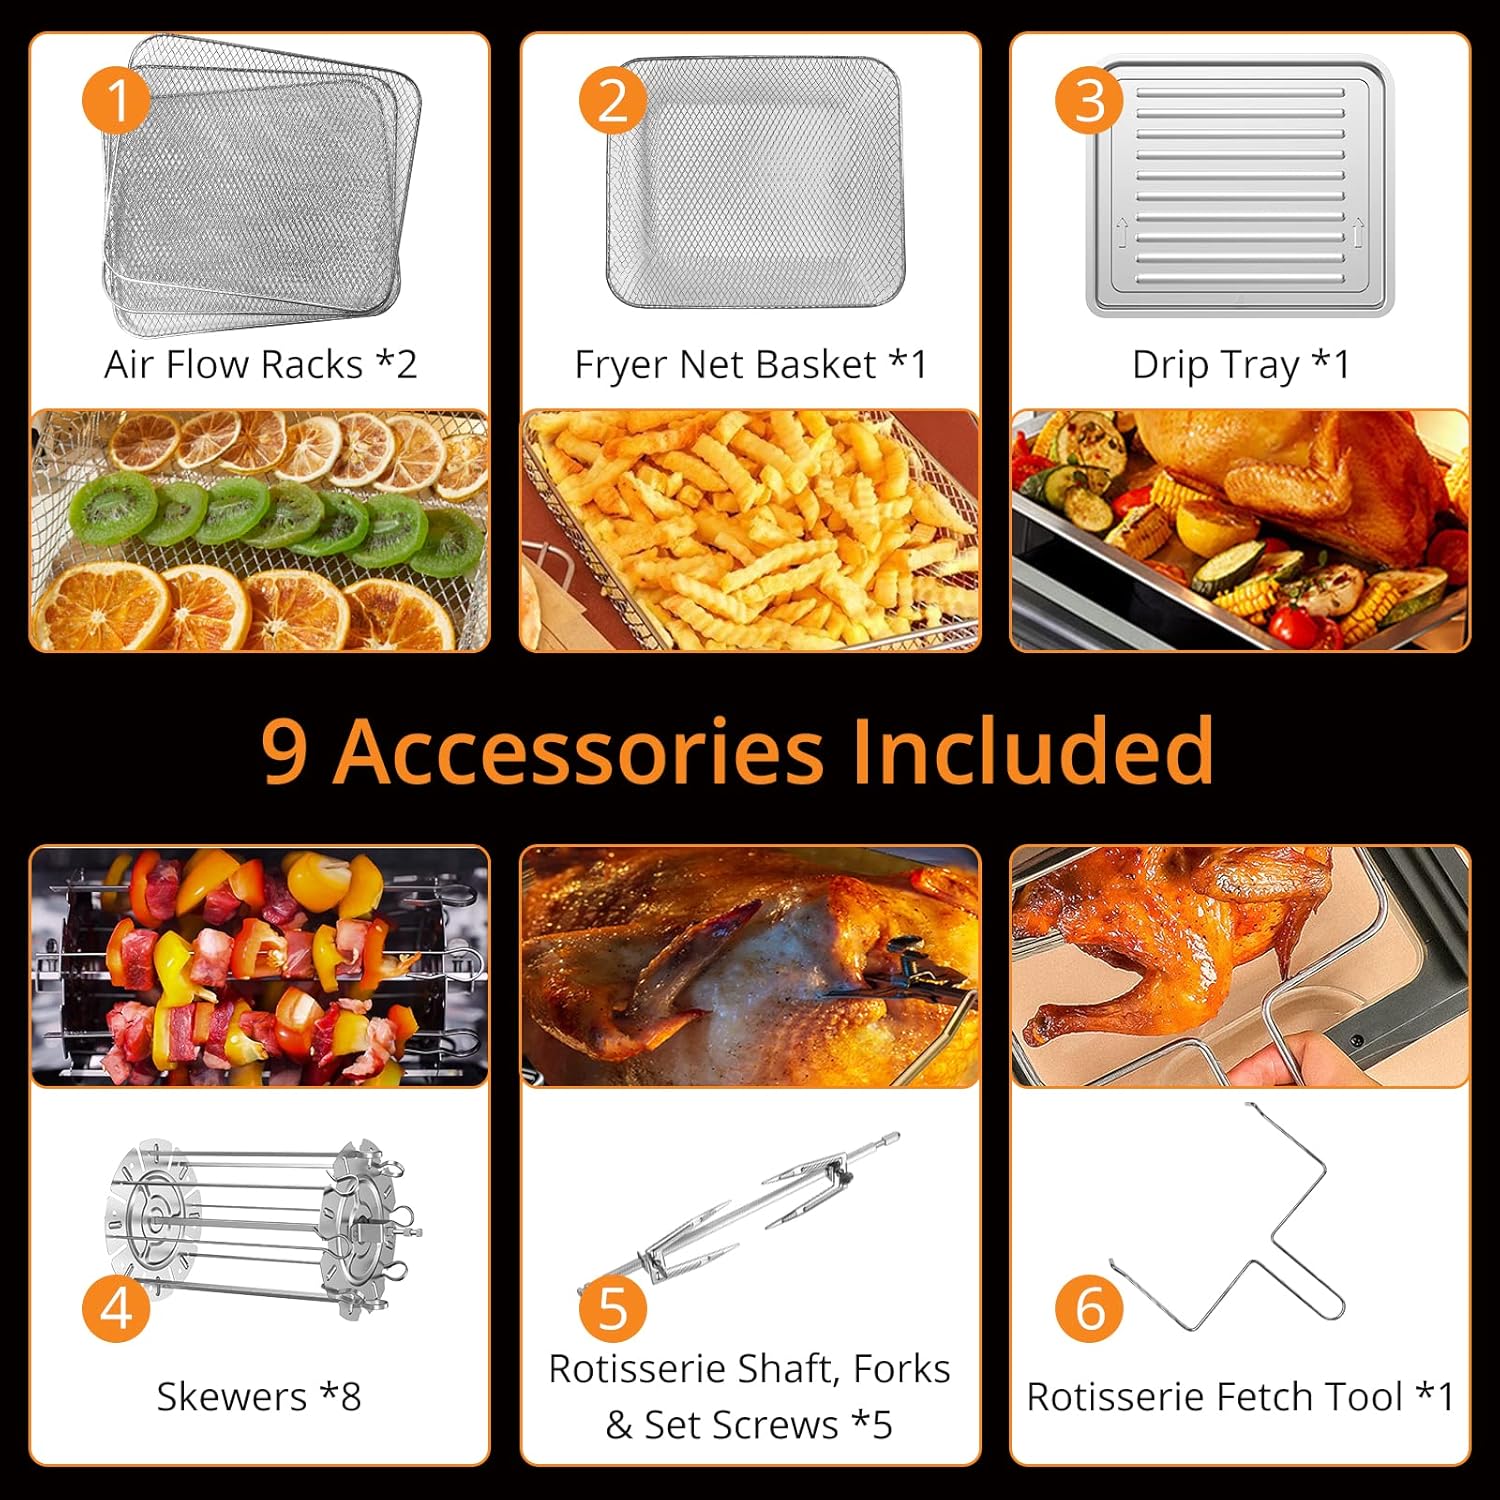
Image: A visual representation of the Air Flow Racks, Fryer Net Basket, Drip Tray, Skewers, Rotisserie Shaft with Forks, and Rotisserie Fetch Tool.
4. Impostazione
4.1 Disimballaggio e posizionamento iniziale
- Rimuovere con cautela tutto il materiale di imballaggio dall'apparecchio e dai suoi accessori.
- Place the air fryer oven on a stable, flat, heat-resistant surface. Ensure there is at least 15 cm (6 inches) of clear space on all sides of the appliance for proper air circulation.
- Do not place the appliance directly against a wall or under cabinets, as hot steam may damage surfaces.
4.2 Pulizia iniziale
- Prima del primo utilizzo, pulire l'esterno dell'apparecchio con un panno umido.amp stoffa.
- Wash all removable accessories (Air Flow Racks, Fryer Net Basket, Drip Tray, Skewers, Rotisserie Shaft and Forks) with warm, soapy water. Rinse thoroughly and dry completely. All accessories are dishwasher safe.
- Insert the Drip Tray at the bottom of the cooking chamber.
4.3 Accessory Installation (Rotisserie Example)
The rotisserie function allows for even cooking of larger items like whole chickens. Follow these steps for proper installation:
- Preparare il cibo: Force the rotisserie shaft lengthwise through the center of the food (e.g., a whole chicken).
- Attach Forks: Slide the rotisserie forks onto the shaft from either end. Lock them in place with the set screws, ensuring the food is securely held. There are indentations on the shaft for the set screws.
- Inserire nel forno: Carefully insert the rotisserie shaft into the designated slots inside the oven. The pointed end of the skewer should go into the left skewer rack, and the clip-end should be squeezed and inserted into the opposite skewer rack slot to secure it.

Image: Detailed steps for installing the rotisserie shaft and skewers, including securing the food and placing it in the oven.
5. Istruzioni per l'uso
5.1 Accensione/spegnimento e funzionamento di base
- Collegare il cavo di alimentazione a una presa a muro con messa a terra. Il display digitale si illuminerà.
- Premere il pulsante di accensione/spegnimento per accendere l'apparecchio.
- Use the temperature and time adjustment buttons (up/down arrows) on the touch screen to set your desired cooking parameters. The maximum temperature is 200°C.
- Premere il pulsante Avvio/Pausa per iniziare la cottura.
- To stop cooking, press the Power On/Off button or the Start/Pause button again.

Image: The large smart touch screen display, showing controls for cooking presets, time, temperature, rotation function, internal lighting, and power.
5.2 preimpostazioni di cottura
The Acekool FT1 offers 10 pre-programmed cooking modes for convenience:
- Patate fritte
- Bacchette
- Bistecca
- Sandwich
- Pescare
- Pollo
- Gamberetto
- Fruit Dry (Dehydrate)
- Pizza
- Dolci
To use a preset, simply select the desired icon on the touch screen. The appliance will automatically set the optimal temperature and time for that food type. You can adjust these settings manually if needed.

Image: The digital display highlighting the 10 cooking presets available on the Acekool FT1 Air Fryer Oven.
5.3 Funzione girarrosto
After installing the rotisserie shaft with your food (as described in Section 4.3), select the rotisserie icon on the touch screen. This will activate the rotation, ensuring even cooking and browning on all sides. The transparent glass window allows you to monitor the cooking process.
5.4 Consigli generali di cucina
- Preriscaldamento: Per risultati ottimali, preriscaldare la friggitrice ad aria per 3-5 minuti prima di aggiungere il cibo.
- Utilizzo dell'olio: While the air fryer requires little to no oil, a light spray or toss with oil can enhance crispiness and flavor for some foods.
- Scuotere/Capovolgere: For even cooking, especially with smaller items in the basket or on racks, shake the basket or flip the food halfway through the cooking time.
- Grado di cottura: Always check food for doneness, especially meats, using a food thermometer to ensure safe internal temperatures.
6. Pulizia e manutenzione
Regular cleaning and maintenance will extend the life of your Acekool FT1 Air Fryer Oven.
- Stacca la spina e lasciati raffreddare: Scollegare sempre l'apparecchio dalla presa di corrente e lasciarlo raffreddare completamente prima di pulirlo.
- Accessori lavabili in lavastoviglie: The Air Flow Racks, Fryer Net Basket, Drip Tray, Skewers, and Rotisserie Shaft/Forks are all dishwasher safe for convenient cleaning.
- Lavaggio delle mani: Per il lavaggio a mano, utilizzare acqua tiepida e sapone e una spugna non abrasiva. Risciacquare abbondantemente e asciugare completamente.
- vassoio antigoccia: Empty and clean the Drip Tray after each use to prevent smoke and odors from accumulated grease.
- Interno: Pulire l'interno del forno con l'adamp cloth and mild detergent. For stubborn residue, a soft brush can be used. Avoid abrasive cleaners or metal scouring pads.
- Esterno: Pulire l'esterno dell'apparecchio con un detergenteamp stoffa. Non utilizzare prodotti chimici aggressivi o materiali abrasivi.
- Magazzinaggio: Assicurarsi che l'apparecchio e tutti gli accessori siano puliti e asciutti prima di riporlo. Conservare in un luogo fresco e asciutto.
7. Risoluzione Dei Problemi
If you encounter issues with your Acekool FT1 Air Fryer Oven, please refer to the following common problems and solutions:
| Problema | Possibile causa | Soluzione |
|---|---|---|
| L'apparecchio non si accende. | Non collegato; malfunzionamento della presa di corrente; apparecchio non acceso. | Ensure plug is securely in a working outlet. Press the Power On/Off button. |
| Il cibo non è cotto in modo uniforme. | Sovraffollamento; agitazione/ribaltamento insufficienti; temperatura/tempo errati. | Cuocere in piccole quantità. Agitare/girare il cibo a metà cottura. Regolare la temperatura e il tempo secondo necessità. |
| Fumo bianco proveniente dall'apparecchio. | Residui di grasso/olio derivanti da un utilizzo precedente; cibo ad alto contenuto di grassi. | Clean the Drip Tray and interior thoroughly. For high-fat foods, ensure proper ventilation and use the Drip Tray. |
| Il cibo non è croccante. | Troppa umidità; olio insufficiente (per alcuni alimenti); bassa temperatura. | Pat food dry before cooking. Lightly spray with oil. Increase temperature or cooking time. |
Se il problema persiste dopo aver provato queste soluzioni, contattare l'assistenza clienti.
8. Specifiche
| Caratteristica | Specificazione |
|---|---|
| Marca | Acekool |
| Numero di modello | KAFO-1800F-D2 |
| Colore | Clear (Black unit with transparent door) |
| Dimensioni del prodotto | Dimensioni: 45.72 x 46.99 x 45.72 cm |
| Capacità | 18 litri |
| Potenza / Wattage | 1800 watt |
| Voltage | 220 Volt |
| Materiale | Acciaio inossidabile |
| Caratteristiche speciali | Temperature Control, Digital Touch Screen, Rotisserie Function, Overheating Protection, Auto Shut-Off |
| Peso dell'articolo | 9.42 kg |
9. Garanzia e supporto
The Acekool FT1 Air Fryer Oven comes with a Garanzia di 2 annoLa presente garanzia copre i difetti di materiali e di fabbricazione in normali condizioni di utilizzo.
For any questions, concerns, or support needs regarding your product, please contact the Acekool customer service team. Please have your model number (KAFO-1800F-D2) and purchase information ready when contacting support.
For more information and support, you may visit the official Acekool store: Negozio Acekool su Amazon