1. Introduzione
This manual provides detailed instructions for the setup, operation, and maintenance of your Odokee Digital Dual Alarm Clock, Model UE218-Wood-1. Please read this manual thoroughly before using the product to ensure proper function and longevity.

Figure 1: Odokee Digital Dual Alarm Clock (Model UE218-Wood-1)
2. Caratteristiche del prodotto
- Easy Setup & Dimmable Display: Intuitive controls with clearly labeled buttons. Large 1.6-inch white LED digits with 0-100% adjustable brightness via a dimmer dial.
- Customizable Dual Alarms: Set two independent alarms with 7-5-2 alarm modes (every day, weekdays, or weekends).
- 5 Suoni di allarme: Choose from Beep, Birds Chirping, Buzzer, Soft Music, or Siren. Alarm volume is adjustable from 30dB to 110dB.
- Rispondi facilmente: A large, accessible snooze button provides an additional 9 minutes of rest.
- Porta di ricarica USB: Integrated USB port for charging mobile devices.
- Batteria di backup: Richiede 3 batterie AAA (non incluse) per mantenere le impostazioni dell'ora e della sveglia durante lo spegnimento.tages.
- Visualizzazione dell'ora: Supporta sia il formato orario a 12 ore che a 24 ore.
3. Impostazione
3.1 Collegamento di alimentazione
- Connect the provided AC adapter to the DC 5V input port on the back of the alarm clock.
- Collegare l'adattatore CA a una presa a muro standard. Il display si illuminerà.

Figura 2: Accensione della sveglia
3.2 Installazione della batteria di backup
For battery backup functionality, install 3 AAA batteries (not included) into the battery compartment located on the bottom of the clock. This ensures time and alarm settings are retained during a power outage. Note that the display will not remain continuously lit and the USB charging port will not function when operating solely on battery backup.
4. Istruzioni per l'uso

Figure 3: Rear Controls Overview
4.1 Impostazione dell'ora
- Premere e tenere premuto il tasto IMPOSTAZIONE DELL'ORA pulsante sul retro dell'orologio. Le cifre delle ore inizieranno a lampeggiare.
- Utilizzare il ORA E MINIMO buttons on the top of the clock to adjust the hour and minute respectively.
- Premere IMPOSTAZIONE DELL'ORA di nuovo per confermare l'ora.
- To set the day of the week, press the GIORNO DELLA SETTIMANA button repeatedly until the correct day is displayed.
4.2 Formato 12/24 ore
Premere il tasto 12/24 ore pulsante sul retro dell'orologio per passare dal formato orario a 12 ore (con indicatore AM/PM) a quello a 24 ore.

Figure 4: 12-Hour vs. 24-Hour Display
4.3 Impostazione degli allarmi (allarme 1 e allarme 2)
L'orologio è dotato di due sveglie indipendenti. La procedura di configurazione è identica per entrambe.
- Premere e tenere premuto il tasto ALLARME 1 INSERITO or ALLARME 2 INSERITO pulsante. Le cifre dell'ora della sveglia lampeggeranno.
- Utilizzare il ORA E MINIMO pulsanti per impostare l'orario desiderato per la sveglia.
- Premere il rispettivo SET ALLARME nuovamente il pulsante per confermare l'ora.
- Next, the alarm mode will flash. Use the SUONO ALLARME button to cycle through the 7-5-2 alarm modes:
- SAB-DOM: Weekend alarm (Saturday and Sunday only).
- LUN-VEN: Weekday alarm (Monday to Friday only).
- LUN-DOM: All 7 days alarm.
- Premere il rispettivo SET ALLARME button again to confirm the alarm mode.
- Per attivare o disattivare un allarme, premere il tasto ACCESO/SPENTO button located on the front side of the clock corresponding to Alarm 1 or Alarm 2. An alarm icon (1 or 2) will appear on the display when active.

Figure 5: Dual Alarms with 7-5-2 Modes

Figure 6: Alarm 1 and Alarm 2 Indicators
4.4 Selezione dei suoni di allarme
After setting the alarm time and mode, you can select one of five alarm sounds:
- During alarm setting, after confirming the alarm mode, the current alarm sound will flash.
- Premere il tasto SUONO ALLARME button repeatedly to cycle through the available sounds: Beep, Birds Chirping, Buzzer, Soft Music, or Siren.
- Premere il rispettivo SET ALLARME pulsante per confermare la selezione.

Figure 7: Selectable Alarm Sounds
4.5 Regolazione del volume della sveglia
The alarm volume can be adjusted from 30dB (low) to 110dB (high) using the VOLUME dial located on the left side of the clock.
4.6 Funzione posticipa
Quando suona un allarme, premere il tasto grande POSTICIPARE button on the top of the clock to temporarily silence the alarm for 9 minutes. The alarm will sound again after 9 minutes.
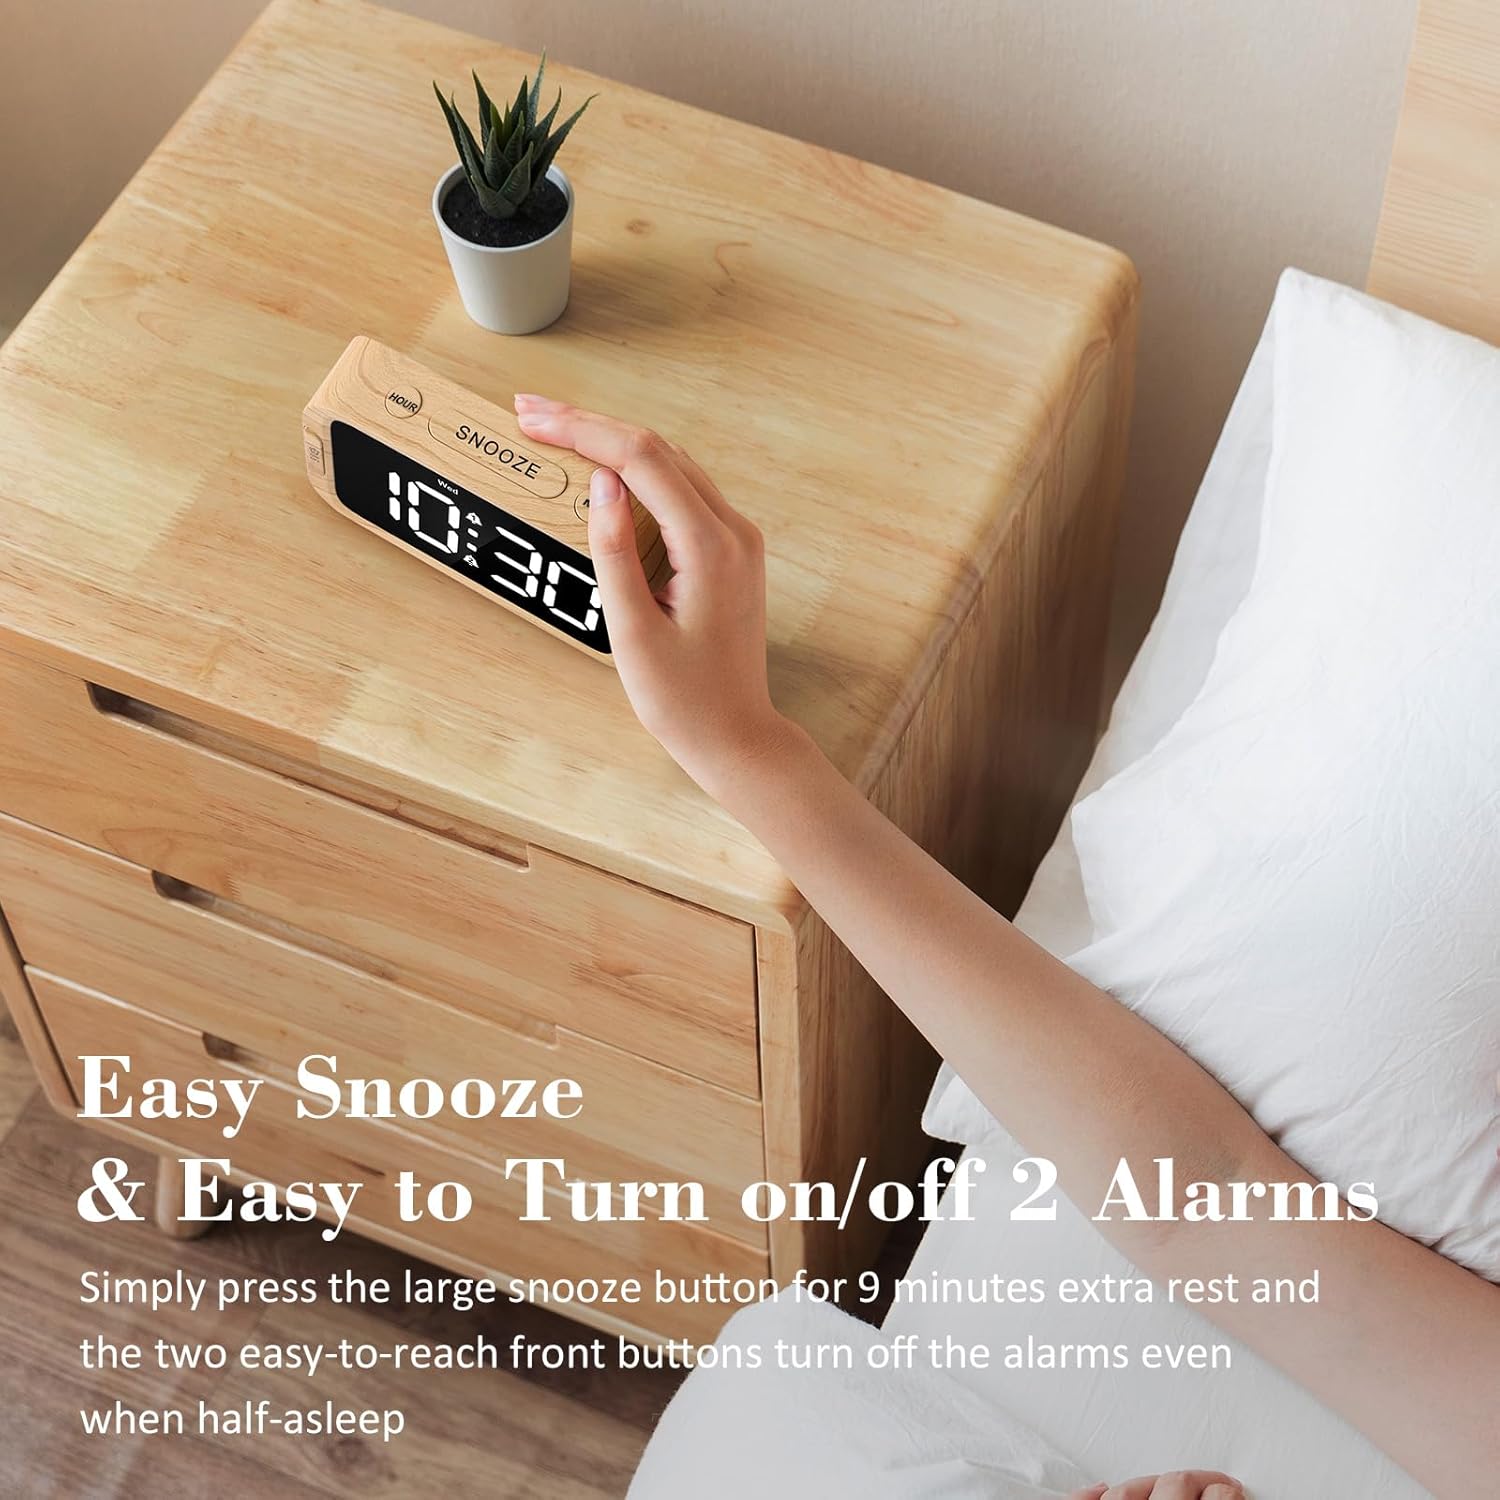
Figure 8: Using the Snooze Function
4.7 Adjusting Display Brightness (Dimmer)
The display brightness can be adjusted from 0% (fully dark) to 100% (very bright) using the DIMENSIONATORE dial located on the right side of the clock.

Figura 9: Regolazione della luminosità del display
4.8 porta di ricarica USB
A USB charging port is located on the back of the clock. Connect your mobile device's USB cable to this port to charge it. This port is active only when the clock is powered by the AC adapter.

Figure 10: USB Charging Port in Use
5. Battery Backup Functionality
The battery backup feature requires 3 AAA batteries (not included). When AC power is interrupted, the batteries will preserve the time and alarm settings. The display will turn off to conserve battery power, but the internal clock will continue to run, and alarms will still activate at the set time. The USB charging port will not function during battery backup mode. It is recommended to use the battery backup only for power outage situations, as continuous use on batteries will drain them quickly.
6. Risoluzione Dei Problemi
| Problema | Possibile causa | Soluzione |
|---|---|---|
| Il display è vuoto o non si illumina. | Nessuna potenza, potenza spentatage, or dimmer set to 0%. | Ensure AC adapter is securely plugged in. Check power outlet. Adjust the DIMMER dial. If on battery backup, press any button to briefly illuminate the display. |
| L'allarme non suona. | Alarm not activated, volume too low, or incorrect alarm mode. | Ensure the alarm is activated (alarm icon visible). Adjust the VOLUME dial. Verify the alarm mode (7-5-2) is set correctly for the current day. |
| L'ora non è corretta. | Time not set correctly, or power interruption without battery backup. | Re-set the time using the TIME SET button. Install fresh AAA batteries for backup. |
| La ricarica USB non funziona. | Clock is on battery backup, or cable/device issue. | Ensure the clock is connected to AC power. Try a different USB cable or device to rule out external issues. |
7. Specifiche
- Marca: Odokee
- Numero modello: UE218-Wood-1
- Tipo di visualizzazione: Digital LED (White)
- Dimensioni dello schermo: 1.6 inches (digit height)
- Dimensioni del prodotto: 5.3"W x 2.9"H x 1.95"D (approximate, based on image a7e9cdcf-2bbb-4f2d-b58e-081cedcaeaaa)
- Fonte di energia: Corded Electric (AC adapter included), 3x AAA batteries for backup (not included)
- Suoni di allarme: 5 selectable (Beep, Birds Chirping, Buzzer, Soft Music, Siren)
- Volume allarme: Adjustable (30dB-110dB)
- Luminosità dello schermo: 0-100% adjustable dimmer
- Durata della ripetizione: 9 minuti
- Formato ora: 12/24 ore selezionabile
- Materiale: Plastica (acrilonitrile-butadiene-stirene)
- Peso dell'articolo: 6.3 once (178.6 grammi)

Figura 11: Dimensioni del prodotto
8. Garanzia e supporto
Odokee products come with a hassle-free 18-month warranty. For any questions, issues, or warranty claims, please contact Odokee customer service. Odokee is dedicated to providing functional and stylish products and values customer feedback.
You can visit the official Odokee store for more information: Negozio Odokee su Amazon.