Introduzione
This manual provides comprehensive instructions for the installation, adjustment, maintenance, and troubleshooting of your maXpeedingrods T6 Series Coilover Suspension Kit. Please read this manual thoroughly before attempting any installation or adjustment to ensure proper function and safety. Professional installation is recommended.
Caratteristiche del prodotto
- 24 Levels of Rebound Force Adjustment: Allows fine-tuning of damping for various driving conditions.
- Altezza regolabile: Customize ride height by 1-3 inches for a desired stance.
- Molle ad alta resistenza alla trazione: Front spring rate of 10 kg/mm (560 lbs/in) and Rear spring rate of 7 kg/mm (392 lbs/in), tested for durability.
- Pillow Ball Top Mount: Designed for sharp and precise handling response.
- CNC Billet Aluminum Components: Durable and lightweight perches and locking rings.
- High Rigid Piston Rod: Features a 22mm front rod diameter with high-frequency heat treatment for strength and longevity.
- Optimized Damper Knob: Easier to operate and adjust dampimpostazioni.
- Full Length Dust Boot: Protects the rod and piston from dust and debris.
- Surface Sandblasting Lower Mount: Provides excellent wear-resistant performance.

Image: Close-up of the pillow ball top mount, designed for enhanced handling.

Image: Details of the optimized damper knob for easy adjustment and upgraded full aluminum plates for strength.
Informazioni sul montaggio
This maXpeedingrods Coilover Suspension Kit (Model FC84PB) is compatible with the following vehicle models:
- Nissan 350Z Coupe RWD (Z33) 2003-2008
- Nissan 350Z Roadster Convertible RWD (Z33) 2003-2008
- Nissan Skyline Coupe RWD (V35) 2003-2007
- Infiniti G35 Coupe RWD (V35) 2003-2007
- Infiniti G35 Sedan RWD (V35) 2003-2006
Nota: This kit is designed to lower the vehicle's ride height and does not maintain the original ride height.
Elenco dei componenti
The maXpeedingrods T6 Series Coilover Suspension Kit typically includes the following components:
- 2x Front Coil-overs
- 2x Rear Shock Absorbers
- 2x Rear Spring Kits
- 2x C Spanners
- 2x Allen Wrenches

Image: Visual representation of the components included in the maXpeedingrods coilover kit packaging.
Istruzioni per l'installazione
Precauzioni di sicurezza
- Indossare sempre dispositivi di protezione individuale (DPI) adeguati, tra cui occhiali e guanti di sicurezza.
- Prima di iniziare il lavoro, assicurarsi che il veicolo sia saldamente appoggiato su cavalletti o su un sollevatore.
- Non lavorare mai sotto un veicolo sostenuto solo da un cric.
- Disconnect the battery before working on any electrical components.
- In caso di dubbi su qualche passaggio, consultare un meccanico qualificato.
Montaggio del Coilover
The following steps detail the assembly of the coilover unit. Refer to the video for visual guidance.
Video: Detailed guide on how to assemble the maXpeedingrods coilover unit, showing each component being fitted.
- Begin by sliding the spring seat onto the damper corpo.
- Next, install the upper locker, followed by the lower locker, onto the threaded body.
- Place the ring onto the dampehm, asta.
- Slide the dust boot over the dampehm, asta.
- Install the main spring onto the damper, ensuring it seats correctly.
- Place the spring plate on top of the spring.
- Position the top mount assembly over the damper rod and secure it.
- Add the washer and then tighten the locking nut onto the damper rod to secure the top mount.
- Adjust the spring preload correctly and lock it tight using the provided C spanners.
- If applicable, install the adjuster cover on the top mount.
Installazione del veicolo
This video demonstrates the installation process of the coilover system on a vehicle. While specific vehicle models may vary, the general steps and principles apply.
Video: Oltreview of the COT6 Series Coilover, including visual examples of installation on a vehicle.
- Sollevare il veicolo in sicurezza e rimuovere le ruote.
- Carefully remove the original suspension components, following your vehicle's service manual.
- Install the assembled maXpeedingrods coilover units into the vehicle's suspension mounting points.
- Secure all bolts and nuts to the manufacturer's specified torque settings.
- Ensure brake lines and ABS sensor wires are clear of moving parts and properly secured.
- Reinstallare le ruote e abbassare il veicolo.
- Perform a wheel alignment after installation to ensure proper handling and tire wear.
Regolazione e funzionamento
Regolazione dell'altezza
The coilover kit allows for independent ride height adjustment. To adjust the height:
- Loosen the lower locking ring on the threaded body.
- Ruotare il supporto della molla principale per sollevare o abbassare il veicolo.
- Once the desired height is achieved, tighten the lower locking ring securely against the spring perch.
- Ensure both sides of the vehicle are adjusted evenly.

Image: Illustration of height adjustable coilovers with independent ride height and spring tension settings.

Image: Visual guide on how to twist the threaded body to adjust the shock suspension to the preferred height.
Damper Adjustment (24 Levels)
The coilovers feature 24 levels of rebound force adjustment, allowing you to customize the ride feel from soft to hard. The adjustment knob is located on the top of the coilover unit.
- Livelli 0-8: Recommended for street use, providing a more comfortable ride.
- Livelli 9-16: Suggested for mountain roads or spirited driving, offering a balance of comfort and performance.
- Livelli 17-24: Ideal for race tracks, providing maximum stiffness for aggressive handling.
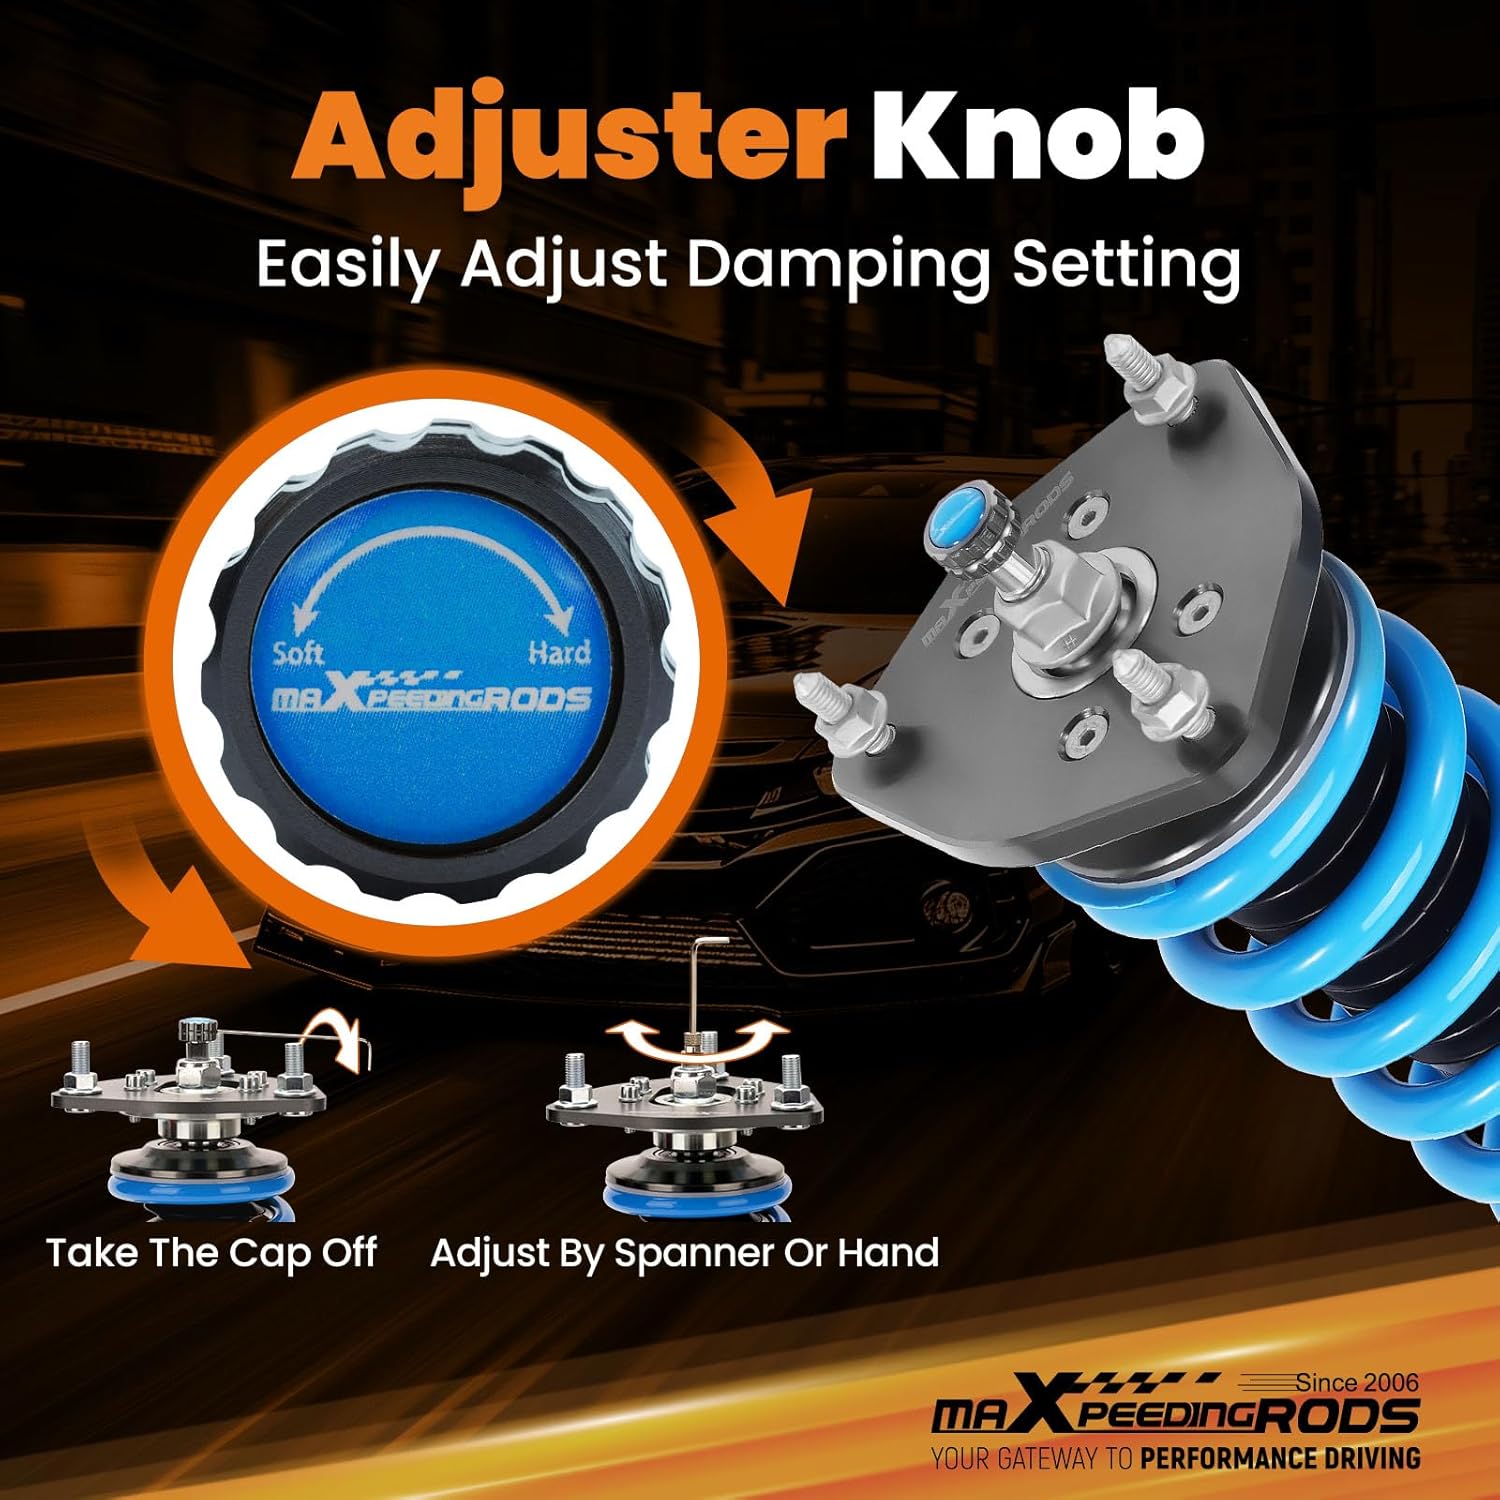
Image: Close-up of the adjuster knob, showing how to remove the cap and adjust damping with a spanner or by hand.

Image: Visual guide to the 24-level damping adjustment, with suggested settings for street, mountain, and track use.
Manutenzione
Regular maintenance helps ensure the longevity and performance of your coilovers.
- Ispezione regolare: Periodically check all mounting bolts, nuts, and locking rings for tightness. Inspect for any signs of wear, damage, or leaks.
- Pulizia: Keep the coilover bodies and threads clean from dirt, salt, and debris. This prevents corrosion and ensures smooth height adjustments.
- Lubrificazione: Apply a thin layer of appropriate grease to the threads if they become stiff during adjustment.
- Dust Boots: Ensure dust boots are intact and properly seated to protect the piston rods.
Risoluzione dei problemi
If you encounter issues with your coilover suspension, consider the following common problems and solutions:
| Problema | Possibile causa | Soluzione |
|---|---|---|
| Unusual Noises (e.g., clunking, squeaking) | Loose mounting bolts, worn bushings, improper spring preload, damaged components. | Check all fasteners for tightness. Inspect bushings for wear and replace if necessary. Verify spring preload is set correctly. Inspect for damaged parts. |
| Altezza di marcia irregolare | Regolazione dell'altezza non corretta, precarico della molla non uniforme. | Re-measure and adjust ride height on all corners. Ensure spring preload is consistent across corresponding coilovers. |
| Poor Ride Quality (too stiff/soft) | d . erratoamper impostazioni. | Regola il damper settings (rebound force) according to your preference and driving conditions (refer to Damper Adjustment section). |
| Leaking Damper | Damaged seal or internal component. | A leaking damper typically requires replacement. Contact customer support for assistance. |
If troubleshooting steps do not resolve the issue, please contact maXpeedingrods customer support.
Specifiche
| Caratteristica | Dettaglio |
|---|---|
| Marca | maXpeedingrods |
| Numero di modello | FC84PB |
| Peso dell'articolo | 62.9 libbre |
| Dimensioni del prodotto | 27.56 x 19.69 x 7.48 pollici |
| Posizione | Front (Coilover kit includes components for both front and rear) |
| Damper adeguamento | 24 Levels Rebound Force |
| Rigidità della molla anteriore | 10 kg/mm (560 libbre/pollice) |
| Rigidità della molla posteriore | 7 kg/mm (392 libbre/pollice) |
| Gamma di regolazione dell'altezza | Abbassamento di 1-3 pollici |
Garanzia e supporto
maXpeedingrods offers customer support for their products. For specific warranty details, technical assistance, or to report any issues, please refer to the warranty information provided with your purchase or contact maXpeedingrods directly through their official channels.
- Resi: In genere è possibile effettuare resi facili entro 30 giorni.
- Assistenza clienti: maXpeedingrods provides customer support for product inquiries and assistance.

Image: Information regarding easy installation and available customer support from maXpeedingrods.


