1. Introduzione
This user manual provides comprehensive instructions for the installation, operation, and maintenance of your Weiser SmartCode Keypad Electronic Deadbolt. This advanced keyless entry system offers enhanced security and convenience for your home.
The SmartCode deadbolt features a sleek design, a backlit keypad for visibility, and the ability to store up to 50 user codes. It operates on 4 AA batteries and includes SmartKey re-key technology for added security and flexibility.
2. Informazioni sulla sicurezza
Please read and understand all instructions before installing and using this product. Keep this manual for future reference.
- Do not attempt to disassemble or modify the lock. This may cause damage to the product and void the warranty.
- Use only the specified battery type (4 AA alkaline batteries). Do not mix old and new batteries or different types of batteries.
- Assicurarsi che la polarità sia corretta quando si inseriscono le batterie.
- Keep all keys and user codes in a secure location.
- Avoid exposing the lock to extreme temperatures or direct moisture.
- Controllare regolarmente la funzionalità della serratura e il livello della batteria.
3. Contenuto della confezione
Verificare che tutti i componenti siano presenti prima di iniziare l'installazione:

Image: Complete package contents of the Weiser SmartCode Keypad Electronic Deadbolt.
- Electronic Deadbolt (Exterior Keypad Assembly)
- Electronic Deadbolt (Interior Battery Unit)
- Fermo
- Piastra d'urto
- Piastra di montaggio
- Installation Hardware (Screws)
- 2 Chiavi
- Strumento SmartKey
- Manuale di installazione (questo documento)
Nota: sono necessarie 4 batterie AA, non incluse nella confezione.
4. Configurazione e installazione
The Weiser SmartCode deadbolt is designed for easy installation. For a seamless setup experience, it is highly recommended to use the free BILT app, which provides step-by-step interactive 3D instructions with voice and video guidance.
4.1 Compatibilità delle porte
This lock is designed to fit standard doors 1-3/8" to 1-3/4" (35 mm - 44 mm) thick with an adjustable backset (2-3/8" or 2-3/4"). It is ideal for most exterior and interior residential doors.
4.2 Passaggi di installazione (oltreview)
- Prepara la porta: Ensure your door is properly drilled and aligned for a deadbolt installation.
- Installa il fermo: Insert the latch into the door edge, ensuring the correct backset is selected.
- Installare il gruppo esterno: Place the exterior keypad assembly onto the door, feeding the cable through the cross bore.
- Installare la piastra di montaggio: Secure the mounting plate to the door using the provided screws, ensuring the cable passes through the plate.
- Collegare il cavo e installare il gruppo interno: Connect the cable from the exterior assembly to the interior battery unit. Mount the interior unit to the mounting plate.
- Installa le batterie: Insert 4 AA alkaline batteries into the interior unit, observing polarity.
- Eseguire il processo di consegna delle porte: This crucial step teaches the lock the orientation of your door. Follow the specific instructions in the full manual or BILT app.
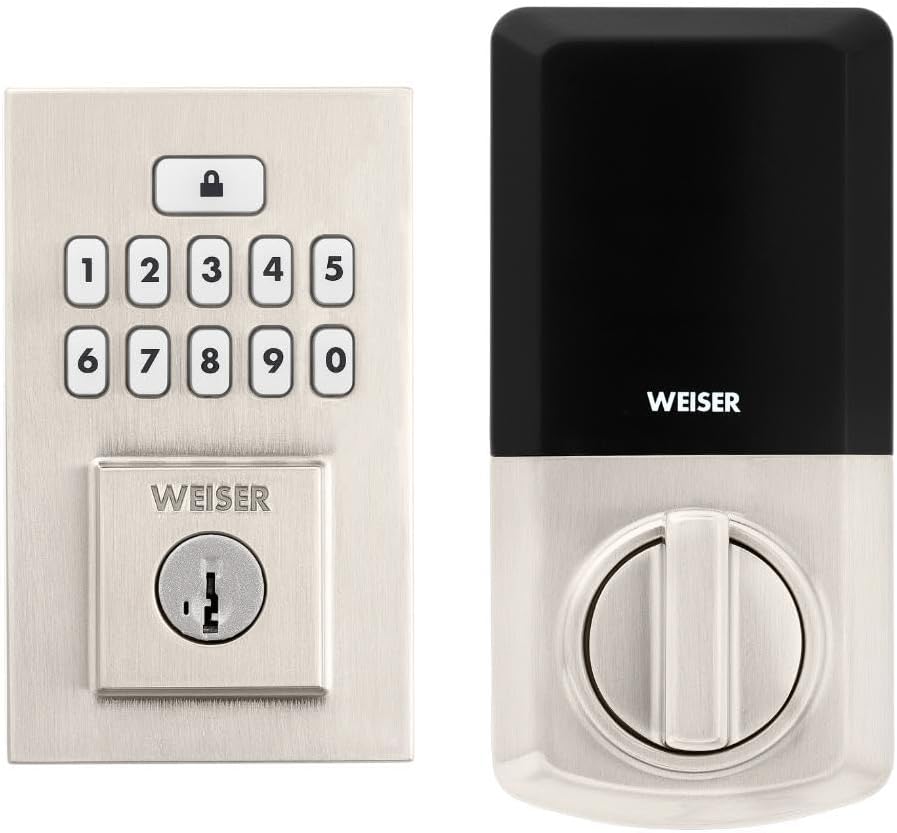
Image: Assembled Weiser SmartCode Keypad Electronic Deadbolt, showing both exterior and interior components.

Image: Close-up of the exterior keypad, featuring the backlit numeric buttons and keyhole.
5. Istruzioni per l'uso
5.1 Chiusura della porta
- Blocco con un solo tocco: Press the Lock button (top button with padlock icon) on the keypad. The deadbolt will extend.
- Funzionalità di blocco automatico: If enabled, the deadbolt will automatically extend after a set period (e.g., 30 seconds) once unlocked.
5.2 Apertura della porta
- Utilizzo di un codice utente: Enter your personalized 4-8 digit user code on the keypad. The deadbolt will retract.
- Utilizzando la chiave: Inserire la chiave fisica nella serratura e girare per sbloccare.
5.3 Programmazione dei codici utente
The lock supports up to 50 user codes and 1 master code. Refer to the detailed programming instructions in the full manual for adding, deleting, or modifying codes.
- Codice principale: The master code is used to add and delete user codes. It does not unlock the door.
- Codici utente: These codes are used to unlock the door.


Image: Icons illustrating user management, programming, and auto-lock features.
5.4 SmartKey Re-key Technology
The SmartKey re-key technology allows you to re-key your lock in seconds, maintaining key control and protecting against lost, stolen, or unauthorized keys without removing the lock from your door. Use the provided SmartKey tool and follow the instructions carefully.

Image: SmartKey Security feature, demonstrating how to re-key the lock.
6. Manutenzione
6.1 Sostituzione della batteria
The lock operates on 4 AA alkaline batteries. When the batteries are low, the lock will provide an audible and/or visual low battery warning. Replace all four batteries simultaneously to ensure optimal performance.
- Rimuovere il coperchio della batteria dall'unità interna.
- Rimuovere le vecchie batterie e smaltirle correttamente.
- Inserire nuove batterie alcaline AA, assicurandosi della corretta polarità (+/-).
- Riposizionare il coperchio della batteria.
Note: Battery life can vary based on usage frequency and environmental conditions. If the auto-lock feature is frequently used, battery life may be shorter.
6.2 Pulizia
Pulisci la serratura con un panno morbido eamp panno. Evitare l'uso di detergenti abrasivi, solventi o spray chimici, poiché possono danneggiare la finitura e i componenti elettronici.
7. Risoluzione Dei Problemi
| Problema | Possibile causa | Soluzione |
|---|---|---|
| Lock does not respond or keypad is not lit. | Batterie scariche. | Sostituire tutte e quattro le batterie AA. |
| Lock beeps 3 times during programming or code entry. | Incorrect code, programming error, or lock not handed correctly. | Verify the code. Re-attempt programming steps carefully. Perform the door handing process again. If issues persist, reset the unit to factory settings (refer to full manual). |
| Deadbolt extends when door is open (Auto-lock issue). | The lock does not have a sensor to detect if the door is open or closed. Auto-lock activates after the set time regardless of door position. | This is normal operation. Ensure the door is closed before the auto-lock time expires, or disable the auto-lock feature if it causes inconvenience. |
| Keypad is difficult to see at night. | Backlight not active. | The keypad is backlit and stays lit for 30 seconds after inactivity. Ensure there is enough battery power. |
| Lock is not operating smoothly. | Misalignment of door or strike plate, or internal mechanism issue. | Check door and frame alignment. Ensure the strike plate is correctly installed. If the issue persists, contact customer support. |
8. Specifiche
| Caratteristica | Dettaglio |
|---|---|
| Numero di modello | 9GED92600-003 |
| Dimensioni del prodotto | 6.99 x 2.86 x 13.97 cm (2.75 x 1.13 x 5.5 pollici) |
| Peso dell'articolo | 454 g (1 libbre) |
| Colore | Nichel satinato |
| Stile | Contemporaneo |
| Fine | Spazzolato |
| Materiale | Metallo |
| Tipo di blocco | Deadbolt, Electronic |
| Tastiera | 10-Button, Backlit |
| Codici utente | Up to 50 user codes, 1 master code |
| Fonte di alimentazione | 4 batterie AA (non incluse) |
| Compatibilità dello spessore della porta | 1-3/8" to 1-3/4" (35 mm - 44 mm) |
| Entrata | Adjustable 2-3/8" or 2-3/4" |
| Caratteristiche speciali | Weather Resistant, Anti-Bump, Auto-Lock, One-Touch Lock, Back-Lit Keypad, SmartKey Security |
| Grado ANSI | Grado 2 |
| Paese di origine | Cina |
9. Garanzia e supporto
9.1 Informazioni sulla garanzia
The Weiser SmartCode Keypad Electronic Deadbolt comes with a Garanzia di 1 anno dalla data di acquisto. La presente garanzia copre difetti di materiale e fabbricazione in condizioni di normale utilizzo. Si prega di conservare la prova d'acquisto per eventuali reclami in garanzia.
For full warranty details and limitations, please refer to the official Weiser websito o contattare l'assistenza clienti.
9.2 Assistenza clienti
For technical assistance, troubleshooting, or warranty inquiries, please contact Weiser customer support:
- Supporto online: Visit the official Weiser websito per FAQ, tutorial video e moduli di contatto.
- Supporto telefonico: Refer to the contact information provided on the Weiser packaging or websito per gli orari dell'assistenza telefonica.
- Applicazione BILT: Utilize the BILT app for interactive 3D installation and programming guidance.
When contacting support, please have your product model number (9GED92600-003) and purchase date available.


