1. Introduzione
Thank you for choosing the Speedlink BRIO Stereo Soundbar. This manual provides essential information for the proper setup, operation, and maintenance of your device. Please read it carefully to ensure optimal performance and longevity of your soundbar.
The BRIO Stereo Soundbar is designed to deliver clear audio for your computer, featuring a compact design that fits conveniently under most monitors. It includes an illuminated volume control, and front-facing ports for headphones and a microphone for easy access.
2. Informazioni sulla sicurezza
- Non esporre la soundbar ad acqua, umidità o temperature estreme.
- Evitare di posizionare il dispositivo vicino a fonti di calore o alla luce diretta del sole.
- Utilizzare solo i cavi forniti o ricambi compatibili.
- Non tentare di aprire o riparare il dispositivo da soli. Per qualsiasi intervento di assistenza, rivolgersi a personale qualificato.
- Tenere la soundbar lontana da forti campi magnetici.
3. Contenuto della confezione
Si prega di controllare la confezione per verificare la presenza dei seguenti elementi:
- Speedlink BRIO Stereo Soundbar
- USB-A power cable (integrated)
- Two 3.5mm jack audio cables (integrated)

Image: The Speedlink BRIO Stereo Soundbar, showing its front grille, volume knob, headphone and microphone jacks, and the integrated USB-A and 3.5mm audio cables extending from the back.
4. Impostazione
4.1 Posizionamento
Position the Speedlink BRIO Stereo Soundbar on a stable, flat surface, ideally directly under your computer monitor. Its compact design is specifically engineered for this placement, optimizing desk space.

Image: The Speedlink BRIO Stereo Soundbar positioned neatly beneath a computer monitor, demonstrating its space-saving design on a desk next to a keyboard.
4.2 Connessioni
- Collegamento elettrico: Connect the integrated USB-A cable from the soundbar to an available USB-A port on your computer or a compatible USB power adapter. This supplies power to the soundbar.
- Ingresso audio: Connect the two integrated 3.5mm jack plugs to the corresponding audio output ports on your computer (typically a green port for line-out). Ensure both plugs are securely inserted.
5. Istruzioni per l'uso
5.1 Accensione/spegnimento e controllo del volume
The large illuminated swivel control knob on the front right side of the soundbar serves as both the power switch and volume control.
- Per accendere/spegnere: Rotate the knob clockwise from the 'off' position to turn the soundbar on. Continue rotating to increase volume. Rotate counter-clockwise until it clicks to turn off.
- Per regolare il volume: Rotate the knob clockwise to increase the volume and counter-clockwise to decrease it. The illumination around the knob indicates the power status and can change with volume adjustments.
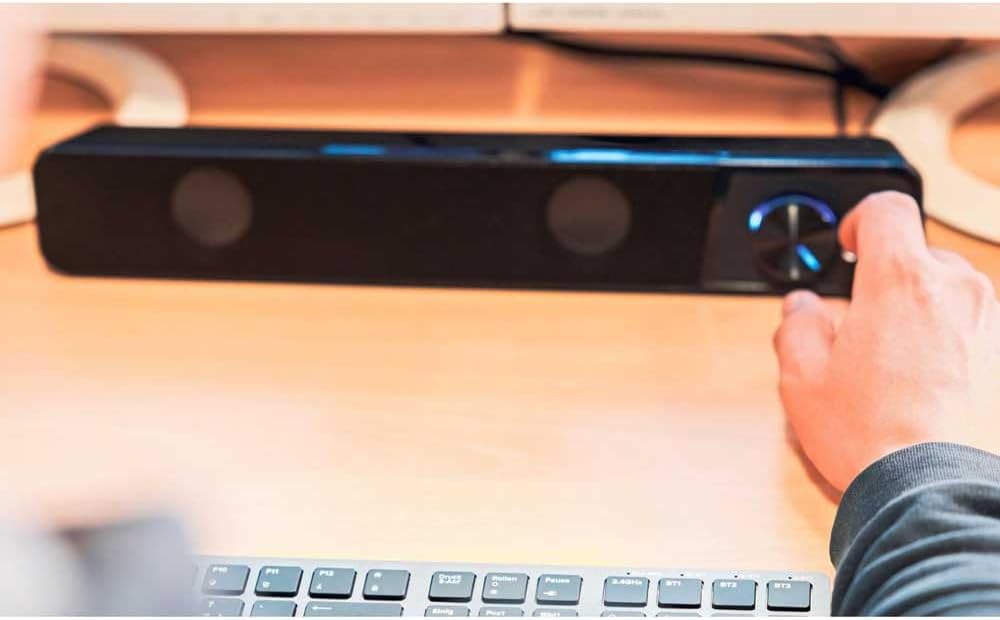
Image: A hand reaching to adjust the illuminated volume control knob on the Speedlink BRIO Stereo Soundbar, which is placed on a desk.
5.2 Headphone and Microphone Sockets
Two 3.5mm sockets are located on the front of the soundbar, next to the volume control, for convenient connection of headphones and a microphone.
- Presa per cuffie: Plug your headphones into the designated headphone jack. This will typically mute the soundbar's speakers and route audio to your headphones.
- Presa per microfono: Plug your microphone into the designated microphone jack for voice input.
6. Manutenzione
6.1 Pulizia
To clean the soundbar, gently wipe its surface with a soft, dry, or slightly damp cloth. Do not use abrasive cleaners, solvents, or strong chemicals, as these can damage the finish.
6.2 Conservazione
Quando non viene utilizzata per lunghi periodi, conservare la soundbar in un luogo fresco e asciutto, lontano dalla luce solare diretta e da temperature estreme.
7. Risoluzione Dei Problemi
- Nessun suono:
- Ensure the soundbar is powered on and the volume knob is turned up.
- Verify that the USB-A cable is securely connected for power.
- Check that the 3.5mm audio jack cables are fully inserted into both the soundbar and your computer's audio output.
- Confirm your computer's audio output settings are configured to send sound to the correct device.
- If headphones are plugged into the front port, unplug them to enable soundbar speakers.
- Volume basso o suono distorto:
- Adjust the volume on both the soundbar and your computer.
- Ensure audio cables are not damaged and are securely connected.
- Test with different audio sources to rule out source issues.
- Microfono non funzionante:
- Ensure the microphone is correctly plugged into the front microphone socket.
- Check your computer's sound settings to ensure the correct microphone input device is selected and its volume is not muted.
8. Specifiche
| Caratteristica | Dettaglio |
|---|---|
| Nome del modello | BRIO |
| Numero modello articolo | SL-810200-BK |
| Tipo di altoparlante | Barra audio |
| Modalità di uscita audio | Stereo |
| Configurazione del canale audio surround | 2.0 |
| Potenza massima in uscita dell'altoparlante | 12 Watt |
| Tecnologia di connettività | Auxiliary (3.5mm Jack), USB-A (for power) |
| Risposta in frequenza | 18KHz |
| Impedenza | 4 Ohm |
| Dimensioni del prodotto (P x L x A) | 2.72" x 15.04" x 2.36" (69 x 382 x 60 mm) |
| Peso dell'articolo | 1.19 libbre (540 grammi) |
| Materiale | Plastica |
| Fonte di alimentazione | Elettrico con cavo (USB-A) |
9. Garanzia e supporto
9.1 Garanzia limitata
The Speedlink BRIO Stereo Soundbar comes with a limited warranty. Please refer to the warranty card included with your purchase or visit the official Speedlink website for detailed terms and conditions. The EU spare part availability duration is 1 year.
9.2 Assistenza clienti
For technical assistance, troubleshooting beyond this manual, or warranty claims, please contact Speedlink customer support through their official websito o le informazioni di contatto fornite con la documentazione del prodotto.


