1. Introduzione
This instruction manual provides detailed guidance for the proper use and application of Phomemo Iron-on Name Tags. These fabric labels are designed for durable and clear identification on clothing and other textiles, suitable for various environments such as daycares, schools, and nursing homes. For optimal performance, please follow all instructions carefully.
2. Prodotto finitoview
Nome termoadesivo Phomemo Tags are 1/2 inch (12mm) wide and 6.5 feet (2m) long, available in White on Blue and Black on White. They are designed to be compatible with Dymo Letratag label makers (LT-110T, LT-100T, LT-100H Plus, LT-100H, QX50, XR, XM, 200B) and Phomemo label makers (P12, P12-Pro, LT12 F12). These labels are made from gentle, non-irritating materials, ensuring comfort when applied to clothing. They are washable and durable, maintaining readability after multiple washes.

Image: Phomemo Iron-on Name Tags in various colors.
Video: Un oltreview of Phomemo P12 Fabric Label Tape, demonstrating its features and applications.
3. Impostazione
To begin using your Phomemo Iron-on Name Tags, first ensure your compatible label maker is ready. The label tape cassette needs to be correctly installed.
3.1 Installing the Label Tape Cassette
- Open the label maker's tape compartment.
- Insert the Phomemo label tape cassette, ensuring it clicks into place.
- Pull out approximately 1 inch (3cm) of the label tape through the tape guides and paper outlet.
- Close the label maker's tape compartment securely.
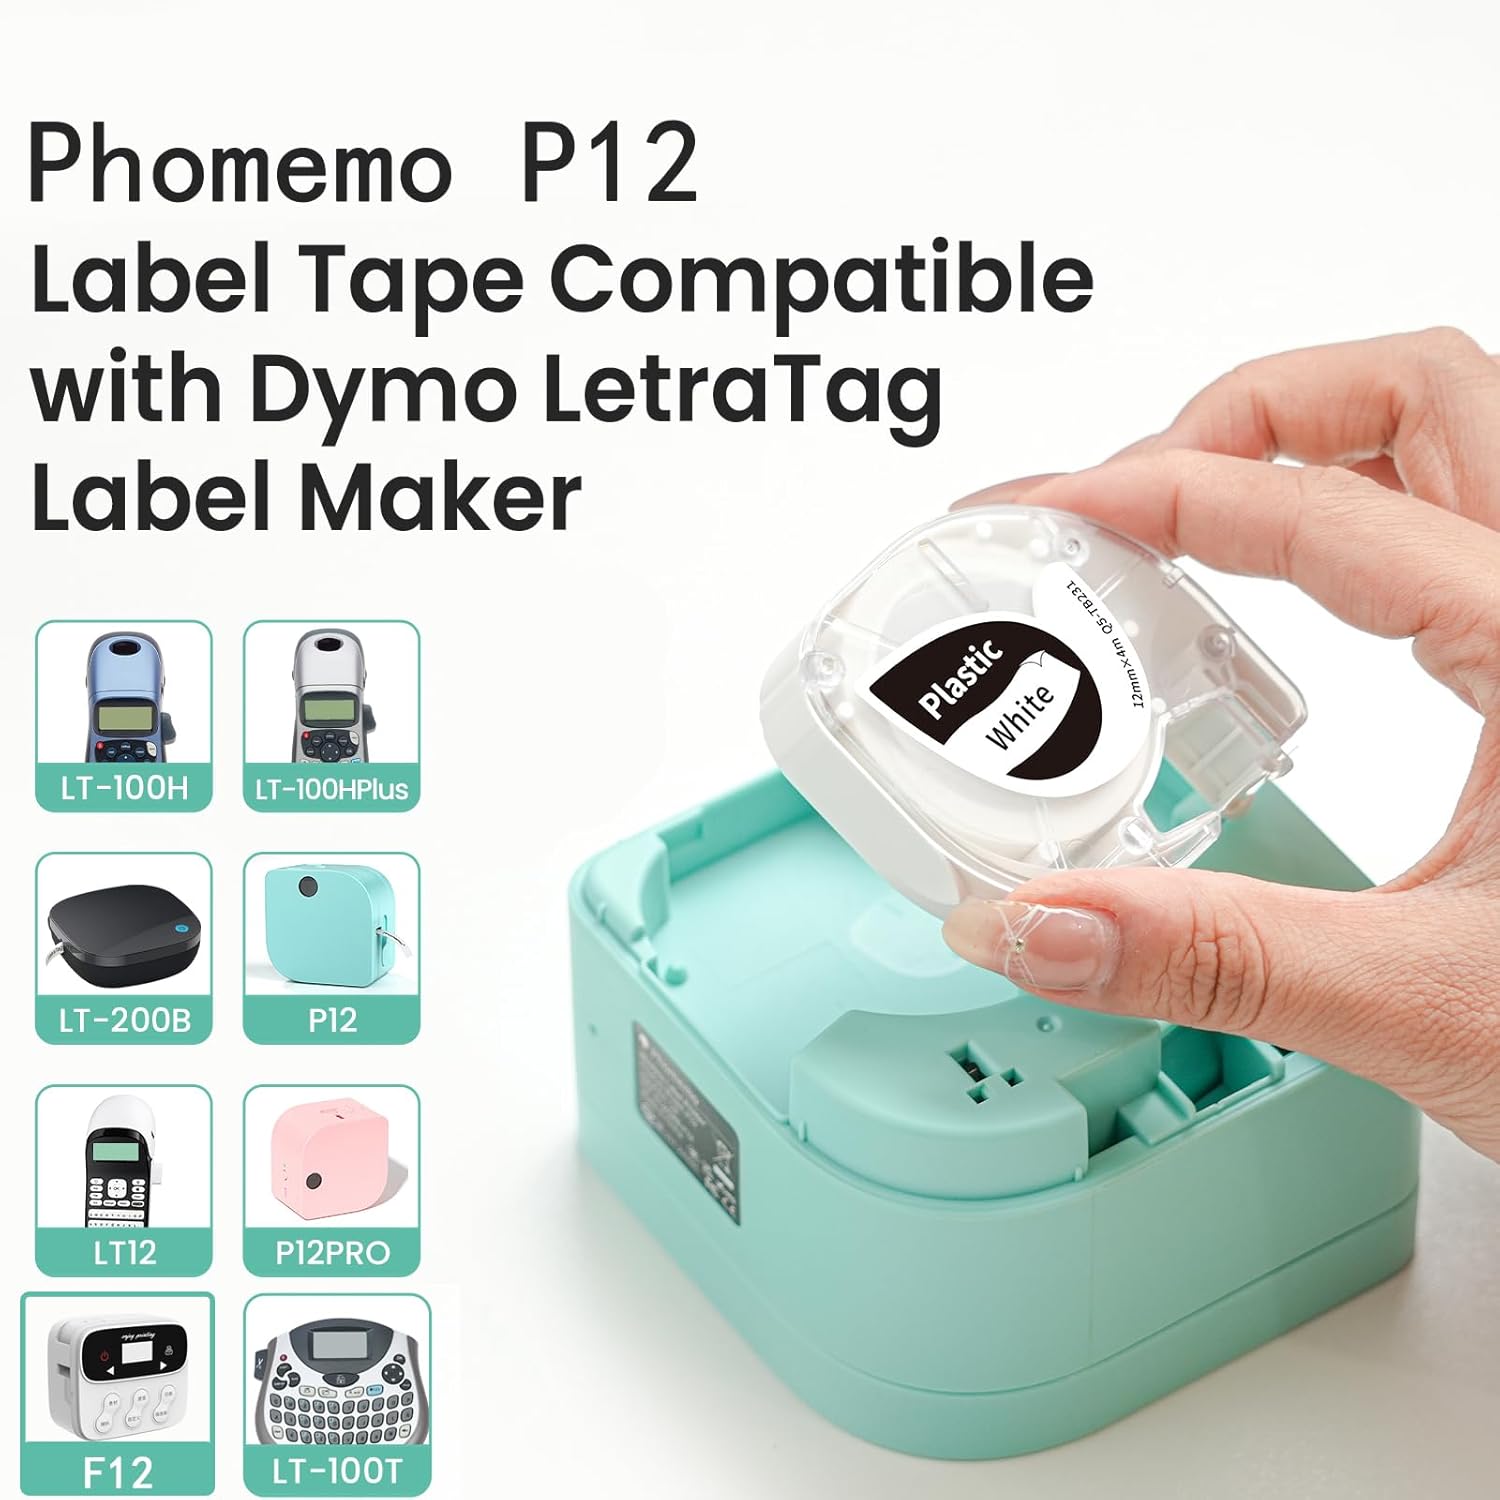
Image: Correct insertion of the label tape cassette into a compatible label maker.
Video: Demonstrates how to insert the label tape with an LT12 label maker.
4. Istruzioni per l'uso
4.1 Printing Iron-on Labels
For Phomemo P12/P12 Pro label makers, use the Print Master app to create your labels. Ensure the 'Mirror mode print' option is selected for iron-on labels, as the text needs to be reversed for proper transfer.
- Connect your Phomemo P12/P12 Pro label maker to the Print Master app via Bluetooth.
- Design your label using the app's features (text, symbols, borders, fonts).
- Before printing, select the 'Mirror mode print' option. This is crucial for iron-on labels.
- Stampa l'etichetta.
- Carefully remove the printed label from the label maker.

Image: Customizing and printing labels with the Phomemo P12 label maker.
Video: Detailed instructions on how to use Phomemo P12 and P12 Pro label makers to print iron-on labels.
4.2 Applying Iron-on Labels to Fabric
Follow these steps to securely apply the iron-on label to your chosen fabric:
- Peel off the backing from the printed label.
- Place the label on the fabric with the printed side facing down. The text should appear reversed at this stage.
- Cover the label with a thin cotton cloth to protect the fabric and the label during ironing.
- Preheat your iron to approximately 150°C - 180°C (300°F - 350°F).
- Apply continuous ironing pressure for 15 to 30 seconds. Repeat this process 3 to 5 times, ensuring even heat distribution. For best results, apply firm pressure (3kg - 5kg force) after ironing the four corners to fix the label's position and reduce warping.
- Allow the label and fabric to cool completely.
- Carefully peel off the white back-adhesive layer. The printed text should now be transferred to the fabric.

Image: Ironing an iron-on label onto clothing.
5. Manutenzione
Nome termoadesivo Phomemo Tags are designed to be washable and durable. To ensure longevity:
- Wait at least 24 hours after ironing before washing the item.
- Wash items with applied labels according to the fabric's care instructions.
- Avoid harsh scrubbing directly on the label area.
6. Risoluzione Dei Problemi
6.1 Label Not Adhering Properly
- Insufficient Heat/Pressure: Ensure the iron is preheated to the recommended temperature (150°C - 180°C) and firm, continuous pressure is applied for 15-30 seconds, repeated 3-5 times.
- Tipo di tessuto: These labels are suitable for cotton, linen, and polyester. Ensure the fabric is clean and dry before application.
- Tempo di raffreddamento: Allow the label to cool completely before attempting to peel off the backing. Premature peeling can cause incomplete transfer.
6.2 Label Peeling After Washing
- Tempo di polimerizzazione: Always wait at least 24 hours after application before the first wash to allow the adhesive to fully set.
- Application Quality: Re-evaluate the application process, ensuring adequate heat, pressure, and repetitions during ironing.
7. Specifiche
| Caratteristica | Dettaglio |
|---|---|
| Marca | Fomeo |
| Numeri di modello | Q5-FA231, Q5-FA233 |
| Larghezza etichetta | 1/2 di pollice (12 mm) |
| Lunghezza etichetta | 6.5 feet (2m) per roll |
| Tipo di materiale | Fabric Iron-on |
| Colori disponibili | White on Blue, Black on White |
| Compatibilità | Testo e Traduzione Dymotag (LT-110T, LT-100T, LT-100H Plus, LT-100H, QX50, XR, XM, 200B), Phomemo (P12, P12-Pro, LT12 F12) |
| Peso dell'articolo | 2.04 once |
| Dimensioni del prodotto | 7.09 x 2.36 x 1.57 pollici |

Image: Detailed specifications and features of the iron-on labels.
8. Garanzia e supporto
For any questions, technical assistance, or warranty information regarding your Phomemo Iron-on Name Tags, please contact Phomemo customer support through their official webo al rivenditore presso cui è stato acquistato il prodotto. Si prega di conservare la prova d'acquisto per eventuali reclami in garanzia.


