1. Introduzione
Thank you for choosing the COUGAR MX360 RGB Mid Tower Case. This manual provides essential information for the proper installation, operation, and maintenance of your new PC case. The MX360 RGB combines a sleek design with ARGB LED strips on the front panel, offering excellent cooling performance and support for a wide range of components, including up to a 360mm radiator, 315mm graphics cards, and 170mm CPU coolers. Its compact layout and full-length PSU shroud contribute to a clean and organized build.
2. Informazioni sulla sicurezza
- Scollegare sempre l'alimentatore dalla presa a muro prima di installare o rimuovere qualsiasi componente.
- Handle components with care to avoid damage from static electricity. Consider using an anti-static wrist strap.
- Tenere le parti di piccole dimensioni e le viti lontano dalla portata dei bambini.
- Assicurare una corretta ventilazione attorno al case per evitare il surriscaldamento.
- Non tentare di modificare la custodia o i suoi componenti, poiché ciò potrebbe invalidare la garanzia e comportare rischi per la sicurezza.
3. Contenuto della confezione
Si prega di verificare che tutti i seguenti articoli siano inclusi nel pacchetto:
- Custodia mid-tower COUGAR MX360 RGB
- Scatola degli accessori (contenente viti, distanziatori, fascette, ecc.)
- Manuale dell'utente (questo documento)
4. Prodotto finitoview
The COUGAR MX360 RGB case features a minimalist design with integrated ARGB lighting and a tempered glass side panel for showcasing la tua build.

Figura 4.1: Lato anteriore view of the COUGAR MX360 RGB case, showing the interior and active RGB lighting.
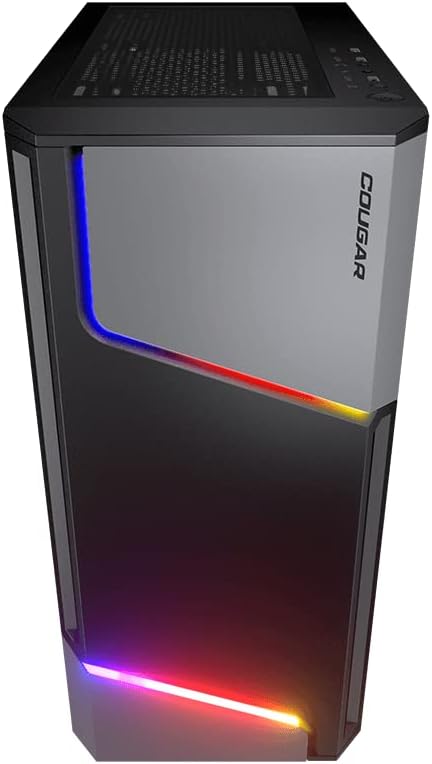
Figura 4.2: Fronte view of the COUGAR MX360 RGB case, highlighting the integrated ARGB LED strips.
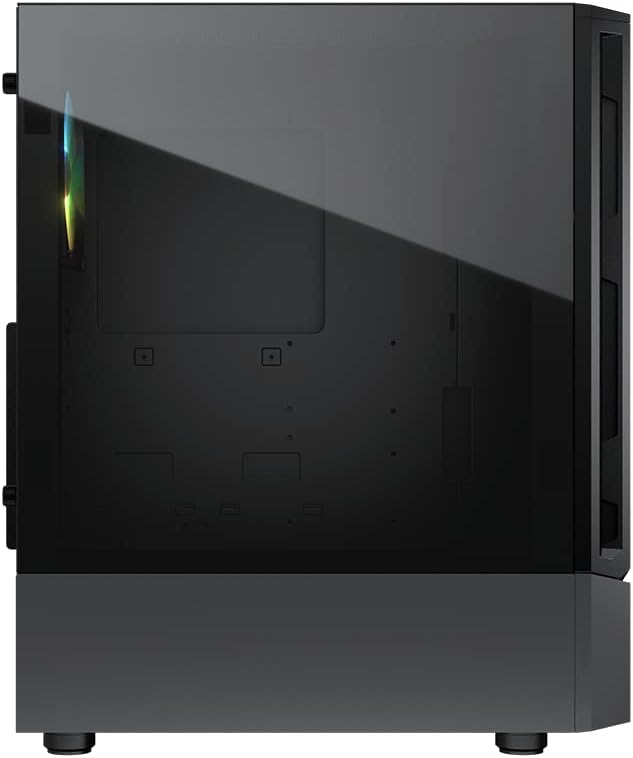
Figura 4.3: lato view of the COUGAR MX360 RGB case, featuring the tempered glass panel.

Figura 4.4: Fronte angolato view of the COUGAR MX360 RGB case, showcasing its design and ARGB elements.
5. Configurazione e installazione
Follow these steps to install your components into the COUGAR MX360 RGB case.
5.1 Preparazione del caso
- Posizionare la custodia su una superficie piana e stabile.
- Remove the tempered glass side panel by unscrewing the thumb screws at the rear of the case and carefully sliding the panel off.
- Remove the opposite metal side panel by unscrewing the thumb screws and sliding it off.
5.2 Installazione della scheda madre
- Installare la schermatura I/O (se non preinstallata sulla scheda madre) nell'apertura posteriore del case.
- Ensure the correct standoffs are installed for your motherboard form factor (ATX, Micro-ATX, Mini-ITX). Adjust or add standoffs as needed.
- Posizionare con attenzione la scheda madre sui distanziatori, allineando i fori delle viti.
- Fissare la scheda madre con le viti fornite.
5.3 Installazione dell'unità di alimentazione (PSU).
- Locate the PSU shroud at the bottom of the case.
- Slide your PSU into the designated compartment from the rear of the case.
- Fissare l'alimentatore con le viti dalla parte posteriore del case.
- Route necessary cables through the cutouts in the PSU shroud for cable management.
5.4 Installazione dell'unità di archiviazione
The MX360 RGB supports various storage configurations.
- HDD da 3.5": Install into the drive cage located under the PSU shroud.
- 2.5" SSDs/HDDs: Mount onto the dedicated trays or mounting points behind the motherboard tray.
5.5 Installazione della scheda grafica (GPU)
- Rimuovere le coperture degli slot PCIe necessari dalla parte posteriore del case.
- Inserire la scheda grafica nello slot PCIe appropriato sulla scheda madre.
- Secure the graphics card with screws. The case supports graphics cards up to 315mm in length.
5.6 Installazione del sistema di raffreddamento (ventole/radiatori)
The case supports up to six fans and a 360mm water cooling radiator.
- Davanti: Supports up to 3 x 120mm or 2 x 140mm fans, or a 240/280/360mm radiator.
- Superiore: Supports up to 2 x 120mm or 2 x 140mm fans, or a 240/280mm radiator.
- Posteriore: Supporta 1 ventola da 120 mm.
Install fans or radiators using the provided screws, ensuring proper airflow direction.
5.7 Collegamenti del pannello frontale
Connect the front panel cables (USB, Audio, Power, Reset, LED) to their corresponding headers on your motherboard. Refer to your motherboard manual for exact header locations.
5.8 ARGB Lighting Connection
The integrated ARGB LED strips on the front panel connect via a 5V/3Pin ARGB connector. Connect this cable to a compatible 5V/3Pin ARGB header on your motherboard to synchronize lighting effects with your system.
6. Funzionamento del caso
Once all components are installed and connected, replace the side panels. Power on your system using the power button on the top I/O panel. The ARGB lighting will illuminate, controlled by your motherboard's software or a dedicated ARGB controller if you have one installed.
7. Manutenzione
Una manutenzione regolare aiuta a garantire prestazioni ottimali e longevità dei componenti del PC.
- Filtri antipolvere: The MX360 RGB includes removable dust filters (e.g., top, bottom). Periodically remove and clean these filters with compressed air or water (ensure they are completely dry before reinstallation).
- Pulizia interna: Use compressed air to remove dust from internal components like fans, heatsinks, and the motherboard.
- Pulizia esterna: Pulire le superfici esterne con un panno morbido, damp stoffa. Evitare detergenti abrasivi.
8. Risoluzione Dei Problemi
In caso di problemi, fare riferimento ai seguenti passaggi comuni per la risoluzione dei problemi:
- Nessun potere: Ensure all power cables (24-pin ATX, 8-pin CPU, GPU power) are securely connected. Check the PSU switch is in the 'ON' position. Verify front panel power button connection to the motherboard.
- Illuminazione ARGB non funzionante: Confirm the 5V/3Pin ARGB connector is correctly plugged into a compatible motherboard header. Check your motherboard's RGB software for control settings.
- Surriscaldamento: Ensure all case fans are spinning and oriented correctly for optimal airflow. Check for dust buildup on filters and components. Verify CPU cooler and GPU cooler are properly installed.
- Collegamenti allentati: Re-seat all components (RAM, GPU, storage drives) and check all power and data cables.
9. Specifiche
| Caratteristica | Specificazione |
|---|---|
| Marca | PUMA |
| Nome del modello | MX360RGB |
| Numero modello articolo | CGR-5CC6G-RGB |
| Tipo di caso | Mid Tower |
| Dimensioni (LxWxH) | 14.88 x 8.27 x 18.11 pollici (378 x 210 x 460 mm) |
| Peso dell'articolo | 10.56 libbre (4.8 chilogrammi) |
| Materiale | Tempered Glass, Fine Metal |
| Colore | Nero |
| Supporto per la scheda madre | Mini ITX/Micro ATX/ATX |
| massimo Lunghezza scheda grafica | 315 millimetri |
| massimo Altezza del dispositivo di raffreddamento della CPU | 170 millimetri |
| Supporto PSU | ATX standard PS2 |
| Metodo di raffreddamento | Aria / Acqua |
| Supporto radiatore | Front: 360mm / 280mm / 240mm / 140mm / 120mm Superiore: 280 mm / 240 mm / 140 mm / 120 mm Posteriore: 120mm |
| Supporto per i fan | Anteriore: 3 x 120 mm / 2 x 140 mm Parte superiore: 2 x 120 mm / 2 x 140 mm Posteriore: 1 x 120 mm |
| Alloggiamenti unità | 3.5" HDD: 2 2.5" SSD: 2+2 (converted from 3.5" drive bays) |
| Pannello I/O | USB 3.0 x 2, USB 2.0 x 1, Mic x 1, Audio x 1, RGB Button |
| Caratteristica speciale | ARGB LED Strips, Full-length PSU Cover for Cable Hiding and Improved Airflow |
10. Garanzia e supporto
COUGAR products are designed and manufactured to the highest quality standards. For warranty information, please refer to the warranty card included with your product or visit the official COUGAR websito. Conservare la prova d'acquisto per eventuali reclami in garanzia.
For technical support or further assistance, please visit the official COUGAR websito o contattare il servizio clienti. Puoi trovare maggiori informazioni e risorse sul sito COUGAR Store on Amazon.