1. Introduzione
The GAMDIAS HELIOS P2-1000G is a fully modular power supply unit designed for high-performance computing systems. It features 80 Plus Gold certification for energy efficiency, supports ATX 3.1 and PCIe Gen 5.1 standards, and incorporates 100% Japanese capacitors for enhanced reliability. This manual provides essential information for the safe installation, operation, and maintenance of your power supply.
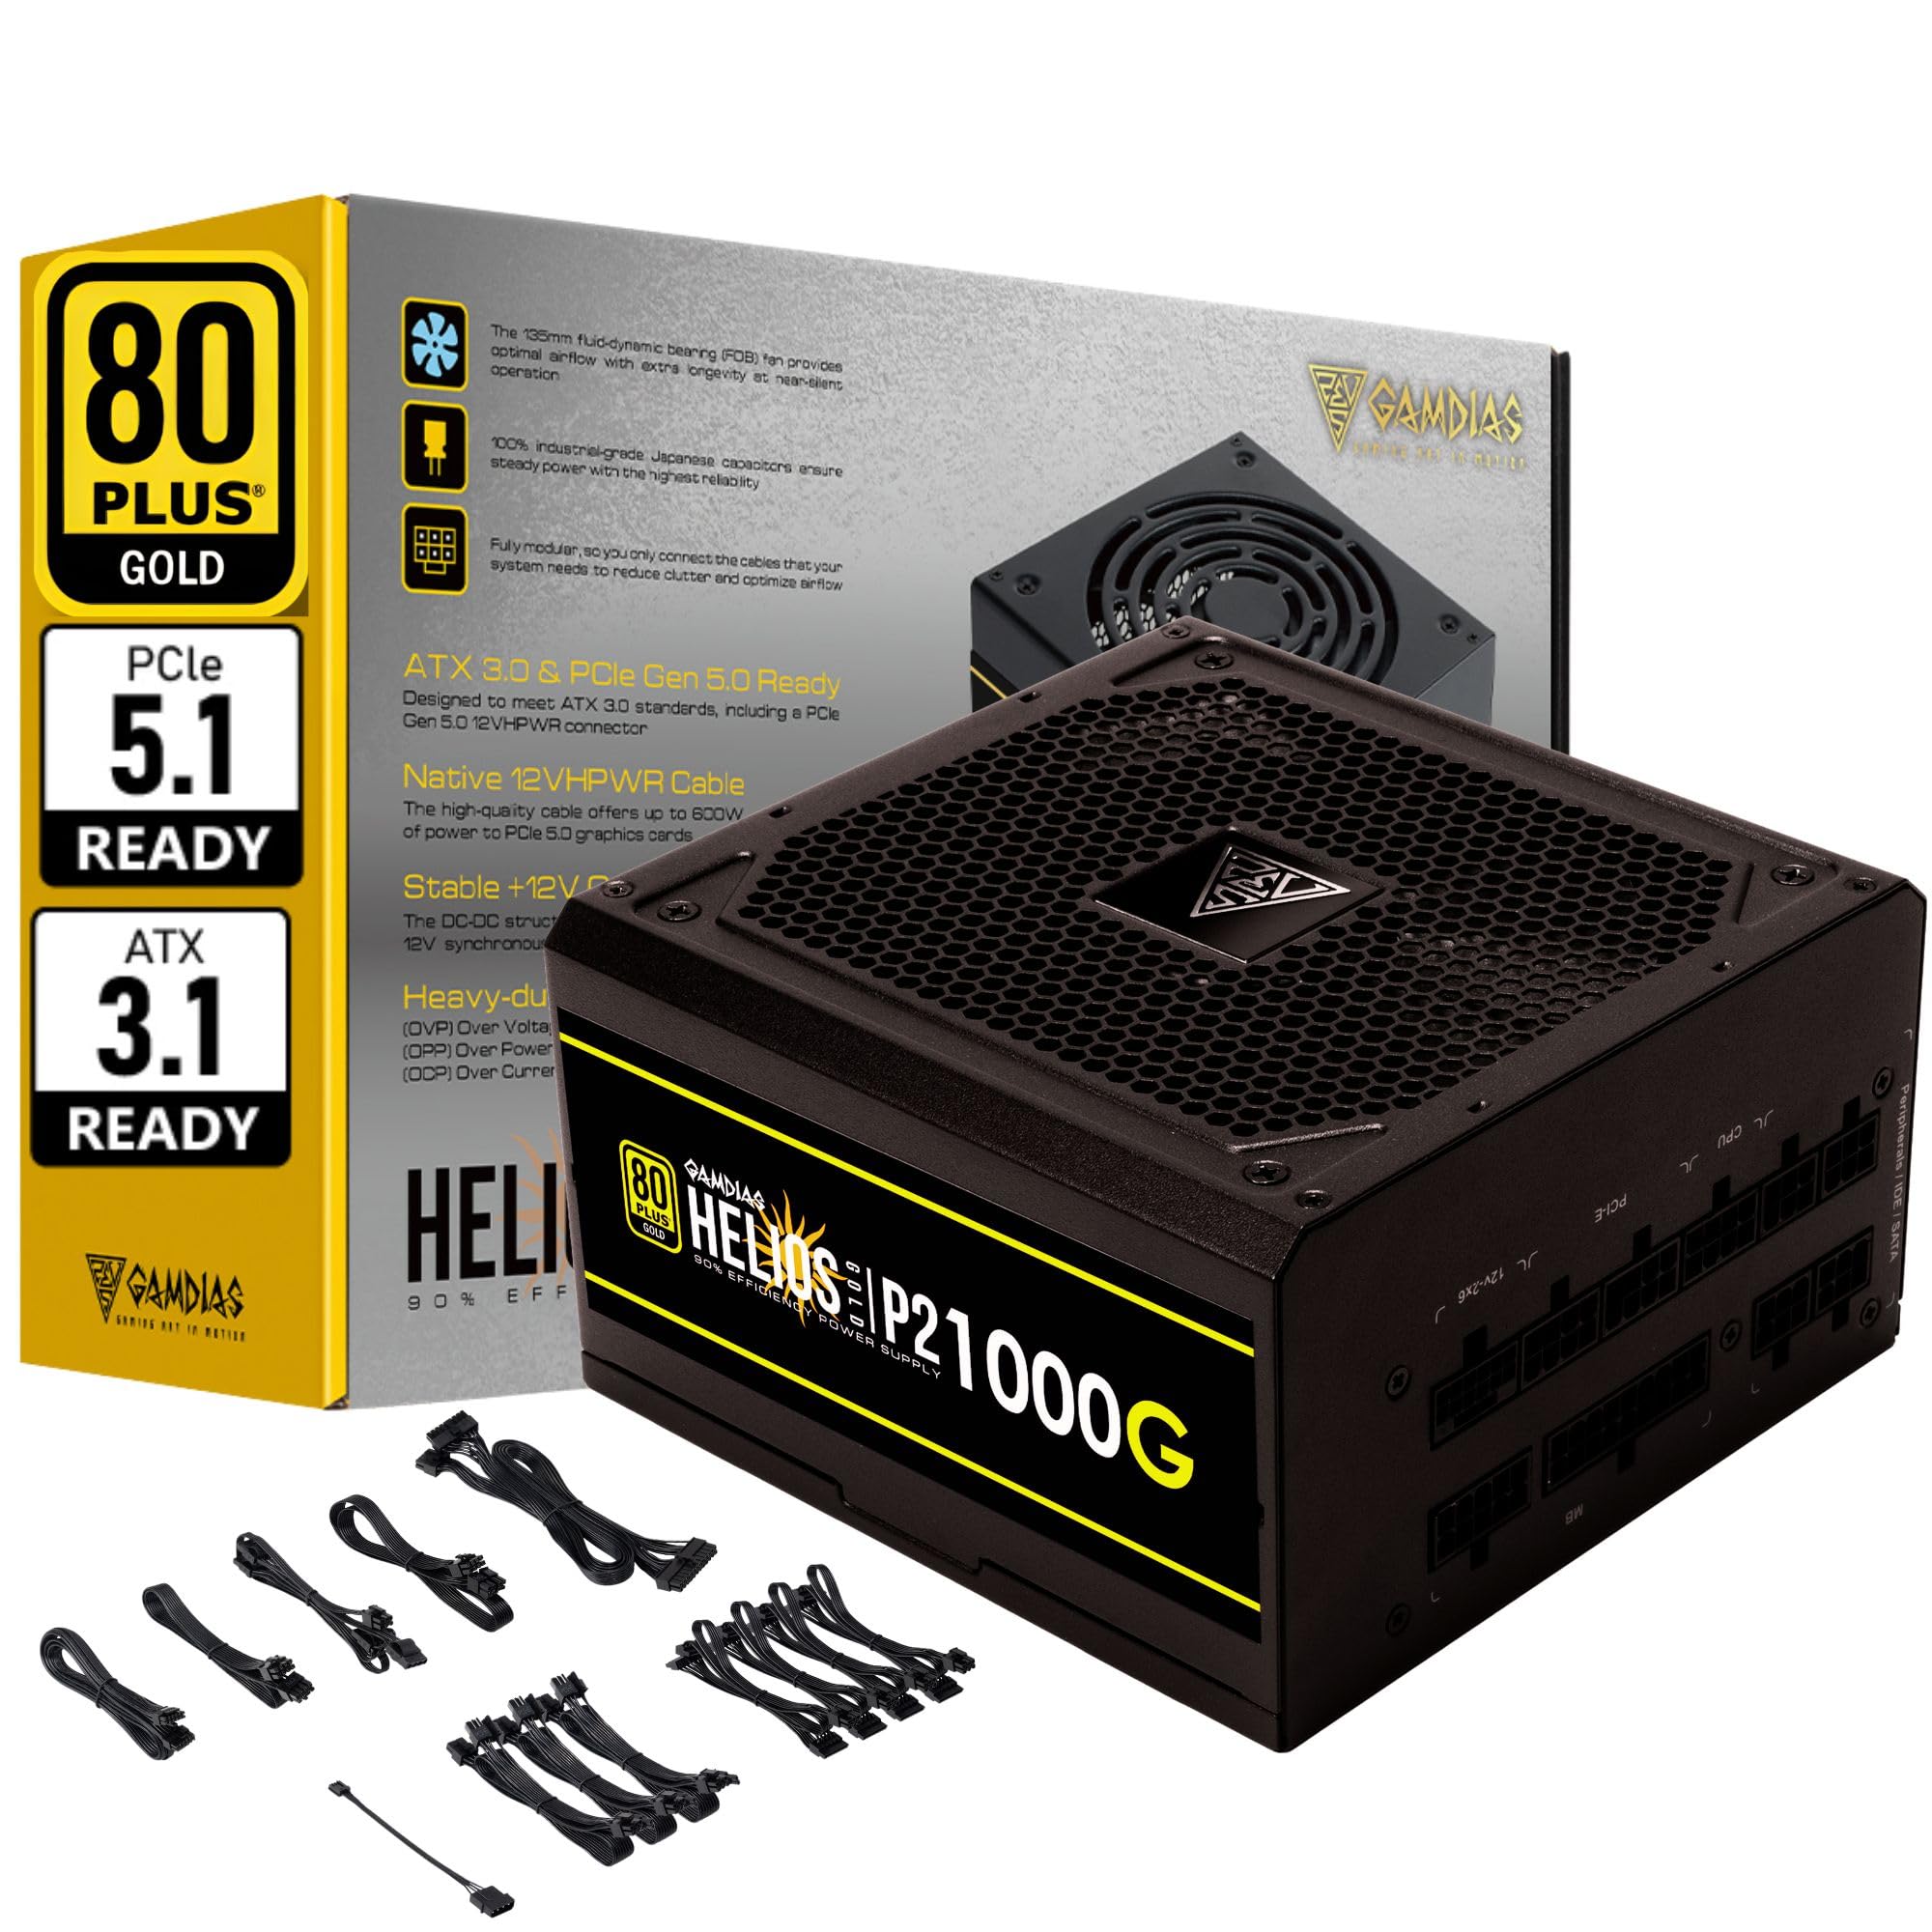
Immagine 1.1: Passoview of the GAMDIAS HELIOS P2-1000G Power Supply.
2. Informazioni sulla sicurezza
- Alto volumetage: L'alimentatore contiene alta tensionetage componenti. Non aprire l'alimentatore casing. There are no user-serviceable parts inside. Opening the unit will void the warranty and poses a risk of electric shock.
- Messa a terra corretta: Ensure the power supply is properly grounded using the provided power cord.
- Ventilazione: Non ostruire le aperture di ventilazione dell'alimentatore. Garantire un flusso d'aria adeguato attorno all'unità per evitare il surriscaldamento.
- Ambiente: Evitare di installare l'alimentatore in ambienti con elevata umidità, temperature estreme o polvere eccessiva.
- Spegni: Always disconnect the AC power cord from the wall outlet before installing, removing, or cleaning the power supply or any connected components.
- Corretto Wattage: Ensure the power supply's wattage is sufficient for your system's components.
3. Contenuto della confezione
Verificare che tutti gli articoli siano presenti nel pacco:
- GAMDIAS HELIOS P2-1000G Power Supply Unit
- Modular Cable Set (including 24-pin ATX, CPU, PCIe, SATA, Molex, and 12VHPWR cables)
- Cavo di alimentazione CA
- Viti di montaggio
- Manuale dell'utente (questo documento)
4. Caratteristiche del prodotto
The HELIOS P2-1000G power supply incorporates several features designed for performance and reliability:
- Efficienza certificata 80 PLUS Gold: Achieves up to 92% efficiency at 50% load, reducing power consumption and heat generation.
- ATX 3.1 and PCIe Gen 5.1 Ready: Designed to meet the latest power standards, supporting next-generation graphics cards with up to 200% total power excursion.
- Native 12VHPWR Cable: Includes a native 16-pin (12VHPWR) PCIe connector capable of delivering up to 600W for PCIe 5.1 graphics cards.
- Quiet Operation with 135mm Dual-Ball Bearing Smart Fan: Features a high-quality 135mm fan with a dual-ball bearing design for durability and quiet operation. The smart fan control adjusts speed based on load to minimize noise.
- Design completamente modulare: Allows for connecting only the necessary cables, improving cable management and airflow within the PC case.
- Premium Japanese Capacitors: Built with 100% high-quality Japanese 105°C/221°F electrolytic capacitors for superior durability and power stability.
- Meccanismi di protezione globale: Includes Over Current Protection (OCP), Over Temperature Protection (OTP), Over Voltage Protection (OVP), Over Power Protection (OPP), Under Voltage Protection (UVP), and Short Circuit Protection (SCP) to ensure system safety.
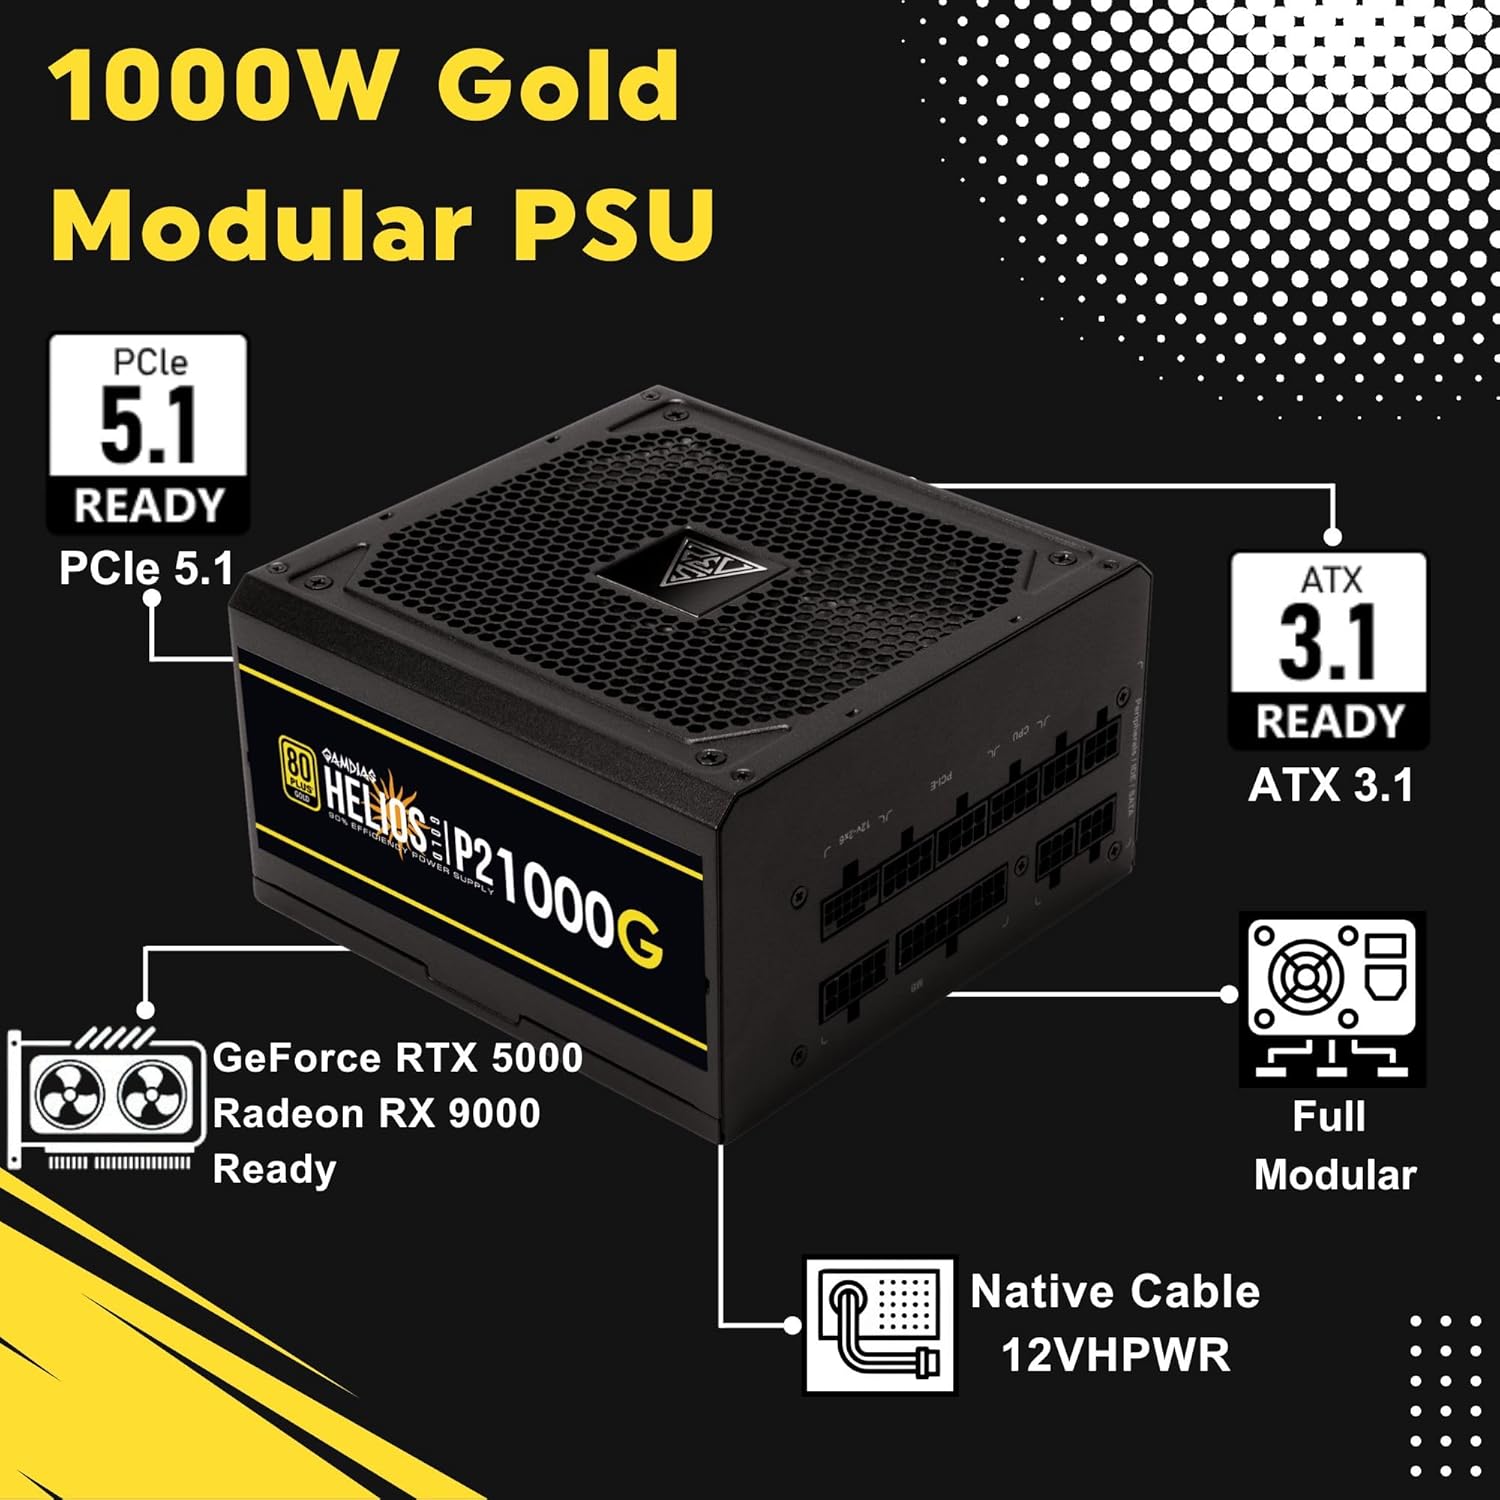
Image 4.1: Key features of the HELIOS P2-1000G, including PCIe 5.1 and ATX 3.1 readiness.

Image 4.2: The 80 Plus Gold certification ensures high energy efficiency.
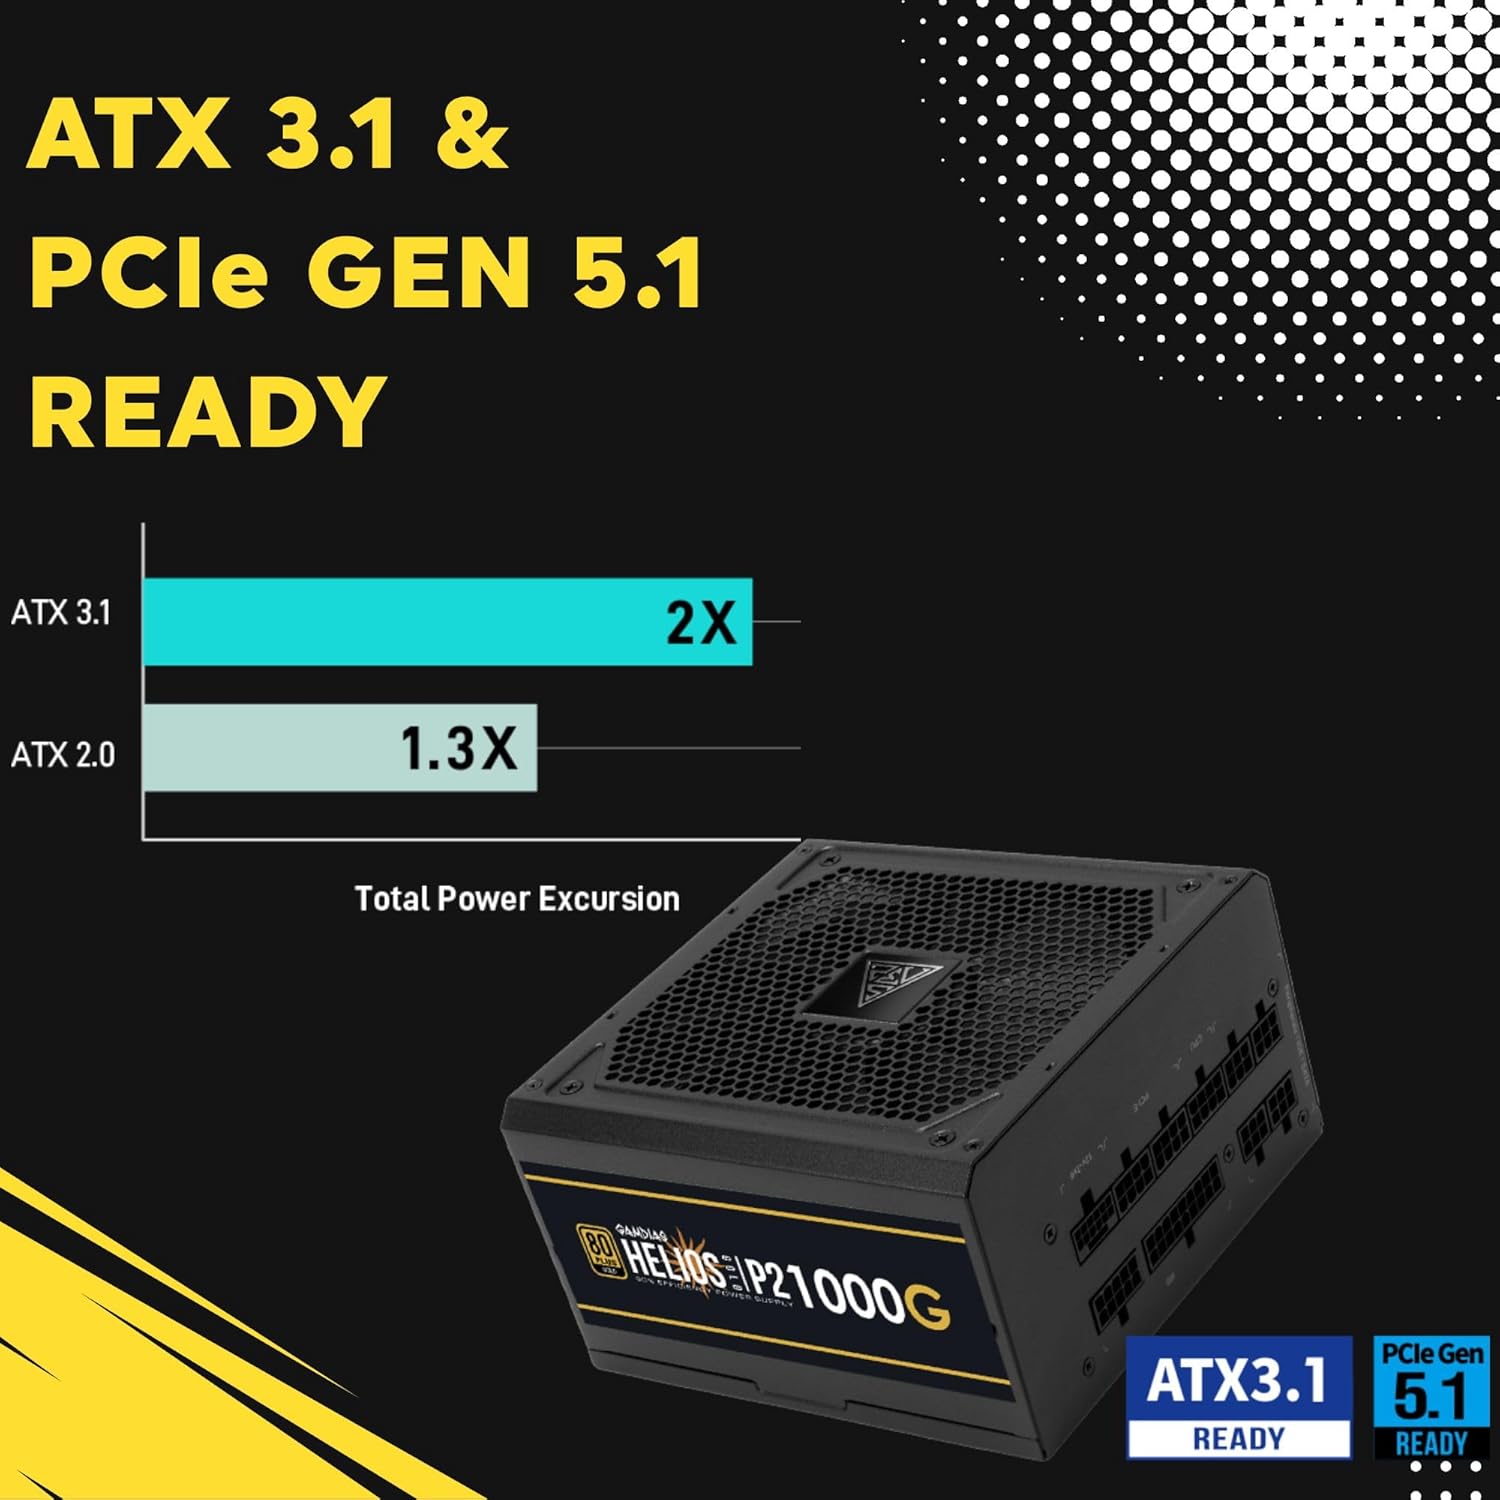
Image 4.3: The power supply is ready for ATX 3.1 and PCIe Gen 5.1, offering improved power excursion.

Image 4.4: Icons representing the various protection features integrated into the power supply.
5. Configurazione e installazione
5.1 Installazione fisica
- Prepara il tuo sistema: Assicurati che il computer sia completamente spento e scollegato dalla presa a muro.
- Montare l'alimentatore: Carefully slide the HELIOS P2-1000G into the power supply bay of your PC case. Ensure the fan is oriented correctly (typically facing downwards for bottom-mounted PSUs, or upwards if your case design requires it for optimal airflow).
- Proteggere l'alimentatore: Use the provided mounting screws to secure the power supply to the PC case from the rear.
5.2 Collegamenti dei cavi
The HELIOS P2-1000G is fully modular. Connect only the cables required for your system components.
- Cavo della scheda madre ATX a 24 pin: Connect the large 24-pin cable to the corresponding port on your motherboard. Ensure it clicks into place.
- CPU (EPS) Cable: Connect the 4+4-pin or 8-pin CPU cable to the CPU power connector(s) on your motherboard. High-end motherboards may require two 8-pin connectors.
- PCIe Graphics Card Cables:
- 12VHPWR Cable: For compatible PCIe 5.1 graphics cards, connect the native 16-pin 12VHPWR cable directly to the GPU. Ensure a firm connection.
- 6+2-pin PCIe Cables: For other graphics cards, connect the 6+2-pin PCIe cables to the GPU power connectors.
- Cavi di alimentazione SATA: Connect SATA power cables to your SSDs, HDDs, and other SATA-powered devices.
- Cavi periferici (Molex): Connect Molex cables for any legacy peripherals that require them.
- Cavo di alimentazione CA: Once all internal connections are made, connect the AC power cord to the power supply and then to a grounded wall outlet.

Image 5.1: The native 16-pin 12VHPWR cable for direct connection to PCIe 5.1 graphics cards.
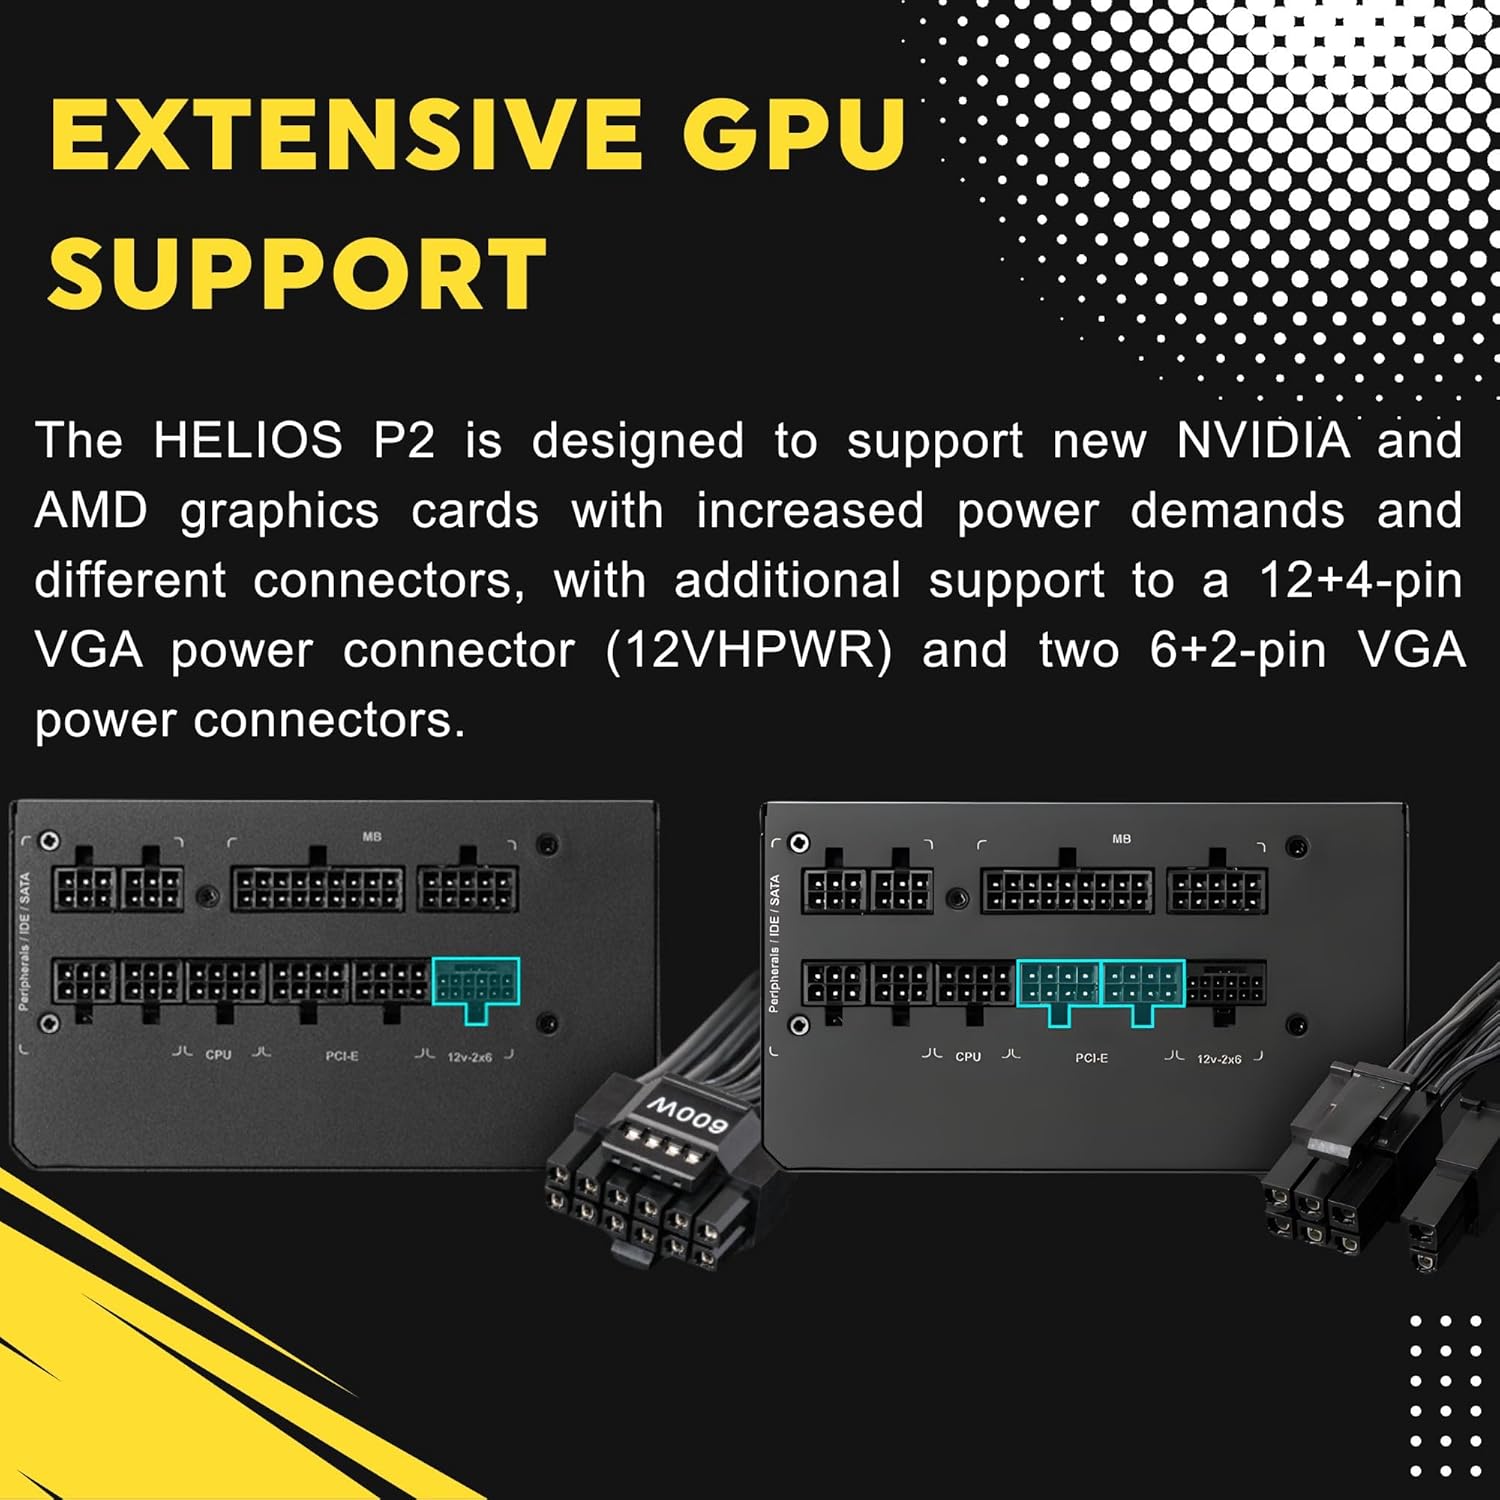
Image 5.2: Illustration of the fully modular design, showing various cable connections.
6. Istruzioni per l'uso
6.1 Accensione del sistema
After ensuring all cables are securely connected, flip the power switch on the back of the power supply to the 'ON' (I) position. You can then power on your computer using the case's power button.
6.2 Smart Fan Control
The HELIOS P2-1000G features a smart fan control system. The 135mm fan will adjust its speed automatically based on the power supply's load and internal temperature. This ensures optimal cooling while minimizing noise during lighter loads.

Image 6.1: Graph illustrating the smart fan's speed adjustment relative to power output.
7. Manutenzione
7.1 Pulizia
To maintain optimal performance and longevity, periodically clean the power supply:
- Scollegare l'alimentazione: Always unplug the AC power cord from the wall outlet and the power supply before cleaning.
- Rimozione della polvere: Use compressed air to gently blow dust out of the fan grille and ventilation openings. Hold the fan blades to prevent them from spinning rapidly during cleaning, which can damage the bearings.
- Pulizia esterna: Wipe the exterior of the power supply with a soft, dry cloth. Do not use liquid cleaners or solvents.
7.2 Conservazione
If storing the power supply, keep it in a cool, dry environment, away from direct sunlight and extreme temperatures. Use its original packaging if available to protect it from dust and physical damage.
8. Risoluzione Dei Problemi
Se riscontri problemi con l'alimentatore, fai riferimento ai seguenti passaggi comuni per la risoluzione dei problemi:
- Nessun potere:
- Assicurarsi che il cavo di alimentazione CA sia collegato saldamente sia all'alimentatore sia alla presa a muro.
- Check that the power switch on the back of the PSU is in the 'ON' (I) position.
- Verify all modular cables are firmly seated in both the power supply and the components.
- Prova la presa a muro con un altro dispositivo per verificare che sia alimentata.
- Instabilità/arresti anomali del sistema:
- Assicuratevi che i requisiti di alimentazione del vostro sistema non superino la capacità di 1000 W dell'alimentatore.
- Controllare che i cavi non siano allentati, in particolare quelli della scheda madre e della scheda grafica.
- Ensure adequate ventilation within your PC case to prevent overheating of components, including the PSU.
- Forte rumore della ventola:
- The fan speed adjusts based on load. High system load will naturally increase fan speed.
- Check for dust accumulation in the fan or vents and clean as described in the Maintenance section.
If issues persist after performing these steps, contact GAMDIAS customer support.
9. Specifiche
| Caratteristica | Specificazione |
|---|---|
| Nome del modello | HELIOS P2-1000G |
| Marca | GAMDIA |
| Uscita Wattage | 1000 Watt |
| Fattore di forma | ATX |
| Certificazione di efficienza | 80 PLUS Gold |
| Metodo di raffreddamento | Air (135mm Dual-Ball Bearing Smart Fan) |
| Tipo di connettore | ATX, PCI Express (Native 12VHPWR) |
| Dispositivi compatibili | Personal computer |
| Dimensioni del prodotto (L x P x A) | 12.8 x 8.27 x 4.13 pollici |
| Peso dell'articolo | 7.28 libbre (3300 grammi) |
| Data prima disponibilità | 19 aprile 2023 |
10. Informazioni sulla garanzia
GAMDIAS products are manufactured to the highest quality standards. For detailed warranty terms and conditions, please refer to the official GAMDIAS websito o la scheda di garanzia inclusa con il prodotto. Conservare la prova d'acquisto per eventuali reclami in garanzia.
11. Assistenza clienti
If you require technical assistance or have questions regarding your GAMDIAS HELIOS P2-1000G power supply, please visit the official GAMDIAS support website or contact their customer service department. Contact information can typically be found on the GAMDIAS websito o nella confezione del prodotto.


