Introduzione
This manual provides detailed instructions for the installation, operation, and maintenance of your JVC KD-T92MBS Single DIN Marine Bluetooth CD Stereo Receiver System. Please read this manual thoroughly before use to ensure proper functionality and safety. Keep this manual for future reference.
Prodotto finitoview
The JVC KD-T92MBS system is designed for marine environments, offering a comprehensive audio solution. The system includes the following main components:
- JVC KD-T92MBS Single DIN Marine Bluetooth CD Stereo Receiver
- Four (4) 6.5-inch 260 Watt Peak White Boat Audio Speakers with Multicolor LED
- One (1) 10-inch 1300 Watt LED Subwoofer
- Mono Amplifier with Wiring Kit
- Antenna marina
- Cavo per altoparlanti

Figura 1: JVC KD-T92MBS Marine Stereo Receiver highlighting key features like Bluetooth, CD Player, Front Aux, Front USB, 3 RCA Out, Water Resistant, AM FM Radio, Indoor/Outdoor, LED Lighting, Spotify, SiriusXM, Remote App, Dual Phone connection, Conformal Coating, LCD Display, Rapid Charging, Wireless Music Browsing, Spanish Menu, and 13 Band EQ.
Configurazione e installazione
Precauzioni di sicurezza
- Prima di iniziare qualsiasi lavoro elettrico, scollegare sempre il terminale negativo della batteria del veicolo.
- Assicurarsi che tutti i cavi siano adeguatamente isolati per evitare cortocircuiti.
- Use appropriate fuses as specified in the individual component manuals.
- Se non si è sicuri di una qualsiasi fase dell'installazione, consultare un installatore professionista.
Posizionamento dei componenti
Careful placement of each component is crucial for optimal performance and longevity, especially in a marine environment.
- Ricevitore: Install the KD-T92MBS in a location that is easily accessible and protected from direct water exposure, though it is water-resistant.
- Relatori: Mount the 6.5-inch speakers in suitable locations on your boat, ensuring clear sound projection and secure fastening.
- Subwoofer: Position the 10-inch subwoofer in an area that allows for effective bass reproduction, typically in a sealed or ported enclosure if not already integrated.
- Amplificatore: Install the mono amplifier in a dry, well-ventilated area, away from heat sources and direct sunlight.
- Antenna: Mount the marine antenna in a location that provides clear reception, typically high and unobstructed.

Figura 2: JVC 6.5-inch marine speakers with integrated multicolor LED lighting.
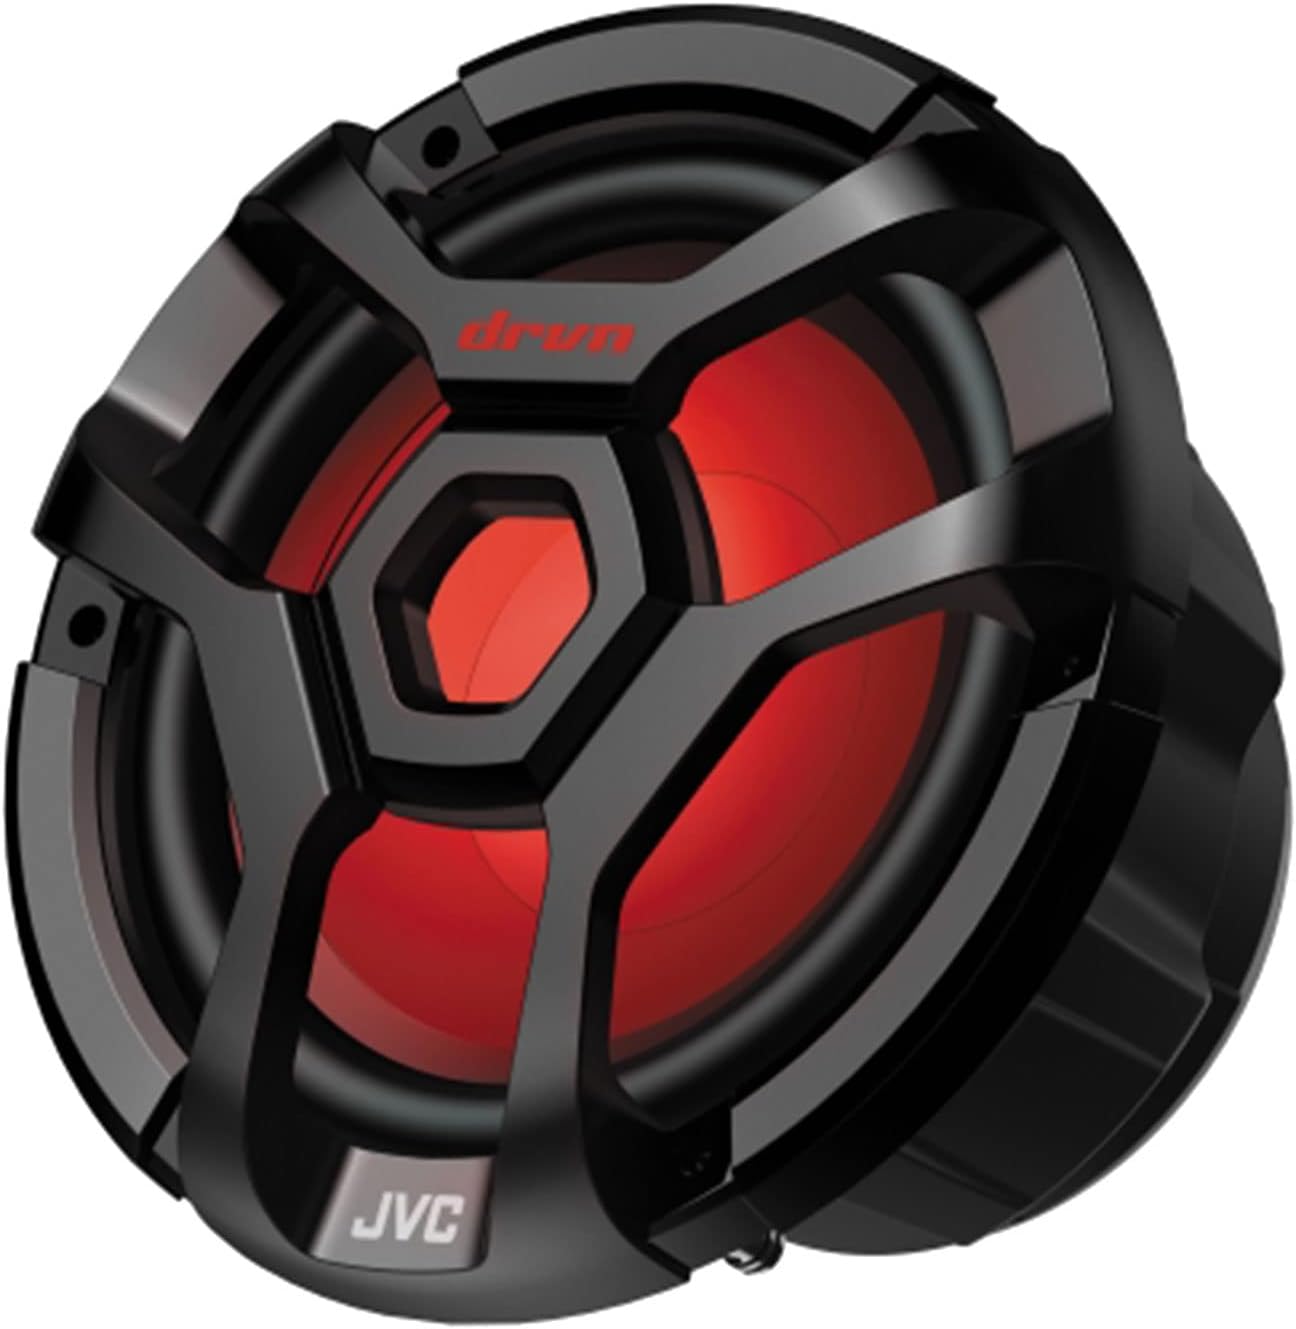
Figura 3: JVC 10-inch marine subwoofer with integrated LED lighting.

Figura 4: JVC mono amplifier, designed to power the subwoofer.
Collegamenti elettrici
Refer to the individual manuals for detailed wiring diagrams for each component. General connections include:
- Alimentazione e terra: Connect the main power wire (typically red or yellow) to a fused constant 12V source and the ground wire (black) to a clean chassis ground. The amplifier will have its own power and ground connections, often requiring a separate, heavier gauge wire directly from the battery.
- Accensione remota: Connect the remote turn-on wire (blue/white) from the receiver to the amplifier to activate it when the receiver is turned on.
- Collegamenti degli altoparlanti: Connect the speaker wires from the receiver to the 6.5-inch speakers. The subwoofer will connect to the mono amplifier, which in turn receives its signal from the receiver's RCA outputs.
- Antenna: Connect the marine antenna to the designated antenna input on the receiver.
- Uscite RCA: Use RCA cables to connect the receiver's pre-outs to the amplifier's inputs for the subwoofer.

Figura 5: Example of a wiring kit, including power cables, fuse holder, and various connectors for installation.

Figura 6: Marine antenna for radio reception.
Istruzioni per l'uso
Controlli di base

Figura 7: Front panel of the JVC KD-T92MBS receiver, showing controls and display.
- Power Button (SRC): Press to turn the unit ON. Press and hold to turn OFF.
- Manopola del volume: Ruotare in senso orario per aumentare il volume, in senso antiorario per diminuirlo.
- Source Button (SRC): Press repeatedly to cycle through available audio sources (CD, Tuner, Bluetooth, USB, AUX).
- Pulsante Menu/Impostazioni: Access audio settings, display settings, and system options.
Fonti audio
- Lettore CD: Insert a CD into the slot. Playback will begin automatically. Use track skip buttons to navigate.
- Radio AM/FM: Select "Tuner" source. Use the seek buttons to find stations. Press and hold to auto-seek. Save favorite stations using preset buttons.
- Audio Bluetooth:
- Assicurati che il Bluetooth sia abilitato sul tuo dispositivo mobile.
- Select "Bluetooth" source on the receiver.
- On your device, search for "JVC KD-T92MBS" and pair.
- Una volta effettuata l'associazione, è possibile riprodurre l'audio in streaming in modalità wireless.
- Ingresso USB: Connect a USB storage device to the front USB port. The unit will automatically detect and play compatible audio files.
- Ingresso AUX: Connect an external audio device using a 3.5mm stereo cable to the front AUX input.
Regolazioni del suono
Access the audio menu to adjust settings such as:
- Equalizzatore (EQ): Select from preset EQ curves or customize the 13-band graphic equalizer.
- Bassi/Alti: Regola con precisione i livelli dei bassi e degli acuti.
- Bilanciamento/Fader: Regola la distribuzione dell'audio tra gli altoparlanti sinistro/destro e anteriore/posteriore.
- Livello subwoofer: Control the output level of the connected subwoofer.
Controllo dell'illuminazione a LED
The speakers and subwoofer feature multicolor LED lighting. Refer to the receiver's menu or a dedicated remote control (if included) for options to change colors, patterns, or brightness.
Manutenzione
- Pulizia: Use a soft, dry cloth to wipe the receiver's front panel and speaker grilles. For stubborn dirt, a slightly damp È possibile utilizzare un panno, ma assicurarsi che non penetri umidità nell'unità. Evitare detergenti abrasivi o solventi.
- Resistenza all'acqua: While the unit is designed to be water-resistant, avoid direct high-pressure water jets. Ensure all covers and caps are securely closed to maintain water resistance.
- Rivestimento conforme: The receiver features a conformal coating on its circuit boards, providing enhanced protection against moisture and corrosion in marine environments. This requires no special user maintenance.
Risoluzione dei problemi
| Problema | Possibile causa | Soluzione |
|---|---|---|
| Nessun potere | Fusibile bruciato; cablaggio errato; collegamento elettrico allentato. | Check and replace fuses; verify power and ground connections; ensure wiring is secure. |
| Nessun suono dagli altoparlanti | Volume too low; incorrect source selected; speaker wires disconnected; amplificatore non alimentato. | Increase volume; select correct source; check all speaker connections; verify amppotenza del lifier e accensione remota. |
| Il Bluetooth non si connette | Bluetooth not enabled on device; device not in pairing mode; interference. | Ensure Bluetooth is ON on your device; put receiver in pairing mode; try re-pairing; move device closer to receiver. |
| CD playback errors | Dirty or scratched CD; incorrect disc format. | Clean CD with a soft cloth; try a different CD; ensure disc is compatible. |
| Scarsa ricezione radio | Antenna not connected; antenna damaged; poor signal area. | Check antenna connection; inspect antenna for damage; try moving to an area with better signal. |
Specifiche
| Caratteristica | Specificazione |
|---|---|
| Numero di modello | JVC KD-T92MBS |
| Marca | JVC |
| Peso dell'articolo | 33 libbre (peso totale del sistema) |
| Tecnologia di connettività | Ausiliario, Bluetooth, USB |
| Tipo di controllore | Squillo |
| Dispositivi compatibili | Oratore |
| Tipo di connettore | Jack da 3.5 mm, USB |
| Modalità di uscita audio | mono, stereo |
| Configurazione del canale audio surround | 5.1 (Note: This typically refers to the system's capability, not necessarily the head unit's direct output) |
| Potenza di uscita | 600 Watts (Likely ampuscita lifier) |
| Numero di canali | 2 (For receiver's internal amplification, external amplifier provides additional channels) |
Garanzia e supporto
Per informazioni dettagliate sulla garanzia, fare riferimento alla scheda di garanzia inclusa con il prodotto o visitare il sito ufficiale JVC websito. Conservare la prova d'acquisto per eventuali reclami in garanzia.
For technical support, troubleshooting assistance beyond this manual, or service inquiries, please contact JVC customer support through their official websito o le informazioni di contatto fornite nella confezione del prodotto.