1. Introduzione
This manual provides detailed instructions for the setup, operation, and maintenance of your NIIMBOT D11 Portable Bluetooth Thermal Label Printer. Please read this manual thoroughly before using the device to ensure proper function and longevity.

Image: The NIIMBOT D11 Label Maker, a compact and portable thermal printer.
2. Contenuto della confezione
Verificare che tutti gli articoli siano presenti nel pacco:
- 1 × NIIMBOT D11 Label Maker
- 1 × Cavo USB
- 1 × Roll of 0.6×1.6 inch (160 pcs) label tape (pre-installed inside the machine)
- 1 × Manuale utente
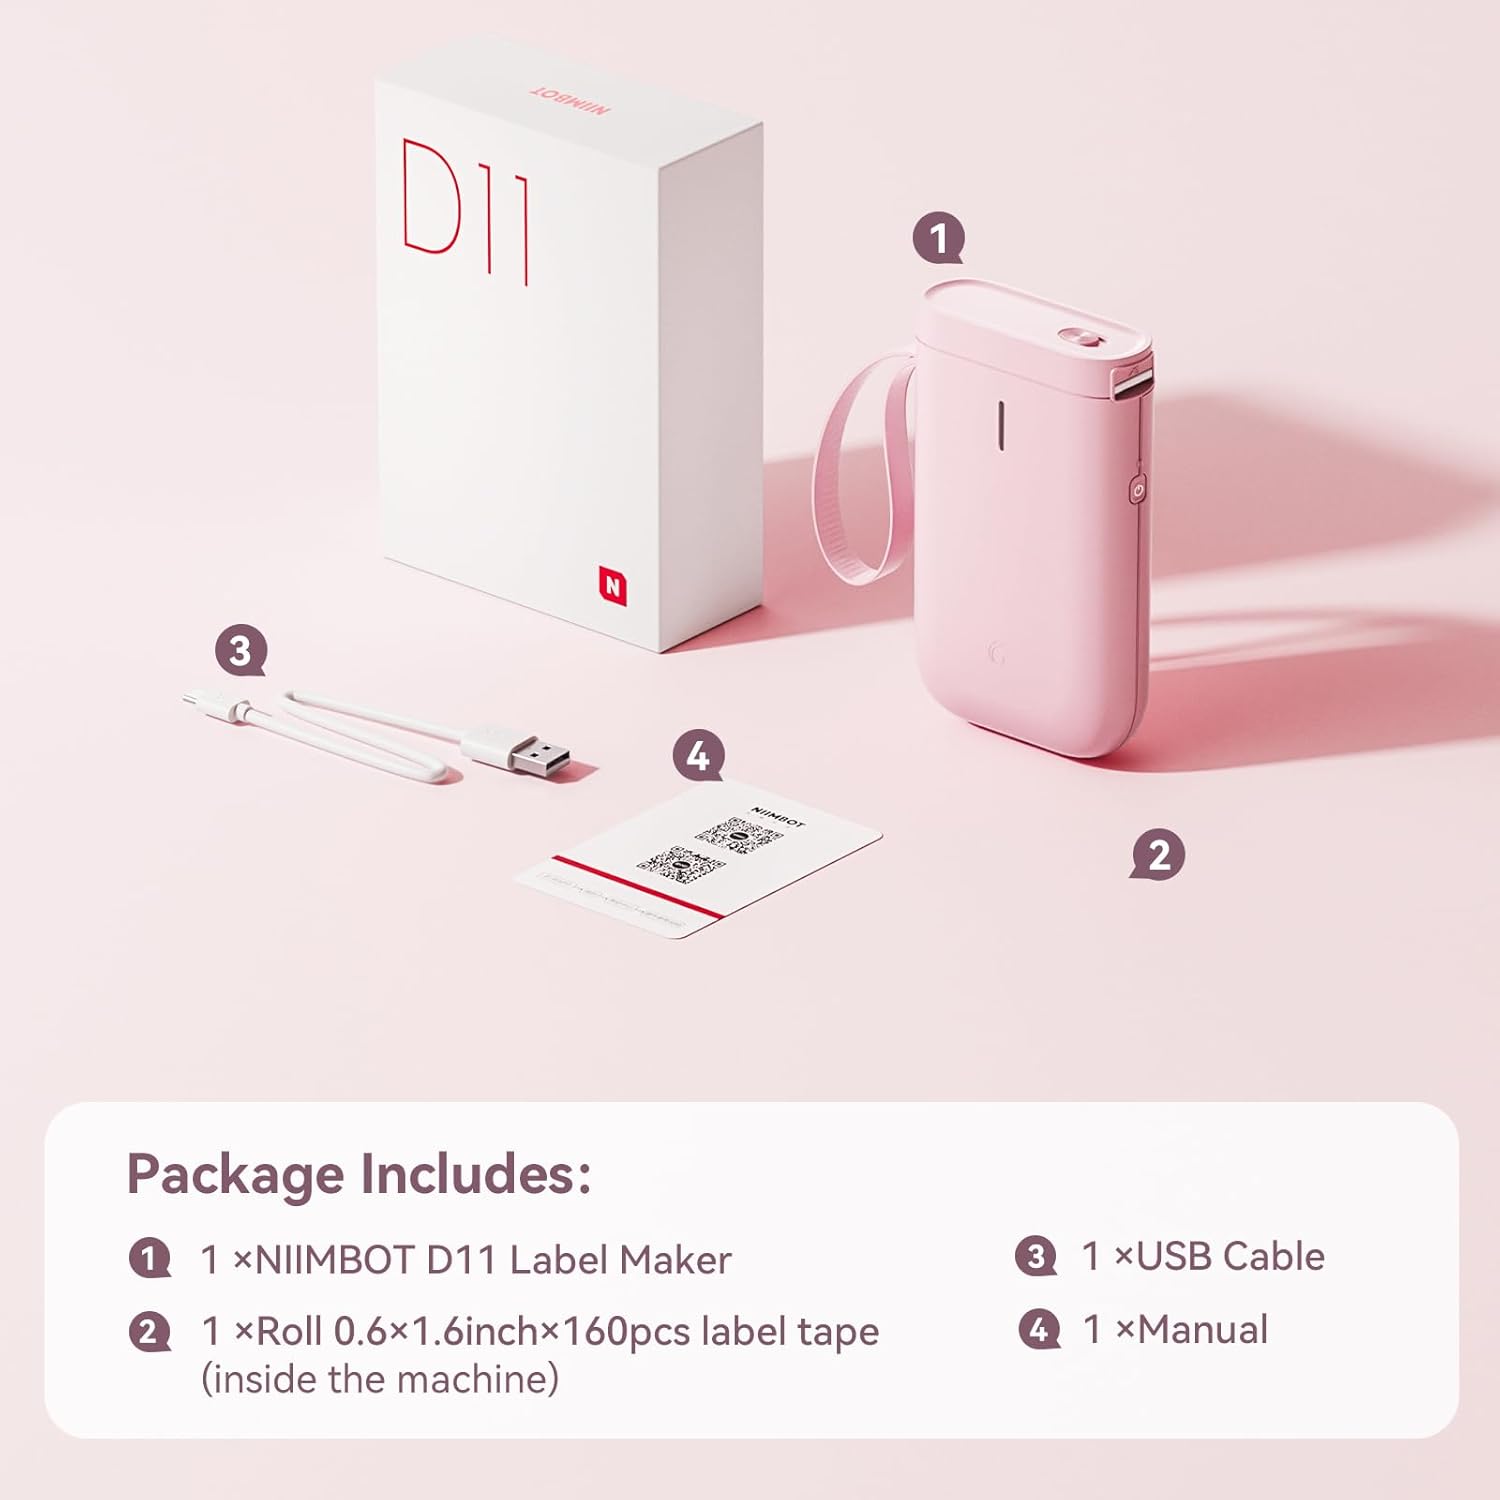
Image: Visual representation of the NIIMBOT D11 Label Maker package contents, including the device, USB cable, label roll, and manual.
3. Impostazione
3.1 Ricarica del dispositivo
Before first use, fully charge the NIIMBOT D11 Label Maker using the provided USB cable. Connect the USB cable to the charging port on the device and a compatible USB power source. The LED indicator will show charging status. A full charge may take several hours.
3.2 Caricamento della carta per etichette
- Locate the paper cover switch on the top of the device.
- Slide the switch to open the paper cover.
- Ensure the label roll is inserted correctly. The tip of the label tape should face towards the power button.
- Chiudere bene il coperchio della carta.
- Press and hold the power button for 0.5 seconds to allow the machine to automatically align the label paper.
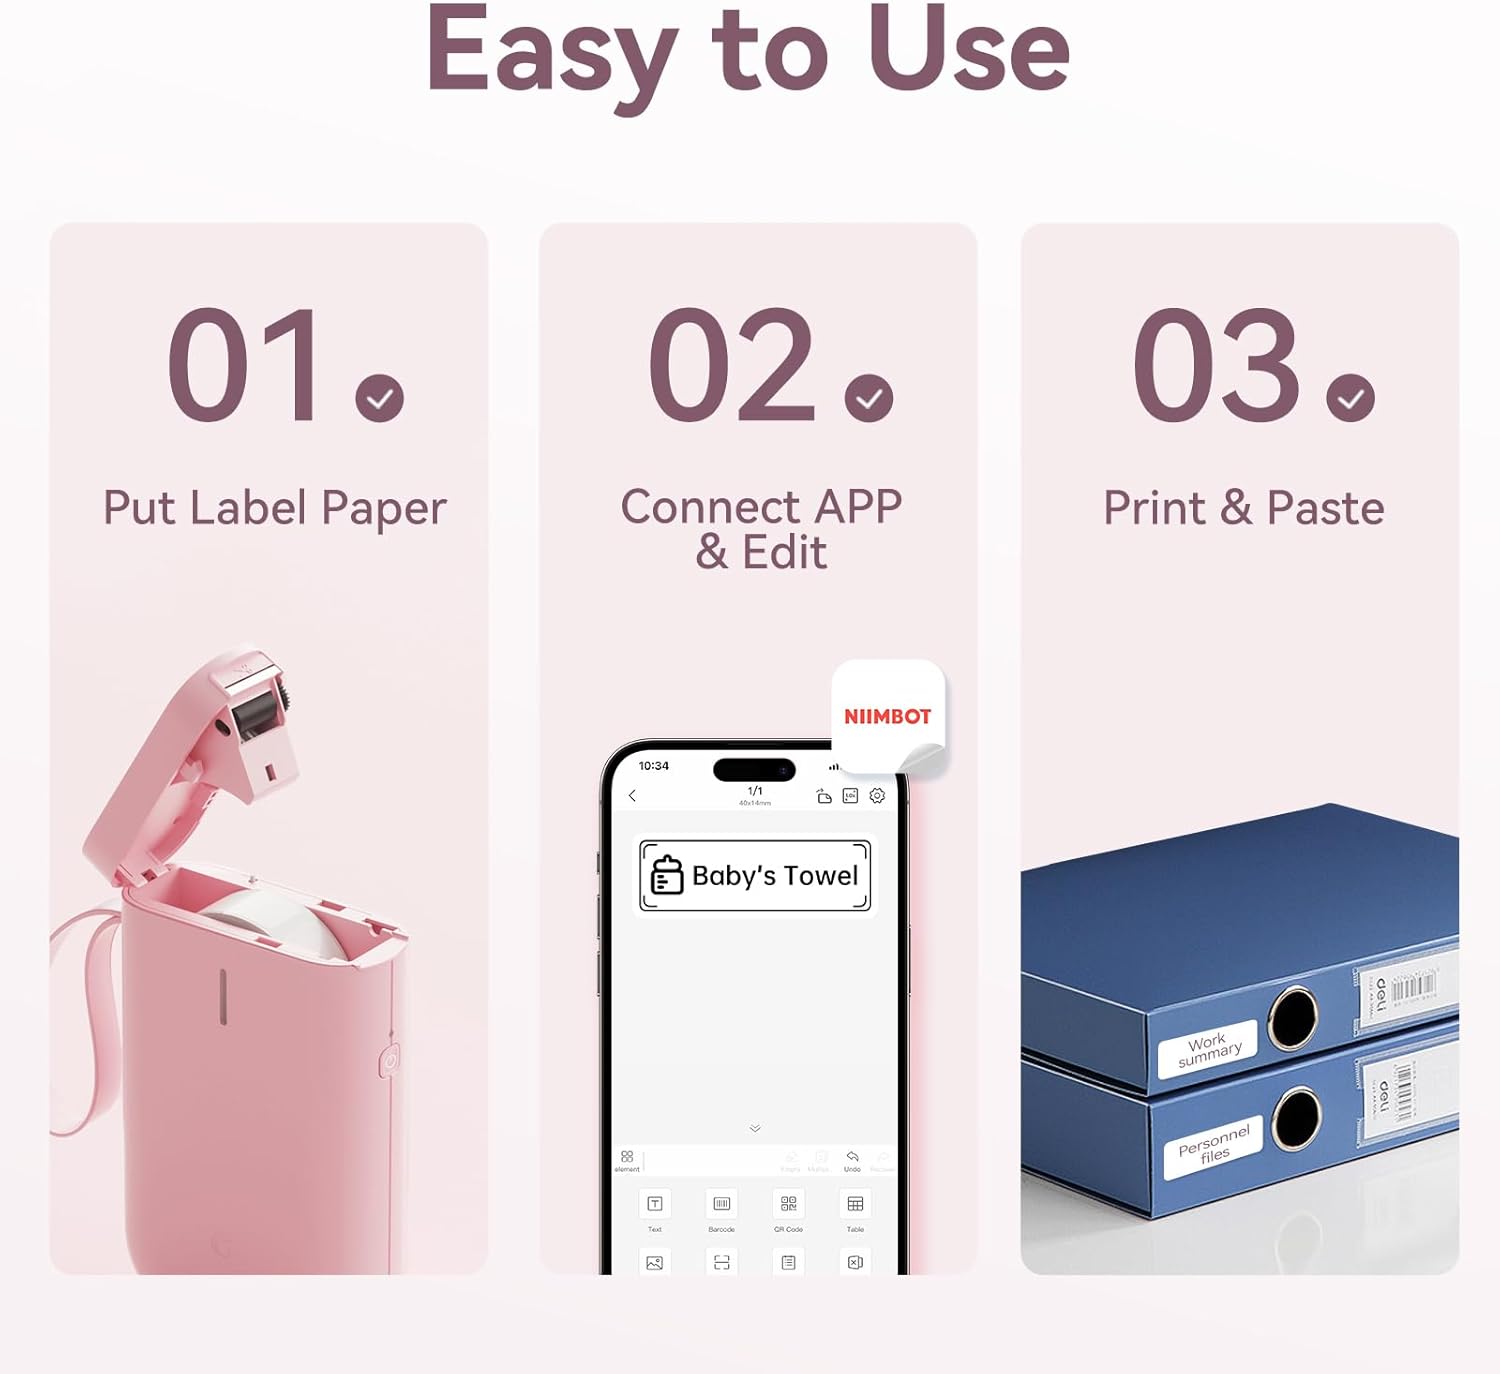
Image: Visual guide showing the three steps to load label paper, connect to the app, and print/paste labels.
Video: Detailed operation guide for the D11 Label Maker, including paper loading and basic functions.
3.3 Download e installazione dell'app
The NIIMBOT D11 operates via the NIIMBOT mobile application. Download the app from your device's app store:
- For iOS devices: Search "NIIMBOT" in the Apple App Store.
- For Android devices: Search "NIIMBOT" in the Google Play Store.
Installa l'applicazione sul tuo smartphone.
3.4 Associazione con il dispositivo mobile
- Turn on the NIIMBOT D11 Label Maker by pressing the power button for 3 seconds. The blue light will flash.
- Abilita il Bluetooth sul tuo dispositivo mobile.
- Open the NIIMBOT application.
- In the app, search for nearby devices and select "D11" from the list to connect.
- Once connected, the app will automatically identify the label paper template.
4. Istruzioni per l'uso
4.1 Creazione di etichette
The NIIMBOT app offers various features for label creation:
- Testo: Inserisci testo personalizzato, modifica carattere, dimensione e stile.
- Icone: Scegli tra una libreria di icone per migliorare le tue etichette.
- Codici a barre/codici QR: Generate and print barcodes or QR codes for product identification or information.
- Modelli: Utilize pre-designed templates for common labeling needs (e.g., home organization, price tags).
- Immagini: Insert simple images onto your labels.
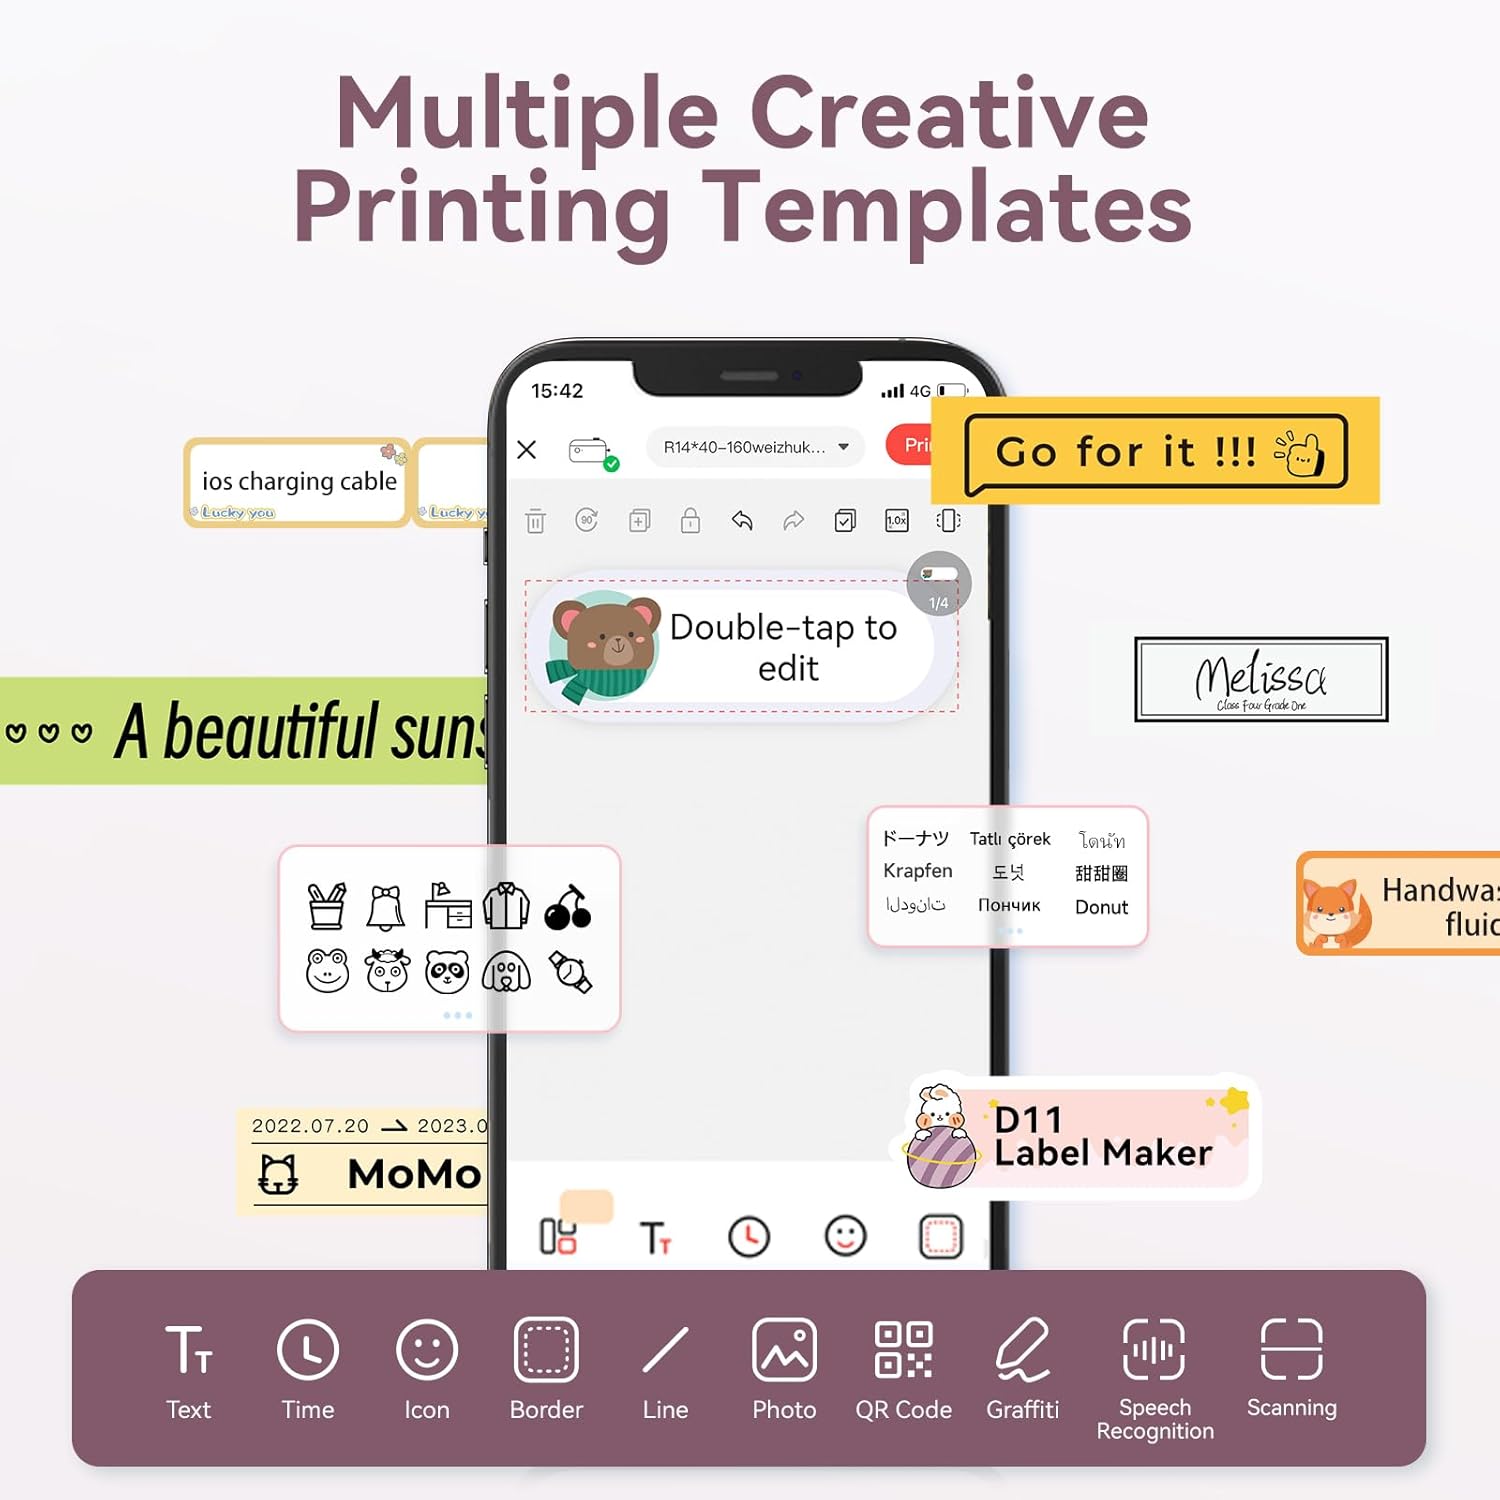
Image: The NIIMBOT app interface displaying various creative templates and editing options for labels.
4.2 Stampa delle etichette
Dopo aver progettato l'etichetta nell'app:
- Review l'etichetta preview nell'app.
- Adjust the number of copies and print density as needed.
- Click the "Print" button in the app. The label maker will print the labels.
- Gently tear off the printed labels from the machine.
Video: A demonstration of the D11 Label Maker in various scene applications, showcasinla sua facilità d'uso e versatilità.
Video: Un oltreview of the D Series Label Maker with tape, highlighting its features and applications.
5. Applicazioni
The NIIMBOT D11 Label Maker is versatile and suitable for various labeling needs:
- Organizzazione della casa: Labeling containers, storage bins, pantry items, and personal belongings.
- Ufficio e scuola: Organizzazione files, documents, stationery, and school supplies.
- Piccola impresa: Creazione del prezzo tags, product labels, and inventory identification.
- Specialty Labels: Cable identification, jewelry tags, and food date marking.

Image: Collage showing labels used for home organization (medicine box), office files, business products (sweater with barcode), and school items (notebook).

Immagine: Examples of labels demonstrating features like waterproof properties, food date marking, data cable organization, and personal item identification.
6. Manutenzione
6.1 Pulizia
To maintain optimal printing quality, regularly clean the print head. Use a soft, lint-free cloth lightly dampened with isopropyl alcohol. Gently wipe the print head. Ensure the device is powered off before cleaning.
6.2 Conservazione
Store the label maker in a cool, dry place away from direct sunlight and extreme temperatures. Remove any label rolls if storing for extended periods.
7. Risoluzione Dei Problemi
| Problema | Possibile causa | Soluzione |
|---|---|---|
| Il dispositivo non si accende | Batteria scarica | Carica completamente il dispositivo. |
| Impossibile connettersi tramite Bluetooth | Bluetooth is off on phone; device not discoverable | Ensure phone's Bluetooth is on. Restart both device and phone. Re-pair in the app. |
| Qualità di stampa scadente | Dirty print head; incorrect label roll insertion; low print density setting | Clean the print head. Re-insert label roll correctly. Increase print density in app. |
| Le etichette non vengono alimentate correttamente | Label roll jammed or incorrectly inserted | Open cover, check for jams, re-insert label roll, and perform auto-alignment. |
8. Specifiche
- Nome modello: D11
- Tecnologia di stampa: Termico
- Connettività: Bluetooth
- Velocità di stampa massima (monocromatica): 20 ppm
- Risoluzione massima di stampa in bianco e nero: 203 dpi
- Batteria: 1 batteria agli ioni di litio (1200 mAh)
- Dimensioni del prodotto: 4.2 x 2.9 x 1.2 pollici
- Peso dell'articolo: 12.6 once
- Dispositivi compatibili: Smartphones (iPhone, iOS & Android)
- Metodo di controllo: Applicazione
- Caratteristiche speciali: Portable, Easy to Use, Clear Printing, Rechargeable
- Dimensioni massime dei supporti: Più piccolo di A3
- Sheet Size Options: 0.47''X1.57'', 0.55''x1.18'', 0.55''X1.57'', 0.47''X1.18'', 0.59''X1.18'' Inches
9. Garanzia e supporto
For warranty information and customer support, please refer to the official NIIMBOT website or contact their customer service directly. The user manual included in your package may also contain specific warranty details and contact information.
Per ulteriori risorse e informazioni sul prodotto, visitare il NIIMBOT Store on Amazon.


