1. Introduzione
Thank you for choosing the THOKWOK TK-X2 Motorcycle Bluetooth Headset. This manual provides detailed instructions for the proper installation, operation, and maintenance of your device. Please read this manual thoroughly before use to ensure optimal performance and safety.
Precauzioni di sicurezza:
- Dare sempre priorità alla sicurezza stradale. Non utilizzare il dispositivo in modo da distrarti dalla guida.
- Prima di guidare, assicurarsi che il dispositivo sia fissato saldamente al casco.
- Adjust volume to a safe level that allows you to hear ambient traffic sounds.
- Non tentare di smontare o modificare il dispositivo. Ciò potrebbe invalidare la garanzia e causare danni.
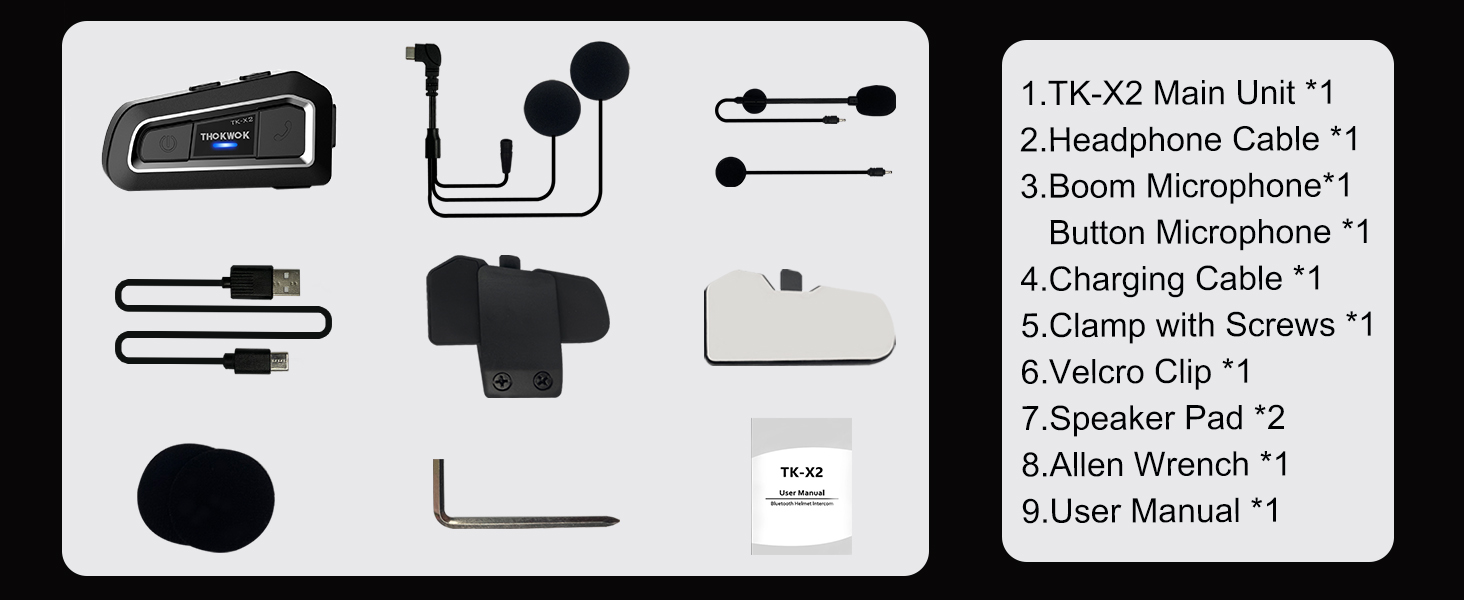
2. Cosa c'è nella scatola
Verificare che tutti i componenti siano presenti prima di procedere con l'installazione.

TK-X2 Main Unit

Microfono boom

Microfono a pulsante

Headphone Cable & Charging Cable
Clamp con viti
Clip in velcro
Cuscinetti per altoparlanti
Chiave a brugola
Manuale d'uso
3. Prodotto finitoview
The THOKWOK TK-X2 features an intuitive button layout for easy operation even with gloves. Below is a diagram highlighting the main unit and its components.
Main Unit: Power Button (left), Function Button (middle), Phone Button (right).
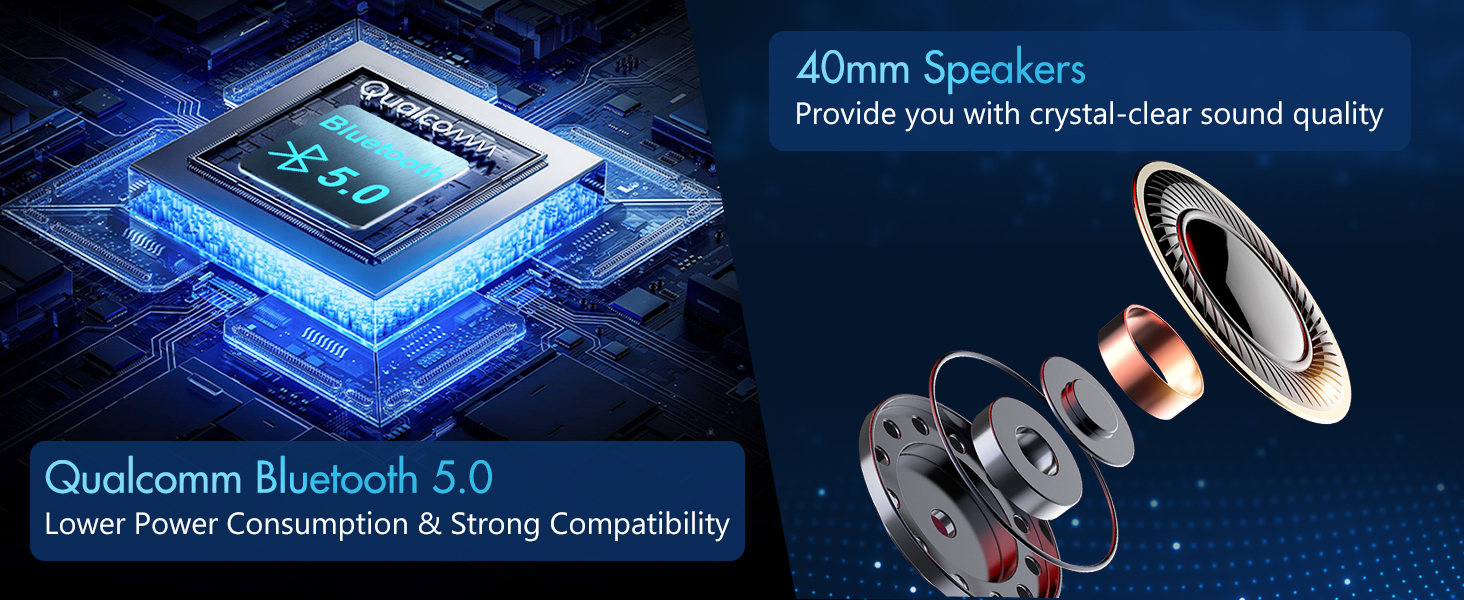
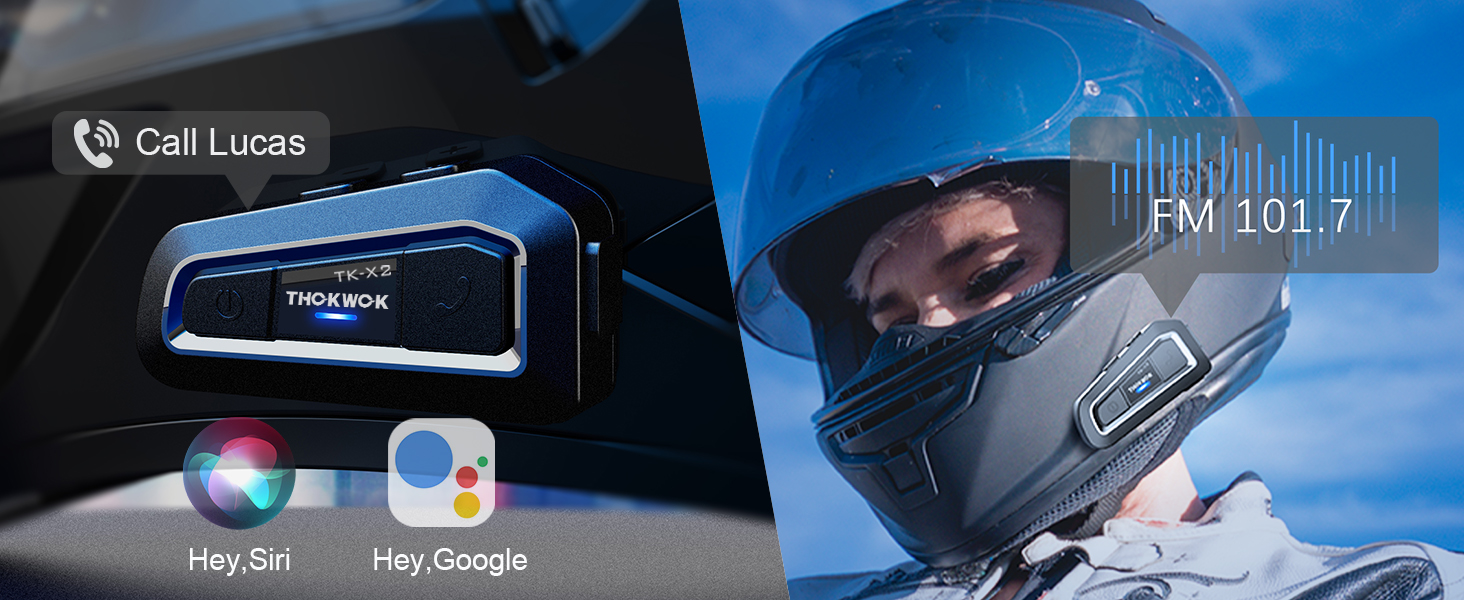
Key Features: Bluetooth 5.0, 3 Riders' Group, FM Radio, Hi-Fi Stereo, DSP&CVC Noise Reduction, Voice Assistant, IP67 Waterproof, 650mAh Battery.
4. Installazione
The TK-X2 offers flexible installation options to suit various helmet types.
4.1. Montaggio dell'unità principale
Utilizzare il clamp with screws or the velcro clip to attach the main unit to the side of your helmet. Ensure it is securely fastened and does not obstruct your vision or helmet functionality.
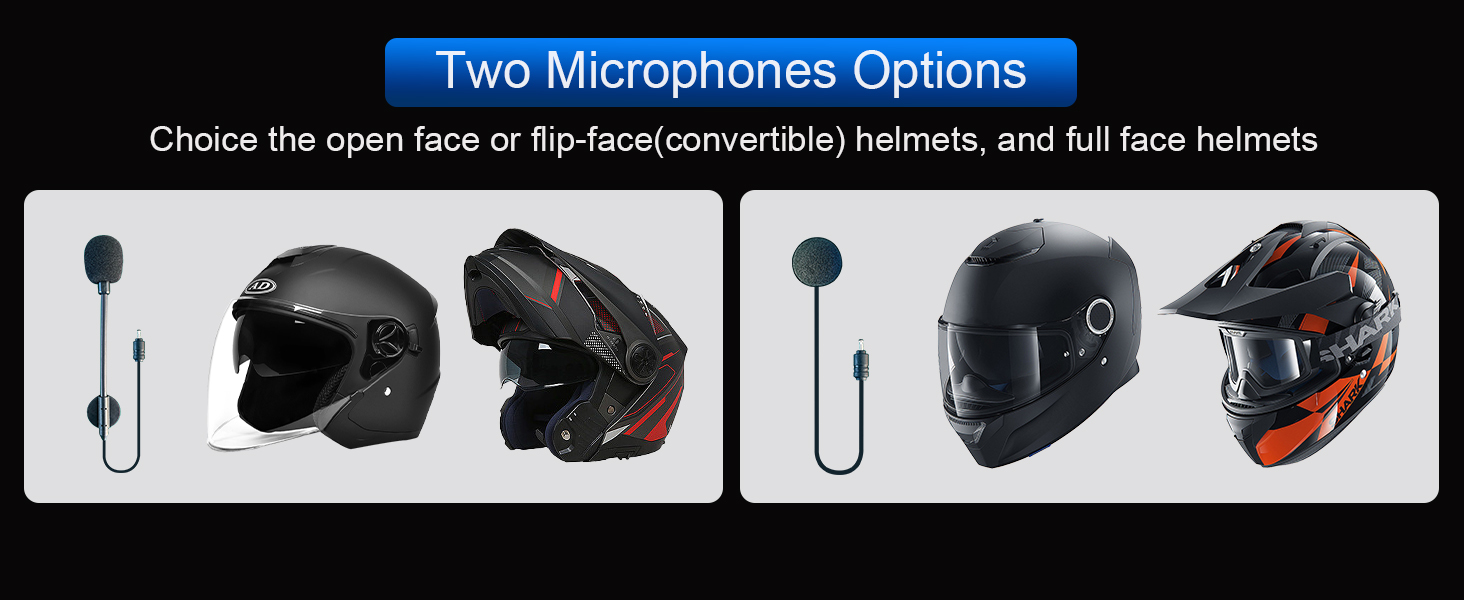
4.2. Microphone Options
The TK-X2 includes two interchangeable microphones for different helmet styles:
- Microfono a braccio: Ideal for open-face or flip-face (modular) helmets.
- Microfono a pulsante: Suitable for full-face helmets.
Choose the appropriate microphone for your helmet type.
5. Configurazione e associazione
5.1. Accoppiamento Bluetooth con il telefono
To connect your TK-X2 headset to your smartphone:
- Ensure the TK-X2 is powered off.
- Long press the Power button for 4 seconds until the red and blue lights flash alternately. This indicates pairing mode.
- On your phone, turn on Bluetooth and search for "TK-X2".
- Select "TK-X2" to connect. Once connected, the blue light on the headset will flash slowly.
Video: Demonstrates pairing the TK-X2 with a smartphone for music and call functions.
5.2. Accoppiamento interfono (unità multiple)
The TK-X2 supports intercom communication for up to 3 riders, with 2 riders talking simultaneously. Before pairing, ensure all units have their previous Bluetooth pairing records cleared by long pressing the Power and Phone buttons simultaneously for 8 seconds until pink lights flash twice.
5.2.1. Two-Way Intercom Pairing
- Turn on both TK-X2 units.
- On both units, long press the Power button for 4 seconds until red and blue lights flash alternately (pairing mode).
- Click the Power button on one of the units to initiate pairing.
- Once paired, the blue lights on both units will flash slowly, and you will hear "Intercom connected".
5.2.2. Three-Way Intercom Pairing
- Clear all previous pairing records on all three units (A, B, C) as described above.
- Turn on all three units.
- Pairing A and B: On units A and B, long press the Power button for 4 seconds until red and blue lights flash alternately. Click the Power button on unit A to pair. Once paired, blue lights flash slowly.
- Pairing B and C: On unit B, click the Power button to hang up the intercom. On units B and C, long press the Power button for 4 seconds until red and blue lights flash alternately. Click the Power button on unit B to pair. Once paired, blue lights flash slowly.
- Pairing C and A: On unit C, click the Power button to hang up the intercom. On units C and A, long press the Power button for 4 seconds until red and blue lights flash alternately. Click the Power button on unit C to pair. Once paired, blue lights flash slowly.
- Initiating 3-Way Intercom: Double-click the Power button on unit A to talk with C. Click the Power button on unit C to talk with B.
Video: Illustrates the process of pairing two and three TK-X2 units for intercom communication.
6. Funzionamento
6.1. Controlli di base
- Accensione/spegnimento: Premere a lungo il pulsante di accensione per 2 secondi.
- Riproduci/Pausa musica: Click the Function button.
- Prossima canzone: Click the Phone button.
- Canzone precedente: Fare clic sul pulsante di accensione.
- Aumenta volume: Long press the Phone button. You will hear a "Di" sound when maximum volume is reached.
- Volume basso: Premere a lungo il pulsante di accensione.
- Rispondi/Termina chiamata: Click the Phone button.
- Rifiuta chiamata: Long press the Phone button for 2 seconds.
- Voice Assistant (Siri/S-Voice): Long press the Function button for 2 seconds. You will hear "Voice Dial".
- Accensione/spegnimento radio FM: Double-click the Function button. You will hear "Turn on radio" or "Turn off radio".
Access voice assistant and FM radio with simple button presses.
6.2. Utilizzo dell'interfono
- Avvia Intercom: Click the Power button (after successful pairing).
- Fine citofono: Fare clic sul pulsante di accensione.
- When an intercom call is active, music playback will automatically pause. Music will resume when the intercom call ends.
7. Manutenzione
7.1. Ricarica
The TK-X2 features a built-in 650mAh Lithium Polymer battery. Connect the charging cable to the Type-C port on the unit and a suitable USB power source. A full charge takes approximately 2.5 hours. The device will broadcast battery status upon power-on: "Battery full", "Battery medium", or "Battery low".

Enjoy up to 24 hours of music or intercom time and 280 hours of standby time.
7.2. Pulizia e conservazione
The TK-X2 has a waterproof design (IP67 rated), allowing use in various weather conditions. To clean, wipe the unit with a soft, damp cloth. Avoid using harsh chemicals or abrasive materials. Store the device in a cool, dry place when not in use.
The waterproof design ensures durability in various riding environments.
8. Risoluzione Dei Problemi
| Problema | Possibile causa | Soluzione |
|---|---|---|
| Impossibile accendere | Batteria scarica | Caricare il dispositivo per almeno 2.5 ore. |
| Impossibile associare il telefono | Device not in pairing mode / Phone Bluetooth off / Previous pairing conflict | Ensure TK-X2 is in pairing mode (red & blue flashing). Turn on phone Bluetooth. Clear previous pairing records on TK-X2 and try again. |
| Citofono non connesso | Units not in pairing mode / Previous pairing conflict | Ensure all units are in pairing mode. Clear all previous pairing records on all units and re-pair. |
| Scarsa qualità del suono / Rumore | Posizionamento del microfono/altoparlante / Rumore ambientale | Adjust microphone and speaker position inside the helmet. Ensure microphone is close to your mouth. The device features DSP & CVC noise cancellation for high-speed clarity. |
| Radio FM non funzionante | Weak signal / Feature not activated | Move to an area with better signal. Double-click the Function button to activate FM radio. |
9. Specifiche
| Caratteristica | Dettaglio |
|---|---|
| Nome del modello | TK-X2 Single |
| Versione Bluetooth | 5.1 |
| Interfono Distanza | Up to 1000m (no obstacles) |
| Max Riders (Intercom) | 3 (2 simultaneous talk) |
| Controllo del rumore | Cancellazione attiva del rumore (DSP e CVC) |
| Tipo di batteria | Polimeri di litio (650mAh) |
| Tempo di musica/interfono | Fino a 24 ore |
| Tempo di standby | Fino a 280 ore |
| Tempo di ricarica | Circa 2.5 ore |
| Livello di resistenza all'acqua | Impermeabile (IP67) |
| Presa per cuffie | Tipo C |
| Dimensioni | 3 x 1.6 x 0.83 pollici |
| Peso dell'articolo | 8.4 once |
| Materiale | Acrilonitrile Butadiene Stirene (ABS) |
10. Garanzia e supporto
THOKWOK products are designed and manufactured to the highest quality standards. For warranty information, technical support, or customer service inquiries, please refer to the contact information provided on your product packaging or visit the official THOKWOK websito.
Conservare la prova d'acquisto per eventuali richieste di garanzia.


