Introduzione
Thank you for choosing the Karlsson Alarm Clock with Wireless Charger. This device combines a stylish LED alarm clock with the convenience of wireless phone charging, all housed in an elegant dark wood veneer finish. This manual provides detailed instructions to help you set up, operate, and maintain your new alarm clock.

Davanti view of the Karlsson Alarm Clock, displaying the time and temperature.
Impostare
Accensione del dispositivo
The alarm clock can be powered via the included USB adapter or by 4 AAA batteries (not included). For continuous operation and wireless charging functionality, it is recommended to use the USB adapter.
- Alimentazione USB: Connect the provided USB cable to the DC 5V input port on the back of the alarm clock. Plug the other end into a compatible USB power adapter (included) and then into a wall outlet.
- Alimentazione a batteria (backup): Insert 4 AAA batteries (not included) into the battery compartment on the back of the unit. Batteries are primarily for backup during power outages or for temporary portability, and may not support continuous display or wireless charging.

Posteriore view of the alarm clock, showing the power input and control buttons.
Configurazione iniziale
Once powered on, the LED display will illuminate. The clock may display a default time or require immediate setting. Refer to the 'Operating' section for instructions on setting the time and alarm.
Operativo
The control buttons (SET, UP, DOWN, RESET) are located on the back of the unit.
Impostazione dell'ora
- Premere il tasto IMPOSTATO una volta il pulsante per accedere alla modalità di impostazione dell'ora. Le cifre delle ore lampeggeranno.
- Utilizzare il UP E GIÙ pulsanti per regolare l'ora.
- Premere IMPOSTATO again to move to minute setting. The minute digits will flash.
- Utilizzare il UP E GIÙ pulsanti per regolare i minuti.
- Premere IMPOSTATO una terza volta per confermare e uscire dalla modalità di impostazione dell'ora.
Impostazione della sveglia
- Premere il tasto IMPOSTATO button repeatedly until the alarm icon (if present) or 'AL' appears, indicating alarm setting mode. The alarm hour digits will flash.
- Utilizzare il UP E GIÙ pulsanti per regolare l'ora della sveglia.
- Premere IMPOSTATO again to move to alarm minute setting. The alarm minute digits will flash.
- Utilizzare il UP E GIÙ pulsanti per regolare i minuti della sveglia.
- Premere IMPOSTATO a third time to confirm and exit alarm setting mode.
- Per attivare o disattivare l'allarme, utilizzare il UP or GIÙ button while in normal time display mode, or follow specific instructions in the alarm setting menu.
Utilizzo della funzione di ricarica wireless
The alarm clock features an integrated wireless charging pad on its top surface. This function is active when the clock is powered via the USB adapter.
- Ensure the alarm clock is connected to the USB power adapter.
- Place your Qi-compatible smartphone or device directly onto the center of the top surface of the alarm clock, aligning it with the wireless charging symbol.
- The device should begin charging automatically. A charging indicator (e.g., a light on the phone or clock, or a symbol on the clock's display) may appear.
- If charging does not begin, adjust the position of your device on the charging pad. Remove any thick phone cases that might interfere with charging.
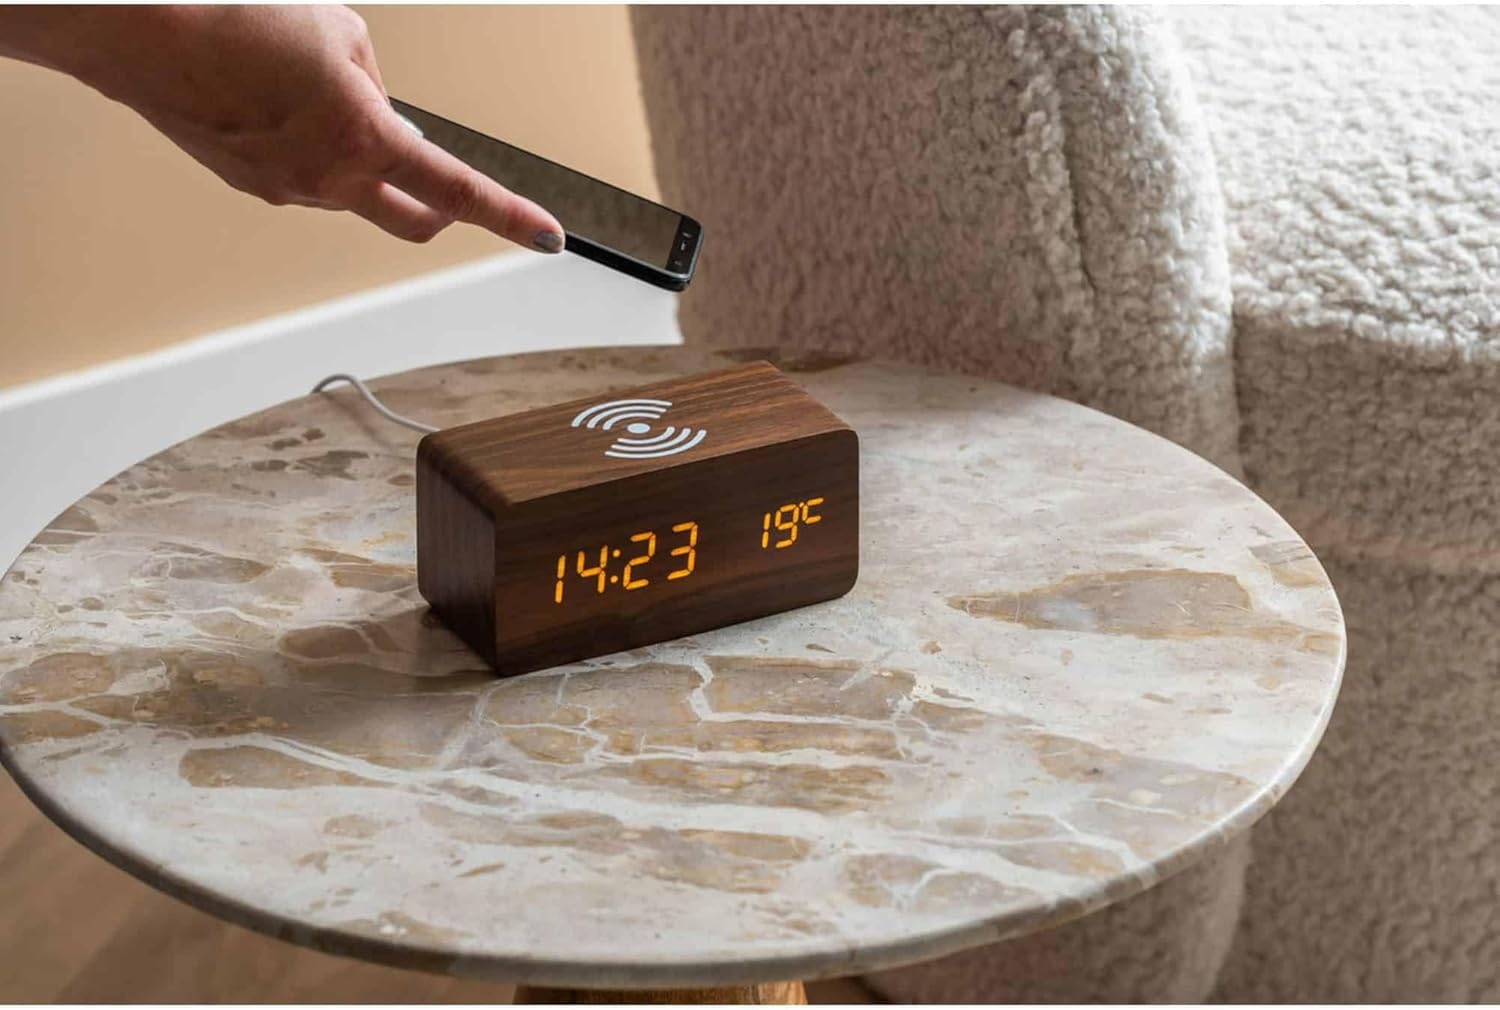
A smartphone being placed on the alarm clock for wireless charging.

Superiore view of the alarm clock, highlighting the wireless charging area.
Luminosità dello schermo
Some models allow adjustment of display brightness. Typically, this is done by pressing the UP or GIÙ button in normal time display mode, or through a dedicated setting within the menu accessed by the IMPOSTATO pulsante.
Manutenzione
Pulizia
Per pulire la sveglia, strofinare delicatamente la superficie con un panno morbido, asciutto o leggermente damp cloth. Do not use abrasive cleaners, solvents, or harsh chemicals, as these may damage the wood veneer or electronic components.
Sostituzione della batteria
If using AAA batteries for backup, replace all four batteries simultaneously when the display dims or the clock loses time during a power outage. Assicurarsi che la polarità sia corretta quando si inseriscono le nuove batterie.
Risoluzione dei problemi
- Il display è spento o poco luminoso:
- Ensure the USB power adapter is securely connected to both the clock and a working power outlet.
- If using batteries, check if they are depleted or inserted correctly. Replace if necessary.
- Adjust display brightness if applicable. - La ricarica wireless non funziona:
- Confirm the clock is powered by the USB adapter, not just batteries.
- Ensure your phone is Qi-compatible.
- Reposition your phone on the charging pad, ensuring it is centered.
- Remove any thick phone cases that might obstruct charging.
- Check for any metal objects between the phone and the charging pad. - L'allarme non suona:
- Verify that the alarm time is set correctly.
- Ensure the alarm function is activated (check for an alarm icon on the display).
- Check the alarm volume setting if available. - Clock losing time:
- Ensure a stable power supply. If using batteries, replace them.
Specifiche
| Caratteristica | Dettaglio |
|---|---|
| Marca | Karlsson |
| Numero di modello | Modello KA5933DW |
| Dimensioni (L x P x A) | Dimensioni: 15 x 3.81 x 7.1 cm |
| Materiale | MDF (pannello di fibre a media densità) |
| Alimentazione elettrica | USB Adapter (included), 4 x AAA Batteries (not included) |
| Caratteristiche | LED Display, Alarm Function, Wireless Induction Charging |
Garanzia e supporto
Per informazioni sulla garanzia e sull'assistenza clienti, consultare la documentazione fornita con l'acquisto o contattare direttamente il rivenditore o il produttore. Conservare la prova d'acquisto per eventuali reclami in garanzia.


