1. Introduzione
This manual provides comprehensive instructions for the installation, operation, and maintenance of your Aero-Flex Snap & Trim Trimmer Head. Designed for compatibility with RYOBI and Hart Auto-Feed Trimmers, this system simplifies trimmer head replacement and blade reloading, enhancing efficiency and cutting performance.
The Aero-Flex Snap & Trim system replaces traditional string spools with durable, flexible blades, offering a more robust and user-friendly trimming experience. Its aerodynamic design allows for effective cutting at lower speeds, extending battery life and reducing fatigue.
2. Configurazione e installazione
The Aero-Flex Snap & Trim head is designed for quick and easy installation without the need for special tools. Ensure your trimmer is powered off and the battery is removed before beginning installation.
2.1 Compatibilità
This product is compatible with the following RYOBI 18V Auto-Feed String Trimmers:
- P2080, P2008A, P2008, P20100, P20010A, P20010, P2210, P2210CAN, P2200A, P2200ACV, P2200, P2030, P2031, P2003A, P2003, P2060A, P2060, P2006A, P2006, P2052, P2051, P2050, P2005, P2040, P2041, P2004, P20102, P2102BTL, P20120, P20103, P20103BTL, P20130
And the following HART 20V - 40V Auto-Feed String Trimmers:
- HGST041VNM, HGST04BTVNM, HGST061VNM, HLST011VNM, HLST01BTVNM
Important: This product does NOT fit Ryobi or Hart Bump Feed String Trimmers.
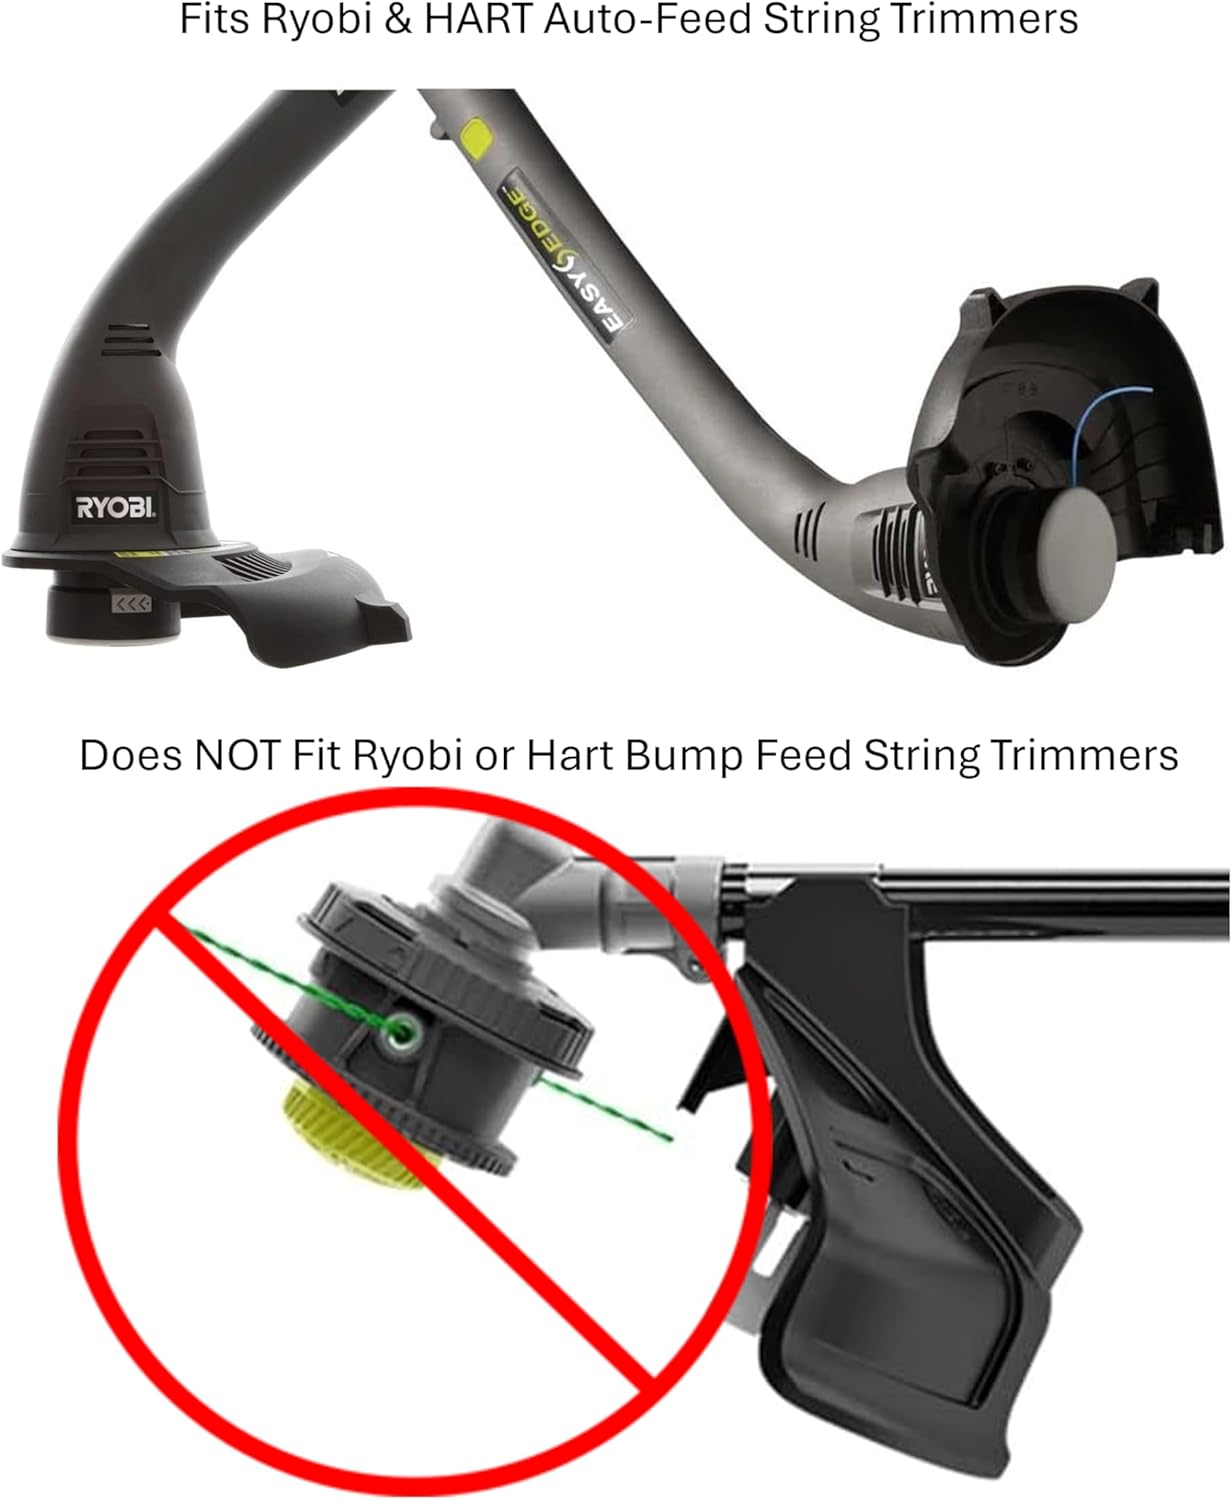
Figura 2.1: Compatibilità suview. The top image shows compatible auto-feed trimmers. The bottom image clearly indicates that bump-feed trimmers are not compatible.
2.2 Passaggi di installazione
- Remove Auto-Feed Head: Carefully remove the existing auto-feed trimmer head from your string trimmer. This typically involves unscrewing or unlatching the head.
- Insert Blades into Snap & Trim Head: The Aero-Flex Snap & Trim head uses flexible blades. Insert one blade into each designated slot on the head. Ensure they are securely seated.
- Replace with Snap & Trim Head: Align the Aero-Flex Snap & Trim head with the trimmer shaft and snap it into place. The design allows for a secure fit without retrofitting.
- Verifica allegato sicuro: Gently tug on the installed head to ensure it is firmly attached and will not detach during operation.

Figure 2.2: Visual guide for replacing the trimmer head.

Figure 2.3: Inserting flexible blades into the trimmer head.

Figure 2.4: The assembled Snap & Trim head with blades.
2.3 Video di installazione
Per una guida visiva al processo di installazione, guarda il video ufficiale del prodotto qui sotto:
Video 2.1: Official Aero-Flex Snap & Trim installation and usage demonstration.
3. Istruzioni per l'uso
The Aero-Flex Snap & Trim system is designed for efficient and comfortable trimming. Always wear appropriate safety gear, including eye protection, long pants, and sturdy footwear, when operating your trimmer.
3.1 Funzionamento generale
- Accensione: Once the Snap & Trim head is securely installed, attach your trimmer's battery (if applicable) and power on the unit.
- Tecnica di taglio: Use a sweeping motion to cut grass and weeds. The flexible blades are designed to slice through dense vegetation effectively.
- Efficienza: Due to the aerodynamic design of the blades, you may find that you can achieve excellent cutting results even when running your trimmer at a lower speed, which can help conserve battery life.
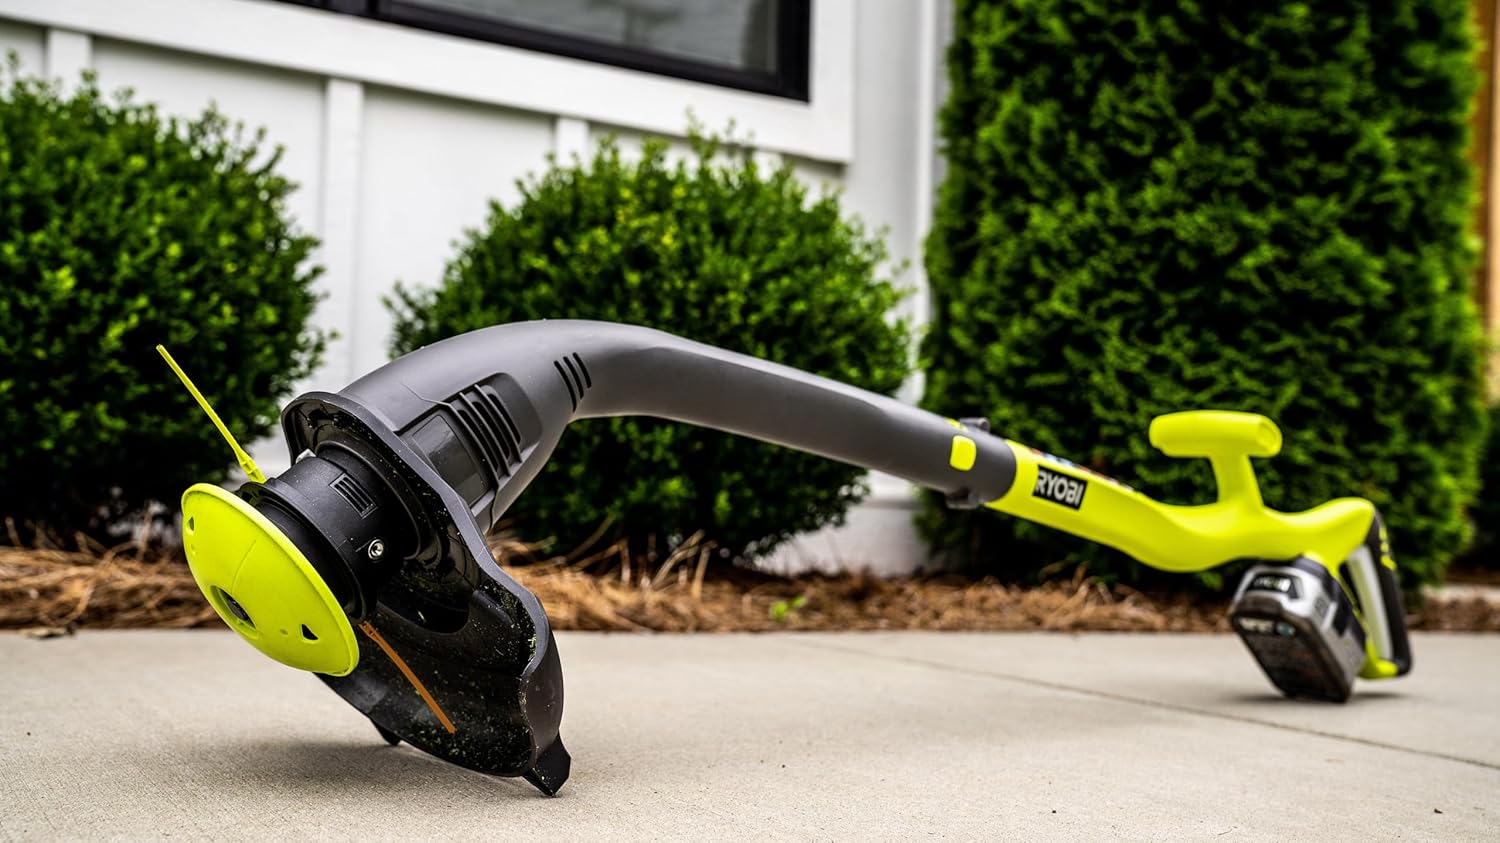
Figure 3.1: Trimmer in operation, demonstrating effective cutting along a fence.
3.2 Ground-Control Glider
The integrated Ground-Control Glider allows you to rest the trimmer head on the ground during operation. This feature offers several benefits:
- Riduzione della fatica: By supporting the trimmer's weight, the glider helps reduce strain on your arms and shoulders.
- Consistent Cut Height: The glider maintains an optimal distance from the ground, ensuring a more even and consistent cut height across your lawn.
- Prevents Scalping: It helps prevent the trimmer from digging into the ground, reducing the risk of scalping your lawn.

Figure 3.2: The Aero-Flex Snap & Trim head attached to a Ryobi trimmer, showcasing il suo design.
3.3 Increased Cutting Control
The neon-colored blades of the Aero-Flex system enhance visibility, allowing you to clearly see your cutting radius. This feature helps ensure you only cut what you intend to, improving precision and preventing accidental damage to plants or objects.
4. Manutenzione
Regular maintenance of your Aero-Flex Snap & Trim head will ensure optimal performance and extend its lifespan. Always disconnect the trimmer from its power source (remove battery) before performing any maintenance.
4.1 Sostituzione della lama
The flexible blades are designed for durability but will eventually wear down, especially when encountering hard surfaces. Replacing blades is quick and easy:
- Remove Worn Blades: Gently pull the worn blades out of their slots on the trimmer head.
- Insert New Blades: Take a new Aero-Flex blade and insert it firmly into the designated slot until it clicks into place. Ensure both ends of the blade are evenly extended.
- Ripetere: Replace all blades as needed to maintain cutting efficiency.
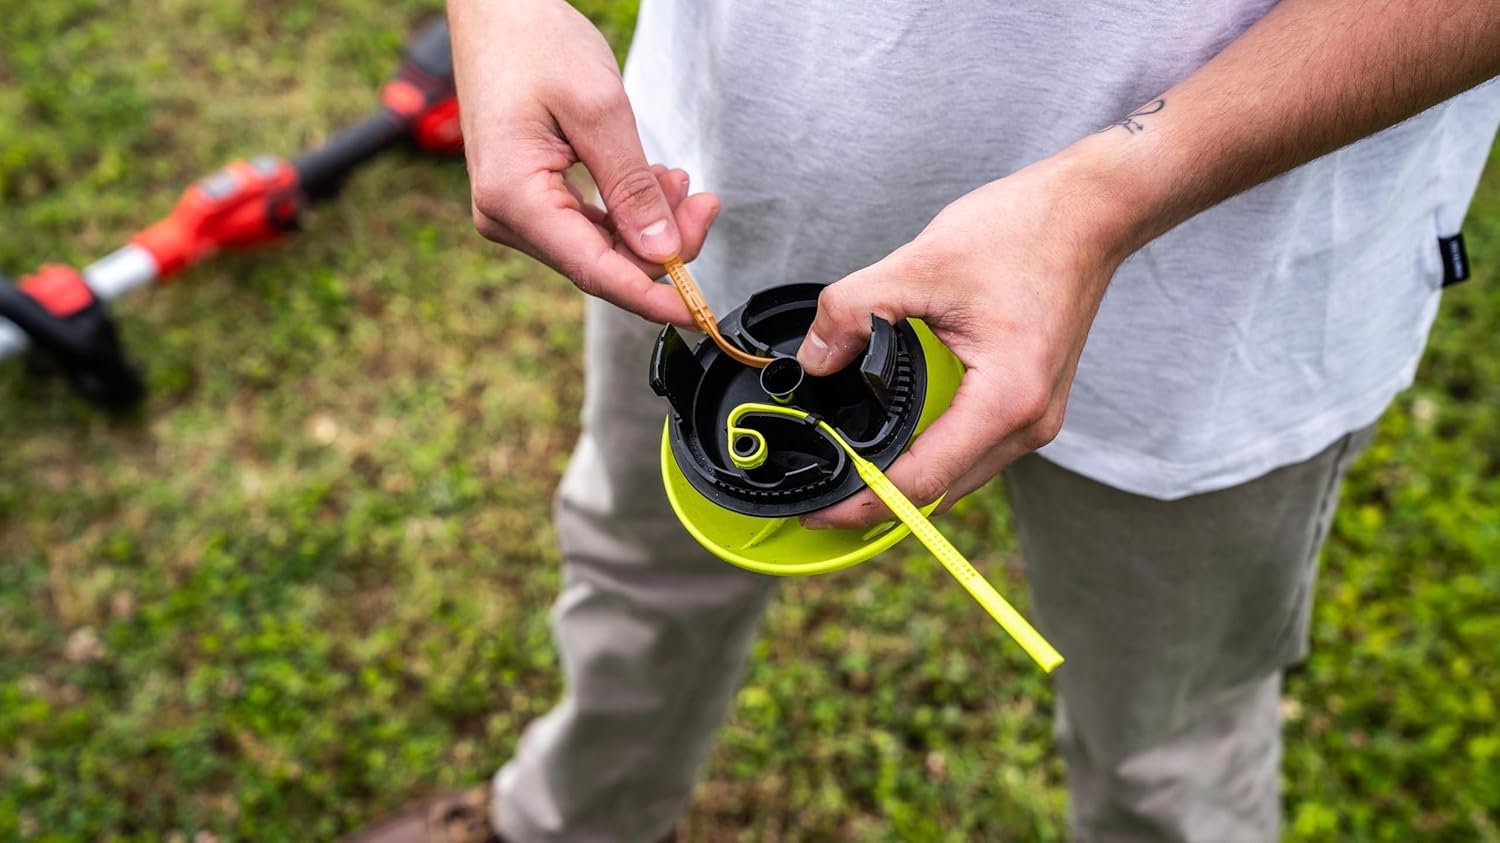
Figure 4.1: Easy reloading of blades.
The "Easy Reload" feature means no spools, no springs, and no rewinding are necessary.
4.2 Pulizia e conservazione
- Pulire dopo ogni utilizzo: After each use, remove any grass clippings, dirt, or debris from the trimmer head and blades. A stiff brush or cloth can be used.
- Ispezionare per danni: Periodically inspect the trimmer head and blades for any signs of cracks, excessive wear, or other damage. Replace damaged components immediately.
- Magazzinaggio: Conservare la testina del tagliabordi in un luogo pulito e asciutto, lontano dalla luce solare diretta e da temperature estreme.
5. Risoluzione Dei Problemi
This section addresses common issues you might encounter with your Aero-Flex Snap & Trim Trimmer Head.
| Problema | Possibile causa | Soluzione |
|---|---|---|
| La testina del tagliabordi non taglia in modo efficace. | Worn or dull blades. | Replace the flexible blades. Refer to Section 4.1. |
| Blades breaking or wearing out too quickly. | Hitting hard surfaces (concrete, rocks, fences). Excessive force during trimming. | Avoid contact with hard surfaces. The blades are durable but not indestructible against abrasive materials. Use the Ground-Control Glider to maintain optimal height. |
| Trimmer motor slows down or struggles. | Trimmer head is too heavy for the specific trimmer model (especially lower-powered electric models). Attempting to cut overly dense or thick vegetation. | Ensure your trimmer is compatible with the Snap & Trim head (refer to Section 2.1). For very thick brush, consider a more powerful trimmer or alternative cutting tools. Try running the trimmer at a slightly higher RPM if possible. |
| Trimmer head does not snap into place. | Incompatibility with trimmer model (e.g., bump-feed vs. auto-feed). Ostruzione o disallineamento. | Double-check your trimmer model against the compatibility list in Section 2.1. Ensure no debris is preventing proper seating. |
6. Specifiche
| Caratteristica | Dettaglio |
|---|---|
| Dimensioni del prodotto | 10 x 13 x 5 pollici |
| Peso dell'articolo | 9.1 once |
| Produttore | Aero-Flex |
| ASIN | B0CNDB4RCF |
| Paese di origine | U.S.A. |
| Numero modello articolo | STRYB16 |
7. Garanzia e supporto
7.1 Informazioni sulla garanzia
For specific warranty details regarding your Aero-Flex Snap & Trim Trimmer Head, please refer to the product packaging or contact Aero-Flex Technologies, Inc. directly. General return policy for this product is 30 days for refund/replacement.
7.2 Assistenza clienti
If you have any questions, require assistance with installation, operation, or troubleshooting, or need to inquire about replacement parts, please contact Aero-Flex Technologies, Inc. customer support.
You can also visit the official Aero-Flex Store on Amazon for more information and products: Aero-Flex Store
For additional product information and resources, you may also scan the QR code found on the product packaging or visit: https://uqr.to/xzbf


