1. Informazioni sulla sicurezza
Read all instructions carefully before using your microwave oven. Keep this manual for future reference. Improper use may result in fire, electric shock, or injury.
Precauzioni generali di sicurezza:
- Non tentare di far funzionare il forno con lo sportello aperto o se lo sportello è danneggiato.
- Non posizionare alcun oggetto tra la parte anteriore del forno e lo sportello e non lasciare che residui di sporco o detergente si accumulino sulle superfici di tenuta.
- Non azionare il forno se è danneggiato. È particolarmente importante che la porta del forno si chiuda correttamente e che non vi siano danni a: (1) porta (piegata), (2) cerniere e chiavistelli (rotte o allentate), (3) guarnizioni e superfici di tenuta della porta.
- Il forno non deve essere riparato o regolato da nessuno, eccetto personale di assistenza adeguatamente qualificato.
- Prima di mettere in funzione il forno, assicurarsi sempre che il piatto girevole e l'anello girevole siano posizionati correttamente.
- Non riscaldare liquidi o altri alimenti in contenitori sigillati poiché potrebbero esplodere.
- Never use the oven for deep-frying.
- Non utilizzare prodotti chimici o vapori corrosivi in questo apparecchio.
2. Configurazione e installazione
Proper installation is crucial for the safe and efficient operation of your SHARP microwave oven.
Disimballaggio:
- Rimuovere tutto il materiale di imballaggio dall'interno della cavità del forno e dallo sportello.
- Controllare che il forno non presenti danni, come porte disallineate o piegate, guarnizioni e superfici di tenuta danneggiate, cerniere e chiusure rotte o allentate, ammaccature all'interno della cavità o sulla porta. In caso di danni, non utilizzare il forno e contattare personale di assistenza qualificato.
Posizionamento:
- Posizionare il forno su una superficie piana e stabile, in grado di sostenerne il peso e il cibo più pesante che si prevede di cuocere nel forno.
- Ensure adequate ventilation. Leave a minimum of 4 inches (10 cm) of space around the sides, top, and rear of the oven for proper airflow. Do not block any ventilation openings.
- Tenere il forno lontano da fonti di calore e da forti campi magnetici.
Requisiti elettrici:
- The oven must be plugged into a properly grounded 3-prong outlet.
- Assicurare il volumetage and frequency match the ratings on the oven's nameplate.
- Do not use an extension cord unless absolutely necessary, and if so, ensure it is a grounded 3-wire cord of the correct rating.
Assemblaggio giradischi:
Place the roller ring in the center of the oven cavity. Position the glass turntable securely on top of the roller ring, ensuring it sits correctly on the center hub.

Figure 2.1: Interior of the microwave showing the glass turntable and roller ring correctly installed.
3. Istruzioni per l'uso
Your SHARP Countertop Microwave Oven offers a variety of features for convenient cooking and reheating.

Figura 3.1: dettagliata view of the control panel, highlighting the various cooking options and numerical keypad.
Cottura base al microonde:
- Disporre il cibo in un contenitore adatto al microonde sul piatto girevole.
- Chiudere bene lo sportello del forno.
- Inserire il tempo di cottura desiderato utilizzando il tastierino numerico.
- Premere il pulsante 'START/+30 SEC' per iniziare la cottura.
Livelli di potenza:
The oven features 10 power levels for precise cooking control. To adjust the power level:
- Enter desired cooking time.
- Premere il pulsante 'LIVELLO DI POTENZA'.
- Enter the desired power level (1-10) using the number pad.
- Press 'START/+30 SEC'.
Sensor Cook Technology:
Sensor Cook automatically adjusts cooking time and power for optimal results. Available options include Potato, Beverage, Veggie, Frozen Entree, Popcorn, Sensor Reheat, Meat, Poultry, and Fish.
- Mettere il cibo nel forno.
- Press the desired Sensor Cook button (e.g., 'POTATO', 'POPCORN').
- The oven will automatically detect the food's moisture and adjust cooking.
Auto scongelamento:
The Auto Defrost feature allows for quick and accurate thawing based on weight or time.
- Sbrinamento del peso: Press 'AUTO DEFROST', enter the food's weight, then press 'START/+30 SEC'.
- Scongelamento a tempo: Press 'TIME DEFROST', enter the desired defrost time, then press 'START/+30 SEC'.

Figure 3.2: Illustration of food items suitable for the Auto Defrost function.
Cuoco espresso:
For quick heating, simply press any number button (1-6) for 1 to 6 minutes of cooking at full power. Press 'START/+30 SEC' to add 30 seconds to any cooking cycle.
Funzione blocco bambini:
The Child Lock feature prevents unintended operation of the microwave oven, enhancing safety in households with children. This model includes a child-resistant door lock.
Video 3.1: Demonstrates how the child-resistant door lock functions during a cooking cycle, preventing the door from opening.
Video 3.2: Instructions on how to enable or disable the child-resistant door lock feature.
Video 3.3: Shows how the child-resistant door lock remains engaged even after the cooking cycle is complete, requiring manual unlock.
4. Manutenzione e pulizia
Una pulizia e una manutenzione regolari garantiranno la longevità e le prestazioni ottimali del tuo forno a microonde.
Pulizia degli interni:
- Wipe the oven cavity with a soft cloth and mild detergent after each use.
- For stubborn stains, boil a cup of water with a few lemon slices in the microwave for 5-10 minutes, then wipe clean.
- Il piatto girevole in vetro e l'anello girevole possono essere rimossi e lavati in acqua calda e sapone o in lavastoviglie.
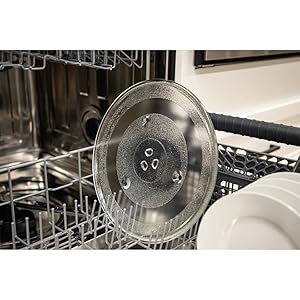
Figure 4.1: The removable glass turntable is dishwasher-safe for easy cleaning.
Pulizia dell'esterno:
- Pulire le superfici esterne con un panno morbido, damp stoffa. Evitare detergenti abrasivi.
- Pulire il pannello di controllo con un panno morbido, damp panno. Non usare troppa acqua.
5. Risoluzione Dei Problemi
Se riscontri problemi con il tuo forno a microonde, consulta i seguenti problemi comuni e le relative soluzioni.
Problemi comuni:
- Il forno non si avvia: Check if the power cord is securely plugged in. Ensure the door is closed properly. Check your household fuse or circuit breaker.
- Cibo non riscaldato: Ensure the cooking time and power level are set correctly. Check if the door is fully closed.
- Il giradischi non gira: Ensure the turntable and roller ring are correctly positioned. Check for any obstructions beneath the turntable.
- Rumore insolito durante il funzionamento: This could be due to improper placement of the turntable or food containers. Reposition items and ensure the turntable is seated correctly.
Video 5.1: Guide on how to identify and fix buzzing or rattling noises that may occur during microwave operation.
6. Specifiche
Detailed technical specifications for the SHARP Countertop Microwave Oven SMC2266KS.
| Caratteristica | Dettaglio |
|---|---|
| Numero di modello | SMC2266KS |
| Capacità | 2.2 piedi cubi |
| Cosatage | 1200 watt |
| Voltage | 120 Volt (CA) |
| Dimensioni del prodotto (P x L x A) | 19.6"P x 24.4"L x 13.6"A |
| Peso dell'articolo | 33.7 libbre |
| Materiale | Acciaio inossidabile |
| Caratteristica speciale | Defrost, Turntable, Child Lock |
| Tipo di installazione | Piano di lavoro |
| Interno | Gray Interior, LED Interior Lighting |
| Display | Display LED bianco |
| Dimensioni del giradischi | 16.5 pollici |

Figure 6.1: Key dimensions of the SHARP Countertop Microwave Oven SMC2266KS.
7. Garanzia e supporto
For warranty information and customer support, please refer to the warranty card included with your product or visit the official Sharp websito. Conservare la prova d'acquisto per eventuali reclami in garanzia.
Per ulteriore assistenza, puoi contattare il servizio clienti Sharp tramite i suoi canali ufficiali.


