1. Introduzione
This manual provides essential instructions for the safe installation, operation, and maintenance of your Leviton 50 Amp, 125/250 Volt, NEMA 14-50R Heavy Duty Flush Mount EV Charging Receptacle. This receptacle is designed for electric vehicle (EV) charging applications, offering durability and reliable performance.
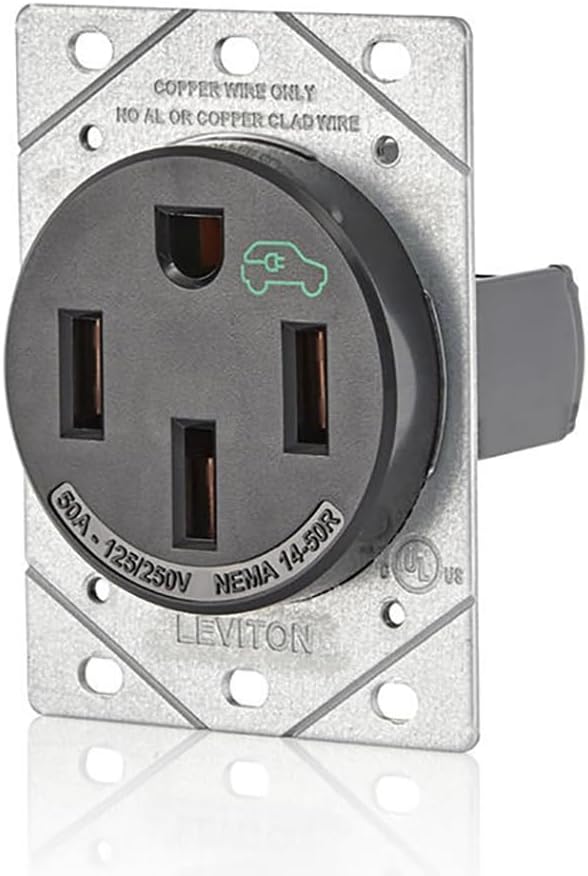
Immagine: Fronte angolato view of the Leviton 1450R receptacle, showing its robust construction and NEMA 14-50R configuration.
Informazioni importanti sulla sicurezza:
- L'installazione deve essere eseguita da un elettricista qualificato, nel rispetto di tutti i codici elettrici nazionali e locali.
- Always disconnect power at the circuit breaker before installing or servicing the receptacle.
- This device is intended for use with copper conductors only. Do not use with aluminum or copper-clad wiring.
- Ensure all terminal connections are tightened to the specified torque to prevent overheating.
2. Caratteristiche del prodotto
- Designed specifically for plug-in EV charging applications.
- Constructed to withstand extended charge times and frequent insertions required by EV chargers.
- Ideal for homeowners preferring a plug-in EV charging unit over a hardwired application.
- Manufactured from durable, high-impact nylon for longevity.
- Features pressure-wire terminal connections to ensure full contact with conductors.
3. Contenuto della confezione
- 1 x Leviton 50 Amp NEMA 14-50R Receptacle
- Viti di montaggio
- Foglio di istruzioni (questo manuale)
4. Specifiche tecniche
| Specificazione | Dettaglio |
|---|---|
| Numero di modello | 1450R |
| Amprabbia | 50 Amp |
| Voltage | 125/250 Volt |
| Configurazione NEMA | 14-50R |
| Poli/fili | 3 poli, 4 fili |
| Tipo di montaggio | Flush Mount |
| Materiale | High-Impact Nylon, Steel |
| Colore | Nero |
| Dimensioni | 5 x 7.5 x 2.5 pollici (circa) |
| Peso dell'articolo | 7.4 once (circa) |
| Certificazione | NEMA, UL Listed (implied by product description and image) |
5. Istruzioni per l'installazione
5.1 Precauzioni di sicurezza
- Turn OFF power at the main circuit breaker before beginning any electrical work. Verify power is off using a voltagetester.
- Indossare dispositivi di protezione individuale (DPI) adeguati, tra cui occhiali di sicurezza e guanti isolanti.
- Ensure the electrical box is properly grounded.
- Se non si è sicuri di una qualsiasi fase del processo di installazione, consultare un elettricista qualificato.
5.2 Strumenti necessari
- Cacciaviti (a croce e a taglio)
- Spellafili
- Torque screwdriver or wrench (recommended for terminal connections)
- Voltagetester
- Nastro isolante
5.3 Wiring and Mounting Steps
- Preparare la scatola elettrica: Ensure you have a suitable electrical box (e.g., a 2-gang box) that can accommodate the receptacle's dimensions. The receptacle is designed for flush mounting.
- Spelare i fili: Carefully strip approximately 3/4 inch (19mm) of insulation from the ends of the copper conductors (two hot, one neutral, one ground).
- Collegare i fili: Refer to the wiring diagram below. Connect the wires to the corresponding terminals on the back of the receptacle.
- Filo di rame verde o nudo: Connect to the Ground (G) terminal.
- filo bianco: Connect to the Neutral (W) terminal.
- Fili neri (caldi): Connect to the two Hot (X and Y) terminals.

Immagine: Posteriore view of the Leviton 1450R receptacle, highlighting the G (Ground), W (Neutral), X (Hot), and Y (Hot) terminals for wiring connections.
- Stringere i terminali: Use a torque screwdriver or wrench to tighten the terminal screws to 75 in-lbs (8.5 Nm). Proper torque is crucial for preventing loose connections and potential overheating.
- Montare la presa: Carefully push the wired receptacle into the electrical box. Secure it to the box using the provided mounting screws.

Immagine: Frontale view of the Leviton 1450R receptacle, showing the NEMA 14-50R configuration and the EV symbol.
- Install Wall Plate (Not Included): Attach a compatible wall plate (sold separately) over the receptacle.
- Ripristina alimentazione: Una volta completata e verificata l'installazione, ripristinare l'alimentazione all'interruttore automatico.
6. Funzionamento
The Leviton 1450R receptacle is designed for straightforward use with NEMA 14-50 compatible EV charging cables. Once installed and powered, it functions as a standard electrical outlet for high-power applications.
- Connecting your EV Charger: Insert the NEMA 14-50 plug of your EV charging cable firmly into the receptacle. Ensure a secure connection.
- Ricarica: Follow the instructions provided with your EV charging unit to initiate and monitor the charging process.
- Disconnessione: When charging is complete, or if you need to disconnect, firmly grasp the plug and pull it straight out from the receptacle. Avoid pulling by the cable.
Nota: While designed for frequent use, it is recommended to avoid unnecessary plugging and unplugging to maintain optimal terminal contact over time.
7. Manutenzione
Regular inspection and minimal maintenance will ensure the longevity and safe operation of your Leviton 1450R receptacle.
- Ispezione periodica: Periodically inspect the receptacle for any signs of damage, discoloration, or loose connections. If any issues are observed, disconnect power and consult a qualified electrician.
- Pulizia: Ensure power is OFF before cleaning. Wipe the surface of the receptacle with a dry, soft cloth. Do not use abrasive cleaners or solvents.
- Monitoraggio della temperatura: During extended charging sessions, occasionally check the receptacle and plug for excessive heat. While some warmth is normal, excessive heat may indicate a problem. If you detect excessive heat, discontinue use and consult an electrician.
8. Risoluzione Dei Problemi
This section addresses common issues you might encounter. For problems not listed here, contact Leviton customer support or a qualified electrician.
| Problema | Possibile causa | Soluzione |
|---|---|---|
| No power to the receptacle. | Circuit breaker tripped; loose wiring connection. | Check and reset the circuit breaker. If issue persists, disconnect power and inspect wiring connections (consult electrician). |
| Receptacle or plug feels excessively hot during charging. | Loose terminal connections; undersized wiring; faulty EV charger plug. | Immediately discontinue use. Disconnect power and have a qualified electrician inspect all connections and wiring. Ensure the EV charger plug is in good condition. |
| EV charger does not recognize the connection. | Plug not fully inserted; issue with EV charger. | Ensure the EV charger plug is fully and securely inserted. Test the EV charger with another compatible outlet if possible, or consult the EV charger's manual. |
9. Garanzia e supporto
Leviton products are manufactured to high-quality standards and are backed by a limited warranty. For specific warranty details, product support, or technical assistance, please visit the official Leviton websito o contattare il loro servizio clienti.
Leviton Customer Support:
- Websito: www.leviton.com
- Phone: Refer to the websito per i numeri di contatto regionali.
Please have your product model number (1450R) and date of purchase available when contacting support.


