1. Introduzione
Thank you for choosing the Syncwire 11 kW 3-Phase EV Charger. This portable charging cable is designed to provide efficient and reliable charging for your electric vehicle. This manual contains important information regarding the safe operation, installation, and maintenance of your charger. Please read it thoroughly before use and retain it for future reference.
2. Importanti istruzioni di sicurezza
Quando si utilizzano prodotti elettrici, seguire sempre le precauzioni di sicurezza di base per ridurre il rischio di incendi, scosse elettriche e lesioni personali.
- Leggi tutte le istruzioni: Familiarize yourself with the charger's functions and safety warnings.
- Installazione corretta: Ensure the 3-phase CEE industrial plug is connected to a compatible 400V industrial socket with appropriate grounding and circuit protection. Installation should be performed by a qualified electrician if you are unsure.
- Evitare l'esposizione all'acqua: While the charger box is IP66 rated and the EV plug is IP54 rated, avoid submerging the unit in water. Do not operate if the charger or cables are wet or damaged.
- Controllare eventuali danni: Before each use, inspect the charger, cables, and connectors for any signs of damage. Do not use if any part is damaged.
- Bambini e animali domestici: Tenere il caricabatterie e i cavi fuori dalla portata dei bambini e degli animali domestici durante il funzionamento e lo stoccaggio.
- Ventilazione: Ensure adequate ventilation around the charger during operation. Do not cover the unit.
- Arresto di emergenza: In caso di emergenza, scollegare immediatamente il caricabatterie dalla fonte di alimentazione e dal veicolo.
3. Contenuto della confezione
Verificare che tutti gli articoli siano presenti nel pacco:
- Syncwire 11 kW 3-Phase EV Charger with Type 2 connector and 3-Phase CEE Industrial Plug
- Supporto per cavo
- Borsa portaoggetti
- Manuale dell'utente (questo documento)

Immagine 3.1: The Syncwire 11 kW 3-Phase EV Charger, including the main control box, Type 2 charging cable, 3-phase CEE industrial plug, cable holder, and storage bag.
4. Prodotto finitoview
The Syncwire 11 kW EV Charger features a robust control box with an LCD display, a Type 2 charging connector for your vehicle, and a 3-phase CEE industrial plug for the power source. The control box manages the charging process, displays real-time information, and allows for adjustable settings.

Immagine 4.1: Un dettagliato view of the 3-phase CEE industrial plug (5-pin, 62mm diameter) required for 11 kW charging. The image also illustrates the significantly faster charging speed (3X) compared to a standard 3 kW charger.
5. Impostazione
5.1 Collegamento di alimentazione
- Ensure your electrical installation has a compatible 400V, 3-phase industrial socket (CEE 5-pin) with adequate circuit protection (e.g., 16A or higher).
- Plug the 3-phase CEE industrial plug of the charger securely into the industrial socket.
- The charger's LCD display should illuminate, indicating it is powered on.
5.2 Cable Holder Installation (Optional)
The included cable holder can be mounted on a wall near your charging location to keep the cable organized and prevent tripping hazards.
- Scegliere una posizione adatta su una parete robusta.
- Use appropriate screws and wall anchors (not included) to secure the cable holder.
- Hang the Type 2 connector and coil the cable neatly around the holder when not in use.

Immagine 5.1: un example of an organized charging setup using the cable holder (left) compared to a disorganized setup without it (right).
6. Istruzioni per l'uso
6.1 Avvio della ricarica
- Assicurarsi che il caricabatterie sia correttamente collegato alla fonte di alimentazione.
- Apri il coperchio della porta di ricarica del tuo veicolo elettrico.
- Insert the Type 2 connector firmly into your vehicle's charging port. A click sound usually indicates a secure connection.
- The charger will perform a self-check, and charging should begin automatically. The LCD display will show charging status, current, and energy delivered.
6.2 Regolazione della corrente di carica
You can adjust the charging current to suit your needs or the capacity of your electrical system. The available current settings are 6A, 8A, 10A, 13A, and 16A.
- Before connecting to the vehicle, or during charging if your vehicle supports it, press the 'Current Adjustment' button on the control box.
- Cycle through the available current options (6A, 8A, 10A, 13A, 16A) until your desired setting is displayed on the LCD.
- The charger will automatically adjust to the selected current.
6.3 Scheduled Charging (Timer Function)
The charger allows you to set a delayed start time for charging, from 0 to 5 hours.
- With the charger connected to the power source but not yet to the vehicle, or before charging starts, press the 'Timer' button on the control box.
- Each press will increase the delay by one hour, up to a maximum of 5 hours.
- Once the desired delay is set, connect the charger to your vehicle. Charging will commence after the set delay.

Immagine 6.1: The charger's LCD display illustrating the options for adjustable current (6A-16A) and scheduled charging (0-5 hours delay).
6.4 Comprensione del display LCD
Il display LCD fornisce informazioni in tempo reale sul processo di ricarica:
- Potenza di carica: Displays the current power in kW.
- Energy Delivered: Shows the total energy transferred in kWh.
- Tempo di ricarica: Indicates the elapsed charging duration.
- Impostazioni correnti: Shows the selected charging current (e.g., 16A).
- Indicatori di stato: Icons for power, connection, and error messages.
6.5 Fine della ricarica
- Stop the charging process via your vehicle's interface or by pressing the stop button on the charger (if available).
- Scollegare il connettore di tipo 2 dalla porta di ricarica del veicolo.
- Disconnect the 3-phase CEE industrial plug from the power source.
- Store the cable neatly using the cable holder and in the provided storage bag.
7. Manutenzione
7.1 Pulizia
Regular cleaning helps maintain the charger's performance and longevity.
- Always disconnect the charger from both the power source and the vehicle before cleaning.
- Pulire la scatola di controllo e i cavi con un panno morbido e asciutto.amp panno. Non utilizzare prodotti chimici aggressivi, solventi o detergenti abrasivi.
- Ensure connectors are free of dust and debris. Use protective caps when not in use.
7.2 Conservazione
When not in use, store the charger in a dry, clean, and temperate environment.
- Coil the cable neatly and use the provided storage bag for protection.
- Evitare di conservare alla luce solare diretta o a temperature estreme.

Immagine 7.1: The Syncwire EV charger neatly stored in its compact, waterproof PU fabric storage bag, suitable for transport in a car trunk.
8. Risoluzione Dei Problemi
If you encounter issues with your Syncwire EV Charger, refer to the following common problems and solutions:
| Problema | Possibile causa | Soluzione |
|---|---|---|
| Il caricabatterie non si accende | No power from the industrial socket; loose connection. | Check the industrial socket for power; ensure the CEE plug is fully inserted. |
| La ricarica non si avvia | Type 2 connector not fully inserted; vehicle not ready to charge; scheduled charging delay active. | Ensure Type 2 connector is secure; check vehicle's charging status; verify scheduled charging settings. |
| La ricarica si interrompe inaspettatamente | Overcurrent/overheating protection activated; vehicle fault; power interruption. | Disconnect and reconnect; check for error codes on LCD; ensure adequate ventilation; consult vehicle manual. |
| Messaggio di errore sul display LCD | Internal fault; connection issue; specific error condition. | Note the error code and refer to the Syncwire support for assistance. Try disconnecting and reconnecting. |
If the problem persists after attempting these solutions, please contact Syncwire customer support.
9. Specifiche
| Caratteristica | Dettaglio |
|---|---|
| Numero di modello | SW-EVP826 |
| Potenza di carica | Up to 11 kW (3-Phase) |
| Ingresso volumetage | 400 Volt (CA) |
| Volume di uscitatage | 400 Volt (CA) |
| Valutazione attuale | Adjustable: 6A, 8A, 10A, 13A, 16A |
| Lunghezza del cavo | 5.5 metri |
| Tipo di connettore EV | Tipo 2 |
| Potenza Tipo spina | 3-Phase CEE Industrial Plug |
| Grado di protezione IP (scatola di controllo) | IP66 (impermeabile e antipolvere) |
| IP Rating (EV Plug) | Grado di protezione IP54 |
| Peso dell'articolo | 3.91 chilogrammi |
| Temperatura di esercizio | Per la gamma specifica, fare riferimento alla confezione del prodotto. |
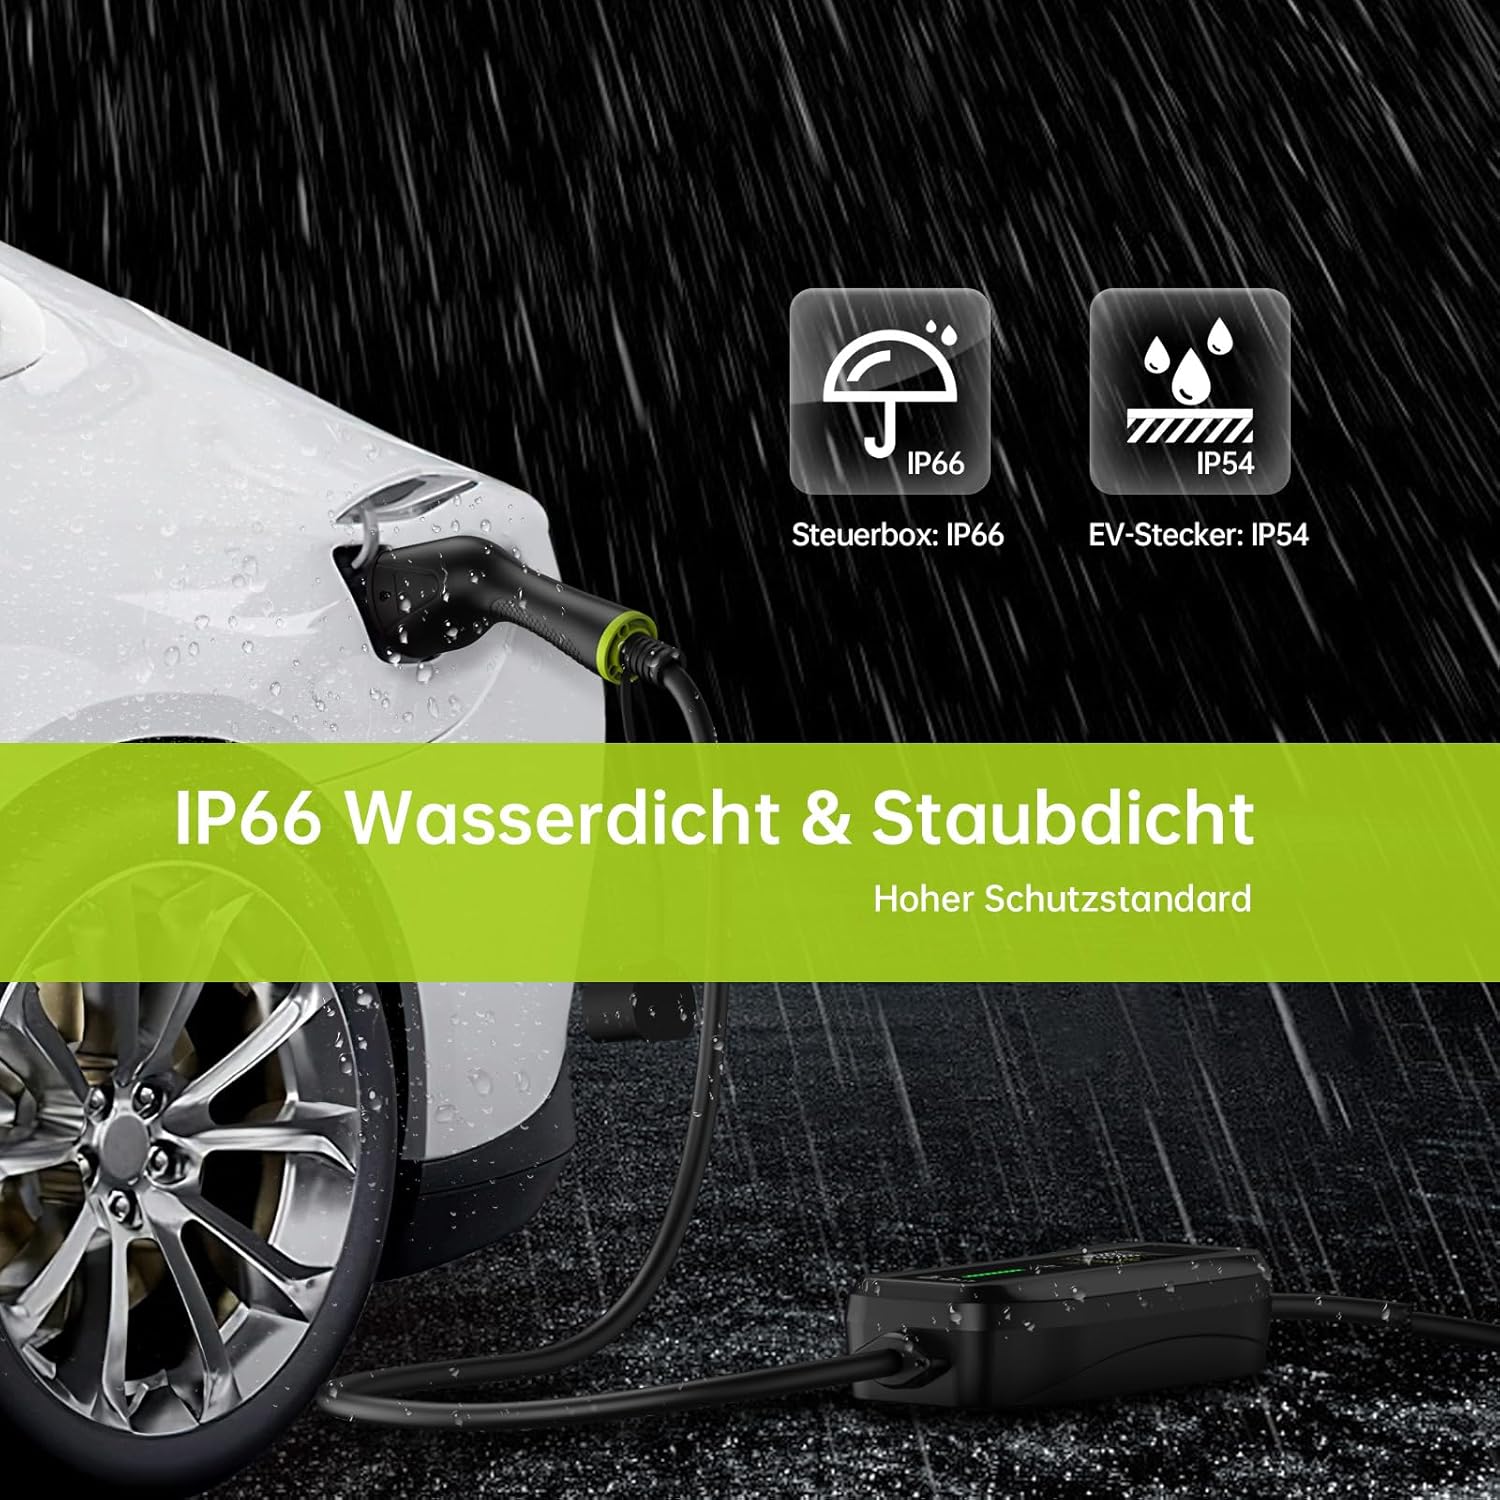
Immagine 9.1: The Syncwire EV charger demonstrating its IP66 waterproof and dustproof rating for the control box and IP54 rating for the EV plug, suitable for outdoor use.
10. Compatibilità del veicolo
The Syncwire 11 kW 3-Phase EV Charger with a Type 2 connector is compatible with a wide range of electric vehicles. Below is a list of commonly compatible brands and models:

Immagine 10.1: A visual representation of various electric vehicle brands and models compatible with the Type 2 EV charger, including Tesla, Volkswagen, Renault, Hyundai, Peugeot, Kia, BMW, Smart, Audi, Fiat, Nissan, Opel, Skoda, Mercedes-Benz, Mini, Dacia, MG, Polestar, Ford, Jaguar, and Porsche.
- Tesla: Model 3/Model Y/Model S/Model X
- Volkswagen: ID.3/ID.4/ID.5/e-UP!/e-Golf
- Renault: ZOE/Twingo/Megane E-Tech
- Hyundai: Kona/IONIQ 5/IONIQ
- Peugeot: e-208/e-2008/e-Expert
- Kia: Niro/Soul EV (39/64 KWH)/EV6
- BMW: i3/iX3/i4/i7/i8/X1
- Accorto: EQ Fortwo/EQ Forfour
- Audi: e-Tron/Q4 e-Tron/e-Tron GT
- Fiat: 500e
- Nissan: Leaf/Ariya
- Opel: Corsa-E/Mokka-E
- Skoda: Enyaq/Citigo
- Mercedes-Benz: EQA/EQC/EQB/EQV/EQS
- Mini: MINI Cooper SE
- Dacia: Primavera
- MG: Zs/Marvel R/5
- Polestar: 2
- Guado: Mustang Mach-E
- Giaguaro: I-ritmo
- Porsche: Taycan
Note: This list is not exhaustive. Always confirm your vehicle's charging port type (Type 2) before use.
11. Garanzia e supporto
11.1 Informazioni sulla garanzia
Syncwire products are manufactured to high-quality standards. For specific warranty details, including coverage period and terms, please refer to the warranty card included with your purchase or visit the official Syncwire websito. Conservare la prova d'acquisto per eventuali reclami in garanzia.
11.2 Assistenza clienti
If you have any questions, require technical assistance, or need to report an issue with your Syncwire 11 kW 3-Phase EV Charger, please contact Syncwire customer support through the following channels:
- Websito: Visit the official Syncwire websito per FAQ, risorse di supporto e moduli di contatto.
- E-mail: Refer to your product packaging or the Syncwire websito per l'indirizzo email dell'assistenza clienti.
- Piattaforma di acquisto: For issues related to your order, you may also contact the seller directly through the platform where you made your purchase.