Importanti istruzioni di sicurezza
Leggere attentamente tutte le istruzioni prima di utilizzare il deumidificatore e conservare il presente manuale per riferimento futuro. Il mancato rispetto di queste istruzioni può causare scosse elettriche, incendi o lesioni gravi.
- Collegare sempre il deumidificatore a una presa di corrente dotata di messa a terra.
- Non utilizzare l'unità se il cavo di alimentazione o la spina sono danneggiati.
- Ensure the dehumidifier is placed on a level, stable surface to prevent water spillage.
- Maintain a minimum clearance of 8 inches (20 cm) around the unit for proper airflow.
- Non inserire le dita o oggetti estranei nell'ingresso o nell'uscita dell'aria.
- Scollegare l'unità prima di pulirla o di effettuare qualsiasi intervento di manutenzione.
- Do not use the dehumidifier in areas where flammable gases or liquids are present.
- Questo apparecchio non è destinato all'uso da parte di persone (bambini compresi) con ridotte capacità fisiche, sensoriali o mentali, o prive di esperienza e conoscenza, a meno che non siano supervisionate o abbiano ricevuto istruzioni riguardanti l'uso dell'apparecchio da una persona responsabile della loro sicurezza.
Prodotto finitoview
The hOmeLabs 1,000 Sq. Ft Portable Dehumidifier is designed to efficiently remove excess moisture from your indoor environment, improving air quality and comfort. It is ideal for small spaces such as bedrooms, bathrooms, offices, and closets, covering up to 1,000 square feet.

Image: The hOmeLabs 1,000 Sq. Ft Portable Dehumidifier, a compact white unit, shown next to its blue product packaging. The unit features a top handle and a visible water level indicator on the front.
This compact unit is capable of removing up to 8 pints of moisture per day (at 89.6°F, 80% RH) and operates at an ultra-quiet 33dB, making it suitable for noise-sensitive environments. It offers both manual bucket drainage and continuous drainage options for convenience.

Image: A diagram illustrating the dimensions of the hOmeLabs 8 Pint Dehumidifier. The unit measures 15.2 inches in height, 11.0 inches in width, and 7.7 inches in depth. The handle adds an additional 2.5 inches to the height.
Impostare
1. Disimballaggio e posizionamento
- Estrarre con cautela il deumidificatore dalla confezione.
- Place the unit upright on a firm, level surface in the area where dehumidification is desired.
- Ensure there is at least 8 inches (20 cm) of space around all sides of the unit for proper air circulation. Do not block the air inlet or outlet.
- Avoid placing the unit near heat sources, direct sunlight, or in areas exposed to freezing temperatures.
2. Collegamento elettrico
- Collegare il cavo di alimentazione a una presa elettrica da 120 V/60 Hz dotata di messa a terra.
- Non utilizzare prolunghe o ciabatte.
3. Opzioni di drenaggio
Your dehumidifier offers two drainage methods: manual bucket drainage or continuous drainage using the included hose.

Image: A split image demonstrating the two drainage options. On the left, a person is shown removing the built-in water tank for manual emptying. On the right, the dehumidifier is connected to a gravity drain hose, illustrating continuous drainage into a floor drain.
Manual Drainage (Built-in Tank)
- The dehumidifier will collect water in its internal water tank.
- When the tank is full, the unit will automatically shut off and an indicator light will illuminate.
- Carefully remove the water tank from the front of the unit.
- Svuotare l'acqua raccolta in un lavandino o in uno scarico.
- Reinserire saldamente il serbatoio dell'acqua vuoto nell'unità finché non scatta in posizione. L'unità riprenderà a funzionare.
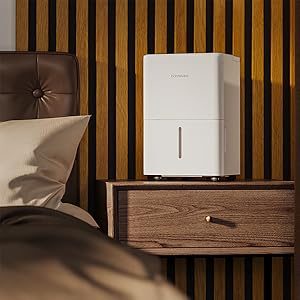
Immagine: un primo piano view of the hOmeLabs dehumidifier's water collection tank being pulled out from the bottom front of the unit for emptying.
Drenaggio continuo (tubo di scarico)
- For continuous operation without needing to empty the tank, attach the included 3.3 ft drain hose.
- Locate the drain outlet on the back or side of the dehumidifier (refer to diagram in manual if available).
- Connect one end of the drain hose to the drain outlet. Ensure a secure connection to prevent leaks.
- Direct the other end of the hose to a suitable drain, such as a floor drain, large sink, or bucket. Ensure the hose is sloped downwards to allow gravity drainage.
- Non lasciare che l'estremità del tubo sia immersa nell'acqua, poiché ciò potrebbe causare un riflusso.
Istruzioni per l'uso
Pannello di controllo

Immagine: un primo piano view of the hOmeLabs dehumidifier's top control panel. It features a digital display showing "35", and buttons for "TIMER", "MODE", power, and humidity adjustment (+/-). Indicator lights for "Comfort", "Continuous Drain", "Turbo", "Auto Defrost", and "Tank Full" are also visible.
- Pulsante di accensione (⏻): Turns the dehumidifier ON or OFF.
- Pulsante Modalità: Cycles through different operating modes:
- Modalità Comfort: Automatically sets the humidity level for optimal comfort.
- Modalità Turbo: Funziona alla massima velocità della ventola per una rimozione più rapida dell'umidità.
- Continuous Drain Mode: Runs continuously, ideal when using the drain hose.
- Pulsanti di regolazione dell'umidità (+/-): Used to set your desired humidity level (typically between 35% and 80% Relative Humidity).
- Pulsante Timer: Sets a timer for the unit to turn ON or OFF (1-24 hours).
- Indicatore di serbatoio pieno: Illuminates when the water tank is full and needs to be emptied.
- Auto Defrost Indicator: Illuminates when the unit is performing an auto-defrost cycle.
Impostazione del livello di umidità desiderato
- Turn on the dehumidifier using the Power button.
- Press the Humidity Adjustment buttons (+/-) to select your desired humidity level. The display will show the set humidity.
- The unit will operate until the ambient humidity reaches the set level, then it will cycle on and off to maintain it.
Utilizzo della funzione timer
- To set a timer for the unit to turn OFF: While the unit is ON, press the Timer button. Use the +/- buttons to select the desired number of hours (1-24) after which the unit will turn off.
- To set a timer for the unit to turn ON: While the unit is OFF, press the Timer button. Use the +/- buttons to select the desired number of hours (1-24) after which the unit will turn on.
Manutenzione
Una manutenzione regolare garantisce prestazioni ottimali e longevità del deumidificatore.
Pulizia del filtro dell'aria
Il filtro dell'aria deve essere pulito ogni due settimane o più frequentemente, a seconda dell'utilizzo e della qualità dell'aria.
- Scollegare il deumidificatore dalla presa di corrente.
- Individuare il filtro dell'aria, solitamente sul retro o sul lato dell'unità. Estrarlo delicatamente.
- Risciacquare il filtro sotto l'acqua corrente del rubinetto (non acqua calda) oppure utilizzare un aspirapolvere per rimuovere polvere e detriti.
- Allow the filter to air dry completely before reinserting it into the unit. Do not expose it to direct sunlight or heat.
- Una volta asciutto, reinserire il filtro nel suo alloggiamento.

Image: A white air filter from the dehumidifier is shown being cleaned under running water in a kitchen sink, demonstrating the washable nature of the filter.
Pulizia del serbatoio dell'acqua
Pulire regolarmente il serbatoio dell'acqua per prevenire la formazione di muffa e funghi.
- Rimuovere il serbatoio dell'acqua dall'unità.
- Lavare il serbatoio con un detergente delicato e acqua tiepida.
- Risciacquare abbondantemente e asciugare completamente prima di riporlo nel deumidificatore.
External Cleaning and Storage
- Pulire l'esterno dell'unità con un panno morbido, damp stoffa. Non utilizzare prodotti chimici aggressivi o detergenti abrasivi.
- For long-term storage, ensure the unit is completely dry, including the water tank and internal components. Store in a cool, dry place, covered to protect from dust.
Risoluzione dei problemi
Prima di contattare l'assistenza clienti, consultare la seguente tabella per i problemi più comuni e le relative soluzioni.
| Problema | Possibile causa | Soluzione |
|---|---|---|
| Il deumidificatore non si accende. | No power; Water tank full or not properly seated; Temperature too low. | Check power connection; Empty and re-seat water tank; Ensure room temperature is above 41°F (5°C). |
| Non è stata raccolta acqua. | Humidity level too low; Air filter clogged; Room temperature too low; Unit in fan-only mode. | Adjust desired humidity lower; Clean air filter; Ensure room temperature is suitable; Select dehumidifying mode. |
| L'unità è rumorosa. | Unità non posizionata su una superficie piana; Filtro dell'aria intasato; Ostruzione nella ventola. | Posizionare su una superficie piana; pulire il filtro dell'aria; controllare e rimuovere eventuali ostruzioni. |
| Brina sulle bobine. | Bassa temperatura ambiente. | This is normal; the unit has an auto-defrost function. If persistent, increase room temperature. |
| Error Codes (e.g., E1, E2). | Sensor malfunction or other internal issue. | Scollegare l'unità per 10 minuti, quindi ricollegarla. Se l'errore persiste, contattare l'assistenza clienti. |
Specifiche
| Caratteristica | Dettaglio |
|---|---|
| Marca | hOmeLabs |
| Nome del modello | HME010081N (Product Model: HME0081) |
| Capacità di deumidificazione | 8 pinte al giorno (a 89.6°F, 80% RH) |
| Area di copertura | Fino a 1000 piedi quadrati |
| Capacità del serbatoio dell'acqua | 0.8 Gallons (approx. 6.4 pints) |
| Dimensioni del prodotto (PxLxA) | 7.7"P x 11"L x 15.2"A |
| Peso dell'articolo | 24 libbre |
| Modalità di funzionamento | Sleep (also Comfort, Turbo, Continuous) |
| Colore | Bianco |
| Codice UPC | 810049721725 |
Garanzia e supporto
For warranty information and customer support, please refer to the warranty card included with your product packaging or visit the official hOmeLabs website. You may also contact hOmeLabs customer service directly for assistance with product inquiries, troubleshooting, or parts replacement.
Please have your model number (HME0081) and purchase date available when contacting support.


