1. Introduzione
This manual provides detailed instructions for the safe and effective operation, maintenance, and troubleshooting of your Acebeam Terminator M2-X Dual Head Spot/Flood EDC Flashlight. Please read this manual thoroughly before using the product to ensure optimal performance and longevity.
2. Istruzioni di sicurezza
- Protezione degli occhi: Do not shine the flashlight directly into eyes. The powerful beam can cause temporary vision impairment or permanent damage.
- Avviso di calore: The flashlight may become hot during prolonged use at high output levels. Handle with care to avoid burns.
- Sicurezza della batteria:
- Use only the recommended 18650 Lithium-Ion battery.
- Non smontare, forare o cortocircuitare la batteria.
- Tenere le batterie lontane dall'acqua e dal fuoco.
- Se la batteria è danneggiata o perde liquido, interromperne immediatamente l'uso.
- Bambini: Tenere fuori dalla portata dei bambini.
- Smontaggio: Do not attempt to disassemble the flashlight head or body, as this may damage the device and void the warranty.
3. Contenuto della confezione
Upon opening your Acebeam Terminator M2-X package, please verify that all items are present and in good condition.

Figura 3.1: The Acebeam Terminator M2-X flashlight, an included 3100mAh 18650 battery, and two USB-C charging cables.
- Acebeam Terminator M2-X Flashlight
- Acebeam ARC18650H-310A 3100mAh 18650 Li-ion Battery (with integrated USB-C charging port)
- Cavo di ricarica USB-C
- Manuale dell'utente (questo documento)
- Lanyard (if included)
- Spare O-rings (if included)
4. Prodotto finitoview
The Acebeam Terminator M2-X is a compact, dual-head EDC (Everyday Carry) flashlight featuring both a floodlight and a spotlight, along with auxiliary RGB lights. It is designed for versatility in various lighting scenarios.

Figura 4.1: The compact design and dimensions of the M2-X, suitable for everyday carry.
4.1 Caratteristiche principali
- Doppie sorgenti luminose: Independent floodlight and spotlight for varied illumination needs.
- High CRI Floodlight: Nichia 519A 5000K High CRI90 LEDs for accurate color rendering.
- Potente riflettore: Long-range beam for distant illumination.
- Auxiliary RGB Lights: Multiple color options and signal modes.
- Design compatto: Durable aluminum construction with a detachable body clip for easy carry.
4.2 Componenti

Figura 4.2: Dettagliato view of the floodlight (left) and spotlight (right) heads.
- Floodlight Head: Contains 3x Nichia 519A 5000K High CRI90 LEDs.
- Testa in primo piano: Single LED for focused, long-distance beam.
- Auxiliary Light Emitters: Located within the floodlight head for RGB functions.
- Interruttore di coda: For power on/off and brightness adjustment.
- Pulsante laterale: For switching between floodlight, spotlight, and auxiliary light modes.
- Tappo batteria: Removable for battery access.
- Body Clip: Detachable stainless steel clip for secure attachment.
5. Impostazione
5.1 Installazione della batteria
- Svitare il tappo posteriore della torcia ruotandolo in senso antiorario.
- Insert the included Acebeam 18650 battery with the positive (+) terminal facing towards the flashlight head.
- Screw the tail cap back on clockwise, ensuring it is tightened completely. The flashlight will not operate if the tail cap is not fully secured.
5.2 Carica iniziale
The included 18650 battery features an integrated USB-C charging port. It is recommended to fully charge the battery before first use.
- Locate the USB-C port on the side of the 18650 battery.
- Connect the provided USB-C cable to the battery's port and to a USB power source (e.g., wall adapter, computer USB port).
- La spia luminosa sulla batteria indicherà lo stato di carica (in genere rossa per la carica in corso, verde per la carica completa).
- Once fully charged, disconnect the cable and reinsert the battery into the flashlight.
6. Istruzioni per l'uso
The Acebeam Terminator M2-X features a tail switch for power and brightness, and a side button for mode selection (Floodlight, Spotlight, Auxiliary Light).
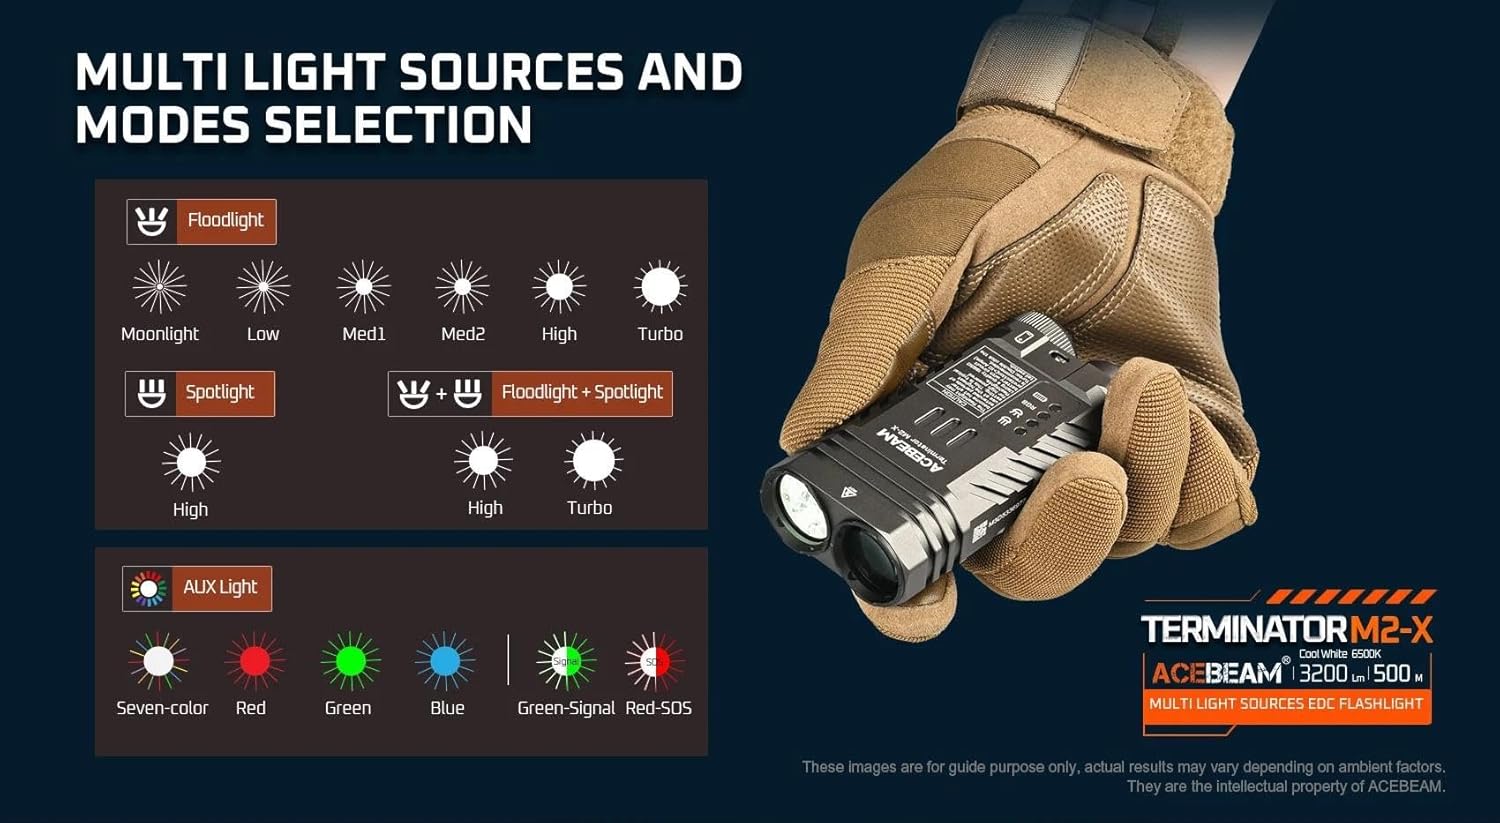
Figura 6.1: Sopraview of multi-light sources and mode selection.
6.1 Basic Operation (Tail Switch)
- Accensione/spegnimento: Single click the tail switch to turn the flashlight ON or OFF.
- Brightness Adjustment (Floodlight/Spotlight): When the light is ON, press and hold the tail switch to cycle through brightness levels (Moonlight, Low, Med1, Med2, High, Turbo for Floodlight; High for Spotlight). Release the switch at your desired level. The light will memorize the last used brightness level for Floodlight and Spotlight independently.
- Turbo istantaneo: From OFF, press and hold the tail switch for approximately 1 second to activate Turbo mode directly. Release to turn OFF.
- Moonlight Mode (Floodlight only): From OFF, press and hold the tail switch for approximately 0.5 seconds to activate Moonlight mode.
6.2 Mode Selection (Side Button)
The side button controls which light source is active (Floodlight, Spotlight, or Auxiliary Light).
- Switching Main Modes: Single click the side button to cycle between Floodlight, Spotlight, and Auxiliary Light modes. The flashlight will remember the last selected mode.
- Floodlight + Spotlight (Combined Mode): From either Floodlight or Spotlight mode, double-click the side button to activate both simultaneously. Double-click again to return to the previous single mode.
- Strobe (Floodlight): From Floodlight mode, triple-click the tail switch to activate Strobe. Single click the tail switch to turn OFF.
6.3 Auxiliary Light Modes
When in Auxiliary Light mode (selected via the side button), the tail switch controls the RGB light functions.

Figura 6.2: Available auxiliary light modes.
- Cycling RGB Colors: With the auxiliary light ON, single click the tail switch to cycle through: Seven-color automatic cycle, Red, Green, Blue, Green-Signal Light, Red-SOS.
- Turning OFF Auxiliary Light: Press and hold the tail switch while in Auxiliary Light mode to turn it OFF.
6.4 Indicatore del livello della batteria
The M2-X features an indicator light to show battery status. This indicator typically turns red when the battery charge drops below 20%.
7. Manutenzione
- Pulizia: Pulisci il corpo della torcia con un panno morbido eamp panno. Non usare detergenti abrasivi o solventi.
- Filettature e O-ring: Lubrificare periodicamente le filettature e gli O-ring con grasso al silicone per mantenere l'impermeabilità. Sostituire gli O-ring se appaiono danneggiati o usurati.
- Cura della batteria:
- Conservare la batteria in un luogo fresco e asciutto quando non viene utilizzata.
- In caso di inutilizzo per periodi prolungati, caricare la batteria fino a circa il 50% della sua capacità.
- Avoid fully discharging the battery, as this can reduce its lifespan.
8. Risoluzione Dei Problemi
| Problema | Possibile causa | Soluzione |
|---|---|---|
| Flashlight does not turn ON. |
|
|
| L'emissione luminosa è debole o tremolante. |
|
|
| Cannot switch between Floodlight/Spotlight/Auxiliary modes. | Side button malfunction or incorrect operation. | Ensure you are single-clicking the side button. If issue persists, contact support. |
| Auxiliary RGB lights are very dim. | This is normal operation for the auxiliary lights. | The auxiliary RGB lights are designed for low output signaling and close-range use, not for illumination. |
9. Specifiche
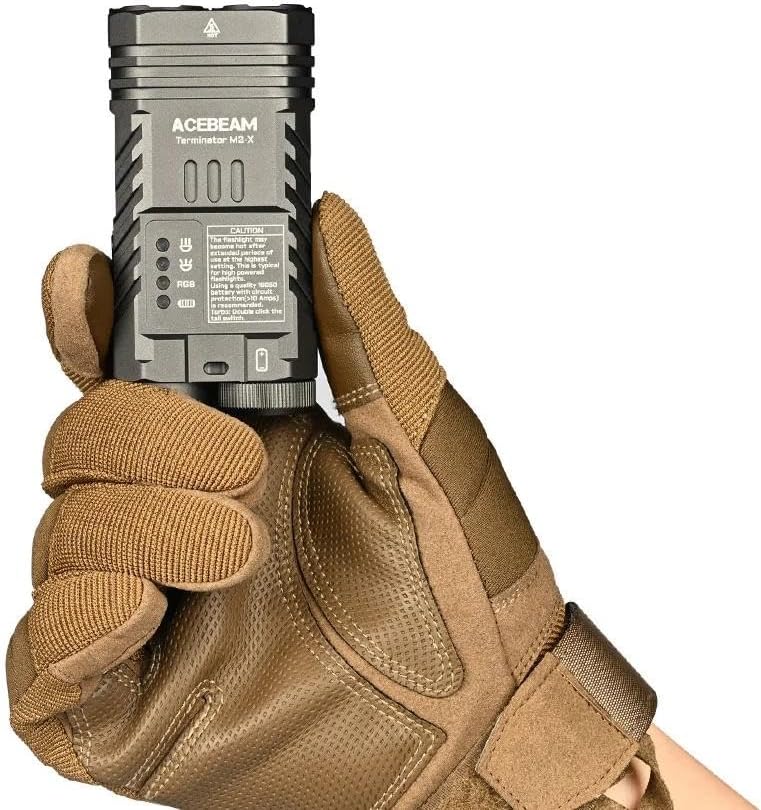
Figura 9.1: Detailed technical parameters for the M2-X.
| Caratteristica | Dettaglio |
|---|---|
| Modello | Acebeam Terminator M2-X |
| LED (Floodlight) | 3x Nichia 519A 5000K High CRI90 |
| Potenza massima (proiettore) | 2,000 lumen |
| Max Output (Spotlight) | 900 lumen |
| Max Runtime (Floodlight Moonlight) | 38 ore |
| Max Runtime (Spotlight High) | 1 ora e 50 minuti |
| Max Beam Distance (Floodlight) | 164 metri |
| Max Beam Distance (Spotlight) | 500 metri |
| Max Beam Intensity (Floodlight) | 6724 dollari |
| Max Beam Intensity (Spotlight) | 62500 dollari |
| Luci ausiliarie | Seven-color cycle, Red, Green, Blue, Green-Signal, Red-SOS (0.5 lumens each) |
| Fonte di alimentazione | 1x 18650 Lithium-Ion Battery (included) |
| Materiale | Alluminio |
| Livello di resistenza all'acqua | Impermeabile |
| Dimensioni (lunghezza x altezza x larghezza) | 95.4mm x 48.5mm x 29mm (3.75 "x 1.90" x 1.14 ") |
| Peso (batteria inclusa) | 197.2 g (6.95 once) |
10. Garanzia e supporto
For warranty information and customer support, please refer to the official Acebeam website or contact your authorized Acebeam dealer. Keep your purchase receipt as proof of purchase for any warranty claims.
Acebeam Official Websito: www.acebeam.com