1. Introduzione
Questo manuale fornisce istruzioni essenziali per l'installazione, il funzionamento, la manutenzione e la risoluzione dei problemi del tuo Blackview BV4800 Rugged Phone. Please read this guide thoroughly to ensure proper use and to maximize the device's features and longevity. The Blackview BV4800 is designed for durability, featuring IP68/IP69K waterproof and MIL-STD-810H drop-proof certifications, a 6.56-inch HD+ display, a 5180mAh battery, and running on Android 13 with Doke OS 3.1.
2. Contenuto della confezione
Verifica che tutti gli articoli siano presenti nella confezione del prodotto:
- Neroview Telefono robusto BV4800
- Cavo USB di tipo C.
- Adattatore di alimentazione
- Strumento di espulsione della SIM
- Guida rapida
- Scheda di garanzia
3. Dispositivo suview
Familiarizza con le componenti fisiche del tuo Blackview BV4800 phone.
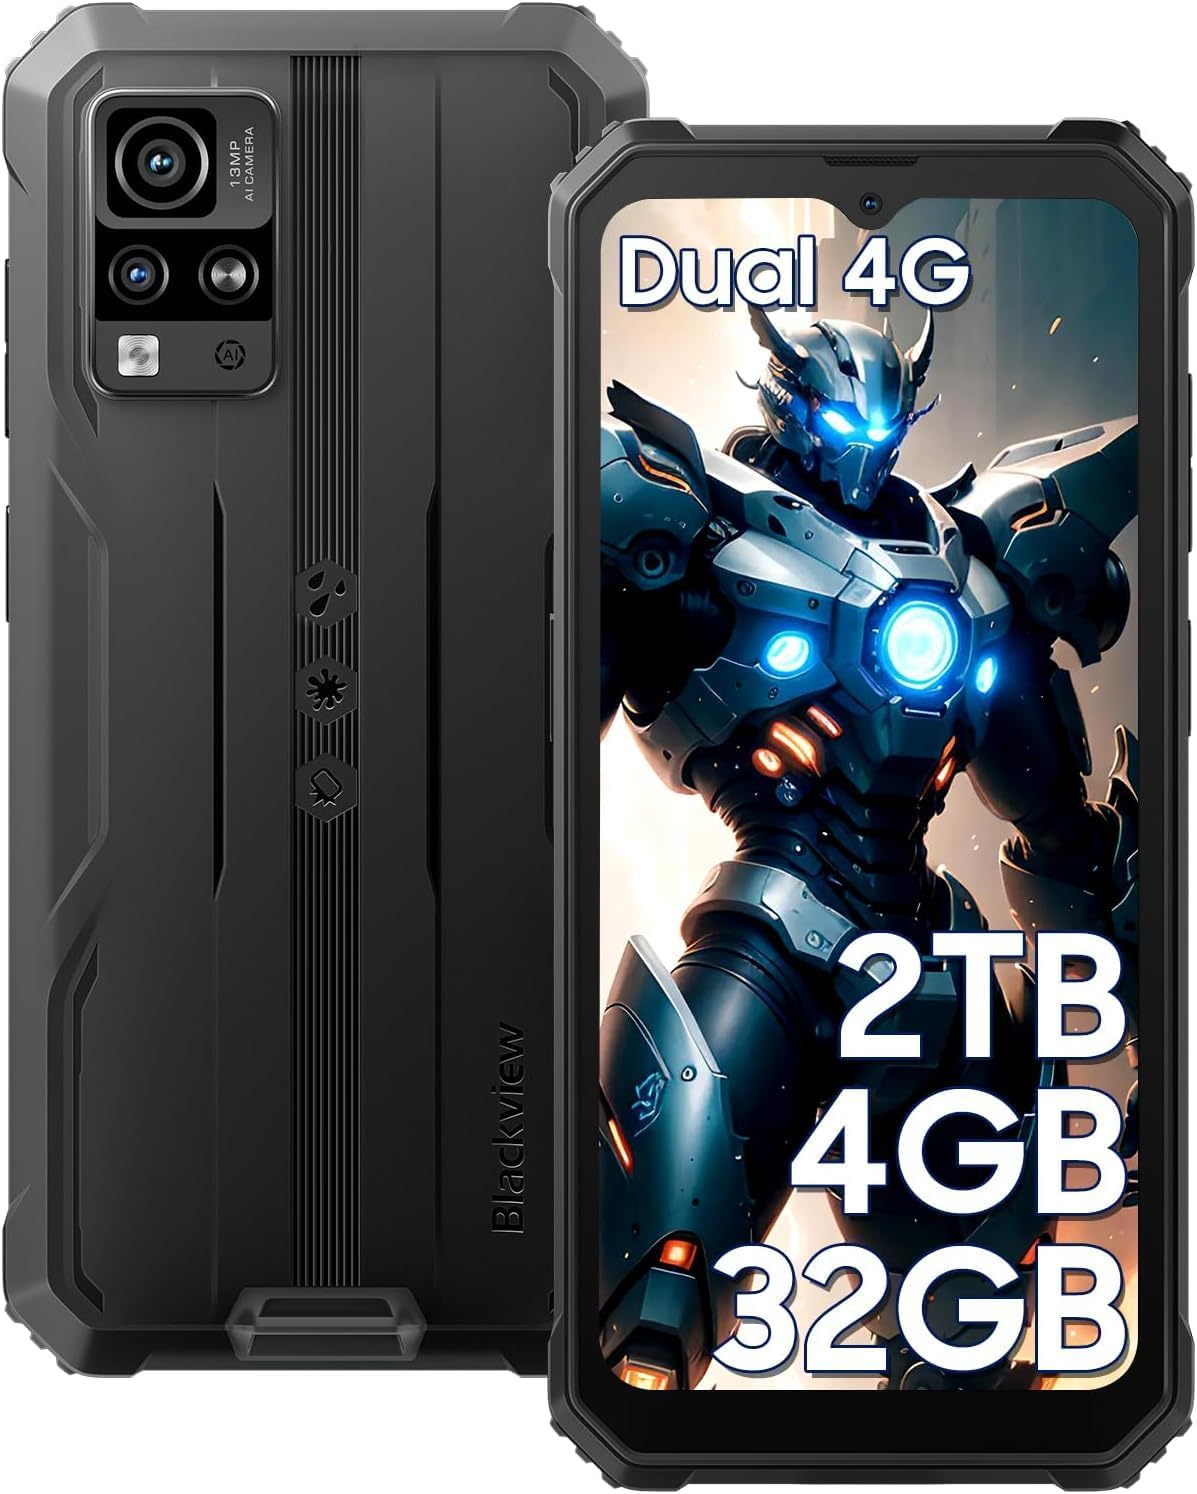
Figura 3.1: Anteriore e posteriore View del Neroview BV4800. This image displays the phone's rugged exterior, including the rear camera module and the display.
- Fotocamera frontale: Situato al centro, in alto, del display.
- Display: Schermo touchscreen HD+ da 6.56 pollici.
- Pulsanti del volume: Lateralmente, per regolare i livelli audio.
- Pulsante di accensione: Sul lato, per accendere/spegnere il dispositivo e bloccare/sbloccare lo schermo.
- Porta USB di tipo C: At the bottom, protected by a flap, for charging and data transfer.
- Oratore: Situato in basso.
- Telecamere posteriori: Located on the back, including the 13MP main camera.
- Torcia elettrica: Adjacent to the rear cameras.
- Slot per scheda SIM/MicroSD: On the side, accessible with the SIM ejector tool.
4. Impostazione
4.1. Installazione della scheda SIM e della scheda MicroSD
Il Neroview BV4800 supports two Nano SIM cards and one MicroSD/TF card simultaneously. Ensure the phone is powered off before installation.
- Individuare il vassoio della scheda SIM sul lato del telefono.
- Inserire lo strumento di espulsione della SIM nel piccolo foro accanto al vassoio e premere con decisione finché il vassoio non fuoriesce.
- Carefully place your Nano SIM cards and MicroSD card into the designated slots on the tray. Ensure they are correctly oriented as indicated on the tray.
- Spingere delicatamente il vassoio nel telefono finché non è a filo con il lato del dispositivo.
- After inserting a storage card, restart the cellphone for proper recognition.
4.2. Accensione iniziale
Per accendere il dispositivo per la prima volta:
- Premere e tenere premuto il pulsante di accensione situato sul lato del telefono finché il neroview il logo appare sullo schermo.
- Seguire le istruzioni sullo schermo per completare la configurazione iniziale, inclusa la selezione della lingua, la connessione Wi-Fi e la configurazione dell'account Google.
4.3. Carica del dispositivo
Prima del primo utilizzo, caricare completamente il tuo Blackview Modello BV4800.

Figura 4.3.1: Caricare il Neroview BV4800. The image shows the phone connected to a charger via its USB-C port, highlighting its 5180mAh battery capacity.
- Open the protective flap covering the USB Type-C port at the bottom of the phone.
- Connect the USB Type-C cable to the phone's port and the other end to the power adapter.
- Collegare l'adattatore di corrente a una presa a muro.
- L'indicatore di carica apparirà sullo schermo. Una ricarica completa potrebbe richiedere diverse ore.
- In case of low battery, if the smartphone cannot power on, keep the charger connected for at least 30 minutes before attempting to power it on.
5. Utilizzo del tuo Blackview BV4800
5.1. Navigazione di base
The BV4800 uses a touchscreen interface. Common gestures include:
- Rubinetto: Seleziona un elemento o apri un'app.
- Scorri: Scorrere le schermate o gli elenchi.
- Pizzico: Ingrandisci o rimpicciolisci le immagini e web pagine.
- Premere a lungo: Accedi ai menu contestuali o sposta le icone.
5.2. Android 13 & Doke OS 3.1 Features
Your BV4800 runs on Android 13, enhanced with Blackview's Doke OS 3.1, offering improved privacy, personalization, and additional functionalities.

Figura 5.2.1: Android 13 and Doke OS 3.1 Interface. This image illustrates the user interface with features like notification permissions, privacy controls, and app customization.
- Controlli sulla privacy: Manage app permissions, notification access, and clipboard history.
- Personalizzazione: Customize themes, icons, and widgets to suit your preferences.
- Per-App Language: Set different languages for individual applications.
- Registrazione delle chiamate: Utilize the built-in call recording feature (check local regulations).
- Monitoraggio dell'indice di esercizio: Monitor your physical activity directly from the device.
5.3. Connettività
The BV4800 supports 4G cellular networks and Wi-Fi connectivity.
- Wifi: Vai a Impostazioni > Rete e Internet > Wi-Fi per connettersi alle reti Wi-Fi disponibili.
- Dati mobili (4G): Assicurati che la tua scheda SIM sia attiva e che i dati mobili siano abilitati in Impostazioni > Rete e Internet > Rete mobile.
- Bluetooth: Connettiti agli accessori wireless tramite Impostazioni > Dispositivi connessi > Bluetooth.
5.4. Caratteristiche della fotocamera
Capture moments with the 13MP rear camera and 5MP front camera, featuring various modes.

Figura 5.4.1: Neroview BV4800 Camera Modes. This image displays the phone's camera capabilities, including Night Mode, Panorama Mode, Beauty Mode, and Underwater Mode.
- Fotocamera principale da 13 MP: Per foto ad alta risoluzione.
- Fotocamera frontale da 5 MP: Per selfie e videochiamate.
- Modalità subacquea: Allows photography in aquatic environments.
- Modalità notturna: Migliora le foto scattate in condizioni di scarsa illuminazione.
- Modalità Panorama: Cattura panorami grandangolari views.
- HDR migliorato: Balances exposure in challenging lighting.
- 0.1s Ultra-fast PDAF: For quick and accurate focusing.
5.5. Caratteristiche speciali
- Modalità guanto: Enables sensitive screen operation even when wearing gloves. Activate this feature in Settings > Smart assistance > Glove mode.
- Riconoscimento Face ID: Unlock your phone securely using facial recognition. Set up in Impostazioni > Sicurezza e privacy > Sblocco facciale.
- Navigazione GPS: Supports GPS, Beidou, GLONASS, and Galileo for accurate positioning and navigation.
- Funzione OTG: Use your BV4800 as a power bank to charge other devices or connect USB peripherals.
6. Manutenzione
Una corretta manutenzione garantisce la longevità e le prestazioni ottimali del tuo Blackview Modello BV4800.
6.1. Durability Features and Guidelines

Figura 6.1.1: Neroview BV4800 Durability. This image highlights the phone's IP68/IP69K waterproof and MIL-STD-810H drop-proof ratings, showing it resistant to dust, shocks, and water.
- IP68/IP69K Waterproof: The phone can withstand immersion in water up to 1.5 meters deep for 30 minutes. Ensure all port covers are securely closed before exposing the device to water.
- MIL-STD-810H Anti-caduta: Certified to withstand drops from up to 1.5 meters. While rugged, avoid intentional drops or extreme impacts.
- A prova di polvere: Il dispositivo è protetto contro l'ingresso di polvere.
Nota: While the phone is rugged, extreme conditions or improper handling can still cause damage. Always ensure port covers are sealed when in wet or dusty environments.
6.2. Pulizia
To clean your phone, use a soft, lint-free cloth. For stubborn dirt, slightly dampLavare il panno con acqua. Evitare l'uso di prodotti chimici aggressivi o materiali abrasivi.
6.3. Aggiornamenti software
Controlla e installa regolarmente gli aggiornamenti software per assicurarti che il tuo dispositivo abbia le ultime funzionalità, patch di sicurezza e miglioramenti delle prestazioni. Vai a Impostazioni > Sistema > Aggiornamento di sistema.
7. Risoluzione Dei Problemi
Questa sezione affronta i problemi comuni che potresti riscontrare con il tuo Blackview Modello BV4800.
| Problema | Possibile soluzione |
|---|---|
| Il telefono non si accende. | Assicurarsi che la batteria sia carica. Collegare il dispositivo a un caricabatterie per almeno 30 minuti prima di provare ad accenderlo. |
| Cannot detect SIM card. | Ensure the SIM card is correctly inserted and the tray is fully closed. Restart the phone. Verify SIM card is active with your carrier. |
| Segnale di rete scarso. | Move to an area with better network coverage. Check if mobile data is enabled. Contact your carrier for network issues. |
| Il touchscreen non risponde. | Restart the phone. If the issue persists, perform a factory reset (backup data first). |
| Le app si bloccano o si arrestano in modo anomalo. | Cancella la cache dell'app (Impostazioni > App > [Nome app] > Archiviazione e cache > Cancella cache). Update the app or the phone's software. |
| La batteria si scarica rapidamente. | Reduce screen brightness, close background apps, disable unnecessary features (GPS, Bluetooth, Wi-Fi when not in use). Check battery usage in settings. |
If you encounter issues not listed here or if the suggested solutions do not resolve the problem, please contact Blackview assistenza clienti.
8. Specifiche
Specifiche tecniche chiave per il Blackview BV4800 Rugged Phone:
| Caratteristica | Dettaglio |
|---|---|
| Modello | BV4800 |
| Sistema operativo | Android 13.0 with Doke OS 3.1 |
| Display | 6.56 pollici HD+ (risoluzione 720 x 1612) |
| Memoria RAM | 4 GB (2 GB fisici + 2 GB virtuali) |
| Memoria interna | 32 GB |
| Archiviazione espandibile | Up to 2TB via MicroSD/TF card |
| Telecamera posteriore | 13MP |
| Fotocamera frontale | 5MP |
| Capacità della batteria | 5180mAh |
| Connettività | 4G LTE, Wi-Fi, Bluetooth, GPS (GPS, Beidou, GLONASS, Galileo) |
| Slot SIM | Doppia Nano SIM + 1 slot per scheda MicroSD/TF |
| Durata | IP68/IP69K impermeabile e antipolvere, MIL-STD-810H anticaduta |
| Dimensioni | 7.28 x 3.58 x 2.05 pollici (confezione) |
| Peso dell'articolo | 1.1 libbre |
9. Garanzia e supporto
Neroview offers a 2-year guarantee service for all Blackview phones. For any issues or inquiries regarding your BV4800, please contact Blackview assistenza clienti.
- Periodo di garanzia: 2 anni dalla data di acquisto.
- Contatto di supporto: Refer to the contact information provided in your Quick Start Guide or on the official Blackview websito.
- Risorse online: Visitare il Neroview Negozio su Amazon per ulteriori informazioni e supporto sul prodotto.
Conservare la prova d'acquisto per eventuali richieste di garanzia.


