1. Informazioni sulla sicurezza
Si prega di leggere attentamente tutte le istruzioni di sicurezza prima del montaggio e dell'uso. Il mancato rispetto di queste istruzioni può causare lesioni o danni al prodotto.
- Installazione sicura: Always secure the greenhouse base to the ground using expansion screws or other appropriate anchoring methods to prevent wind damage.
- Precauzioni meteorologiche: During severe weather conditions (e.g., strong winds, heavy snow), it is recommended to remove any valuable items from inside the greenhouse to avoid potential property loss.
- Protezione dell'acqua: Apply glass glue to the connections between the polycarbonate panels and the frame for enhanced water protection and sealing.
- Protezione UV: The double-wall polycarbonate boards offer 4mm UV protection, blocking 99% of UV radiation to protect plants. However, prolonged direct exposure to sunlight inside the greenhouse should be monitored for sensitive plants.
- Montaggio: This product is delivered in multiple packages and may not arrive simultaneously. Ensure all packages are received before beginning assembly.
2. Contenuto della confezione
Please verify that all components are present and undamaged before starting assembly. Refer to the detailed packing list included in your product packaging.
I componenti tipici includono:
- Aluminum alloy frame components
- Double-wall polycarbonate panels
- Montaggio porta scorrevole
- Adjustable skylight windows
- Fasteners and hardware (screws, nuts, bolts, expansion screws)
- Reinforced rods and diagonal rod fixations
- Manuale di istruzioni
3. Installazione e assemblaggio
Assembly requires careful attention to detail. It is recommended to have at least two people for installation.
3.1 Foundation Preparation
Prepare a level and stable foundation for the greenhouse. For enhanced stability and wind resistance, consider placing the bottom frame in a pre-dug trench.
3.2 Assemblaggio del telaio
Assemble the aluminum alloy frame according to the diagrams in the included manual. Ensure all connections are secure. The frame features reinforced rods on the sides and diagonal rod fixation for enhanced sturdiness.
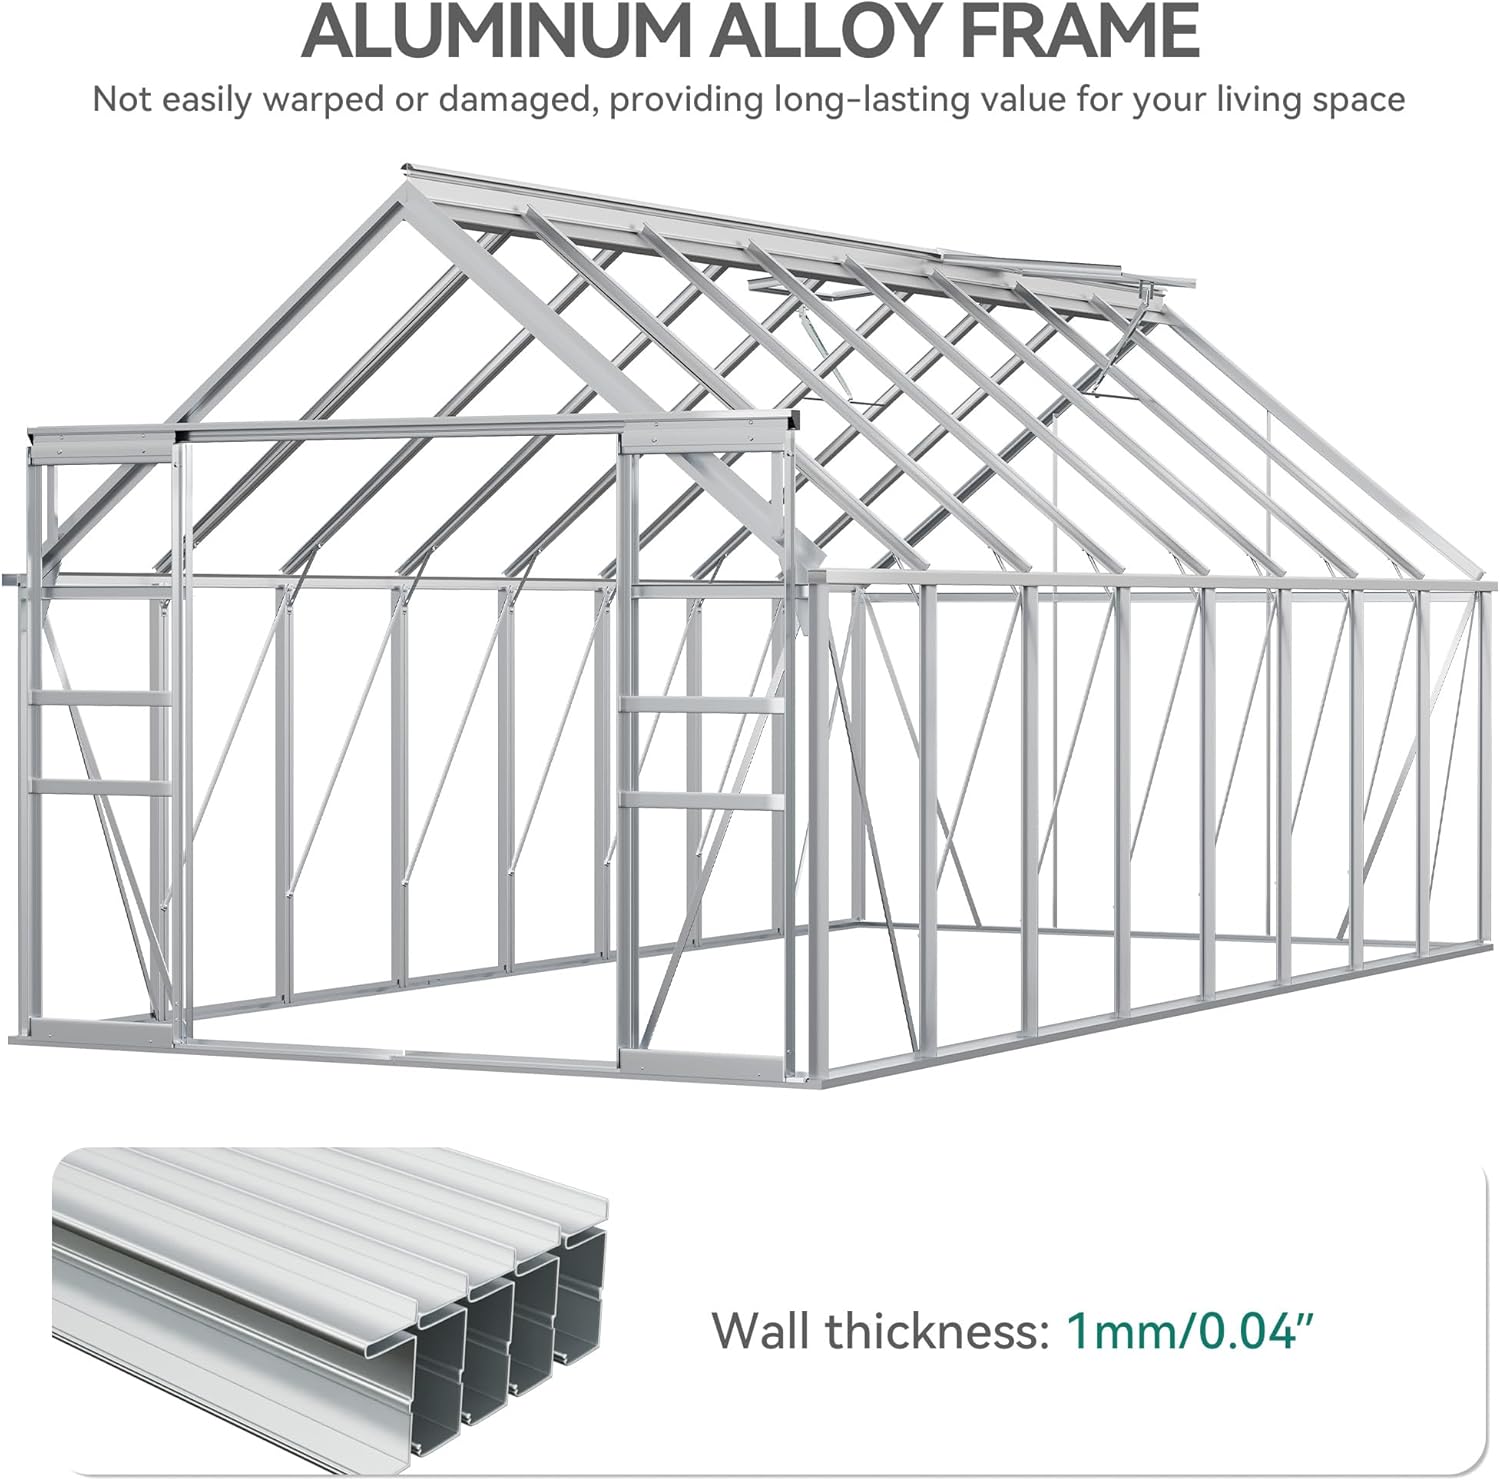
Image: The robust aluminum alloy frame structure, featuring a wall thickness of 1mm (0.04 inches), designed for durability and stability.
3.3 Installazione del pannello
Install the double-wall polycarbonate panels into the frame. Ensure they are correctly seated and secured. For optimal waterproofing, apply glass adhesive to seal the joints where the PC panels meet the frame.

Image: Illustration showing how to fix the greenhouse base to the ground with expansion screws and apply glass glue to panel gaps for improved water protection.
3.4 Messa in sicurezza della serra
After assembling the frame and panels, fix the base to the ground with expansion screws in the pre-drilled holes. Additional measures for wind resistance include driving stakes into the four corners (not included) and securing both sides of the conservatory using wire locks (not included).

Image: Visual guide on enhancing greenhouse wind resistance, including base fixation, ground stakes, wire locks, and panel sealing.
3.5 Guida video all'assemblaggio
For a visual guide on the assembly process and key features, please watch the official product video:
Video: An official YITAHOME video demonstrating the assembly and features of the polycarbonate greenhouse, including adjustable windows, panel sealing, and structural design.
4. Istruzioni per l'uso
4.1 Adjustable Skylights
The greenhouse features two adjustable skylights with multiple opening angles. These can be customized to create an optimal air circulation system, sustaining indoor ventilation and cooling for your plants.

Image: Close-up of the adjustable skylight windows, illustrating the 5 available positions for customized ventilation.
4.2 porte scorrevoli
The innovative sliding door design allows for seamless opening and closing, saving space compared to traditional hinged doors. You can add a lock for enhanced protection (lock not included).

Image: Depiction of the sliding door mechanism, highlighting its simple and convenient access and space-saving benefits.
5. Manutenzione
- Pulizia regolare: Clean the polycarbonate panels periodically with mild soap and water to maintain light transmission and appearance. Avoid abrasive cleaners.
- Integrità del sigillo: Regularly inspect the glass glue seals between panels and the frame. Reapply if any signs of cracking or degradation are observed to ensure water protection.
- Ispezione del telaio: Check the aluminum frame for any loose fasteners or signs of corrosion. Tighten fasteners as needed.
- Sistema di ventilazione: Ensure the adjustable skylights operate smoothly and are free from obstructions.
- Drenaggio: Keep the side drain tanks clear of debris to ensure effective water drainage.
6. Risoluzione Dei Problemi
- Panels Blowing Away: Ensure the greenhouse base is securely anchored to the ground using all provided expansion screws and consider additional anchoring methods like ground stakes or wire locks, especially in windy areas.
- Perdita d'acqua: Check all panel-to-frame joints. Apply or reapply glass glue to ensure a watertight seal. Verify that the side drain tanks are not blocked.
- Difficulty with Sliding Door: Inspect the sliding track for debris or obstructions. Lubricate the track if necessary. Ensure the door is properly aligned.
- Scarsa ventilazione: Adjust the skylight windows to increase airflow. Ensure no plants or objects are blocking the vents.
7. Specifiche
| Caratteristica | Specificazione |
|---|---|
| Numero di modello | MAYIHJqfc7 |
| Misurare | 8x16 piedi |
| Dimensioni del prodotto | 193.7"L x 98.8"W x 89.4"H (16.1 piedi L x 8.2 piedi W x 7.4 piedi H) |
| Peso dell'articolo | 145 libbre |
| Materiale del telaio | Lega di alluminio |
| Materiale di copertura | Policarbonato (PC) |
| Numero di prese d'aria | 2 (Lucernari regolabili) |
| Colore | scheggia |
| Codice UPC | 197839100084 |
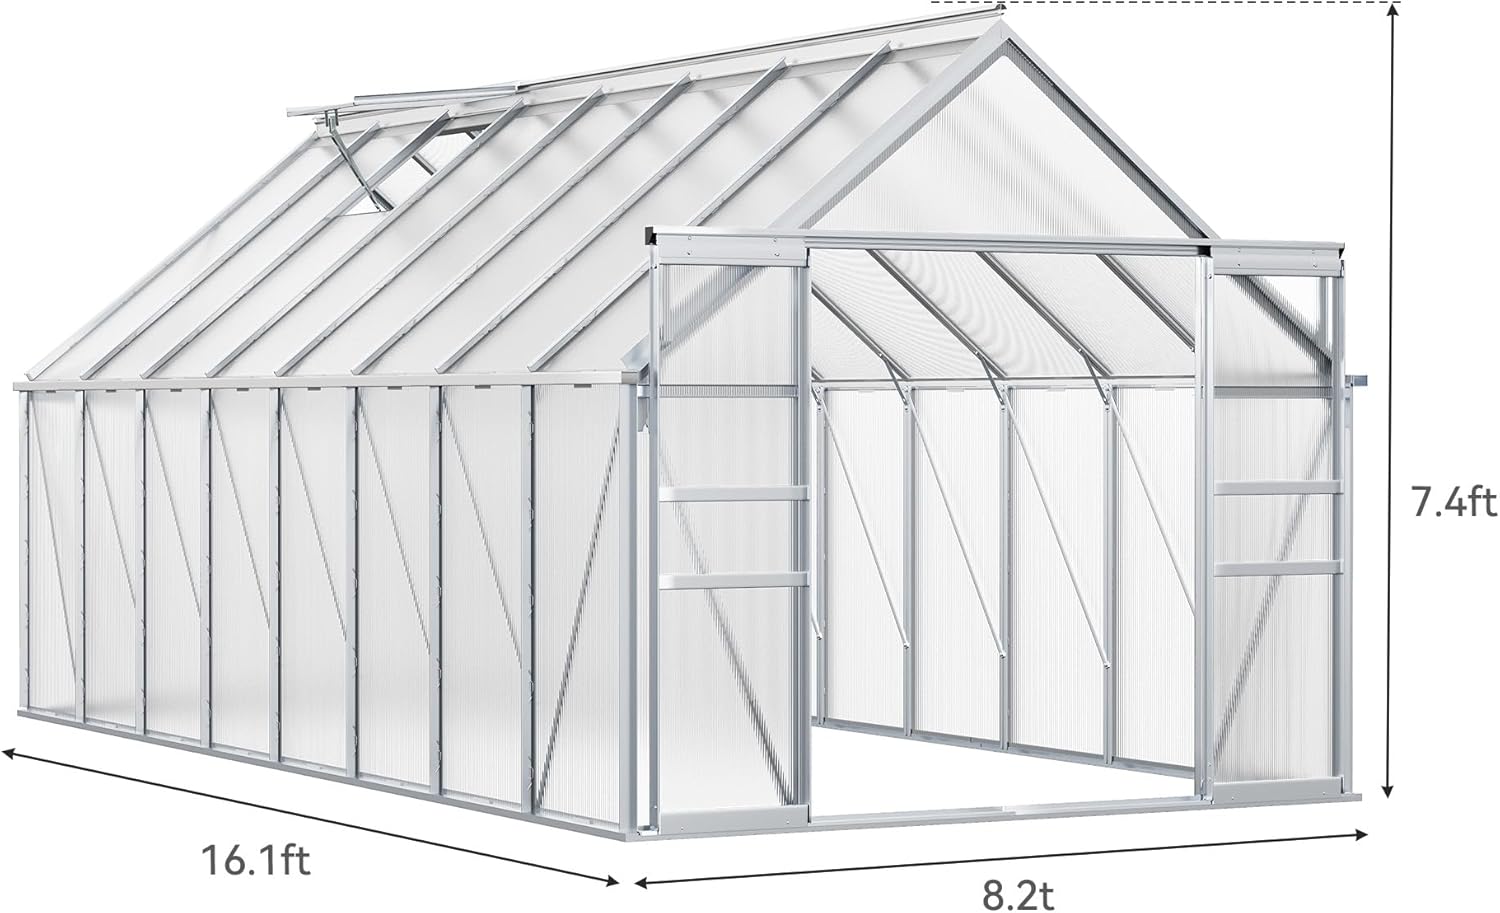
Image: Diagram illustrating the overall dimensions of the YITAHOME 8x16FT Polycarbonate Greenhouse.
8. Garanzia e supporto
For warranty information, technical support, or to inquire about replacement parts, please contact YITAHOME customer service. Refer to your purchase documentation for specific contact details or visit the official YITAHOME websito.
Produttore: YITAHOME
Websito: Visita lo Store YITAHOME su Amazon


