Introduzione
Thank you for choosing the Anmytek Shoe Cabinet. This manual provides essential information for the safe and efficient assembly, operation, and maintenance of your new shoe cabinet. Please read this manual thoroughly before beginning assembly and retain it for future reference.
Informazioni sulla sicurezza
To ensure safe use of your Anmytek Shoe Cabinet, please observe the following precautions:
- Montare sempre il mobile su una superficie pulita, piana e morbida per evitare graffi.
- Prima del montaggio, assicurarsi che tutti i componenti siano presenti e integri. Non procedere con il montaggio se alcuni componenti risultano mancanti o danneggiati.
- Use the provided anti-tipping kit to secure the cabinet to a wall. This is crucial for preventing accidental tipping, especially in households with children or pets.
- Do not overload the cabinet. Distribute weight evenly across shelves and drawers.
- Per evitare rischi di soffocamento, tenere le parti di piccole dimensioni e i materiali di imballaggio lontano dalla portata dei bambini.
- Controllare periodicamente tutti i collegamenti e gli elementi di fissaggio per assicurarsi che siano sempre ben saldi.
Contenuto della confezione
Prima del montaggio, verificare che tutti i componenti elencati di seguito siano inclusi nella confezione. Se qualche componente risulta mancante o danneggiato, contattare l'assistenza clienti.
Componenti:
- Main Cabinet Panels (Top, Bottom, Sides, Back)
- Flip Drawers (2 sets)
- Side Cabinet Door
- Adjustable Shelves (for side cabinet)
- Top Slide Drawer
- Gambe (4 pezzi)
- Hardware Pack (screws, dowels, cam locks, hinges, handles, anti-tipping kit)
Strumenti necessari (non inclusi):
- Cacciavite con testa Phillips
- Martello (facoltativo, per i tasselli)
- Drill (optional, for anti-tipping kit wall anchor)
- Livello
Installazione e assemblaggio
Follow these step-by-step instructions for assembling your Anmytek Shoe Cabinet. It is recommended to have two people for assembly.
Fase 1: preparare l'area
Clear a spacious area and lay down a blanket or cardboard to protect the cabinet parts and your floor from scratches during assembly.
Step 2: Assemble the Base and Legs
Attach the four golden legs to the bottom panel of the cabinet using the provided screws. Ensure they are securely fastened.

Image: The fully assembled Anmytek Shoe Cabinet, highlighting its design and the golden legs.
Step 3: Construct the Main Frame
Connect the side panels to the bottom panel, then attach the back panel. Use cam locks and dowels as indicated in the detailed assembly diagram (refer to the included paper manual for specific diagrams). Ensure all connections are tight and flush.
Step 4: Install Flip Drawers and Side Cabinet
Install the mechanisms for the two flip drawers into their respective compartments. Attach the flip drawer fronts. For the side cabinet, install the hinges and attach the door. Insert the adjustable shelves into the side cabinet at your desired height.
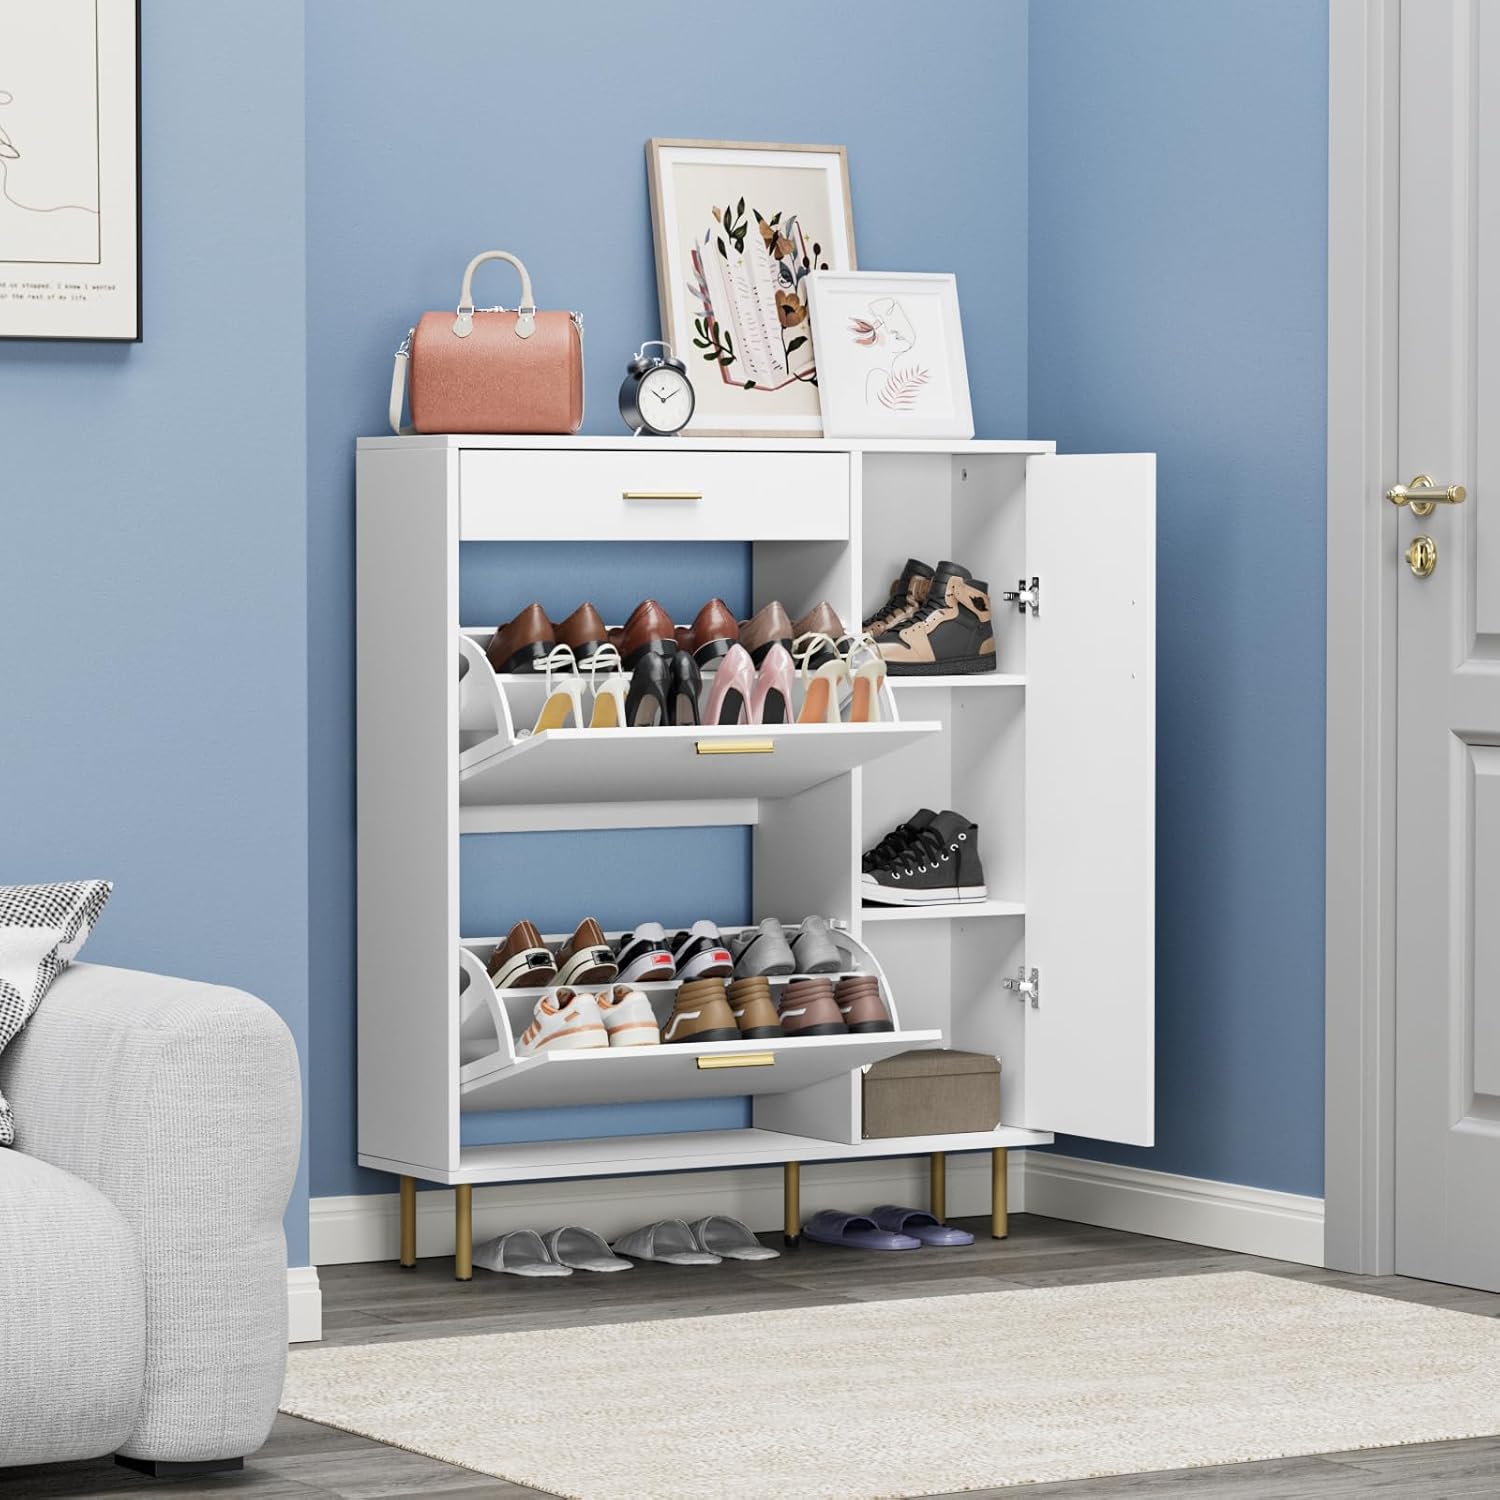
Image: The shoe cabinet with its flip drawers open, displaying shoes, and the side cabinet with its door closed. This illustrates the storage capacity and design.

Image: A detailed diagram illustrating how the panels within the flip-out drawers can be adjusted or removed, and how the shelves in the side cabinet are adjustable and removable to accommodate different shoe sizes, including boots.
Step 5: Install Top Slide Drawer
Assemble the top slide drawer and install its runners. Slide the drawer into its designated slot at the top of the cabinet.
Step 6: Attach Handles and Anti-Tipping Kit
Attach the golden handles to the flip drawers, side cabinet door, and top slide drawer. Finally, install the anti-tipping kit to secure the cabinet to a wall. This step is critical for stability and safety.

Image: The shoe cabinet positioned in an entryway, demonstrating its space-saving design and how it can store different types of footwear.
Istruzioni per l'uso
Using the Flip Drawers
Gently pull the handle of the flip drawer to open it. The internal mechanism will tilt the shoe racks forward, allowing easy access to your shoes. To close, push the drawer back until it clicks securely into place. The internal panels can be adjusted or removed to accommodate different shoe heights, such as sneakers, high heels, or flat shoes.
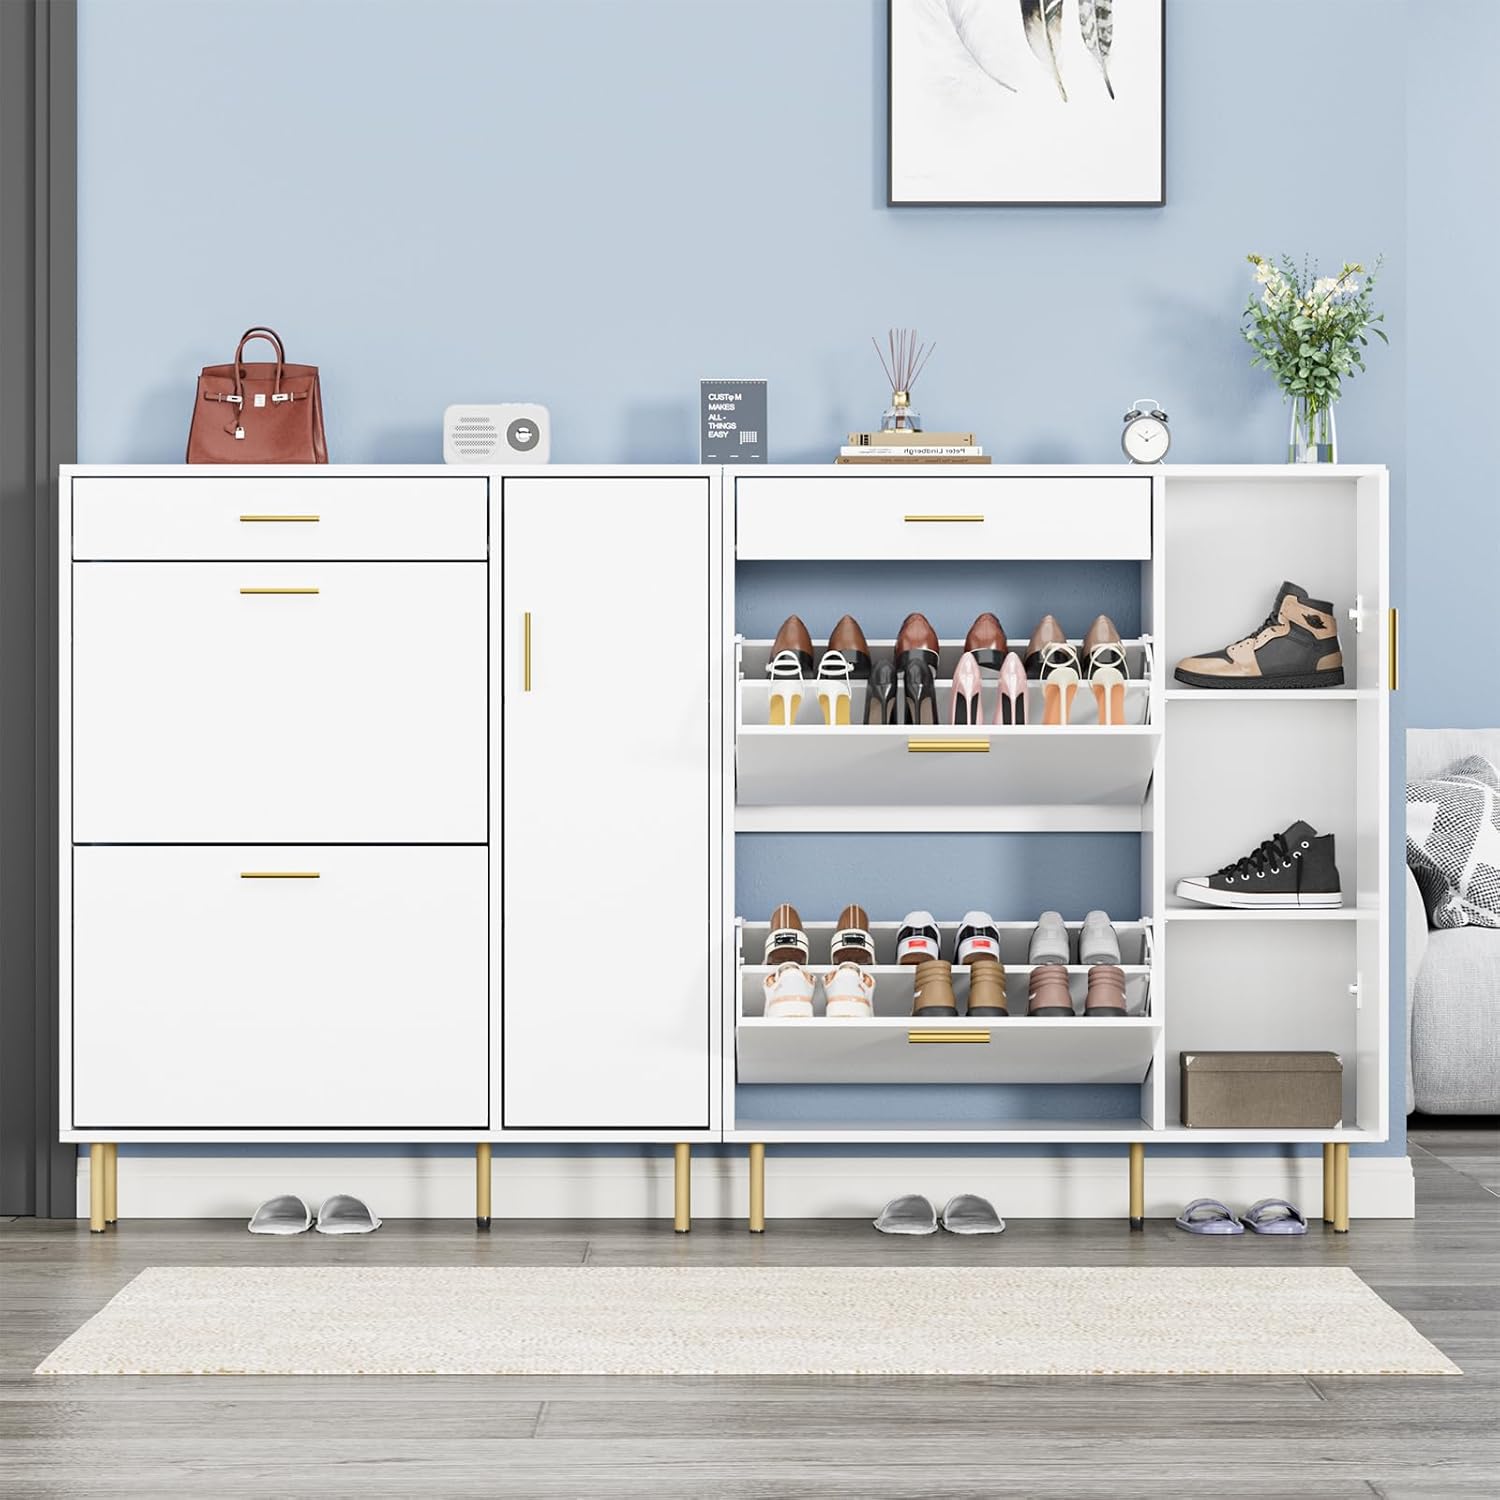
Immagine: un primo piano view of the shoe cabinet with one flip drawer open, demonstrating how shoes are organized and stored within the tilting compartments.
Using the Side Cabinet
Open the side cabinet door to access the internal shelves. These shelves are adjustable, allowing you to customize the storage space for taller items like boots or larger shoes. Simply remove and re-insert the shelf pins into the desired holes.
Using the Top Slide Drawer
The top slide drawer is ideal for storing small items such as keys, wallets, or other entryway essentials. Pull the handle to open and push to close.
Cura e manutenzione
Proper care will extend the life and appearance of your Anmytek Shoe Cabinet:
- Pulizia: Pulire le superfici con un panno morbido, damp panno. Evitare detergenti abrasivi o prodotti chimici aggressivi, poiché possono danneggiare la finitura.
- Spolverare: Spolverare regolarmente con un panno asciutto e morbido.
- Fuoriuscite: Pulire immediatamente eventuali fuoriuscite per evitare macchie o danni al legno ingegnerizzato.
- Luce solare: Evitare l'esposizione prolungata alla luce solare diretta, che può causare sbiadimento o scolorimento.
- Umidità: Mantenere un livello di umidità stabile nella stanza per evitare che il legno si deformi o si screpoli.
- Controllo hardware: Controllare periodicamente tutte le viti, i bulloni e gli elementi di fissaggio per assicurarsi che siano ben serrati. Serrarli nuovamente se necessario.
Risoluzione dei problemi
| Problema | Possibile causa | Soluzione |
|---|---|---|
| Il mobile è traballante o instabile. | Loose fasteners; uneven floor; anti-tipping kit not installed. | Ensure all screws and cam locks are tightened. Use a level to check the floor and place shims if necessary. Install the anti-tipping kit securely to a wall. |
| Flip drawers do not open/close smoothly. | Obstruction; misaligned mechanism; overloaded. | Check for any shoes or objects blocking the mechanism. Verify that the drawer mechanism is correctly installed and aligned. Reduce the number of shoes if overloaded. |
| Side cabinet door is misaligned. | Le cerniere sono allentate o regolate in modo errato. | Adjust the screws on the hinges to realign the door. Refer to the hinge adjustment instructions in the assembly manual. |
| Parti mancanti durante il montaggio. | Errore di imballaggio. | Do not proceed with assembly. Contact Anmytek customer support immediately with your purchase details and the list of missing parts. |
Specifiche del prodotto
- Marca: Anmytek
- Modello: H0153
- Colore: Bianco
- Dimensioni del prodotto: 24 cm P x 90 cm L x 105 cm A (9.4" P x 35.4" L x 41.3" A)
- Materiale: Legno ingegnerizzato
- Caratteristiche speciali: Space Saving, Anti-Tipping, Adjustable Shelf
- Tipo di montaggio: Montaggio a pavimento
- Tipologia di camera: Entryway, Living Room, Hallway
- Numero di ripiani: 4 (adjustable in side cabinet) + 2 flip drawers (multiple compartments)
- Peso dell'articolo: 52.8 libbre (24 chilogrammi)
- Assemblaggio richiesto: SÌ
- Capacità: Stores up to 15-20 pairs of shoes (varies by shoe size and style)

Image: A detailed diagram showing the dimensions of the Anmytek Shoe Cabinet, including height, width, and depth, along with internal measurements for various compartments.
Garanzia e supporto
Anmytek stands behind the quality of its products. For any issues regarding defective products, missing parts, or general inquiries, please contact our customer support team.
Contatta l'assistenza: If you encounter any problems, please click "Contact Seller" on the platform where you purchased the product to receive a satisfactory solution. Please have your order number and product model (H0153) ready when contacting support.
While specific warranty terms are not detailed in this manual, Anmytek is committed to providing prompt assistance for product-related concerns.


