1. Introduzione
Grazie per l'acquistoasing the Karlsson Alarm Clock Duo. This manual provides detailed instructions for setting up, operating, and maintaining your new alarm clock. Please read this manual thoroughly before use and retain it for future reference.
2. Informazioni sulla sicurezza
- Tenere il dispositivo lontano dall'acqua e dall'umidità elevata.
- Non esporre il dispositivo alla luce solare diretta o a temperature estreme.
- Non tentare di smontare o riparare il dispositivo da soli. Per qualsiasi intervento di assistenza, rivolgersi a personale qualificato.
- Utilizzare solo il tipo di batteria specificato. Assicurarsi che la polarità sia corretta quando si inseriscono le batterie.
- Rimuovere le batterie se il dispositivo non verrà utilizzato per un periodo prolungato.
3. Contenuto della confezione
Si prega di verificare che tutti gli elementi siano presenti:
- Karlsson Alarm Clock Duo (Model KA5954BK)
- Manuale dell'utente (questo documento)
Nota: le batterie non sono incluse e devono essere acquistate separatamente.
4. Prodotto finitoview
The Karlsson Alarm Clock Duo features a classic analog clock face combined with a modern digital display for temperature and humidity. Its compact design makes it suitable for various settings.

Figura 1: Davanti view of the Karlsson Alarm Clock Duo. The top section features an analog clock with a white face and black numbers, while the bottom section has a digital display showing temperature (e.g., 22.0 °C) and relative humidity (e.g., 58%).

Figura 2: The alarm clock viewed from the side, demonstrating its compact size and matte black finish. It is shown on a surface next to a white desk lamp, indicating its suitability for bedside tables or desks.
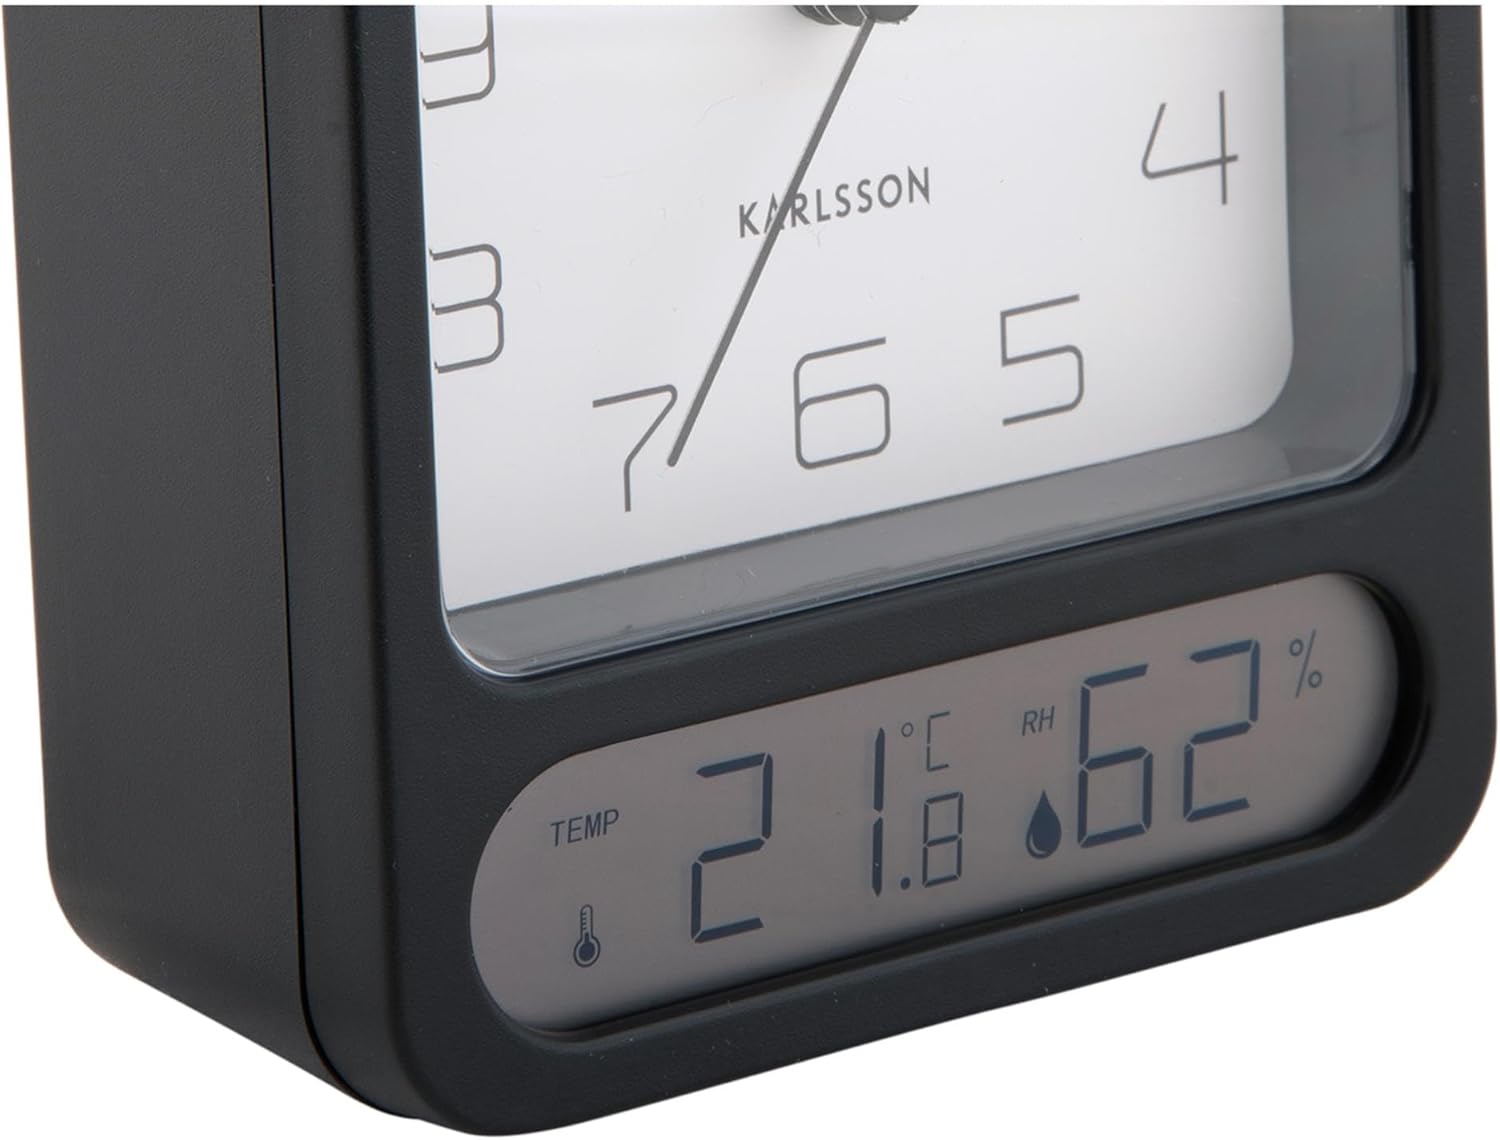
Figura 3: A detailed close-up of the digital display, clearly showing the temperature in Celsius (e.g., 21.8 °C) and the relative humidity percentage (e.g., 62% RH). Small icons for temperature and humidity are also visible.

Figura 4: An angled perspective of the alarm clock, providing a comprehensive view of its design, including the square analog clock face and the rectangular digital display below it, all encased in a matte black frame.
5. Impostazione
5.1. Installazione della batteria
- Individuare il coperchio del vano batterie sul retro della sveglia.
- Rimuovere il coperchio facendolo scorrere o sollevandolo secondo le indicazioni.
- Insert the required batteries (typically 1x AA for the analog clock and 2x AAA for the digital display, though specific types may vary - refer to the compartment markings) ensuring correct polarity (+ and -).
- Riposizionare saldamente il coperchio del vano batteria.
5.2. Impostazione dell'ora
- On the back of the clock, locate the time setting knob (usually labeled "TIME SET" or similar).
- Rotate the knob in either direction to adjust the hour and minute hands to the current time.
5.3. Impostazione dell'allarme
- Locate the alarm setting knob (usually labeled "ALARM SET" or similar) on the back of the clock.
- Rotate this knob to set the alarm hand to your desired alarm time.
- Locate the alarm ON/OFF switch (often a small slider or button). Slide it to the "ON" position to activate the alarm.
6. Istruzioni per l'uso
6.1. Leggere l'ora
The current time is displayed on the analog clock face with hour, minute, and second hands.
6.2. Lettura della temperatura e dell'umidità
The digital display at the bottom of the clock shows the current room temperature (in Celsius or Fahrenheit, depending on model) and relative humidity percentage. There may be a button (e.g., "°C/°F") to switch between temperature units if applicable.
6.3. Funzione di allarme
- When the alarm is set to "ON", it will sound at the designated alarm time.
- To stop the alarm, slide the alarm ON/OFF switch to the "OFF" position.
- Funzione snooze: If your model includes a snooze button (often a large button on top), pressing it during an active alarm will temporarily silence the alarm for a few minutes before it sounds again.
7. Manutenzione
7.1. Pulizia
Pulisci l'orologio con un panno morbido e asciutto. Non utilizzare detergenti abrasivi o solventi, poiché potrebbero danneggiare la finitura o il display.
7.2. Sostituzione della batteria
Replace batteries when the clock hands slow down, the alarm becomes weak, or the digital display fades or stops working. Follow the battery installation steps in Section 5.1.
8. Risoluzione Dei Problemi
| Problema | Possibile causa | Soluzione |
|---|---|---|
| Clock not working / Digital display off | Batterie scariche o inserite in modo errato. | Sostituire le batterie assicurandosi che la polarità sia corretta. |
| L'allarme non suona | Alarm is not activated (OFF position) or set incorrectly. | Ensure alarm switch is ON and alarm time is set correctly. |
| Ora visualizzata errata | Time was not set correctly or batteries are low. | Reset the time. Replace batteries if necessary. |
| Temperatura/umidità imprecisa | Sensor obstruction or extreme environmental conditions. | Ensure the clock is in a well-ventilated area, away from direct heat sources or drafts. Allow time for readings to stabilize. |
9. Specifiche
| Numero di modello | KA5954BK |
| Marca | Karlsson |
| Dimensioni (L x P x A) | Dimensioni: 9.7 x 4.5 x 12 cm |
| Peso | 600 grammi |
| Fonte di alimentazione | Batteria (non inclusa) |
| ASIN | B0DHL8TMB6 |
10. Garanzia e supporto
This Karlsson product is covered by a manufacturer's warranty. Please refer to the warranty card included with your purchase or visit the official Karlsson websito per termini e condizioni di garanzia dettagliati.
For technical support, troubleshooting assistance, or inquiries regarding your product, please contact Karlsson customer service through their official websito o le informazioni di contatto fornite con la documentazione di acquisto.


