1. Prodotto finitoview
The EVERSTEIN Multifunctional Shower System features an innovative LCD digital display along with a three-color LED lighting system, enhancing the ambiance of your shower experience. It includes anti-water hammer and anti-scalding constant temperature functions for increased safety and comfort. The system offers three distinct functionalities: a 12-inch rainfall shower head, and 2 handheld shower, all of which can be used simultaneously or separately. It has undergone 600,000 tests to ensure durability and reliability and complies with cUPC certification and ASME a112.18.1-2018/CSA b125.1-18 standards, suitable for the American standard 1/2-inch pipe connection. The 12-inch ultra-thin showerhead utilizes air pressure-boosting technology to deliver high pressure while saving water. Additionally, it comes with an extra-long 59-inch extendable metal hose and silicone nozzle for easy cleaning. Designed for straightforward installation and maintenance, this shower system adds both luxury and modernity to your bathroom.

Figure 1: Complete EVERSTEIN 12" High-Pressure LCD Rainfall Shower System in Matte Black.
2. Informazioni sulla sicurezza
Nota importante per l'acquisto: This shower system is designed for new or remodeled bathrooms. Installation requires the removal of existing tiles and fixtures, and potentially repiping. It is highly recommended to consult a qualified plumber before purchasing and proceeding with installation to ensure compatibility and proper setup.
- Chiudere sempre l'alimentazione idrica principale prima di iniziare qualsiasi operazione di installazione o manutenzione.
- Assicurarsi che tutti i collegamenti siano sicuri e a tenuta stagna per evitare perdite.
- Verify that the water pressure is within acceptable limits for the shower system.
- The anti-scalding thermostatic valve is designed to maintain a preset temperature and prevent sudden changes. However, always test water temperature before use, especially for children and the elderly.
- Do not use abrasive cleaners or harsh chemicals on the finish, as this may damage the product.
3. Contenuto della confezione
Prima di iniziare l'installazione, verificare che tutti i componenti siano presenti e integri.
- 12" Shower head
- Hand shower head x 2
- Shower fixtures & valve
- Extra-long 59-inch extendable metal hose
- Silicone nozzle (integrated into shower heads)
- Hardware di montaggio (viti, tasselli)
- Manuale di istruzioni
4. Specifiche del prodotto
| Caratteristica | Dettaglio |
|---|---|
| Marca | EVERSTEIN |
| Numero di modello | SFS-1073-BK12 |
| Colore | Nero opaco |
| Materiale | Ottone, Metallo |
| Tipo di finitura | Nero opaco |
| Numero di maniglie | 2 |
| Tipo di montaggio | Montaggio a soffitto |
| Dimensioni della testa | 12 pollici |
| Dimensioni del prodotto | 29 x 16 x 7 pollici |
| Certificazioni | cUPC, ASME a112.18.1-2018/CSA b125.1-18 |
5. Guida all'installazione
Professional installation is recommended. Ensure all local plumbing codes are followed. Turn off the main water supply before starting.
5.1. Valve and Trim Installation
This section guides you through the installation of the main thermostatic valve and its trim. Proper depth and secure connections are crucial.
Video 1: Installation guide for the EVERSTEIN shower system valve and trim (Model SFS-1058-BK10, similar to SFS-1073-BK12).
- Prepara il muro: According to the layout of the shower system, reserve grooves on the wall for installing water pipes and the valve.
- Mark Valve Position: Mark the wall based on the fixed hole positions of the valve.
- Fori di perforazione: Drill holes of appropriate size on the markings based on the diameter of the expansion screws.
- Valvola sicura: Take out four expansion screws from the accessories and place them into the holes. Secure the valve to the wall using the provided screws.
- Collegare i tubi: Connect the hot and cold water inlet pipes to the valve. Ensure standard connections (USA/Canada: 1/2-14" NPT).
- Flush Pipes: Prima di collegarli alla valvola, sciacquare i due tubi di ingresso per due minuti per evitare ostruzioni.
- Install Outlets: Connect the outlet pipes for the rainfall shower heads and handheld shower.
- Prova di pressione: Test whether the water pressure is appropriate and flush the outlet pipes for one minute.
- Prova di tenuta: Insert plugs for a water test to ensure there is no leakage at any joint.
- Install Trim: Install the decorative trim plate and handles onto the valve body. When cutting tiles, ensure the size of the cut does not exceed the dimensions of the trim.

Figure 2: Internal components of the rough-in valve.
5.2. Rainfall Shower Head Installation (Ceiling Mount)
Install the ceiling-mounted rainfall shower head, ensuring proper sealing.
- Prepare Ceiling Outlet: After tiling, ensure that the distance from the surface to the brass fitting is 19/32" (15 mm).
- Applicare il nastro in teflon: Wrap Teflon tape for at least 12 turns around the threads of the shower arm to prevent leaks.
- Installare il braccio doccia: Screw the ceiling shower arm into the brass fitting.
- Fissare il soffione della doccia: Connect the 12-inch rainfall shower head to the shower arm, ensuring the washer is in place for a tight seal.

Figura 3: Oltreview of the 3-in-1 shower system features.
5.3. Handheld Shower System Installation
Install the handheld shower system, including the slide bar and hose connection.
- Barra di scorrimento di montaggio: Mark and drill holes for the slide bar brackets. Secure the slide bar to the wall.
- Install Water Outlet: After tiling, ensure that the distance from the surface to the brass fitting is 5/8" (15 mm).
- Applicare il nastro in teflon: Wrap Teflon tape for at least 12 turns around the threads of the water outlet connector to prevent leaks.
- Collegare il tubo: Connect the hexagonal shaped end of the shower hose to the water outlet port of the slide bar.
- Attach Handheld Shower: Connect the other end of the hose to the handheld shower head. Place the handheld shower into its adjustable holder on the slide bar.

Figure 4: Adjustable slide bar for customized handheld shower height.
6. Istruzioni per l'uso
The EVERSTEIN shower system offers intuitive controls for a personalized shower experience.
6.1. Thermostatic Temperature Control
- The thermostatic valve maintains a consistent water temperature, preventing sudden changes.
- The temperature can be locked at 38°C (100°F) for safety, especially for children and the elderly. Adjust the main handle to set your desired temperature.

Figure 5: Vernet Thermostatic Cartridges for consistent temperature control.
6.2. LCD Digital Display and LED Lighting
- The innovative LCD digital display shows the current water temperature and shower time.
- The three-color LED lighting system changes color based on water temperature, providing a visual indicator and enhancing ambiance. These LEDs are water-powered and require no external batteries.

Figure 6: Anti-Scald LED Design with temperature-sensitive color changes.

Figure 7: LCD temperature display for precise temperature monitoring.
6.3. Multiple Spray Patterns
The system allows you to engage the 12" rainfall shower head and two handheld showers individually or simultaneously.
- Acquazzone: Fornisce un getto ampio e delicato, simile a una pioggia.
- Doccia portatile: Offers various spray modes for targeted cleaning and massage.
- Pulse Spray: Powerful, invigorating massage.
- Rainfall Spray: Gentle, natural rain sensation.
- Mixed Spray: Quickly rinses soap and shampoo.
- Rinse Spray: Ideal for bathroom cleaning.

Figure 8: Various spray modes available from the handheld shower.
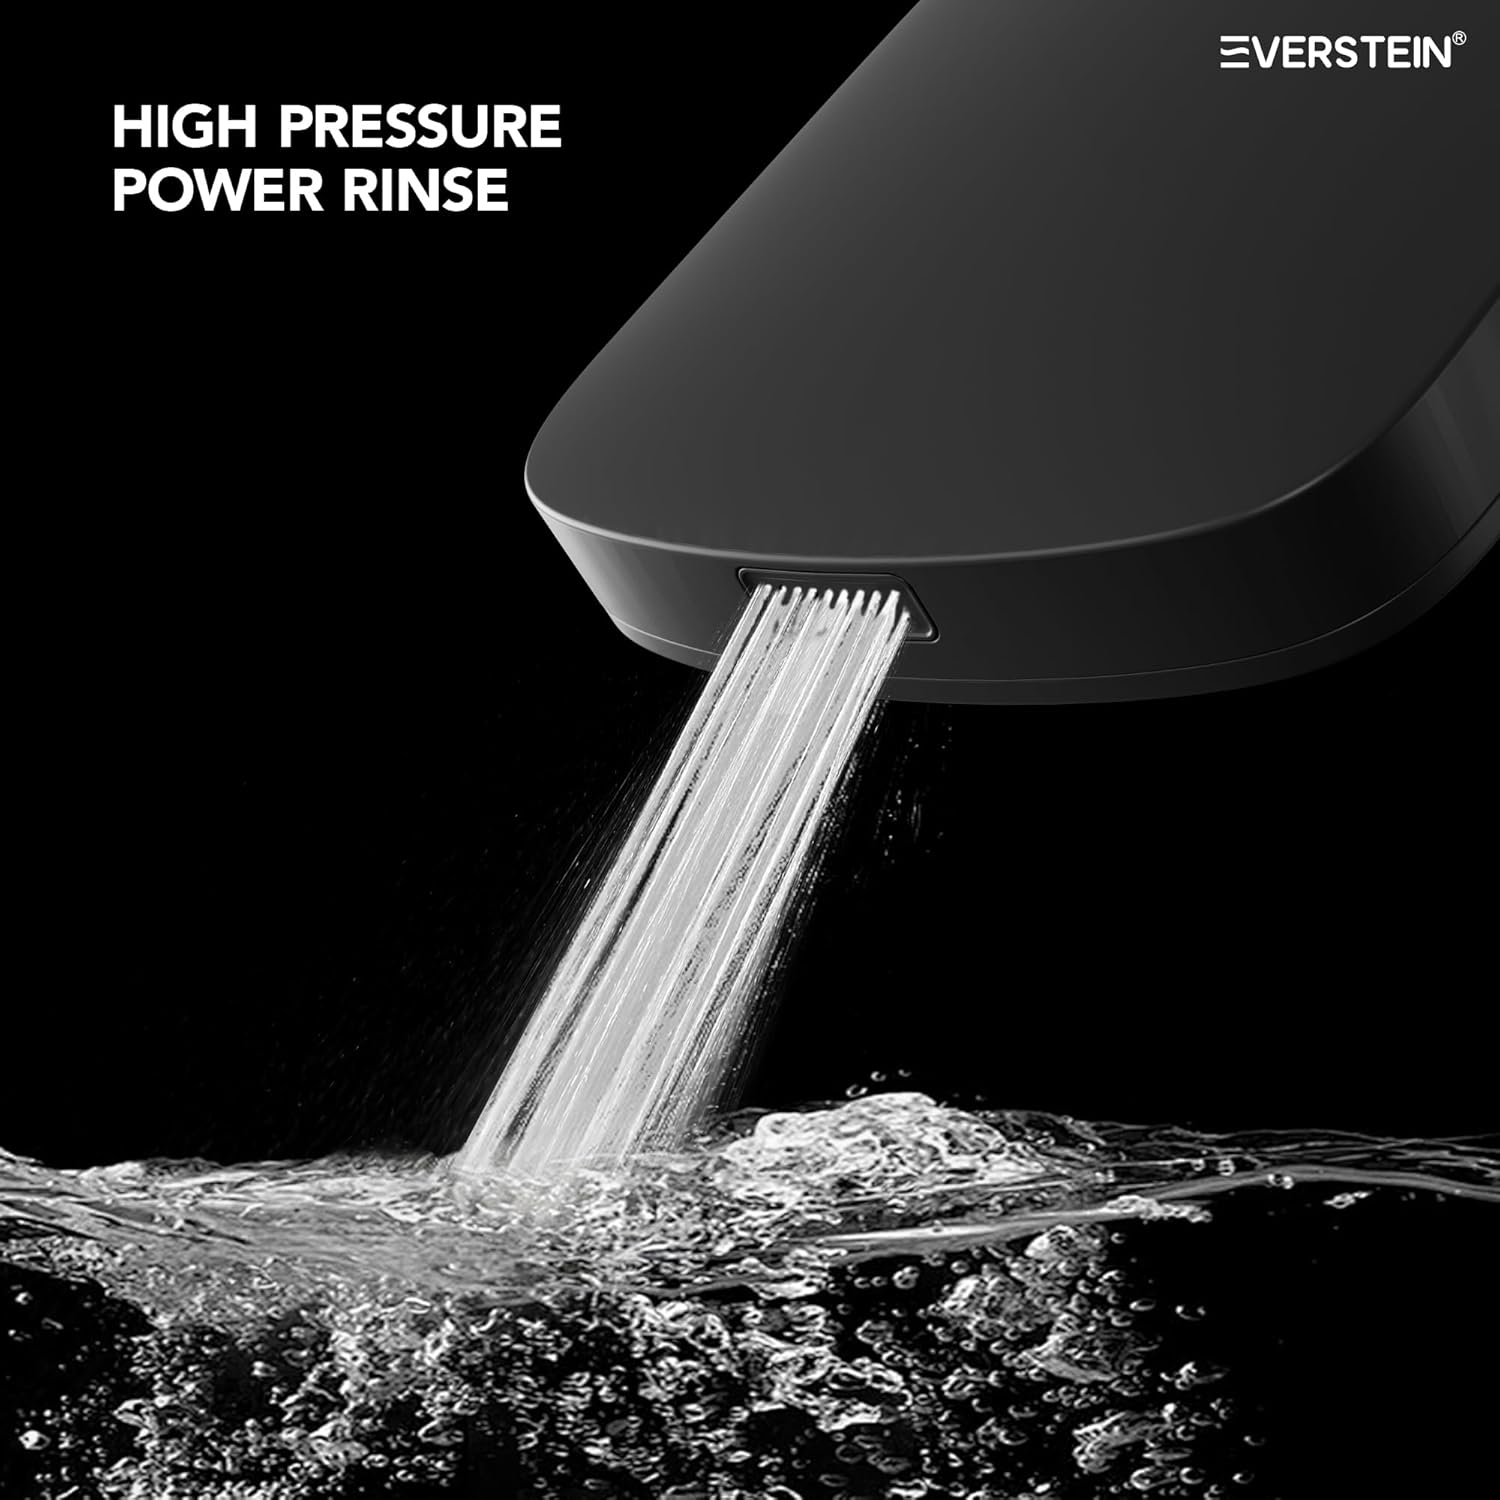
Figure 9: High-pressure power rinse feature.
7. Manutenzione
- Pulizia: Regularly clean the shower heads and nozzles to prevent mineral buildup. The silicone nozzles are designed for easy cleaning; simply rub them to dislodge any deposits.
- Cura finale: Use a soft cloth and mild soap to clean the matte black finish. Avoid abrasive cleaners, scouring pads, or harsh chemicals, as these can scratch or damage the surface.
- Controlli delle perdite: Periodically check all connections for any signs of leakage. Tighten if necessary.
8. Risoluzione Dei Problemi
If you encounter issues with your EVERSTEIN shower system, refer to the following common solutions:
- Bassa pressione dell'acqua:
- Controllare che la valvola principale di alimentazione dell'acqua sia completamente aperta.
- Inspect shower heads and nozzles for mineral buildup and clean them.
- Ensure there are no kinks or blockages in the shower hose.
- Perdita d'acqua:
- Check all threaded connections for tightness. Apply more Teflon tape if needed.
- Inspect washers and O-rings for damage and replace if necessary.
- Temperatura dell'acqua non costante:
- Ensure both hot and cold water supplies are adequately flowing.
- If the thermostatic valve is not maintaining temperature, it may require professional inspection or recalibration.
- Luci LED non funzionanti:
- Ensure water is flowing through the shower head, as the LEDs are water-powered.
- Se il problema persiste, contattare l'assistenza clienti.
9. Garanzia e supporto
EVERSTEIN provides a lifetime limited warranty, which means that as long as you use our product properly, we will offer ongoing repair and replacement support. However, this warranty does not cover repairs or replacements due to improper use or installation. If you encounter any issues or have questions about our products, please feel free to contact us. Our goal is to ensure that every customer enjoys high-quality products and exceptional after-sales service, giving you peace of mind and confidence in your purchase.
For customer service, please refer to the contact information provided with your product packaging or visit the official EVERSTEIN websito.


